
You may be asking yourself what exactly an API is at this point. It stands for Application Programming Interface. Many websites such as Prezi, Twitter, Wordpress, and Facebook, open up their programming interface to allow third-party developers access to the functionality of the site, so that they can integrate and further develop specific functionalities from the host site on their own site. For example, if you've ever been to a website that allowed you to comment using your Facebook account, the developers of that site were making use of Facebook's API.
Note
More information, documentation, and the latest updates about Prezi's API can be found at http://prezi.github.io/prezi-player/
Tip
Note of caution
Note the warning from the Prezi API Page: "The status of the API is alpha, currently we are looking for feedback. We are dedicated to support it, but we may be slow to fix bugs or implement new features. Also, your code may clash with an upgrade." This means that the API could change in the future, so you'll want to check your creations every so often to ensure that they are still functioning correctly.
You'll need to ensure that you have the following in order to make use of the information presented in this chapter:
- A modern web browser (Firefox, Chrome, Safari, Opera, or Internet Explorer 8 and above will all work just fine)
- Your own web server that will host the page with the Prezi and table of contents
- Basic JavaScript knowledge (we'll walk you through this)
- An HTML editor
Unlike most of the work we've done with Prezi, in order to make use of the API, you must have a place to host files that you'll be creating. This cannot be done exclusively through the Prezi website.
Many organizations will already have a website hosted on a server. If that's the case, you may need to work with the IT department to establish a procedure that will enable you to upload your own files, or that will allow you to submit files for uploading.
Tip
Practicing with the Prezi API
If you'd like to practice with the tools that we're discussing in this chapter, but you aren't ready for this to be live on your organization's website, you can consider creating a free Google Sites account, which will allow you to easily create your own content and can be set to private. Visit https://sites.google.com/ for more information.
HyperText Markup Language (HTML) is the default language of the World Wide Web and it makes up the core of most web pages you'll visit. HTML uses tags that almost always come in pairs. These tags tell your web browser exactly how to display the information that is contained within them. Consider the following example:
<html>
<head>
<title>Example Page</title>
</head>
<body>
<h1>Example Heading</h1>
This is text that appears underneath the example heading.
</body>
</html>
In this example, we can see that all of the tags have both an opening and closing. For example, <h1> opens the heading and </h1> closes it. Notice that the difference between these two is the forward slash in the second tag. Everything contained between those two tags will be displayed as Heading 1, which is the largest heading option available. If I were to open a file with these contents inside a browser, it would display something like the following:

There are a wide variety of options available for HTML editors, and at a wide variety of prices as well. Many of them will offer very advanced features, and also allow you to design sites through a graphic interface rather than through code. Many allow switching between both. Adobe Dreamweaver is a popular option. If you already have some software that allows you to edit code, you can definitely use that. However, for our purposes, we only need very basic software.
Most operating systems will also come with some built-in software that will work just fine for creating and editing HTML. If you use Windows, the Notepad application will work. Mac and Linux have several editors that are available from the command line (via the Terminal application on Mac).
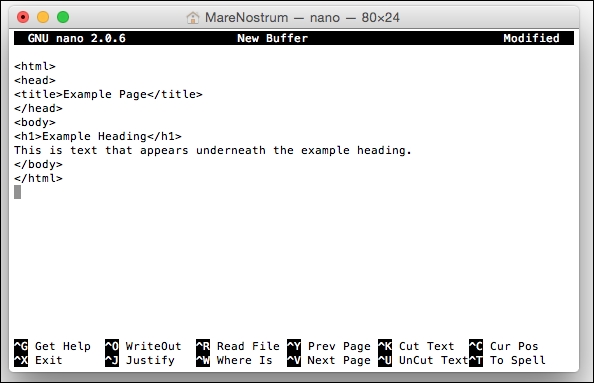
From the Mac terminal, you can type nano to open a basic text editing program:

This will open up a basic editor that allows you to input HTML code:
Another free option that will work for Windows or Mac is Brackets. This software is useful because it automatically color codes the code you're typing to make it more readable, and it creates a closing tag automatically for you when you insert an opening tag.

In the preceding example, you can see that the HTML tags have automatically been colored blue, making them stand out from the content of the page.
Alternatively, if you've decided to use Google Sites, you can type the code directly into their web interface, rather than using an HTML editor.
In order to get the API working on your own site, there are a few steps you'll need to take, which are as follows:
- Loading the JavaScript code from the Prezi API.
- Loading the Prezi Player onto your site.
- Connecting the Prezi Player to your Prezi.
- Using the API code to create new functions.
We'll cover each of these steps in detail, but first, we thought we would offer a basic idea of the types of things the API can do:
- Querying information about the Prezi, such as the title
- Querying information about the current state of the Prezi, such as the current step number or object identity
- Monitoring changes in the above information (that is, if the viewer clicks to move to a new path point)
- Navigating to a specific step or object