Hopefully, this far into the chapter, you understand the obvious benefits that both raster and vector imagery bring. But what if you could combine the best of both worlds and have realistic-looking imagery, such as photographs, at a very small file size and with the ability to zoom into them as far as you like with no pixilation at all? Well guess what, you can!
In the rest of this chapter, you'll learn how to become a true master and create imagery that has amazing style as well as being perfect for use in Prezi. You don't need to buy any expensive software to do this or have a degree in graphic design.
In the following sections, two separate methods are explained for turning raster images into vector so that they look great and load quickly in Prezi. The only difference between these methods is that one is completely free and the other has a small price attached.
In the steps that follow, you'll learn how to turn a raster image into a stunning-looking vector version. You'll be able to do this without spending a penny on expensive software, so it's a great benefit to your Prezis and your budget. For this you need to perform the following steps:
- First of all, you'll need a good raster image to vectorize. If you don't already have something to use, then we'd suggest a quick search on Google Images for something interesting.
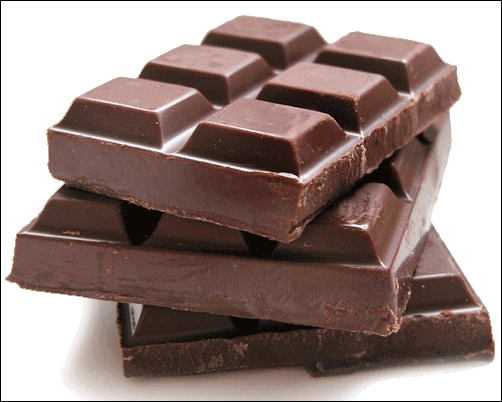
- To continue with the current theme (and to give you another sugar rush), we'll use a raster image of chocolate squares. This should look even yummier once it's turned into a vector graphic and inserted into Prezi:
- Now you need to download and install Inkscape, which is a great piece of vector editing software mentioned earlier in this chapter. It's completely open source which makes it free for anyone to download and use. Inkscape is available on the Windows and Macintosh platforms and has very similar capabilities to its more expensive cousin Adobe Illustrator!
- Go to http://www.inkscape.org/ and enter the Download section to install the correct version of Inkscape for your operating system.
- Once the software is installed, you should see the Inkscape icon in your programs list or on your desktop.
- Now for the fun bit. Obviously, we won't go into detail on all of Inkscape's many features, but it's time to open the software and vectorize your image.
- Double-click on the Inkscape icon from your list of programs.
- When the software opens, go to the File menu and click on Import.
- Select your raster image and click on OK.
- Make sure the Embed option is selected on the next screen and click on OK.
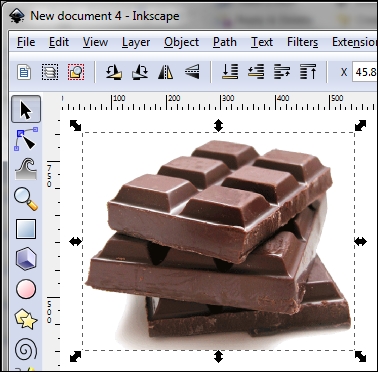
- When your image appears on the Inkscape page, make sure it is selected and surrounded by arrows as shown in the following screenshot:
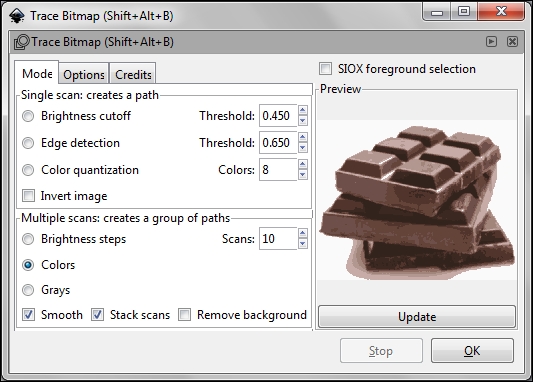
- Now go to Path and select Trace Bitmap. The pop-up box that appears will allow you to create a vector trace of your raster image.
- If your image is a simple line drawing without much color, adjust the settings in the top half of the screen under Single scan. Click on Update to see a preview, and then on OK to create the vector trace.
- If your image is a color photo such as the one in the previous step, you'll need to concentrate on the lower half of the Trace Bitmap screen. Select Colors, click on Update, and adjust settings further until you are happy with the preview. Click on OK to create your trace.
- Back on the main screen, you will see the new vector version of your image. Hold the Ctrl key and use your mouse wheel to zoom in, or click the up arrow in the z box bottom-right corner of the screen.
- If you aren't happy with the vector, just delete it and repeat the steps. Adjust the settings on the Trace Bitmap screen until you are happy.
- Once you are happy with the trace, click on the new vector and move it to one side. You'll see the original raster below. Delete the raster image, leaving only the vector onscreen.
- Now go to File and select Save As. Select Portable Document Format (*.pdf) from the Save as type drop-down list, and save your new vector image to your desktop.
Tip
Commit to being a master
On opening Inkscape for the first time, you might be overwhelmed by the various buttons and options available. Don't be put off by these, and if you can, we'd really recommend you take some time to explore Inkscape in more detail. There are many other useful tools within the software that will really make you into a master of creating imagery for Prezi. Don't get scared; get curious.
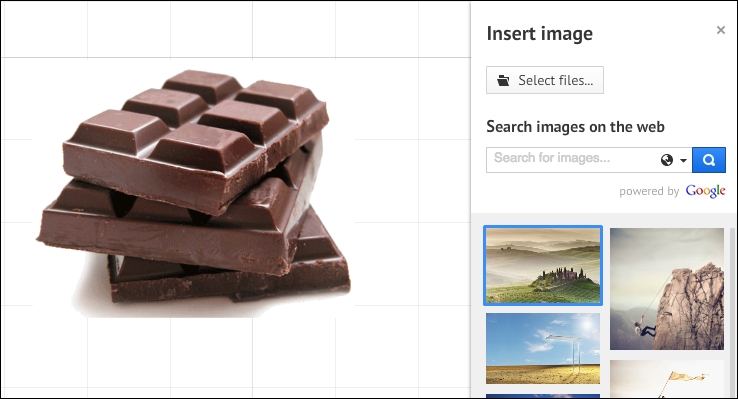
- Now it's time to insert your new vector image into Prezi. Our guess is that you probably got so excited at the end of step 3 that you've already done it, but just in case you need the instructions to complete this process, you need to perform the following steps:
- Open Prezi and click on Insert from the menu.
- Click on Image, and then click on Select files to find your vector image.
- Select your vector image and click Open.
- Once the image is on your Prezi canvas, you can use the zoom tools to go in as close as you like without any loss of clarity, as shown in the following screenshot:
Hopefully you enjoyed the last exercise, and learned lots during the process. You might be sitting at your desk now thinking, "That's amazing, but will I have time to do this for 20 images?" We appreciate that you are probably working to very tight deadlines forced upon you by your business. If you really don't have the time to go through the preceding steps every time you need to create a vector image, then follow the next set of steps. It's much quicker, but unfortunately, it comes at a cost. Although there is a small cost involved, the time saving will pay off in the long run.
Just as in the previous steps, you'll need another raster image to vectorize. You can either use the same image as you did before or carry out another Google Image search for something interesting, for this, you need to perform the following steps:
- Go to http://www.vectormagic.com and click on the Upload Image To Trace button.
- Select the raster image you'd like to vectorize and click on Ok.
- Vector Magic will then perform a trace for you and compare the raster and vector images onscreen, as shown in the following screenshot:
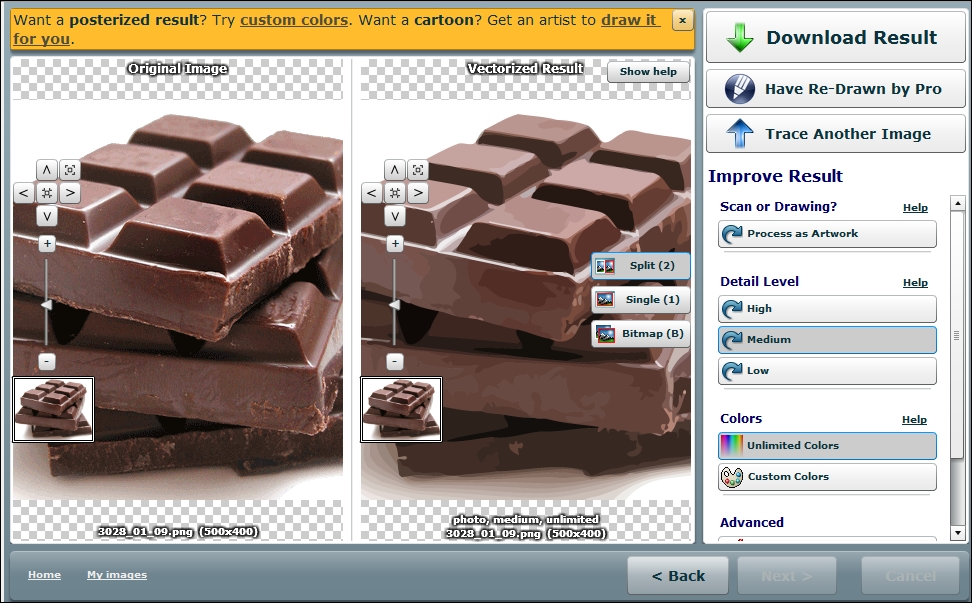
- The default settings of Vector Magic are normally very good, so if you are happy with them, click on Download Result button.
- You'll be asked to enter an e-mail address so that you can set up a free account.
- Once you have verified the account, select the PDF option for download and save to your desktop.
- Open Prezi and click on Insert on the menu.
- Click on Image and then click on Select files to find your vector image.
- Select your vector image and click on Open.
- Once the image is on your Prezi canvas, you can use the zoom tools to zoom in as close as you like, without any loss of image.
Note
As you can see from the previous two methods, there are some clear benefits for each, but an obvious difference in the amount of time and effort it will take. Only you will be able to decide which method suits you and the demands of your business.
One thing is for sure, though. Vector imagery lends itself much better to building presentations in Prezi, and you should try to use it wherever you can.