
250
CHAPTER GALLERY OF PROJECTS
FINISHED BLOCK SIZE
7 inches (17.8 cm)
MATERIALS LIST
FINISHED SIZE
28×28 inches (71×71 cm)
“Mirage” foundation paper pattern
Foundation paper: 16 sheets
Tan:
1
⁄
2
yard (46 cm) (blocks)
Turquoise:
1
⁄
2
yard (46 cm) (blocks)
Dark turquoise:
3
⁄
8
yard (34.3 cm) (blocks)
Dark red:
3
⁄
4
yard (68.6 cm) (blocks, binding)
Light brick red:
3
⁄
8
yard (34.3 cm) (blocks)
Brown:
1
⁄
2
yard (46 cm) (blocks)
Backing: 1
1
⁄
8
yards (103 cm)
Batting: Crib size, at least 38×38 inches (96.5×96.5 cm)
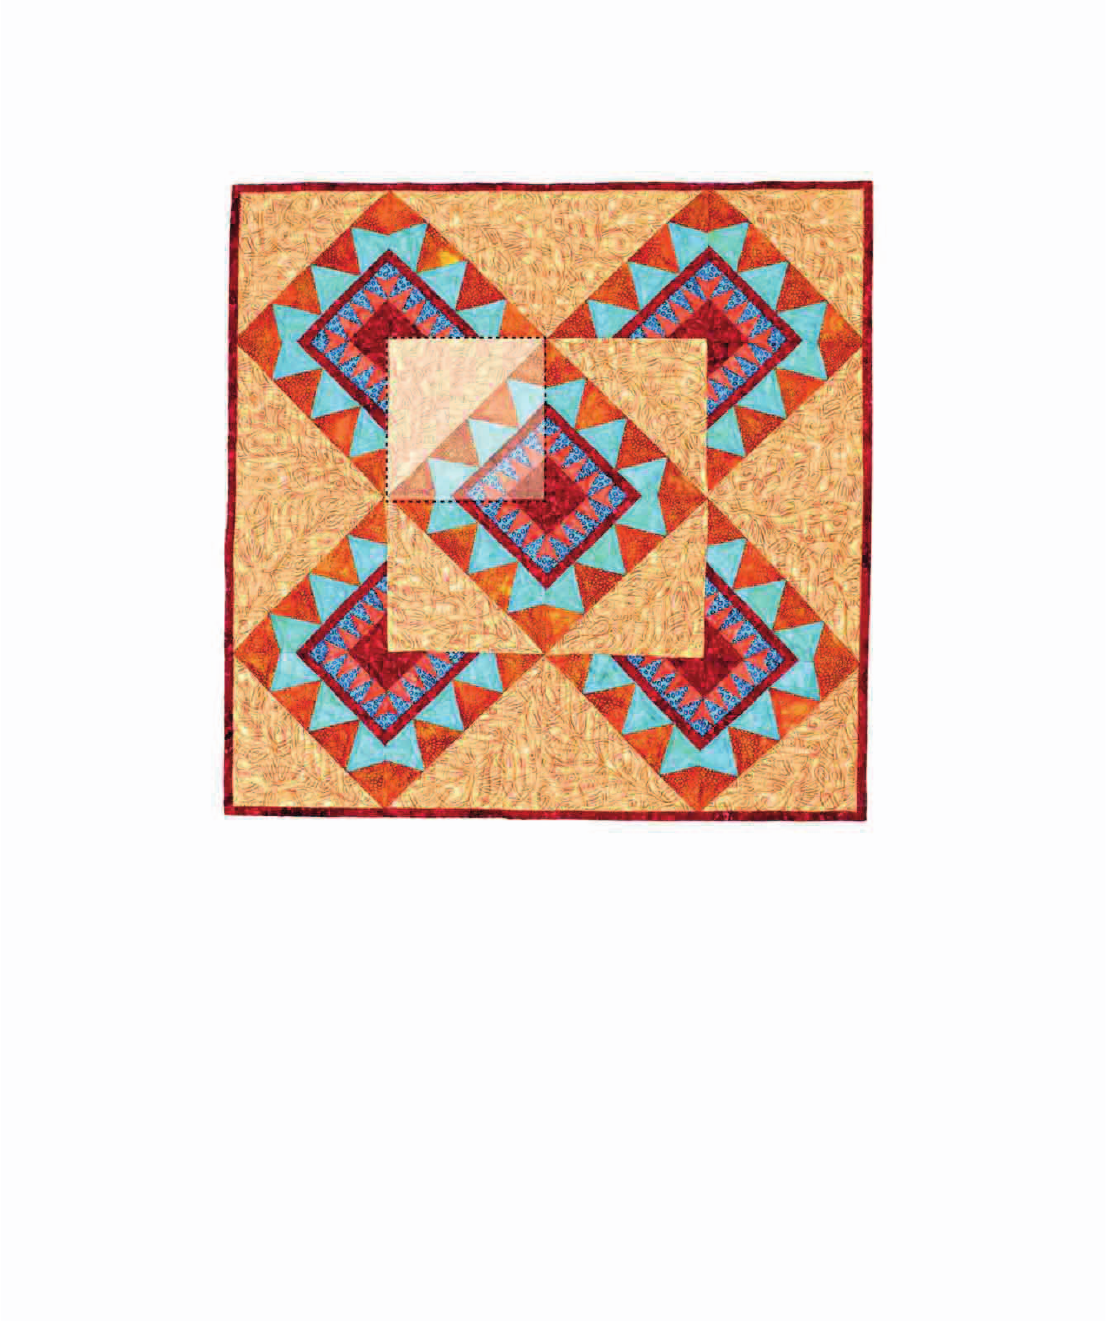
This wall hanging features a variation of the New
York Beauty block. The classic New York Beauty
block echoes the points and the round curves
of the Statue of Liberty’s crown and typically
employs curved piecing in its construction. How-
ever, this variation uses straight lines, making this
block easy to create using the foundation piecing
method. You can lay out the blocks in a variety of
interesting ways, such as the five motif-medallion
layout featured here.
“Mirage” Wall Hanging

251
PROJECT “MIRAGE” WALL HANGING
CUTTING DIRECTIONS
Tan:
8 squares (B8) 8
1
⁄
2
×8
1
⁄
2
inches (20×20 cm), cut in half diago-
nally (foundations)
Turquoise:
48 rectangles (B2, B4, B6) 3
1
⁄
4
×3
3
⁄
4
inches (7×8.2 cm) (foun-
dations)
Dark turquoise:
96 rectangles (A1, A3, A5, A7, A10, A12) 2×2
1
⁄
2
inches
(3.8×5.1 cm) (foundations)
Dark red:
4 strips, 2×42 or 2
1
⁄
4
×42 inches (5.1×106.7 or 5.7×106.7 cm)
wide, as you prefer (binding)
16 rectangles (A9) 2
3
⁄
4
×3
3
⁄
4
inches (5.7×8.2 cm) (founda-
tions)
16 rectangles (A13) 2×7 inches (3.8×16.5 cm) (foundations)
Light brick red:
80 rectangles (A2, A4, A6, A8, A11) 2×2
1
⁄
2
inches (3.8×5.1
cm) (foundations)
Brown:
64 rectangles (B1, B3, B5, B7) 3
1
⁄
4
×3
1
⁄
2
inches (7×7.6 cm)
(foundations)
Backing:
1 square 38×38 inches (96.5×96.5 cm)
Making the Foundation Blocks
1. Prepare foundations by copying the “Mirage” pat-
tern onto foundation paper. Prepare 16 foundations.
Block Z with colors in finished positions (Make 16)
2. To create Block Z, foundation piece the corner sec-
tion of the block (A1–A13). Trim this section, being
careful to retain the necessary seam allowances. Re-
peat to complete the corner section of all 16 Block
Zs.
3. Foundation piece the main section of Block Z (B1–
B8). Trim this section, retaining the necessary seam
allowances. Repeat to complete the main section of
16 Block Zs.
4. Pinning carefully to match the seam allowance
lines on the foundations, pin the corner and main
sections of a block together (right sides together).
Sew with a short stitch length. Repeat to complete
16 Block Zs.
5. Trim each finished block to 7
1
⁄
2
inches (19 cm)
square, which includes the necessary seam
allowances.
B8
B7
B5
B3
B1
B6
B4
B2
A13
A9
A2
A4
A6
A8
A11
A12
A10
A7
A5
A3
A1
252
CHAPTER GALLERY OF PROJECTS
Assembling the Quilt Center
1. Using the Quilt Assembly Diagram, arrange blocks
in rows on your design wall. Pay attention to the ori-
entation of the blocks in order to create the pattern
shown. Sew the blocks in each row together. Press
seams between blocks open.
Block Z
2. Sew the rows together. Press row seams in one direc-
tion. The quilt center should measure 28
1
⁄
2
×28
1
⁄
2
inches (72.4×72.4 cm).
3. Remove the foundation papers.
Quilt Assembly Diagram
253
PROJECT “MIRAGE” WALL HANGING
Quilting and Finishing
1. Remove selvages from the backing fabric before
basting the quilt. Prepare the quilt for quilting and
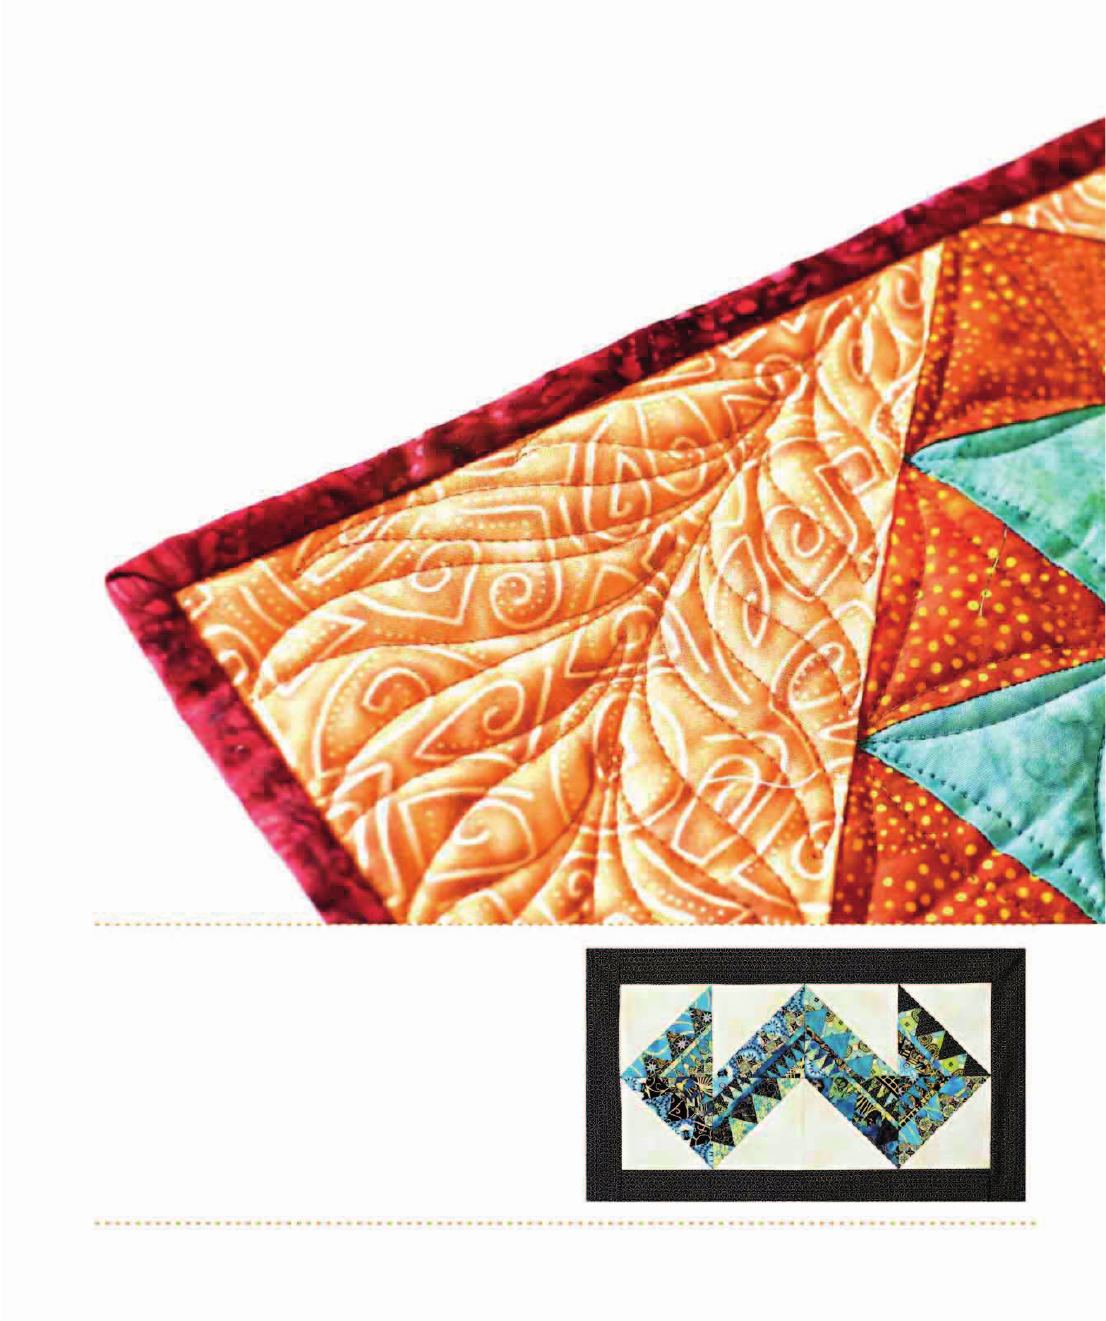
quilt as desired. The sample quilt was quilted with
sharp feathers in the tan triangles, and outline
quilted in the New York Beauty areas.
2. Square up the quilted quilt and bind it. Add a label
and a sleeve for hanging.
The blocks in this pattern can be laid
out in a variety of settings, so use
your design wall and have fun laying
them out! This table runner, which
features Asian fabrics, uses an alter-
nate setting to create a lazy zigzag.
..................Content has been hidden....................
You can't read the all page of ebook, please click here login for view all page.