
92
CHAPTER PIECING TECHNIQUES
FINISHED BLOCK SIZE
12×12 inches (30.5×30.5 cm)
MATERIALS LIST
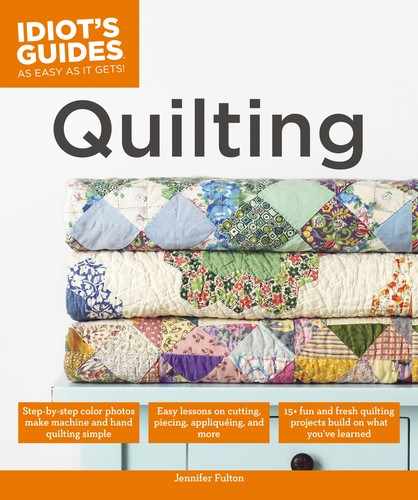
“Stargazer” Wall Hanging
The colors in this wall hanging reflect the colors
of my favorite oriental lily, the Stargazer. It’s per-
fect for practicing four-patches, half-square trian-
gles, and flying geese. If a pattern calls for several
half-square triangles that are similarly colored (as
this one does), the simplest way to make them
is with triangle paper. To make the flying geese,
you’ll use the stitch-and-flip method.
PRACTICEPROJECT
FINISHED SIZE
30×30 inches (76.2×76.2 cm)
Thangles™ 2-inch finished triangle paper (7 strips)
Light lime green:
1
⁄
8
yard (11.4 cm) or Fat Eighth (blocks)
Dark lime green print:
1
⁄
4
yard (22.9 cm) (blocks)
White:
3
⁄
8
yard (34.3 cm) (blocks, Border #2)
Dark rose:
3
⁄
4
yard (68.6 cm) (blocks, Border #1,
Border #2, binding)
Blue-green:
3
⁄
8
yard (34.3 cm) (Border #2)
Backing: 1 yard (91.4 cm)
Batting: 36-inch (91.4 cm) square
93
PRACTICE PROJECT “STARGAZER” WALL HANGING
CUTTING DIRECTIONS
Light lime green:
16 squares (A) 2
1
⁄
2
×2
1
⁄
2
inches (6.4×6.4 cm) (blocks)
Dark lime green print:
16 rectangles (D) 2
1
⁄
2
×6
1
⁄
2
inches (6.4×16.5 cm)
(blocks)
White:
7 rectangles (C) 2
1
⁄
2
×10 inches (6.4×25.4 cm) for
use with Thangles (blocks, Border #2)
16 rectangles (B) 2
1
⁄
2
×4
1
⁄
2
inches (6.4×11.5 cm)
(blocks)
16 squares (A) 2
1
⁄
2
×2
1
⁄
2
inches (6.4×6.4 cm) (blocks)
Dark rose:
4 strips, 2×42 or 2
1
⁄
4
×42 inches (5.1 to 5.7 cm) as you
prefer (binding)
2 rectangles 1
1
⁄
2
×24
1
⁄
2
inches (3.8×62.2 cm)
(Border #1)
2 rectangles 1
1
⁄
2
×26
1
⁄
2
inches (3.8×67.3 cm)
(Border #1)
7 rectangles (C) 2
1
⁄
2
×10 inches (6.4×25.4 cm) for
use with Thangles (blocks, Border #2)
32 squares (A) 2
1
⁄
2
×2
1
⁄
2
inches (6.4×6.4 cm) (blocks)
Blue-green:
4 rectangles (E) 2
1
⁄
2
×24
1
⁄
2
inches (6.4×62.2 cm)
(Border #2)
Backing:
1 square 36×36 inches (91.4×91.4 cm)
Note: Cut border strips first. Trim border strips to the right size after
quilt center is sewn together.
Making the Block Units
AA
B
Unit 1 (Make 16)
1. Using Method 1 for piecing flying geese units,
make 16 flying geese. Use one white B rectangle
and two dark rose A squares to make each flying
geese unit (Unit 1). Measure and trim each Unit 1 to
2
1
⁄
2
×4
1
⁄
2
inches (6.4×11.5 cm), and resew as needed.
Press toward the corners and away from the white
“geese.”
94
CHAPTER PIECING TECHNIQUES
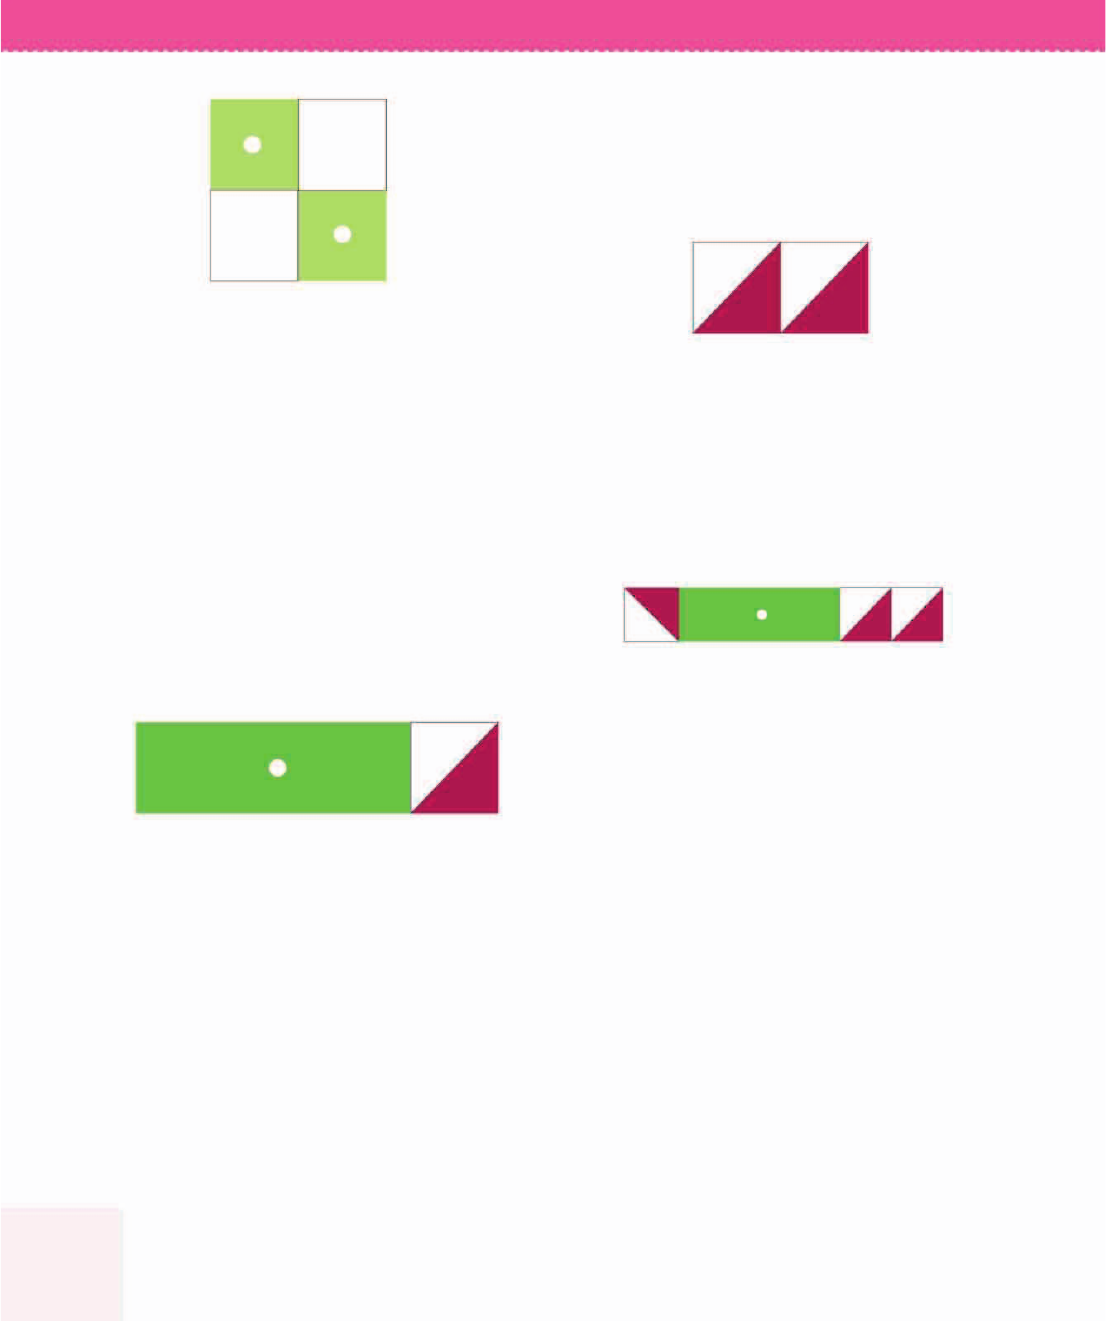
Unit 5 (Make 8)
D
Unit 4
D
Unit 3 (Make 8)
4. Sew one HST to the end of a dark lime green
rectangle D to create Unit 3. Lay out Unit 3 first,
making sure you align the HST unit correctly, and
flip it onto the rectangle without changing the
alignment. Make eight Unit 3s. Measure and trim to
2
1
⁄
2
×8
1
⁄
2
inches (6.4×21.6 cm). Press to the dark lime
green rectangle.
Unit 4 (Make 8)
6. Sew one HST to the left end of a dark lime green
rectangle D and press to the rectangle. Sew Unit
4 to the other end to make Unit 5. Press Unit 4 to
the dark lime green rectangle. Make eight Unit 5s.
Measure and trim to 2
1
⁄
2
×12
1
⁄
2
inches (6.4×31.7 cm).
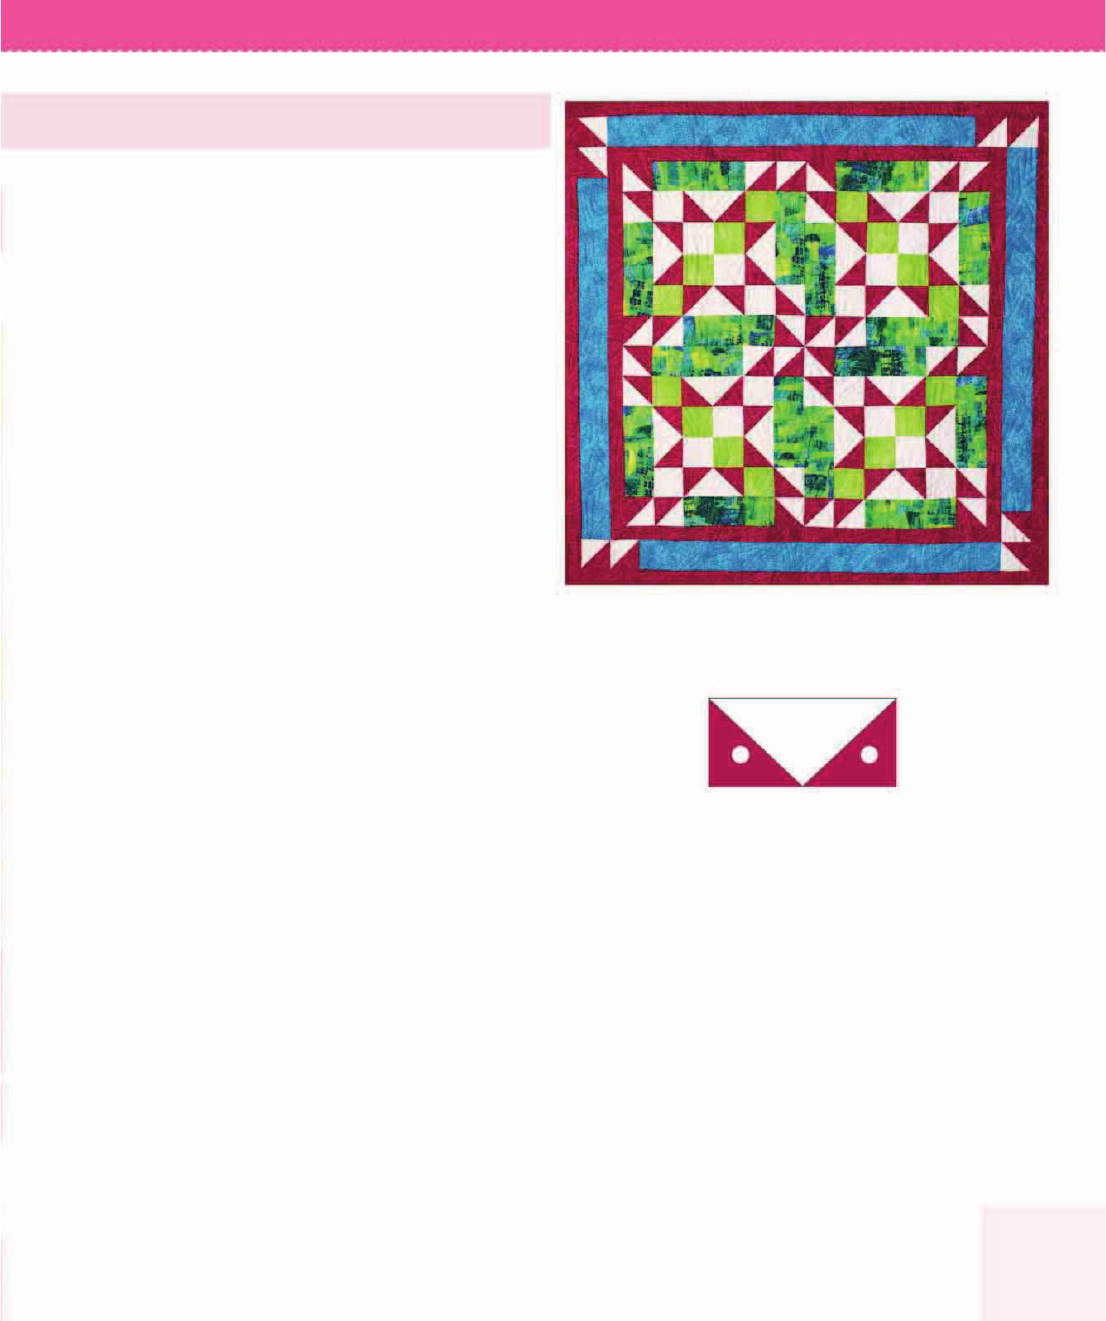
2. Using Method 1 for piecing four-patches, sew two
light lime green A squares and two white A squares
into a four-patch unit (Unit 2) that measures 4
1
⁄
2
inches (11.5 cm) square. Make four Unit 2s. Mea-
sure each Unit 2 and trim as needed. Press both
seams open.
3. Using Method 2 for piecing HSTs, make 42 half-
square triangles (HSTs) using triangle paper. Use
one white and one dark rose C rectangle and one
2-inch triangle paper strip to make six HSTs at one
time. Check that each HST is 2
1
⁄
2
inches (6.4 cm)
square and trim as needed.
A
A
A
A
Unit 2 (Make 4)
5. Sew two HSTs together to make Unit 4. Lay out
the unit to ensure correct orientation of the HSTs.
Make eight Unit 4s. Unit 4 should measure 2
1
⁄
2
×4
1
⁄
2
inches (6.4×11.5 cm). Press to the left HST.

95
PRACTICE PROJECT “STARGAZER” WALL HANGING
Assembling the Quilt Blocks
A
A
AA
UNIT
5
UNIT 1
UNIT 1
UNIT 1
UNIT 1
UNIT 2
UNIT 3
UNIT 3
UNIT 5
1. Join units, light lime green A squares, and white A
squares to create Block Z. Assemble the center star
first, and then add Unit 3s to either side and Unit 5s to
the top and bottom.
2. When sewing each row and then finally sewing the
rows together to create the center star, be sure to
match up the center point of the flying geese unit to
the center of the four-patch (Unit 2). Pin the flying
geese carefully so you do not crop the points. If the
points of your flying geese are not exactly
1
⁄
4
inch (.6
cm) from the edge of the unit, mark your sewing line
so it runs right through the point.
3. When assembling the center star, press to the A
squares and in toward the four-patch center. Make
sure the green squares in the corners and in the four-
patch unit run in the correct direction. The center star
should measure 8
1
⁄
2
×8
1
⁄
2
inches (21.6×21.6 cm).
4. Sew the Unit 3s to the sides of the center star. Pin the
intersections carefully. Press toward the Unit 3s. Sew
the Unit 5s to the top and bottoms of this unit, and
press away from the center star. Create four Block Zs.
Block Z should measure 12
1
⁄
2
×12
1
⁄
2
inches (31.7×31.7
cm).
Assembling the Quilt Center
1. Using the Quilt Assembly Diagram, join four Block
Zs to form the quilt center. Lay out the blocks on
your design wall, and when sewing them together,
pay attention to the orientation of the lime squares
running diagonally through the blocks.
2. Press seams open where the Block Zs are joined.
The quilt center should measure 24
1
⁄
2
×24
1
⁄
2
inches
(62.2×62.2 cm).
Adding the Borders
1. Measure down the quilt center. Cut the dark rose
side Border #1 rectangles that length. Sew these
strips to the sides of the quilt center. Press toward
the strips.
2. Measure across the quilt center. Cut the dark rose
top and bottom borders that length. Sew these
strips to the top and bottom of the quilt center and
press toward the strips. The quilt should measure
26
1
⁄
2
×26
1
⁄
2
inches.
Quilt Assembly Diagram
Block Z (Make 4)
Block Z
Unit 7
Unit 6

96
CHAPTER PIECING TECHNIQUES
E
Unit 7 (Make 2)
5. Measure across the quilt center and cut two blue-
green E rectangles that length minus 6 inches
(15.2 cm). Sew one HST to the left end of one
blue-green E rectangle and press to the rectangle.
Check the Unit 7 diagram for correct orientation
of the HST. Sew two HSTs to the right end of the
blue-green rectangle to make Unit 7. Press to the
blue-green strip. Make two Unit 7s.
6. Refer to Quilt Assembly Diagram, and sew a Unit
7 to the top and bottom of the quilt, making sure
that the HSTs are aligned correctly. Press to Border
#1. The quilt should measure 30
1
⁄
2
×30
1
⁄
2
inches
(77.5×77.5 cm).
3. Measure down the quilt center and cut two blue-
green E rectangles that length minus 2 inches
(5.1 cm). Sew one HST to the right end of one
blue-green E rectangle to create Unit 6. Check that
the orientation of the HST is correct. Press to the
blue-green strip. Make two Unit 6s.
4. Refer to Quilt Assembly Diagram, and sew a Unit 6
to each side of the quilt, making sure that the HSTs
are aligned correctly. Press toward Border #1.
Unit 6 (Make 2)
E
Quilting and Finishing
1. Remove the selvages from the backing fabric be-
fore basting the quilt. Prepare the quilt for quilting
and quilt as desired. The sample quilt was quilted
with spiraling triangles. If you want to quilt using a
simpler straight-line pattern, quilt this piece in a grid
of straight lines that run across and down the quilt,
spaced every 2 inches (5.1 cm) so they run through
the centers of the squares and other units.
2. Square up the quilted quilt and bind it. Add a label
and a sleeve for hanging.
..................Content has been hidden....................
You can't read the all page of ebook, please click here login for view all page.