204
CHAPTER GALLERY OF PROJECTS
FINISHED BLOCK SIZE
8 inches (20.3 cm)
MATERIALS LIST
FINISHED SIZE
60×68 inches (152.4×172.7 cm)
Various light pinks:
7
⁄
8
yard (80 cm) total from fat
quarters and fat eighths (blocks)
Various medium to dark pinks: 1
3
⁄
8
yards (125.7 cm)
total from fat quarters and fat eighths (blocks, Border
#2)
Various light browns:
3
⁄
4
yard (68.6 cm) total from fat
quarters and fat eighths totaling (blocks)
Various medium browns:
1
⁄
4
yard (22.9 cm) total
from fat eighths (Border #2)
Various dark browns: 1 yard (91.4 cm) total from fat
quarters and fat eighths (blocks, Border #2)
1
1
⁄
4
yards (114.3 cm) (Border #1, Border #3)
1
⁄
2
yard (binding)
Backing: 3
2
⁄
3
yards (335.3 cm)
Batting: At least 66×74 inches (167.7×188 cm)
(Twin or Full size)
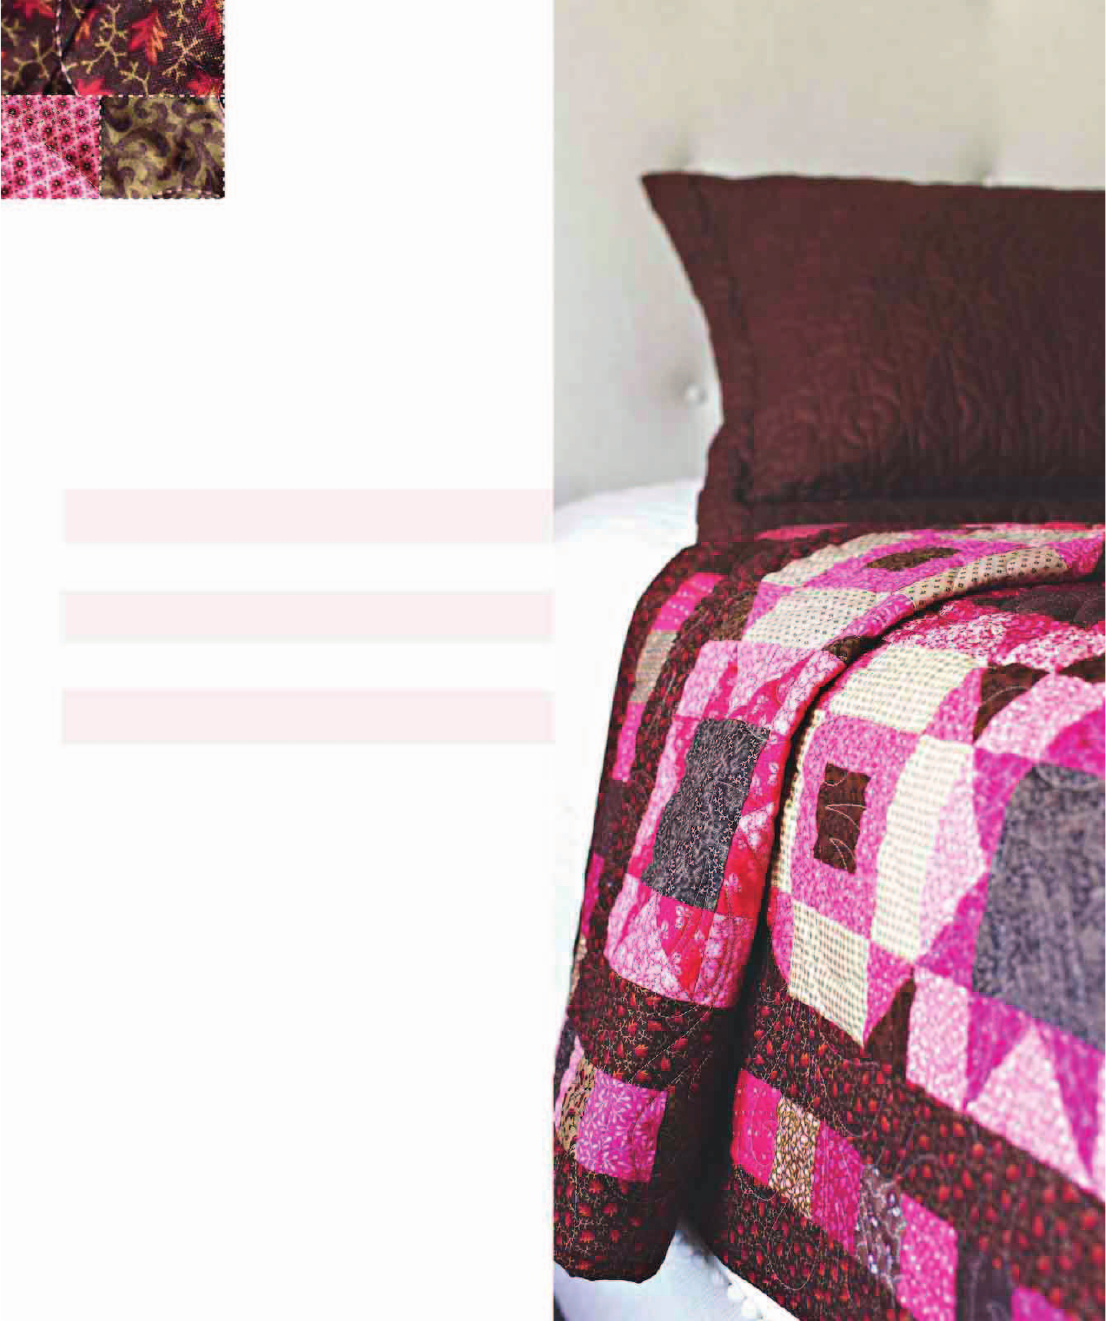
Pink and brown quilts are classics that warm the
heart. The colors and pattern of this quilt remind
me of making strawberry preserves with my
mother and sisters. Although it’s fine to make this
quilt using only a few fabrics, in this version, the
more the merrier.
“Strawberry Preserves”
Lap Quilt

205
PROJECT “STRAWBERRY PRESERVES” LAP QUILT
CUTTING DIRECTIONS
Various light pinks:
For each Block Z, cut 1 square (A) 5
1
⁄
4
×5
1
⁄
4
inches
(13.4×13.4 cm), total of 21 (A) squares needed
For each Block Z, cut 4 squares (C) 2
1
⁄
2
×2
1
⁄
2
inches
(6.4×6.4 cm), total of 84 (C) squares needed
Various medium pinks:
For each Block Y, cut 2 squares (F) 3×3 inches
(7.6×7.6 cm), total of 42 (F) squares needed
28 squares (C) 2
1
⁄
2
×2
1
⁄
2
inches (6.4×6.4 cm) (Border
#2)
Various dark pinks:
For each Block Z, cut 4 squares (B) 2
7
⁄
8
×2
7
⁄
8
inches
(7.3×7.3 cm), total of 84 (B) squares needed
For each Block Y, cut 2 rectangles (G) 1
1
⁄
2
×2
1
⁄
2
inch-
es (3.8×6.4 cm), total of 42 (G) rectangles needed
For each Block Y, cut 2 rectangles (H) 1
1
⁄
2
×4
1
⁄
2
inch-
es (3.8×11.5 cm), total of 42 (H) rectangles needed
30 squares (C) 2
1
⁄
2
×2
1
⁄
2
inches (6.4×6.4 cm) (Border
#2)
Various light browns:
For each Block Y, cut 4 rectangles (E) 2
1
⁄
2
×4
1
⁄
2
inch-
es (6.4×11.5 cm), total of 84 (E) rectangles needed
Various medium browns:
28 squares (C) 2
1
⁄
2
×2
1
⁄
2
inches (6.4×6.4 cm) (Border
#2)
Dark brown yardage:
8 strips 2
1
⁄
2
×42 inches (6.4×106.7 cm) (Border #1)
8 strips 2
1
⁄
2
×42 inches (6.4×106.7 cm) (Border #3)
7 strips, 2×42 or 2
1
⁄
4
×42 inches (5.1×106.7 or 5.7×106.7
cm) as you prefer (binding)
Note: Cut border strips before cutting anything else. Trim the border
strips to the right size aer the quilt center is sewn.
Assembling the Block Units
Various dark browns:
For each Block Z, cut 1 square (D) 4
1
⁄
2
×4
1
⁄
2
inches
(11.5×11.5 cm), total of 21 (D) squares needed
For each Block Y, cut 1 square (C) 2
1
⁄
2
×2
1
⁄
2
inches
(6.4×6.4 cm), total of 21 (C) squares needed
30 squares (C) 2
1
⁄
2
×2
1
⁄
2
inches (6.4×6.4 cm) for
Border #2
For each Block Y, cut 2 squares (F) 3×3 inches
(7.6×7.6 cm), total of 42 (F) squares needed
Backing:
2 strips 66×42 inches (167.7×106.7 cm)
Unit 1 (Make 84)
1. Using Method 2 for piecing flying geese units,
make 84 flying geese (Unit 1). Use 1 A square and
4 B squares to make 4 matching flying geese units.
Measure and trim each Unit 1 to 2
1
⁄
2
×4
1
⁄
2
inches
(6.4×11.5 cm). Press away from the “geese” and
toward the “sky” triangles.
Unit 2 (Make 84)
2. Using Method 1 for piecing half-square triangles
(HSTs), make 84 HSTs (Unit 2). Use 1 F square of
each color to make two matching Unit 2s at one
time. Measure and trim each Unit 2 to 2
1
⁄
2
inches
(6.4 cm) square. Press toward the dark.
A
BB
F
F

206
CHAPTER GALLERY OF PROJECTS
Block Z (Make 21)
1. Join 4 Unit 1s, 4 light C squares, and 1 D square to
create Block Z. Lay out the block first, being careful
to arrange the Unit 1s with star points facing out.
Block Y (Make 21)
4. Join 4 Unit 2s, 1 Unit 3, and 4 E rectangles to create
Block Y. Lay out the block first, being careful to
arrange the Unit 2s correctly (the dark triangle is
always in the outside corner). Make sure Unit 3 is
oriented as shown, with the short borders on the
sides.
5. Start by sewing E rectangles to each side of Unit 3.
Press toward the E rectangles. Sew Unit 2s to the
two remaining E rectangles, pressing toward the E
rectangles. Sew these to the top and bottom of the
center, pressing away from Unit 3. Make 21 Block Ys.
Block Y should measure 8
1
⁄
2
×8
1
⁄
2
inches (21.6×21.6
cm).
2. Assemble each row of the block, pressing away
from the Unit 1s. Sew rows together, pinning in-
tersections so they will match. Pin the flying geese
carefully so you do not crop the points. If the points
of your flying geese are not exactly
1
⁄
4
inch (.6 cm)
from the edge of the unit, mark your sewing line on
the wrong side so it runs right through the point.
3. Press rows 1 and 3 away from row 2. Make 21
Block Zs. Block Z should measure 8
1
⁄
2
×8
1
⁄
2
inches
(21.6×21.6 cm).
Unit 3 (Make 21)
3. To make the center unit (Unit 3) of Block Y, sew 2
G rectangles to opposite sides of the dark C center
square. Press to G rectangles. Sew 1 H rectangle to
each long side, and press to the H rectangles. Make
21 Unit 3s. Unit 3 should measure 4
1
⁄
2
inches (11.5
cm) square.
Assembling the Quilt Blocks
GG
H
H
C
D
UNIT
1
UNIT 1
UNIT 1
C
C
C
C
UNIT 1
UNIT 3
UNIT 2
UNIT 2
UNIT 2
UNIT 2
E
E
E
E

207
PROJECT “STRAWBERRY PRESERVES” LAP QUILT
Assembling the Quilt Center
Adding the Borders
1. Sew two 2
1
⁄
2
×42-inch (6.4×106.7 cm) Border #1
strips together to create a 2
1
⁄
2
×83
1
⁄
2
-inch (6.4×212.1
cm) strip. Repeat to create 4 Border #1 strips.
2. Measure down the quilt center and cut two Border
#1 strips that length. Sew these strips to the sides
of the quilt center. If you sew one strip from the top
of the quilt down and the other from the bottom of
the quilt up, you will avoid placing the border seam
in the side borders in the same position on each
side. Press toward Border #1.
3. Measure across the quilt center and cut the other
two Border #1 strips that length. Sew these strips to
the top and bottom of the quilt center, once again
switching directions from which you sew the bor-
ders in order to stagger where the border seams are
located. Press toward Border #1. The quilt should
now measure 52
1
⁄
2
×60
1
⁄
2
inches (133.4 cm×153.7
cm).
4. Lay out 30 C squares of various colors in a pleasing
arrangement, and sew them together to create one
side Border #2. Repeat to create a second side
Border #2. Press the seams in the same direction,
and then measure the borders. Measure down the
center of the quilt. If your pieced borders do not
equal this measurement, make adjustments to a few
seams in the middle of each pieced border so that
the two measurements are the same. Sew the side
borders to the quilt center. Press toward Border #1.
For example, if your quilt measures 60
1
⁄
4
inches
(153cm) down the center, and your pieced borders
are 60
1
⁄
2
inches (153.6 cm), then your border is
1
⁄
4
inch (.6 cm) too long. If you make two seams
somewhere in the middle of each pieced border
3
⁄
8
inch (1 cm) deep (
1
⁄
8
inch bigger than normal),
you’ll make your borders exactly 60
1
⁄
4
inches
(153cm) long.
Quilt Assembly Diagram
1. Using the Quilt Assembly diagram, arrange blocks in
rows on your design wall. Pay attention to the placement
of Block Zs and Block Ys, as they alternate within each
row. Pin carefully at every intersection. If needed, mark
the sewing line on the back of blocks so it goes through
points. Sew the blocks together into rows. Press the
seams in odd rows to the right, and the seams in even
rows to the left to aid in assembly of the rows.
2. Sew the rows together. Press row seams in the same
direction. The quilt center should measure 48
1
⁄
2
×56
1
⁄
2
inches (133.4×153.7 cm).
Block Z
Block Y
2
1
⁄
2
×60
1
⁄
2
inches (6.4×153.6 cm)
2
1
⁄
2
×56
1
⁄
2
inches (6.4×143.5 cm)
2
1
⁄
2
×52
1
⁄
2
inches (6.4×133.3 cm)
2
1
⁄
2
×56
1
⁄
2
inches (6.4×143.5 cm)
2
1
⁄
2
×60
1
⁄
2
inches (6.4×153.6 cm)
2
1
⁄
2
×64
1
⁄
2
inches (6.4×163.8 cm)

208
CHAPTER GALLERY OF PROJECTS
5. Measure across the quilt center. The quilt should
measure 56
1
⁄
2
inches (143.5 cm) wide. Sew 28 C
squares together to create the top Border #2,
pressing the seams in the same direction. Repeat to
create the bottom Border #2. Measure the borders
and the width of the quilt, and make adjustments
to the middle seams of the borders as needed.
Sew the borders to the top and bottom of the quilt
center. Press toward the Border #1 strips. The quilt
should measure 56
1
⁄
2
×64
1
⁄
2
inches (143.5×163.8 cm).
6. Sew two 2
1
⁄
2
×42-inch (6.4×106.7 cm) strips together
to create a 2
1
⁄
2
×83
1
⁄
2
-inch (6.4×212.1 cm) strip for
Border #3. Repeat to create four Border #3 strips.
7. Measure down the quilt center and trim two Border
#3 strips to that length. Sew these strips to the sides
of the quilt center, sewing in opposite directions so
the border seams area not in the same position on
each side. Press toward the Border #3 strips.
8. Measure across the quilt center and trim the
remaining two Border #3 strips that length. Sew
these strips to the top and bottom of the quilt
center, once again switching directions to stagger
where the border seams are located. Press toward
the Border #3 strips. The quilt should measure
60
1
⁄
2
×68
1
⁄
2
inches (153.6×174 cm).
Quilting and Finishing
1. Piece the backing by sewing the two 66×42-
inch (167.7×106.7 cm) strips together to create a
66×83-inch (167.7×210.8 cm) rectangle (make sure
selvages are removed). Use a
1
⁄
2
-inch (1.2 cm) seam
allowance and backstitch at the beginning and end
of the seam. Press the seam open.
2. Quilt as desired. The sample quilt was quilted with
swirls and feathers.
3. Square up the quilted quilt and bind it. Add a label.
This quilt is easy to make scrappy by
selecting a fabric and cutting what
is needed for a single block. For ex-
ample, select one light pink fabric,
and cut 1 A square and 4 C squares
for each Block Z. Store the fabrics for
each block in the same bag for ease in
construction.
..................Content has been hidden....................
You can't read the all page of ebook, please click here login for view all page.