
18
CHAPTER GETTING READY TO QUILT
A design wall is a flat surface constructed from
foam core insulation board and quilt batting. You
can lean it against a wall or mount it permanently.
The natural static of the batting causes your quilt
blocks to cling to it, allowing you to arrange quilt
blocks prior to sewing them together.
Use a design wall to test out fabrics for a future
quilt or to play with the layout (setting) of your
blocks until you find an arrangement that you
like. Although you can make a quilt without using
a design wall, using one makes it much easier to
plan and organize a quilt project.
To make it easier to transport and
store your design wall, have the store
cut each board in half, making two
large squares. You can then rig the
boards for easy reassembly using four
short PVC pipes.
Create a Design Wall
PRACTICEPROJECT
19
PRACTICE PROJECT: CREATE A DESIGN WALL
MATERIALS LIST
FINISHED SIZE
The size of your design wall will depend on the
dimensions of the foam core insulation boards avail-
able to you and the type of projects you expect to
make. Home improvement stores often sell insulation
boards that are 48×96 inches (122×244 cm). This
is large enough to display the blocks for a crib or
toddler quilt. For larger quilts up to Queen size, you’ll
need two boards this size.
Two
3
⁄
4
- to 1-inch (2–2.5 cm) thick foam core insula-
tion boards
Duct tape
Low-loft quilt batting, large enough to cover the
boards and overlap by 4 inches (10 cm) on each side
Command™ hanging strips or other hanging system
OPTIONAL
Four pieces of 2
3
⁄
4
-inch (6.78 cm) diameter PVC
pipe, each about 36 inches (91.4 cm) long
Four 1
1
⁄
2
-inch (3.9 cm) PVC couplings
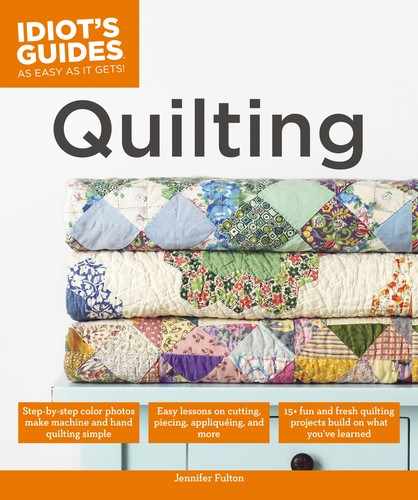
Lay a strip of batting on your floor. Place the insulation board
on top of the batting print side up.
1
Pull up batting around the top edge of the board and tape
the entire edge using duct tape. Miter one corner and tape it
down. To miter the corner, fold the corner down toward the
taped edge, forming a triangle. Then fold the long edge up.
2
20
CHAPTER GETTING READY TO QUILT
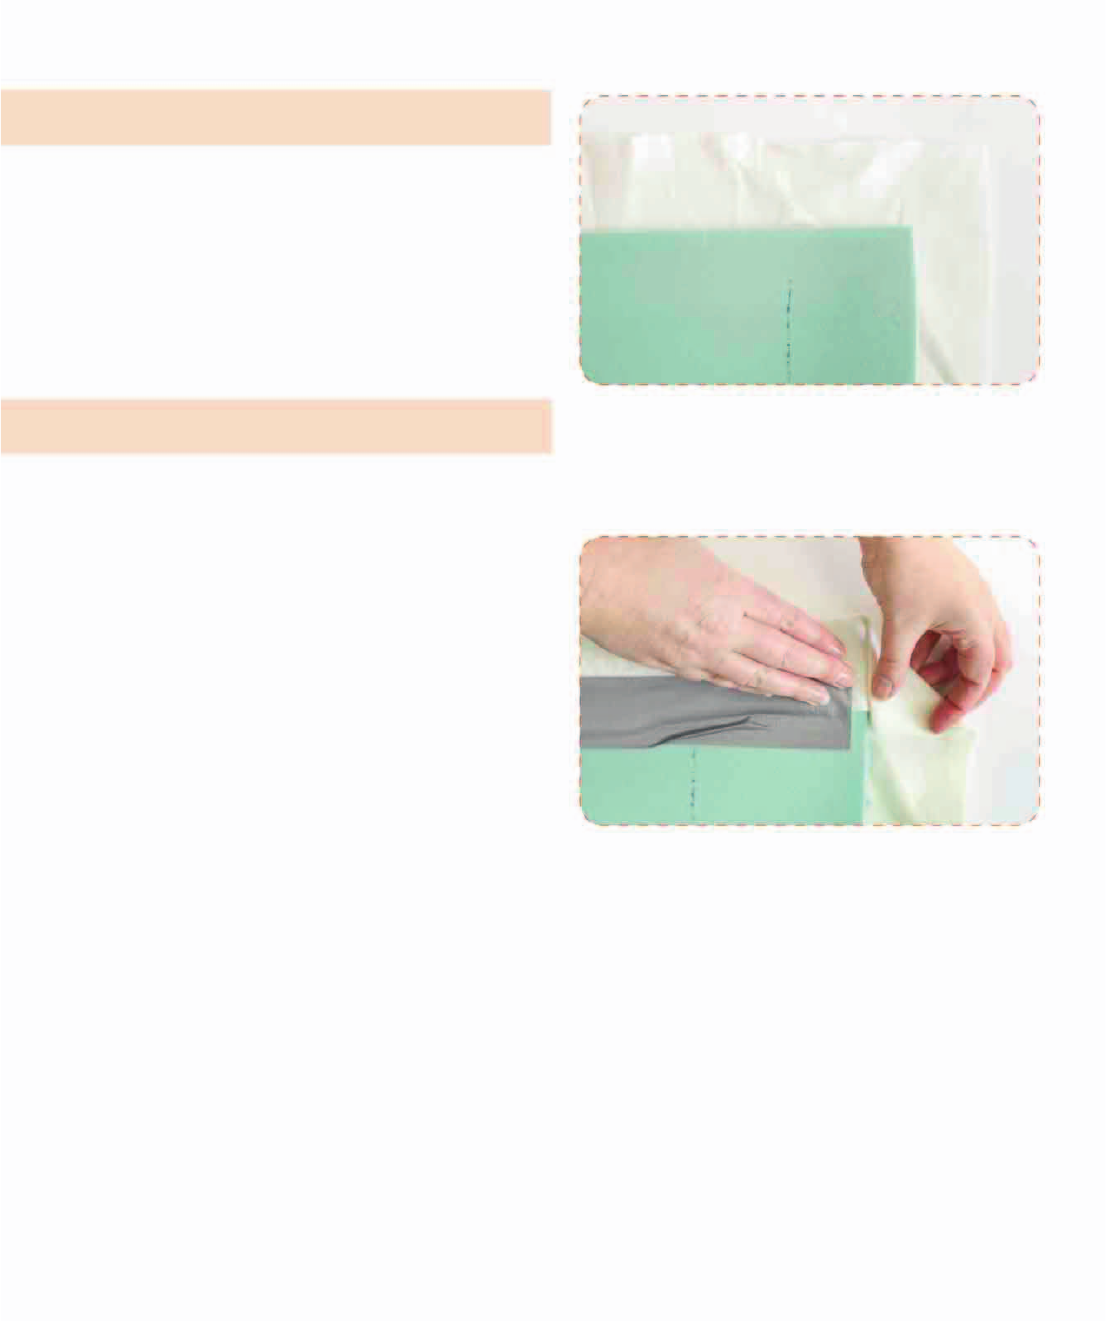
Pull the batting up along the neighboring long side, and tape
it along the entire edge. Miter the next corner and tape that
down. Repeat this process all the way around the board, until
all corners are mitered and all sides are taped.
Repeat to cover all your boards with batting. To hang the
board, attach Command
TM
strips (or other hanging system)
along the top edge.
34
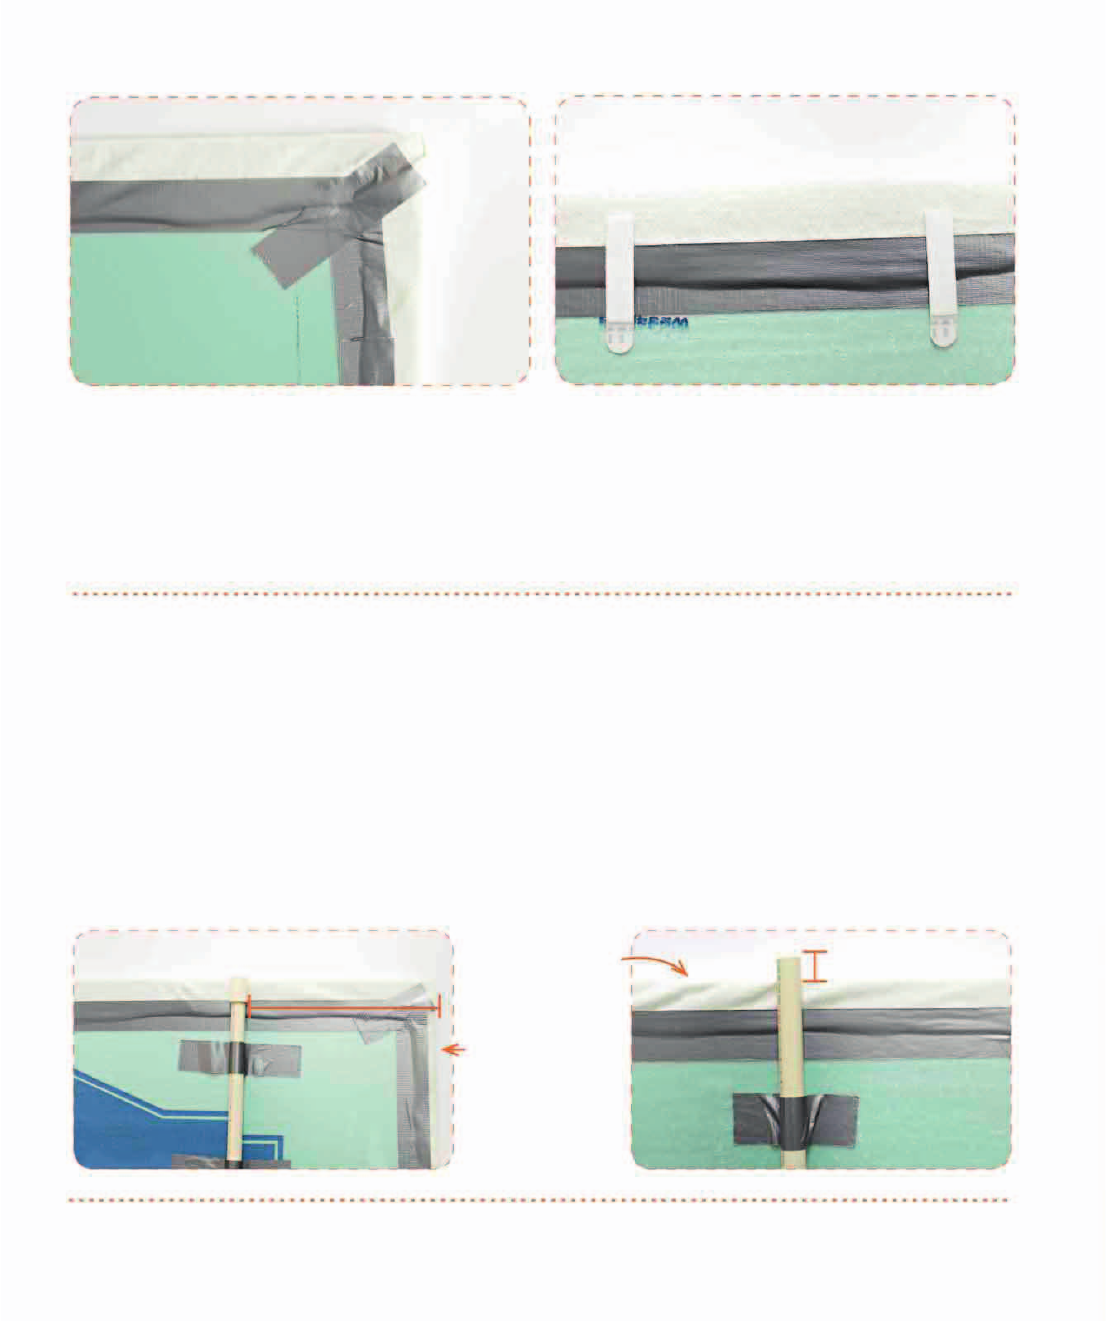
If you cut the boards in half for easy transport, you can reassemble them using PVC
pipe. Fit two of the half pipes with a coupling, and tape them to each bottom board
section, one foot (30.5 cm) from each side edge and even with the top edge. Tape
across the pipe in several places. Tape two PVC pipes to each of the top sections.
Tape them along the bottom edge, 12 inches (30.5 cm) from the left/right edge. Over-
hang the pipes by
3
⁄
4
inch (2 cm), or half the length of the coupling. To reassemble
your design wall, insert the top pipes into the bottom PVC couplings.
Side
To p
1 foot (30.5 cm)
3
⁄
4
-inch (2 cm)
overhang

21
PRACTICE PROJECT: CREATE A DESIGN WALL

..................Content has been hidden....................
You can't read the all page of ebook, please click here login for view all page.