
150
CHAPTER ASSEMBLING A QUILT TOP
Add Mitered Borders
A miter is a diagonal seam. When you miter quilt borders, the result looks like a picture frame. Like
all borders, mitered borders look best when their width is proportional to the width of the quilt block.
For example, if your quilt has 12-inch blocks, a border that measures 1, 2, 3, 4, or 6 inches wide will be
attractive, because those numbers are factors of 12.
If you have more than one border, sew the border strips together first, and then
cut the border set to the right length.
Measure and cut the borders.
Measure both across and down the quilt’s center. To that
measurement, add twice the width of the border, plus
4 inches (7.6 cm). For example, for 3-inch (7.62 cm) side
borders, you would add 10 inches (25.4 cm) to the quilt’s
length measurement.
1
151
ADD MITERED BORDERS
Sew borders onto the quilt center.
Match the centers of one side of the quilt and its border, and
pin. Sew the border, beginning and ending
1
⁄
4
inch (.6 cm)
from the edges of the quilt. Backstitch at the beginning and
end of the seam. Repeat for the other side, and the top and
bottom borders, beginning and ending the seams
1
⁄
4
inch (.6
cm) from the quilt edge.
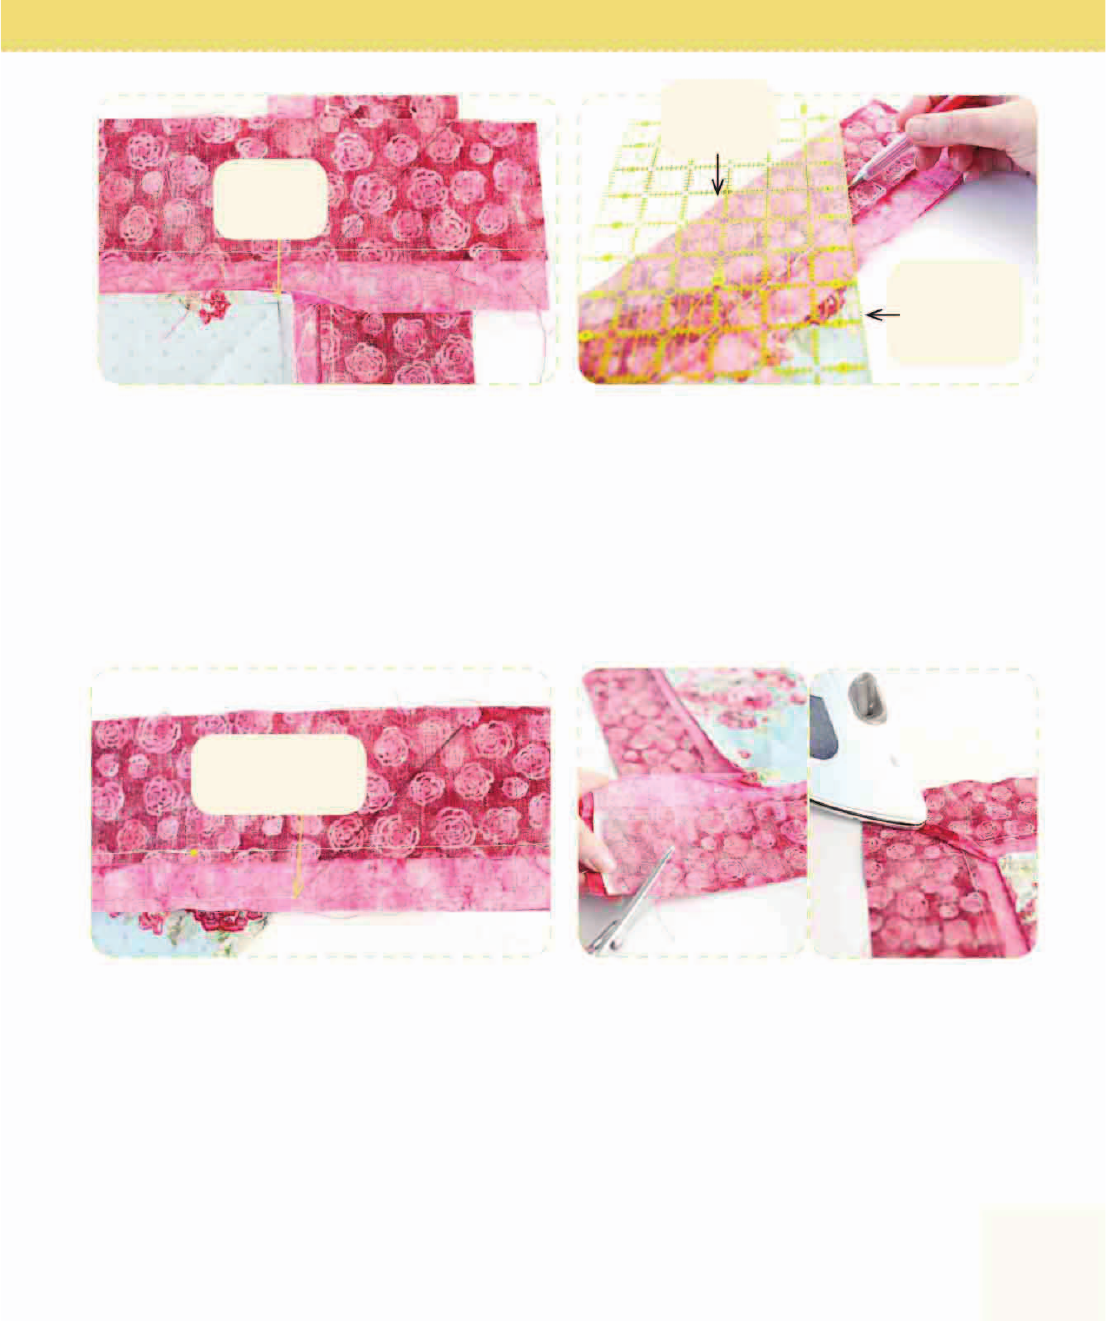
2
Sew the miter seams.
Sew on the diagonal line you marked, starting at the marked
dot and backstitching at the beginning and end of the seam.
Repeat to sew the miter for each border corner.
4
3
Mark the miters.
Mark dots at the spots where you stopped stitching each
border. Fold the quilt (rst) diagonally, aligning and pinning
the edges and the seams of all borders. Place a ruler’s
45-degree line on the outer edge of the border, and its right
edge along the fold. Mark the diagonal miter from the dot
where the border seams end out to the corner. Repeat for
the other three corners.
5
Trim and press.
After checking that the miter lies flat and there are no
puckers or tucks, trim the excess borders and press seam
allowances open.
45-degree
line
Stop
stitching
here
Sew from the dot
to the edge
Place ruler’s
right edge
along the fold
..................Content has been hidden....................
You can't read the all page of ebook, please click here login for view all page.