

8
CHAPTER GETTING READY TO QUILT
You’re probably eager to get started on your quilting journey, but before machine piecing, machine
appliquéing, or machine quilting a quilt, you should take the time to properly prepare your sewing
machine for the job. Repeat this process aer every eight hours of sewing, and any time you encounter
problems while making a quilt by machine.
Prepare Your Sewing Machine
Clean and oil your machine before starting.
After every eight hours of sewing, you should unplug the
machine, clean out the lint, and give it a drop of sewing
machine oil. Use only sewing machine oil (not other oils).
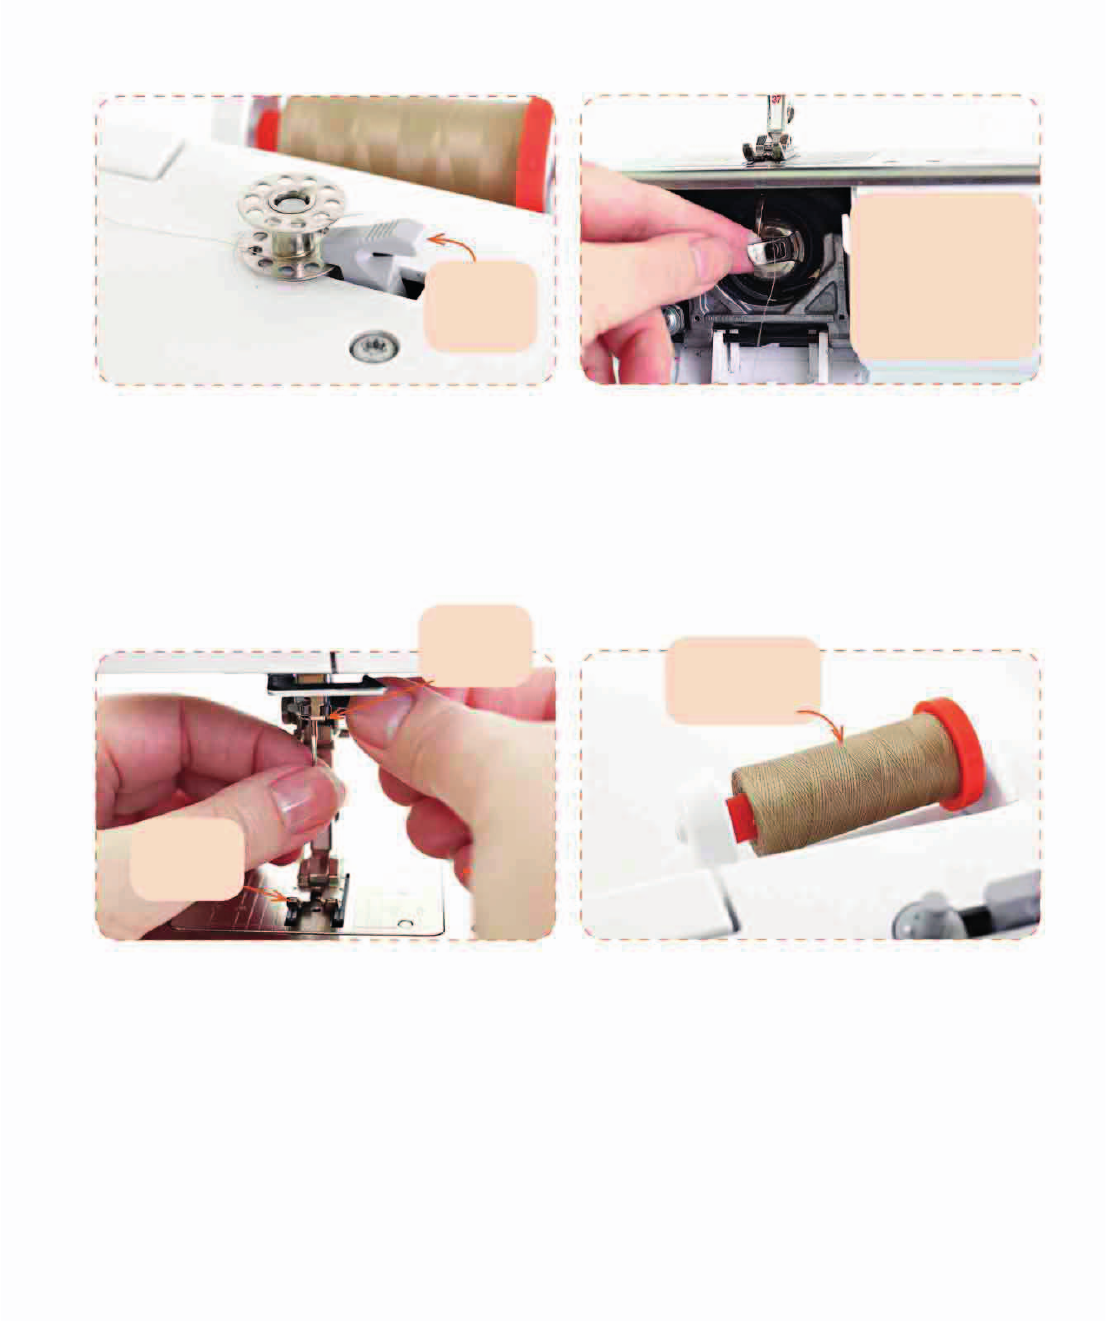
Thread your machine for bobbin winding.
Select the appropriate bobbin thread for your task (machine
piecing, machine appliqué, or machine quilting). Place a bob-
bin on the winder and follow the instructions in your manual
for threading your machine for bobbin winding.
12
Bobbin
Winder
Bobbin
Guide
If you need to load a stacked thread spool and your machine’s spool
pin cannot be set vertically, use a thread stand and place it just
behind your machine on the sewing table.
9
PREPARE YOUR SEWING MACHINE
Lock the bobbin in place.
Wind the thread around the bobbin clockwise, two or three
times. Lock the winder in place by pushing it to the right, or
by pushing a locking lever toward the stationary winder. This
turns o the needle up/down function.
Wind the bobbin and then insert it.
Press the foot pedal to start winding the bobbin. The
machine stops automatically when the bobbin is full. Load
the bobbin using the instructions in your manual. Be sure to
follow the correct thread path when loading the bobbin.
34
Locking
lever
Fill several bob-
bins now so you
won’t have to stop
working to wind a
bobbin.
Load a fresh needle.
Lower the presser foot, and raise the needle bar by turning
the handwheel. Loosen the needle clamp and insert a needle
appropriate to the task. Typically, the flat part of the needle
faces the back (on a Singer Featherweight machine, howev-
er, the flat part faces left). Tighten the needle clamp.
Load the thread on the spool pin.
Select the appropriate thread for your task and then load the
thread on the spool pin. Place cross-wound threads horizon-
tally on the spool pin; place stacked threads (straight-wound
threads) vertically. Secure the spool with the spool cap.
56
Presser
foot
Cross-wound
thread
Needle
bar
10
CHAPTER GETTING READY TO QUILT
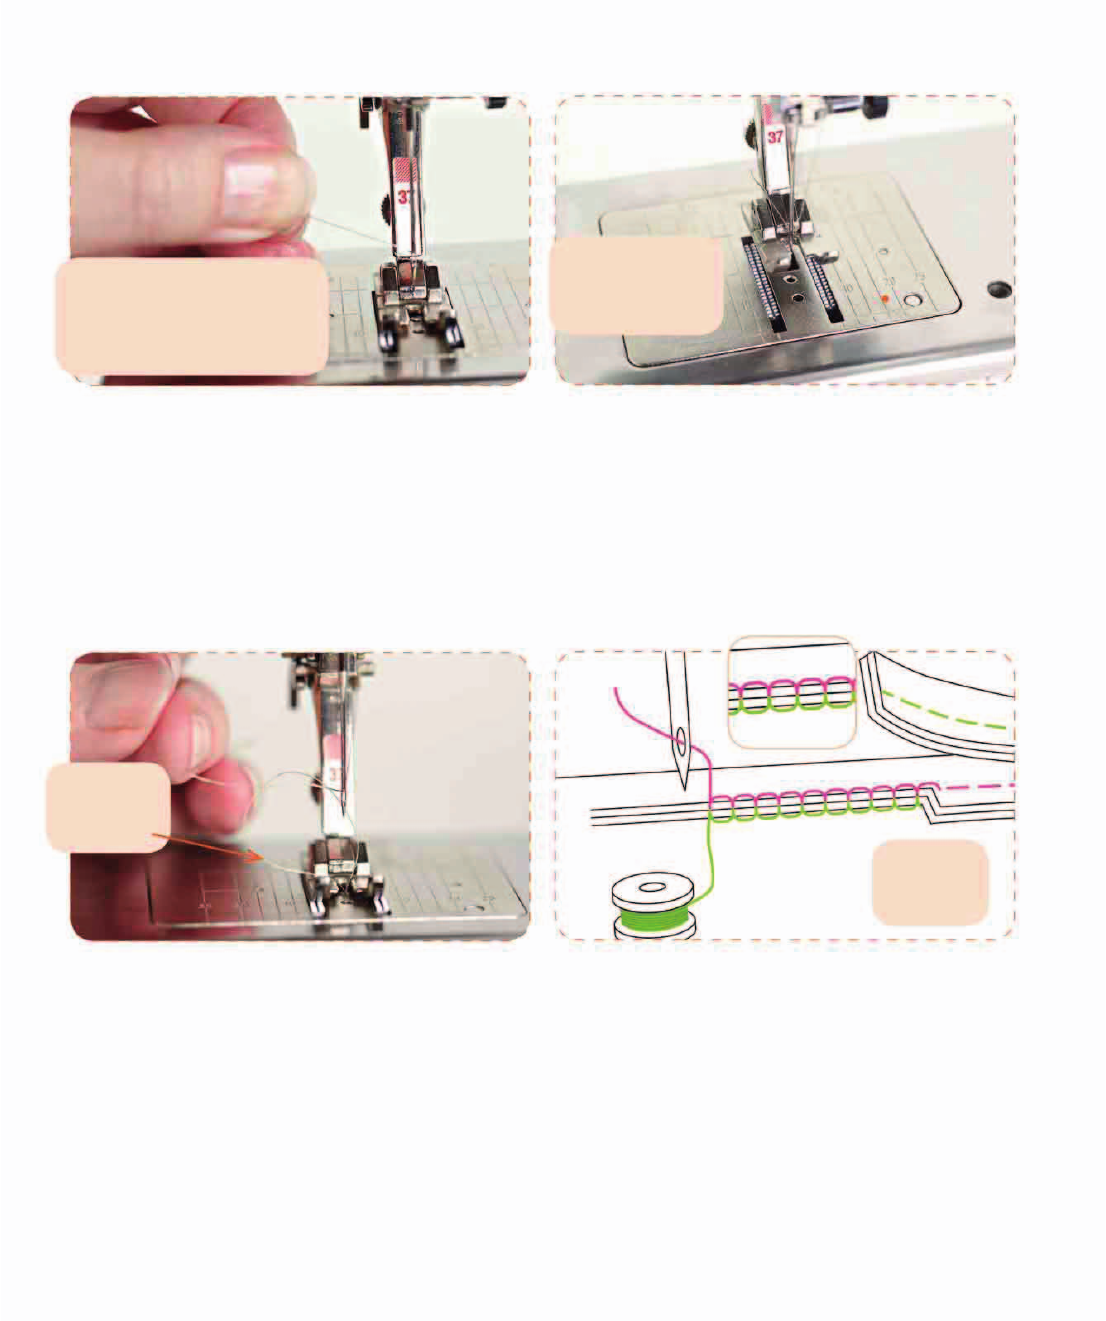
Thread your machine.
Follow the path for threading your machine as listed in your
sewing machine manual. Typically, you run the thread to
the first guide, then down through the tension slit, up to the
take-up lever, and then down to the needle guide(s). Thread
the needle from front to back.
Install the proper foot for the task.
Install the appropriate machine foot for your task (machine
piecing, machine appliqué, or machine quilting).
78
On a Singer Feather-
weight, you thread the
needle from right to le.
Pull up the bobbin thread.
Hold on to the top thread and turn the handwheel one
stitch. Pull on the top thread until the bobbin thread appears.
Place both thread tails under the presser foot with the thread
tails towards the back.
Sew some fabric to test the machine tension.
Place two fabric scraps right sides together, and sew a test
seam. Remove the test scrap from the machine and examine
the seam, front and back. When tension is even, just the top
thread shows on the front, and only the bobbin thread shows
on the back.
910
Bobbin
thread
Straight-stitch
throat plate
Correct
tension
11
PREPARE YOUR SEWING MACHINE
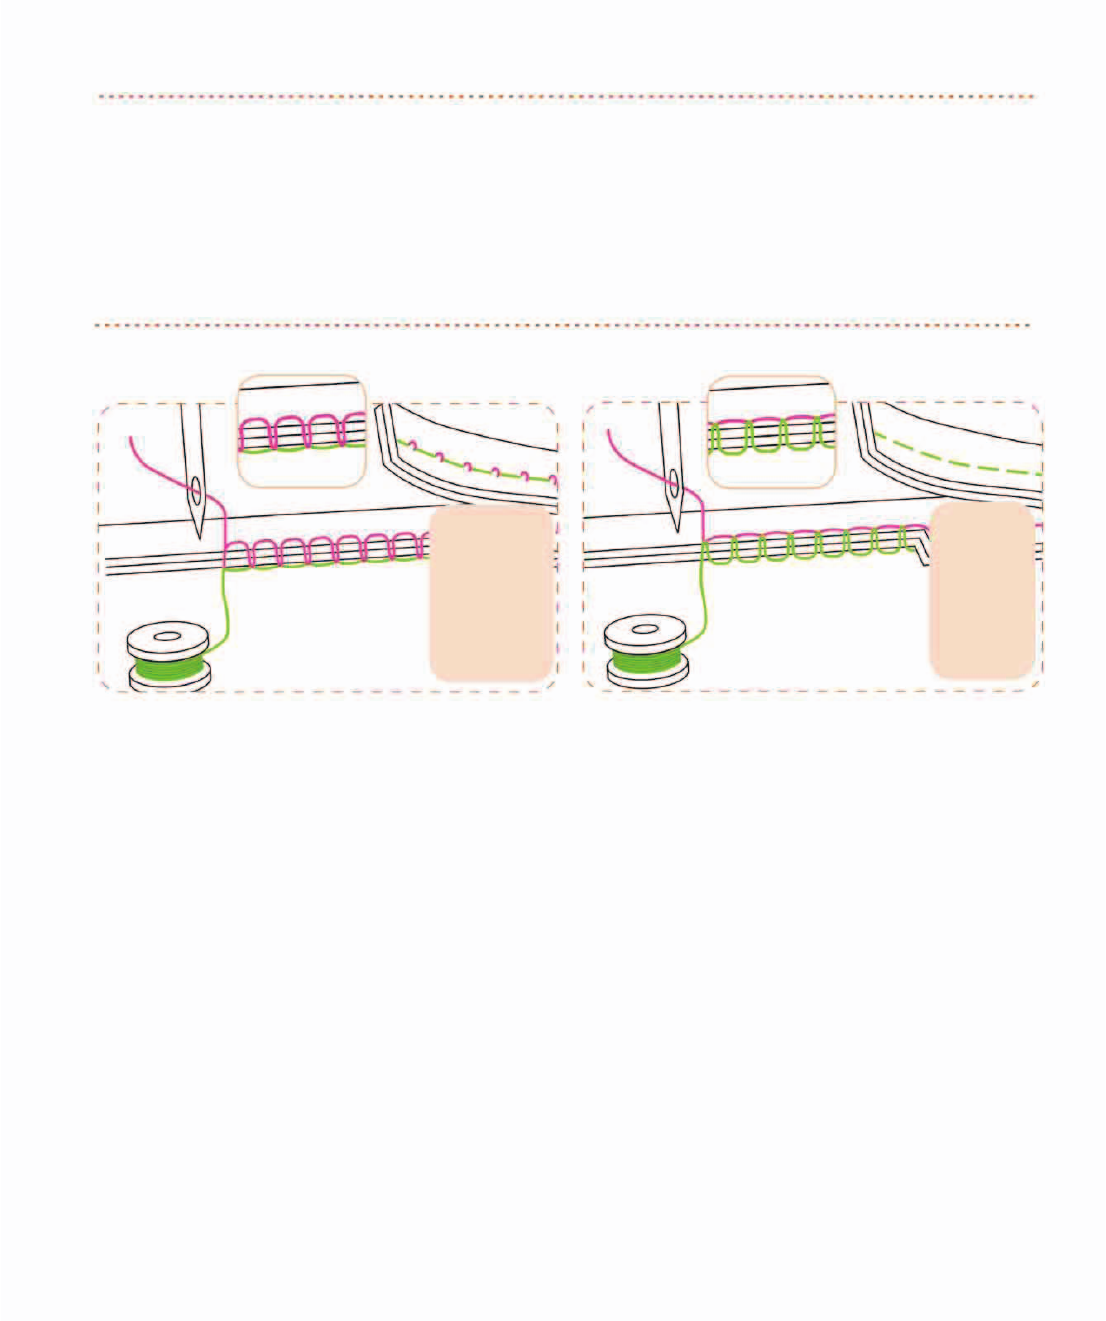
If the top tension is too loose, tighten it.
When the top tension is too loose, it is pulled to the back.
Increase the top tension by turning the tension dial or the
digital tension to a higher number.
If the top tension is too tight, loosen it.
When the top tension is too tight, the bobbin thread is pulled
to the top. Decrease the top tension by turning the tension
dial or digital tension to a lower number.
11 12
Incorrect
tension;
the top
thread is
too loose
Incorrect
tension;
the top
thread is
too tight
If you can buy a straight-stitch throat plate for your sewing machine,
using it when machine piecing or quilting will improve your work.
Just be sure to change to a zigzag throat plate when machine
appliquéing.
..................Content has been hidden....................
You can't read the all page of ebook, please click here login for view all page.