In this recipe, we will build an Opportunity approval process for deals greater than USD 100,000.
Carry out the following steps to build an opportunity approval process for deals greater than USD 100,000:
- Navigate to the approval processes setup page, by going to Your Name | Setup | Create | Workflow & Approvals | Approval Processes.
- In the Manage Approval Processes For: pick list choose, Opportunity as shown in the following screenshot:
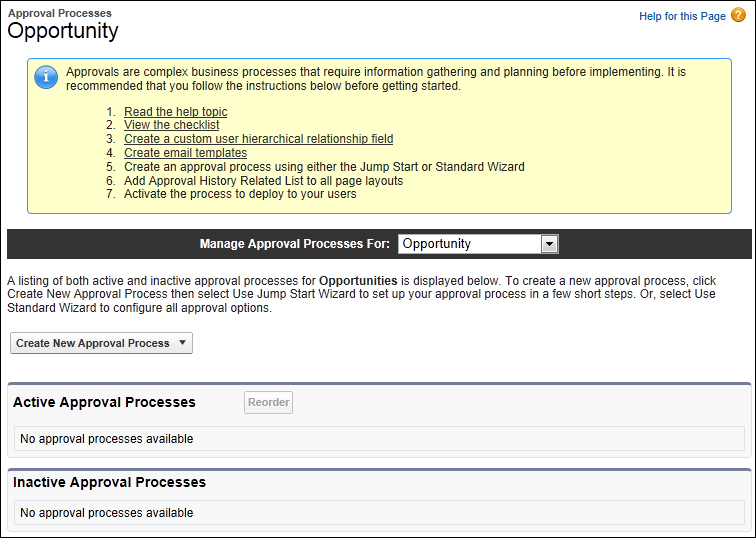
Here, we are presented with a listing of both active and inactive approval processes for opportunities as shown in the previous screenshot.
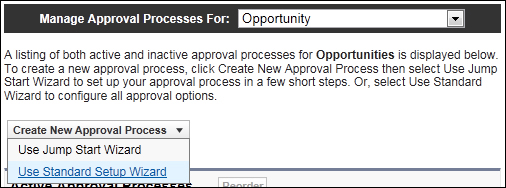
- Click on the Create New Approval Process button.
- Choose the pick list option Use Standard Setup Wizard (as shown in the following screenshot):
- Enter the name of the new approval process in the Process Name field. For this recipe, type the text
Deals > 100k Review. - The Unique Name field is automatically set to Deals_100k_Review.
- Optionally, enter a description for the new approval process in the Description field. For this recipe, type the text
Review required for Opportunities greater than 100k: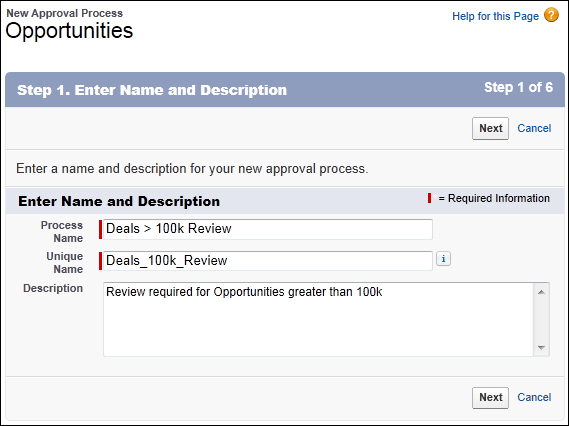
- Click on Next.
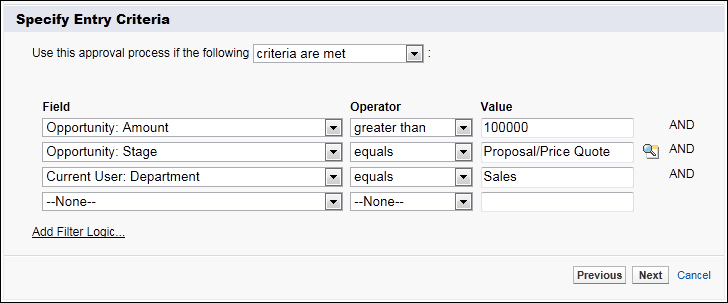
- Select the following field, operator, and value: Opportunity: Amount; greater than; 100000.
- For the second row, select the following field, operator, and value: Opportunity: Stage; equals; Proposal/Price Quote.
- For the third row, select the following field, operator, and value: Current User: Department; equals; Sales (as shown in the following screenshot:
- Click on Next.
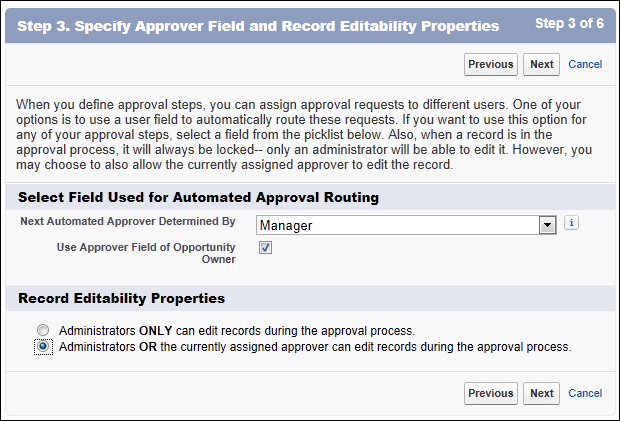
- In the Next Automated Approver Determined By pick list, select the Manager option.
- Set the checkbox to true for the Use Approver Field of Opportunity Owner.
- In the Record Editability Properties section, choose the option Administrators OR the currently assigned approver can edit records during the approval process as shown in the following screenshot.
Note
By setting Record Editability Properties as shown, you are allowing the approving user to make changes to the record while the record is flowing through the approval process. This is useful as the record will remain locked to every user (with the exception of the administrators and approvers) and will prevent the need for edits to be made only by system administrators as this creates additional effort for administrators and risks delays during the sales process.
- Click on Next.
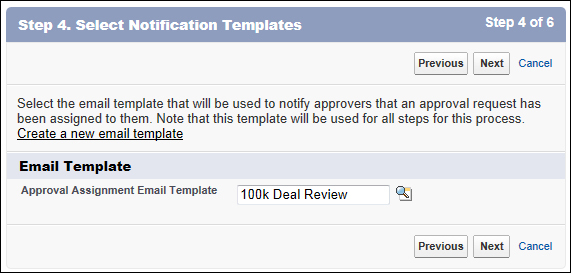
- Select the 100k Deal Review template in the Approval Assignment Email Template lookup that was created in the Creating an e-mail template for use with approval assignments recipe:
- Click on Next.
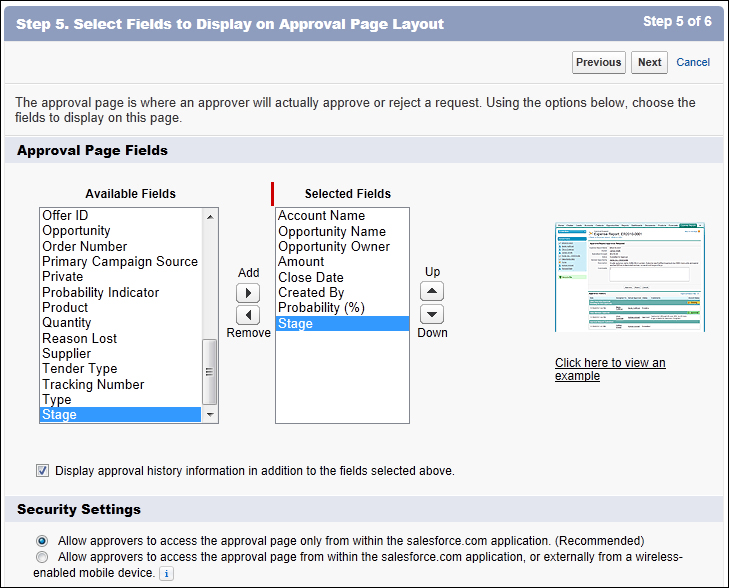
- Select the fields to display on the approval page. Here, we are selecting to show Account Name, Opportunity Name, Opportunity Owner, Amount, Close Date, Created By, Probability, and Stage.
- Select the checkbox Display approval history information in addition to the fields selected above as shown in the following screenshot:
- Click on Next.
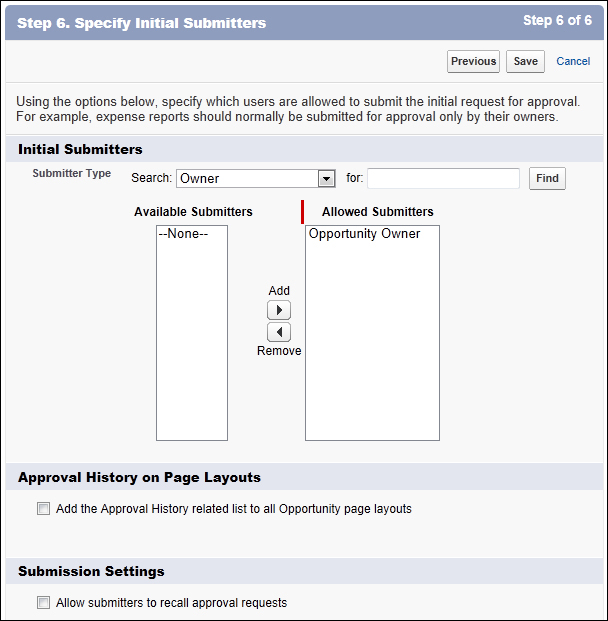
- Here we are leaving the default setting of initial submitter to be set to the Opportunity Owner value as shown in the following screenshot:
- Click on Save.
- Select the Yes, I'd like to create an approval step now option as shown in the following screenshot:
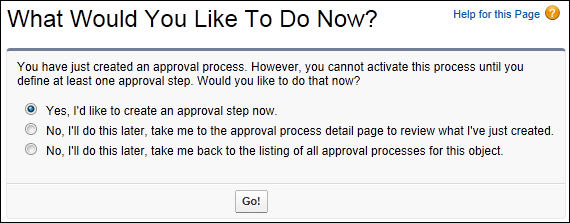
- Click on Go!
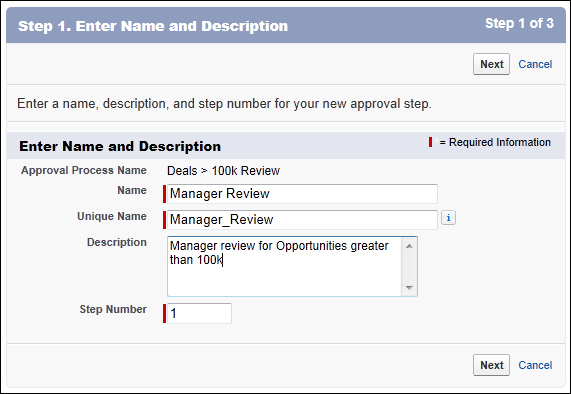
- Enter the name of the new approval step in the Name field. For this recipe, type the text
Manager Review. - The Unique Name field is automatically set to Manager_Review.
- Optionally, enter a description for the new approval step in the Description field. For this recipe, type the text
Manager review for Opportunities greater than 100k. - Leave this as step 1 in the Step Number selection box as shown in the following screenshot:
- Click on Next.
- Choose the All records should enter this step option in the Specify Step Criteria section as shown in the following screenshot:

- Click on Next.
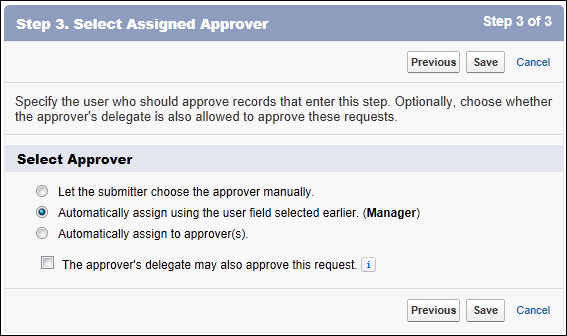
- Choose the Automatically assign using the user field selected earlier. (Manager) option in the Select Approver section as shown in the following screenshot:
- Click on Save.
- Choose the option No, I'll do this later. Take me to the approval process detail page to review what I've just created as shown in the following screenshot:
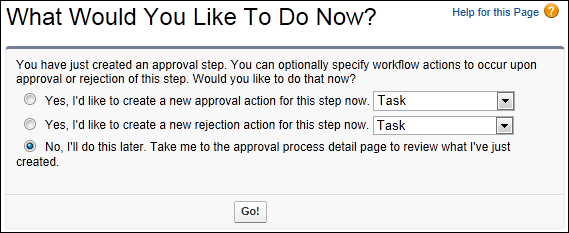
- Click on Go!.

- Click on Activate.
Here, we are presented with a confirmation dialog as shown in the following screenshot:
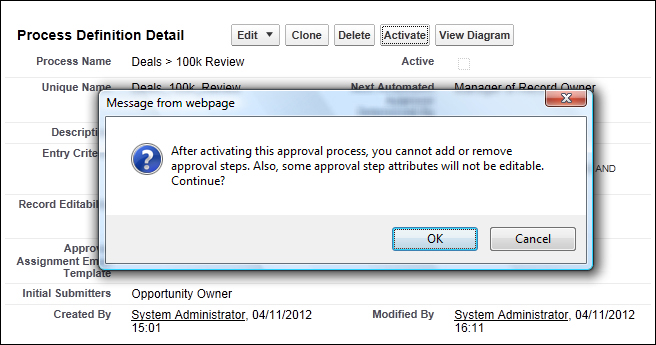
- Click on OK.
After creating the approval process, we need to add the approval history-related list to the appropriate opportunity page layouts (this is to allow the Submit for Approval button to be presented to users).
To add the approval history-related list to the opportunity page layout, carry out the following steps:
- Navigate to the opportunity page layout setup page, by going to Your Name | Setup | Customize | Opportunities | Page Layouts.
- Choose the required opportunity page layout and click on Edit.
- Click on the Related Lists section (at the top-left side of the page).
- Drag the Approval History section onto the page as shown in the following screenshot:
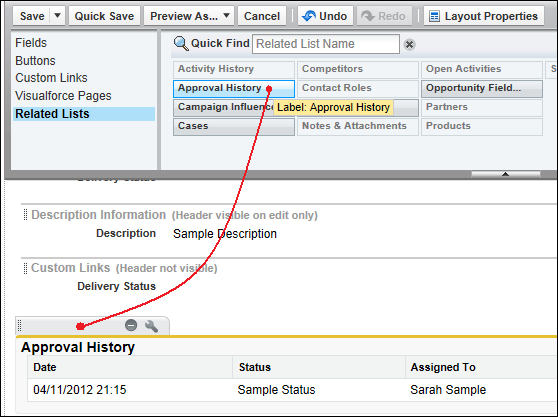
- Click on Save.
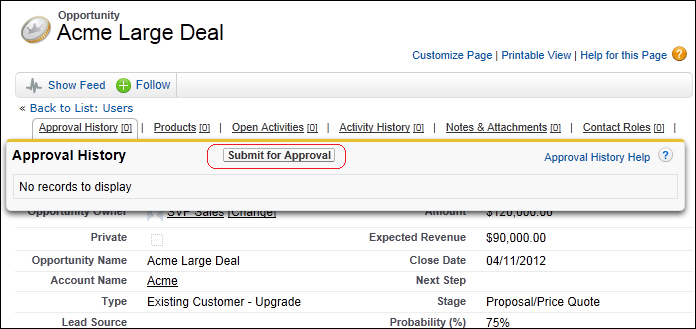
When the user has an opportunity that meets the criteria for the approval process, they may click on the Submit for Approval button on the Approval History list as shown in the following screenshot:
Upon clicking on the Submit for Approval button, the user is then presented with the following confirmation:
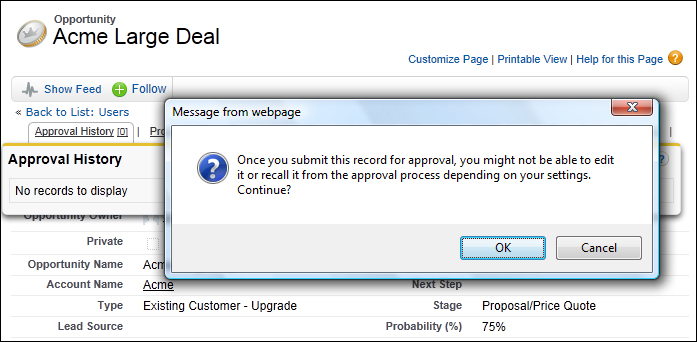
When they click on OK, the opportunity record is sent into the approval process and their specified manager receives an e-mail using the e-mail template that was created in the Creating an e-mail template for use with approval assignments recipe.
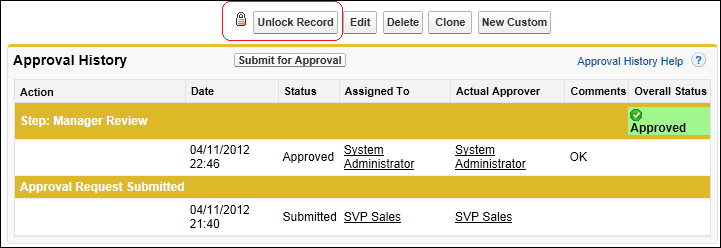
The approval history-related list on the opportunity now appears with the following status:
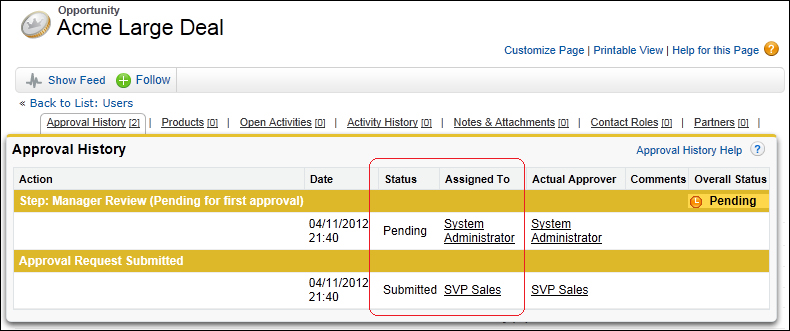
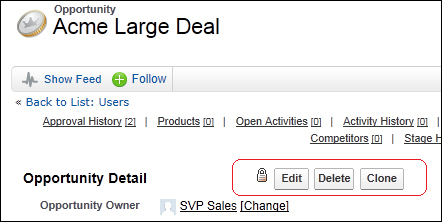
The opportunity record remains locked while the status is Pending and will display the locked icon (as shown in the following screenshot) until the record owner's manager approves (or rejects) the the approval process.
The user's manager can access the Items To Approve related list from their home page to get an instant view of all the approval requests they need, to approve or reject as shown:

By clicking the Approve / Reject link, the user is presented with the Approve/Reject Approval Request screen as shown in the following screenshot:
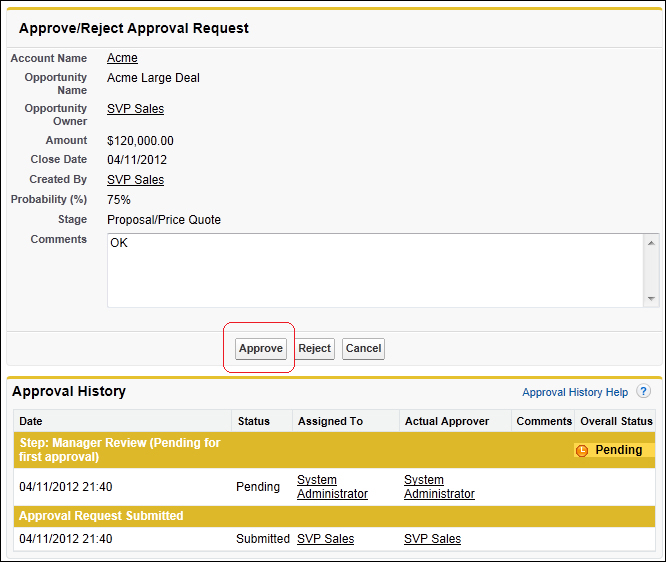
Finally, upon clicking the Approve button, the approval history for the opportunity record is marked as Approved and the approver can then unlock the record as shown: