Whether you built the network yourself (Chapter 18) or work in an office where somebody has done that work for you (Chapter 19), all kinds of fun can come from having a network. You’re now ready to share the following components among the various PCs on the network:
Your Internet connection. Having a network means that all the PCs in your home or office can share a single connection. This is a huge feature, one that can save you hundreds of dollars a year if you have a cable modem or DSL. On a small network, it’s called Internet Connection Sharing, and it’s described in Chapter 18.
Printers. Another excellent justification for creating a network is that you don’t need a printer for every PC; all of the PCs can share a much smaller number of printers. If several printers are on your network—say, a high-speed laser printer for one computer, a color printer for another—everyone on the network can use whichever printer is appropriate to a particular document. You’ll find step-by-step instructions starting on Section 20.1
Files, folders, and disks No matter what PC you’re using on the network, you can open the files and folders on any other networked PC (and its mounted disks), as long as the other PCs’ owners have made these files available for public inspection. That’s where file sharing comes in, and that’s what this chapter is all about. (File sharing also lets you access your files and folders using a laptop on the road.)
The uses for file sharing are almost endless. At its simplest, you can use file sharing to finish writing a letter in the bedroom that you started downstairs at the kitchen table—without having to carry a floppy disk around. But you can also store your library of MP3 music files on one computer and play them from any other computer on the network. You can even run a program like Microsoft Bookshelf from any computer on the network without removing the CD-ROM from the drive.
Note
Your network may include only one Windows XP computer, along with a Windows 95, 98, or Me machine or two. That’s perfectly OK; all of these PCs can participate as equals in this party. This chapter points out whatever differences you may find in the procedures.
Later in this chapter, you can read the steps for making one of your own disks or folders public, so that other people on the network can rifle through it and enjoy its contents.
More often, though, you’ll probably be on the receiving end of that transaction—that is, you’ll connect to other PCs whose disks and folders have been shared.
Fortunately, doing so is extremely easy.
Most people view their network contents using a special window:
In Windows XP or Windows Me: Choose Start→My Network Places.
In earlier versions: Double-click the desktop icon called Network Neighborhood or My Network Places.
The very first time you open the network window, you see icons that correspond to the shared folders and files on the computers of your network (including those on your own machine), as shown in Figure 20-1 Just double-click one to open it.
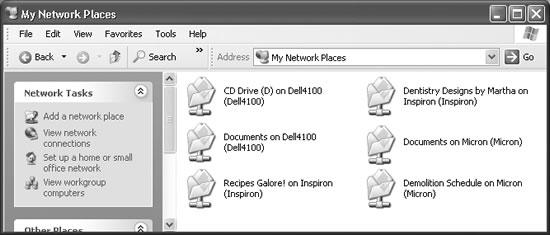
Figure 20-1. In Windows XP, all of the shared disks and folders show up automatically in the My Network Places window—including shared disks and folders on your own PC, which can be a bit confusing.
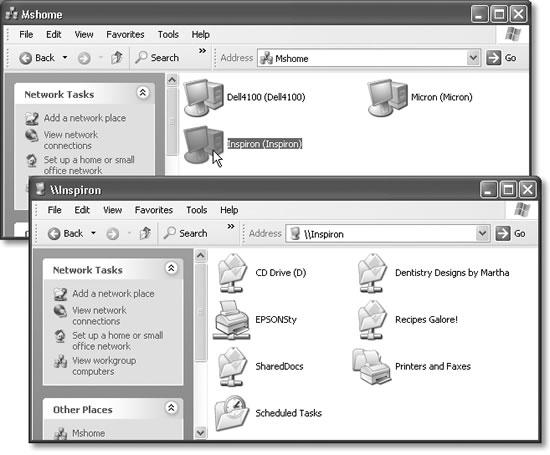
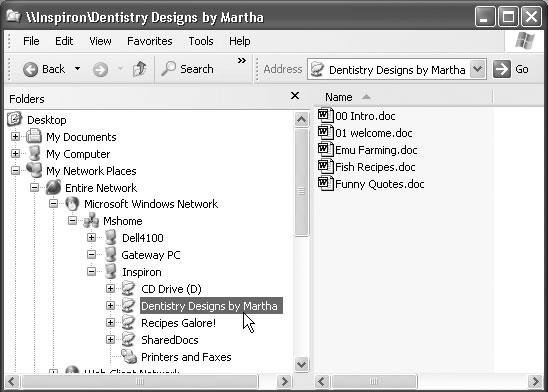
If you find the My Network Places window overwhelmingly crowded as your network grows, you might find clarity in the “View workgroup computers” link at the left side of the window. It shows you the icons of the computers on your network—not every last shared folder on all of them. Double-click one of these computer icons to see a list of the shared folders and printers on it (Figure 20-2).
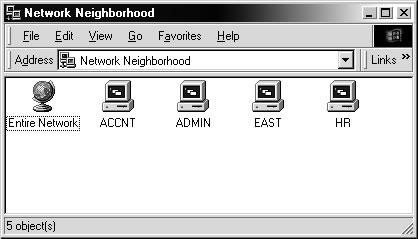
If you’re using a networked PC that’s still running Windows 95 or Windows 98, you won’t find a My Network Places icon on the desktop. Instead, you get its ancestor: Network Neighborhood.
When you open Network Neighborhood, Windows displays an icon in the window for each computer it finds on the workgroup (see Figure 20-3), along with an Entire Network icon. (If you’re on a domain network, you may see a list of domains here. Click the one you want.) Just double-click a computer’s icon to see the shared disks, folders, and printers attached to it. (Once again, you may have to type in the correct password to gain access.)
Instead of using the My Network Places or Network Neighborhood icon on the desktop, some people prefer to survey the network landscape using Windows Explorer. (See Section 3.1.4 for details on opening Windows Explorer.)
The left pane of the window lists an icon for My Network Places or Network Neighborhood. As shown in Figure 20-4, you can click the + button to see a list of the computers and shared resources on them.
For hard-core nerds, that business of burrowing into the My Network Places folder is for sissies. When they want to call up a shared folder from the network, or even a particular document in a shared folder, they just type a special address into the Address bar of any folder window, or even Internet Explorer—and then press the Enter key. You can also type such addresses into the Run dialog box, accessible from the Start menu.
It might look like this: \laptopshared documentssalaries 2002.doc.
Tip
Actually, you don’t have to type nearly that much. The AutoComplete feature proposes that full expression as soon as you type just a few letters of it.
This path format (including the double-backslash before the PC name and a single backslash before a folder name) is called the Universal Naming Convention (UNC). It was devised to create a method of notating the exact location of a particular file or folder on a network. It also lets network geeks open various folders and files on networked machines without having to use the My Network Places window.
You can use this system in all kinds of interesting ways:
Open a particular folder like this: \computer namefolder name.
You can also substitute the IP address for the computer instead of using its name, like this: \192.1681.44my documents.
You can even substitute the name of a shared printer for the folder name.
As described later in this chapter, Windows XP can even access shared folders that sit elsewhere on the Internet (offline backup services, for example). You can call these items onto your screen (once you’re online) just by adding http: before the UNC code and using regular forward slashes instead of backwards slashes, like this: http://Computer Name/Folder Name.