
Task 6.7: Implementing 802.11 Wireless Security
Wireless networks are becoming more prevalent every day. They are inexpensive, easy to set up, and easy to relocate. They can also be one of the most vulnerable forms of network communications today.
In January 2006, during a wireless-security course being held in Washington, DC, a survey of the local access points showed that approximately 30 percent of wireless networks are nonsecured, with no user or access point (AP) authentication and no encryption for the data being transmitted. Further, that survey showed that approximately 15 percent of wireless APs remain with the default settings, including the default administrative logon credentials.
Not only can an attacker connect to the network and read all data transmitted, but he can also log on to the AP as the administrator and reconfigure the system to lock the legitimate users out of their own networks.
Wireless network specifications were originally defined in IEEE’s 802.11 standard. There is now a series of 802.11x standards, and various implementations of wireless networks now occupy several more 802 standards. The original 802.11 standard contained several security measures, including the following:
- The ability to disable the Service Set Identifier (SSID) broadcast
- MAC address filtering
- Wired Equivalent Privacy (WEP) authentication
- WEP data encryption
The AP administrator should immediately change the SSID to something nondescriptive, change the administrative username (if possible) and password, and disable DHCP, if possible.
Security in 802.11 was found to be seriously flawed in several areas. 802.11i was developed to correct the shortcomings of security in 802.11. The WiFi Alliance also improved security for wireless networks with WiFi Protected Access (WPA, WPA2) for home network use, called Personal, and for business network use, called Enterprise. WPA uses an acceptable encryption algorithm that is strong and easier on the devices performing the encryption. WPA2 uses a significantly stronger encryption algorithm that is considered uncrackable, but the performance of your devices may suffer with the heavy workload. If performance remains acceptable, use the strongest security on your wireless networks—WPA2, if available.
Scenario
You are the administrator of a Microsoft Windows environment and must implement a wireless network. Since you probably don’t have resources to implement a business-class system on your home network, you will be implementing WPA-Personal, which uses a Pre-Shared Key (PSK).
Scope of Task
Duration
This task should take 30 minutes.
Setup
You will need to configure WPA-Personal with a PSK on your wireless AP. Then you will need to configure the same settings on your (compatible) wireless client device (wireless network interface card).
In the wireless networking arena, technology and manufacturers are leading the standards. Unfortunately, many wireless devices are incompatible with many other wireless devices.
Prior to performing this task, you might want to check for current firmware updates and driver updates for your wireless devices. Such updates may improve compatibility.
Caveat
Wireless networks are inherently vulnerable to attack. If you fail to complete securing the wireless network, disable the AP’s radio or remove power from the device. Failure to secure the wireless network could expose your systems and information.
Procedure
You will first configure the wireless AP with several security features. Then you will configure the wireless client with a compatible configuration. You will then have the wireless client authenticate and associate with the AP.
Equipment Used
For this task, you must have:
- Windows XP Professional system with Service Pack 2 installed.
- Administrator access on the XP Professional system.
- 802.11i-compliant wireless network interface card (NIC), the wireless client, including 802.11a, 802.11b, or 802.11g radio (compatible with the radio in the wireless AP). For example, if your AP is 802.11b-compliant, your client NIC must also be 802.11b-compliant. In addition, both the AP and the client NIC must be 802.11i-compliant to support the advanced WPA security settings.
- 802.11i-compliant Wireless AP, including 802.11a, 802.11b, or 802.11g radio (compatible with the radio in the wireless client NIC).
- Administrator access on Wireless AP.

In this task, we will be referring to dialog boxes, navigation, and procedures for configuring the NetGear WGT624 Wireless Access Point. Your dialog boxes, navigation, and procedures may be different. However, if the device you are using is 802.11i-compliant, these same settings will be available on the configuration settings of the AP. Follow the specific instructions for your AP.
It is assumed that your wireless AP is connected to your network via a wired Ethernet connection. It is also assumed that the wired interface is configured with a static IP address compatible with your wired network. It is further assumed that the Channel and Country options have been configured correctly.
Details
Securing the Wireless Access Point
1. Log on to the Windows XP Professional system as the Administrator.
2. Launch Internet Explorer. In the address bar, type the IP address of the AP and press the Enter key.
3. You should be prompted for the administrative username and password for the AP. Type in the correct administrative username and password for your AP.
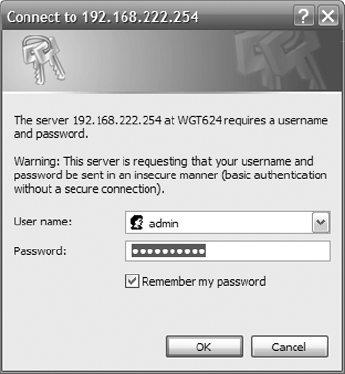
This default administrative username and password should be supplied in the manufacturer’s documentation for the AP device.

Notice that this username and password might be sent in clear text, which could be “sniffed” by an attacker. You should only authenticate as the AP’s Administrator over the wired LAN, and when connected into the network by a switch near the network connection to the AP. If this is a new AP, you will use the default username and password that should be referenced in your device documentation. You should change this default information at the first opportunity.
4. You should be presented with the web-based administrative interface for the AP. If this is a new AP with the default username and password, locate the configuration area to change the administrative username and password. Change it now.

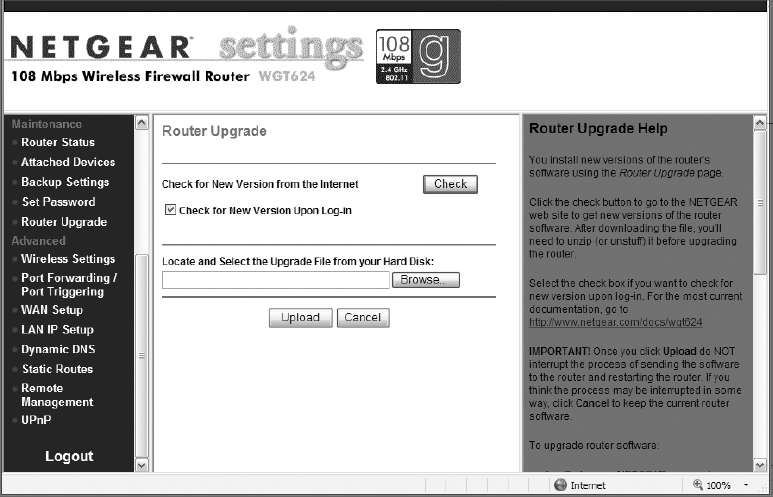
5. Once you have secured the administrative account on the AP, locate the configuration area to check for a firmware update. Perform the firmware update as necessary, carefully following the instructions provided by the manufacturer of the AP.
Each of these steps may require you to click Apply, or may require an AP reboot. If so, apply the changes or reboot and log back into the AP as necessary.
6. In the AP configuration console, locate the configuration area to change the SSID. Change the SSID to something nondescriptive and generally disinteresting. The SSID in the graphic has been changed to WAP.
You will need to know this SSID information later.

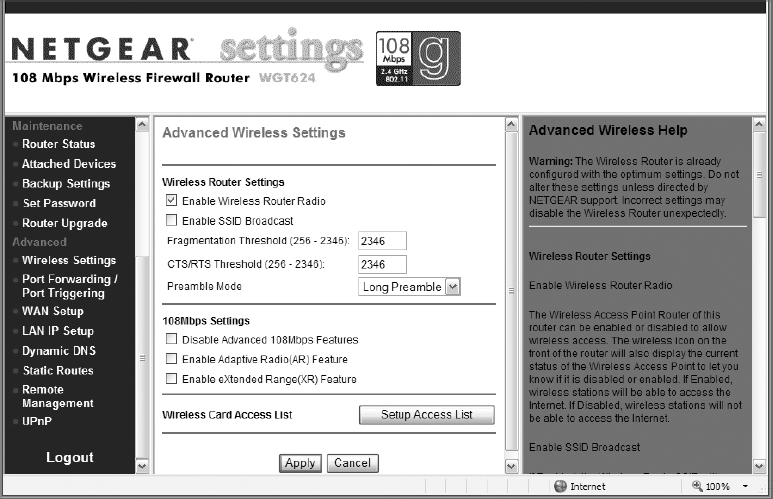
7. In the AP configuration console, locate the configuration area to disable the SSID broadcasts (they may be called announcements, beacons, or something similar). Select the option to disable the SSID broadcasts. In the example shown below, you would clear the Enable SSID Broadcast option, as shown.
If you have a limited list of known, wireless client devices, you can configure MAC address filtering. If you must support unknown devices (as in a lobby or conference room), you should not implement MAC address filtering. Skip steps 8–10.
Only the devices configured on the list will be able to associate with the AP.
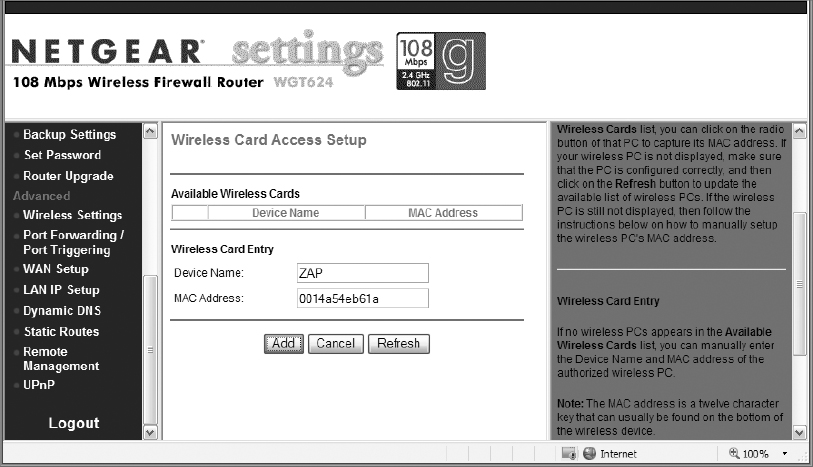
8. In the AP configuration console, locate the configuration area to enable MAC address filtering. Select the option to enable MAC address filtering.
9. To add devices to the MAC address filtering list, enter the device name and MAC address, and click Add.
The Media Access Control (MAC) address is made up of 12 hexadecimal (0–9 and A–F) characters. It may need to be entered without any spaces, or with one blank space between pairs, with dashes between pairs, or with a colon between pairs, depending on the manufacturer. An example of a MAC address is 00-1E-68-48-82-CD.
10. Once you have completed the MAC Address Filter List, click Apply to implement the filter.
11. In the AP configuration console, locate the area to configure security options.
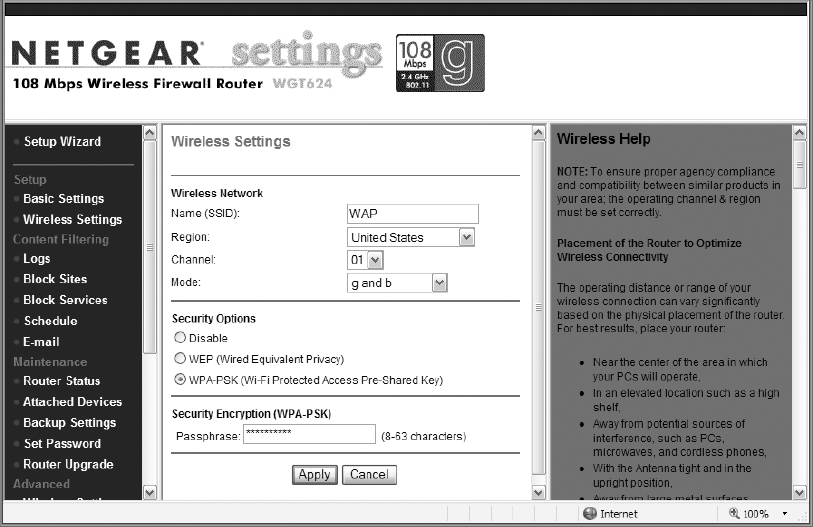
12. Select the configuration for WPA-Personal (this may be called something like WPA-PSK, WPA-SOHO, or WPA-Home).
13. Enter a passphrase. This is a strong password and should contain at least 8 characters (20 is considered strong for a passphrase), and should contain a mix of uppercase, lowercase, numeric, and symbol characters.
You will need to know this passphrase information later.
14. Apply your changes, as required by your AP, and log off the AP administrative console.
How to Find the MAC Address
The MAC address may be referred to as the physical, MAC, hardware, burned-in, or Ethernet address. The MAC address is often printed on wireless devices. It can also be obtained (once the device is installed on an XP Pro system) by executing the command IPCONFIG/ALL at a command prompt:
D:AA>IPCONFIG /ALL
Ethernet adapter INTERNAL ABG WIRELESS:
Description . . . : Broadcom 802.11a/b/g WLAN
Physical Address. . : 00-14-A5-4E-B6-1A
Ethernet adapter LAN:
Description: Realtek RTL8139/810x
Family Fast Ethernet NIC
Physical Address. . : 00-0F-B0-F8-7A-AE
Configuring the Wireless Client
1. While logged into your XP Professional system, select Start ⇒ Settings ⇒ Control Panel ⇒ Network Connections. Right-click on your installed wireless NIC and select View Available Wireless Networks.
If you receive a message regarding the Wireless Zero Configuration (WZC) service, you may need to configure and start the WZC service. Right-click on My Computer and select Manage. Expand Services And Applications, then select Services. Locate the Wireless Zero Configuration service. Configure it for automatic startup and start the service.
Some wireless client device manufacturers implement driver sets that conflict with Microsoft WZC. If this is the case with your device, again, the dialog boxes, navigation, and procedure to configure WPA-PSK may be different, but the settings should all be available and the configuration settings should be the same on your third-party device configuration dialog boxes.
2. In the Choose A Wireless Network dialog box, in the left pane, select Change Advanced Settings.
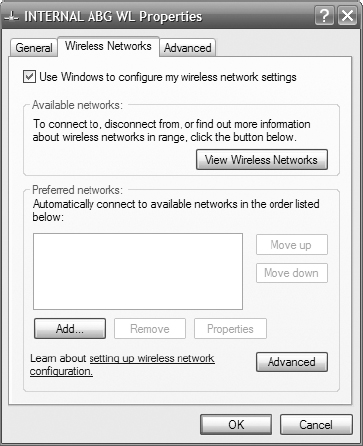
3. On the Wireless Networks tab, add a preferred network.
4. On the Association tab, do the following:
- Enter the SSID: WAP.
The SSID is case sensitive. Type it in exactly as you did on the AP.
- Select WPA-PSK from the Network Authentication drop-down list.
- Select TKIP from the Data Encryption drop-down list.
- Enter the passphrase you selected while configuring the AP in the Network Key field, and enter it again in the Confirm Network Key field.
WPA-PSK may be called WPA-Personal, WPA-SoHo, or WPA-Home on your device.
The passphrase is case sensitive. Type it in exactly as you did on the AP.

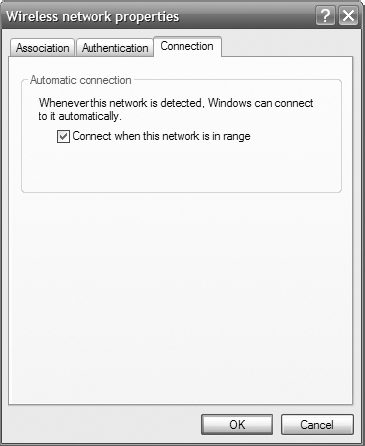
5. On the Connections tab, confirm that the Connect When This Network Is In Range option is enabled. Click OK to close the Wireless Network Properties dialog box.
6. On the Wireless Networks tab, click Advanced.
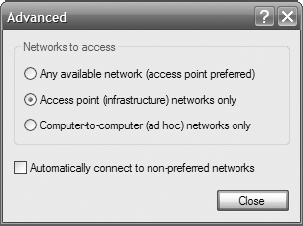
7. On the Advanced tab, select Access Point (Infrastructure) Networks Only, and ensure the Automatically Connect To Non-preferred Networks option is deselected. Click Close to close the Advanced dialog box.
8. Click OK to close the Interface Properties dialog box.
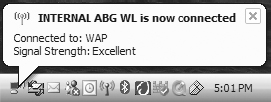
9. You should see a notice that you are now connected to WAP.
10. If you are not connected, in the Control Panel select Network Connections. Right-click on your installed wireless NIC and select View Available Wireless Networks.
11. Select WAP and then click the Connect button at the bottom of the dialog box. The following graphic shows the connected state.

12. The true test is when you disable your wired interface and can browse the network using the wireless interface only.
Notice in the previous graphic that only half of the APs are secured, and one-third are set to their default settings.
Network connectivity requires that the wireless NIC is correctly configured to connect to the AP, and the AP is correctly configured to connect to the network.
Criteria for Completion
You have completed this task when you have successfully connected to your AP using WPA-PSK.