
Task 4.9: BitLocker Drive Encryption
In this mobile world that we live in today, more people carry and use laptop computers to keep up with business and personal computing needs. The use of portable computers increases the likelihood that the computer will get lost or stolen. If the portable computer has sensitive data on it, either your own personal information or sensitive corporate data, many bad things can happen, including identity theft and violation of legal and regulatory compliance issues. Sensitive data on a laptop computer is often substantially more valuable than the computer itself.
Because of the increased likelihood that the device may fall into a stranger’s hands, the drives in portable computers should utilize additional security measures.
On computers, the first level of security relies on the successful logon by a user. If a user cannot log on, the user’s data stored on the device is inaccessible. This level of security can be defeated by removing the disk drive from the device and installing it on a computer with an operating system where the stranger is a privileged user, like the local Administrator. Then the permissions structure on the disk is not considered, and the new local Administrator can access all data on the drive.
One of the recommended security measures to use on laptop computers is drive encryption. This way, while a stranger may acquire the lost or stolen physical device itself, they cannot access any sensitive data stored on the computer.
Scenario
You are preparing a new laptop computer for a traveling worker in your company. The worker will need to access and store sensitive corporate data on the laptop. Your job is to maximize the protection of that sensitive data.
Scope of Task
Duration
This task should take 2 hours.
Setup
You will need to perform a fresh installation of Windows Vista to enable and configure Microsoft BitLocker Drive Encryption. A special partition structure is required on the drive to be encrypted. After the installation of Windows Vista is complete, BitLocker must be enabled.
BitLocker utilizes the latest encryption standard, called the Advanced Encryption Standard (AES). AES uses the Rijndael (pronounced Rain-doll) cipher (or algorithm), a symmetric-key, iterative, block cipher that utilizes key lengths of 128, 192, and 256 bits. The longer the key, the stronger the cipher, but the slower the process due to more CPU horsepower (clock cycles) required.
After AES encrypts the data, BitLocker implements two more manipulations in the AES standard. Large volumes of ciphertext (like in drive encryption) tend to show patterns; the additional functions implemented by BitLocker help to mitigate this vulnerability. Patterns in ciphertext make it easier for a bad guy (called a cracker) to crack the encryption key. The first diffusing function is called Cipher Block Chaining (CBC), and the second diffusing function is called the Elephant Diffuser. So the Rijndael cipher encrypts the data, and then CBC and the Elephant Diffuser hide the patterns in the ciphertext. AES is currently considered “uncrackable” for the next 100 years, unless the user does something to compromise the system, such as share or expose their encryption key (or password).
BitLocker is designed to use an encryption key that gets stored in the TPM chip on the motherboard (TPM stands for Trusted Platform Module and is currently at TPM v1.2). This way, if the disk is ever removed from the device, the encryption key is unavailable, and the data on the drive remains encrypted and secure. TPM is a fairly recent standard and is not implemented on all motherboards. The good news is that BitLocker can be configured to store this encryption key on a USB thumb drive instead of requiring a TPM chip.
Now the USB thumb drive becomes the key to unlocking the operating system on the computer. Without the USB thumb drive inserted into a USB port, the computer simply cannot boot up, since the operating system files cannot be decrypted. Without the USB thumb drive, all data on the encrypted drive is also inaccessible. This is the feature that you’re after. Secure the sensitive data on portable devices so that if the device gets lost or stolen, a stranger cannot access the data. The user must remember not to store the USB thumb drive with the laptop computer. If the bad guy gets both the device and the USB thumb drive, they can access all data on the drive.
Caveat
Any time you encrypt data, you run the risk of not being able to decrypt the data. It is a common occurrence that an encryption key gets lost or destroyed, and encrypted data remains encrypted forever, unavailable for the intended user.
Procedure
You will need to perform a full, fresh installation of Windows Vista on a computer or virtual machine. (You learned about virtual machines in Phase 2 of this book.) You will need to configure specialized partitions prior to the installation of Windows Vista to support BitLocker. Then after the installation of Windows Vista is complete, you will need to configure BitLocker to use a USB thumb drive to store the decryption key.
A preconfigured Virtual PC trial version of Windows Vista can be downloaded from
Microsoft’s Virtual PC can be downloaded from
www.microsoft.com/windows/virtual-pc/default.aspx
Equipment Used
For this task, you must have:
- Computer system (or virtual machine) with no data on the hard drive(s).
(Note that the computer must have a BIOS that can read USB flash drives before the operating system initializes.)
- 40 GB (minimum) of hard drive space.
- Installation media and a product key for Windows Vista Enterprise or Ultimate Edition.
- USB thumb drive. (Two USB thumb drives are preferred).
Details
Creating BitLocker Partitions
1. Boot the computer on the installation media for Windows Vista Enterprise or Ultimate Edition.
2. Click Next on the Language, Time Zone And Keyboard Selection window.
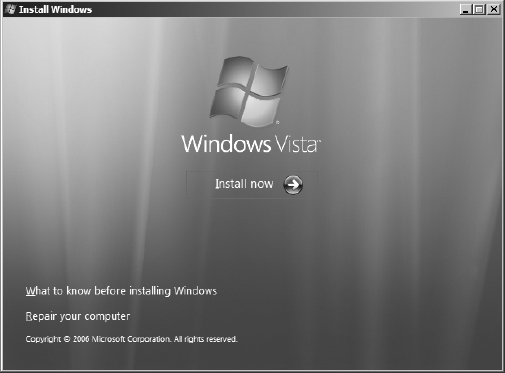
3. On the resulting window, do not click Install Now. Instead, you must click Repair Your Computer in the lower-left corner.
4. The System Recovery Options dialog box should appear with no operating systems available in the window.

5. Click Next. Select Command Prompt from the System Recovery Options window.

6. Type diskpart at the command prompt and press the Enter key. At the resulting DISKPART> prompt, type select disk 0 and press Enter.


The next step is destructive and will cause the loss of all data on the disk drive. Be sure you have backed up any desired data from this drive to remote media.
7. Type clean at the command prompt and press Enter to remove any existing partitions.
8. To create the system partition for BitLocker, at the command prompt type create partition primary size=1500 and press Enter.
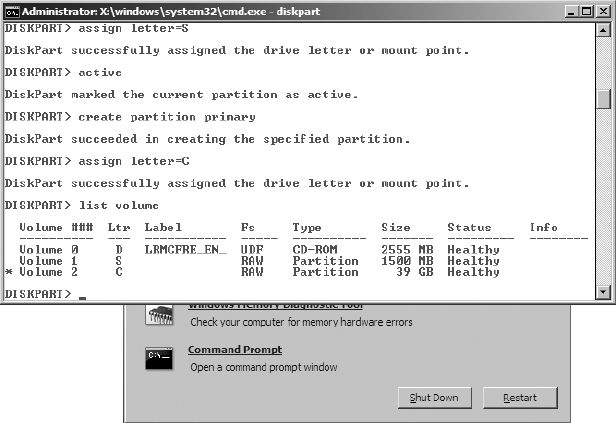
9. At the command prompt, type assign letter=S and press Enter.
10. To make the partition active, at the command prompt type active and press Enter.
11. Next, you must create the Boot partition for the operating system. At the command prompt, type create partition primary and press Enter. By not specifying a size, you ensure that DiskPart will use all remaining available disk space for this partition.
12. At the command prompt, type assign letter=C and press Enter.
13. At the command prompt, type list volume and press Enter. The result should display the CD-ROM with the source media and the two new partitions you just created.
14. At the command prompt, type exit and press Enter to quit the DiskPart utility.
15. At the command prompt, type format c: /y /q /fs:NTFS and press Enter to format the C: drive.
16. At the command prompt, type format s: /y /q /fs:NTFS and press Enter to format the S: drive.

17. At the command prompt, type exit and press Enter to leave the command prompt.
18. Click the X in the upper-right corner to close the System Recovery Options window. Do not click Shut Down or Restart. Closing this window should return you to the Install Now window.
19. Click Install Now and complete the installation of Windows Vista. Install Windows Vista on the large partition, not the 1.5 GB partition.
Enabling BitLocker to Use a USB Thumb Drive
1. After the Windows Vista installation is complete, log into Windows Vista as an Administrator.
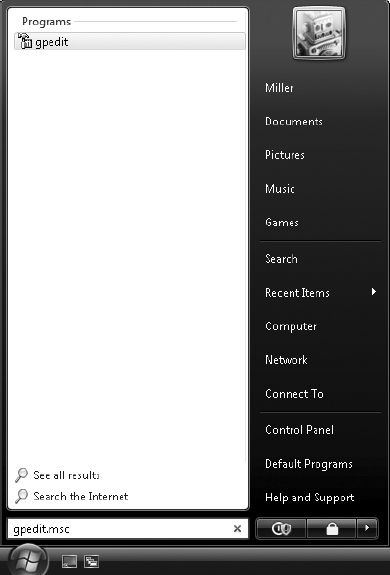
2. You must enable the use of the USB thumb drive to store the decryption key. Click Start ⇒ Search and type gpedit.msc; then press Enter.
3. This opens the Local Computer Policy. Expand Computer Configuration ⇒ Administrative Templates ⇒ Windows Components and click BitLocker Drive Encryption.

4. Double-click on the option Control Panel Setup: Enable Advanced Startup Options. Enable the Allow BitLocker Without A Compatible TPM check box and click OK. Doing so allows BitLocker to use the USB thumb drive instead of the absent TPM chip.

5. Close the Group Policy Object Editor utility.
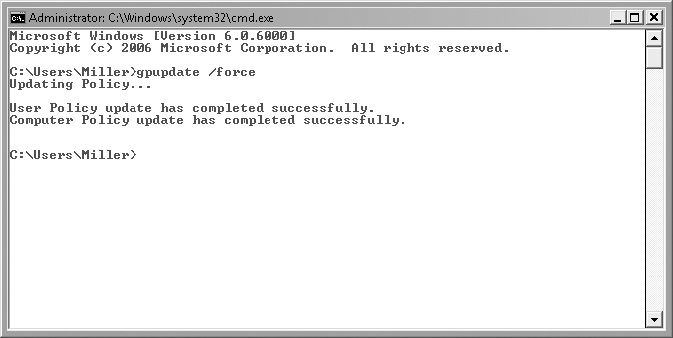
6. To force the policy change, click Start ⇒ Search and type cmd, and then press Enter. In the command window, type gpupdate /force.
7. Close the command window after the command completes.
Creating BitLocker Drive Encryption USB Keys and Recovery Password Keys
1. Insert the USB thumb drive and confirm that it is recognized by the operating system.
2. Click Start ⇒ Control Panel ⇒ Security ⇒ BitLocker Drive Encryption.
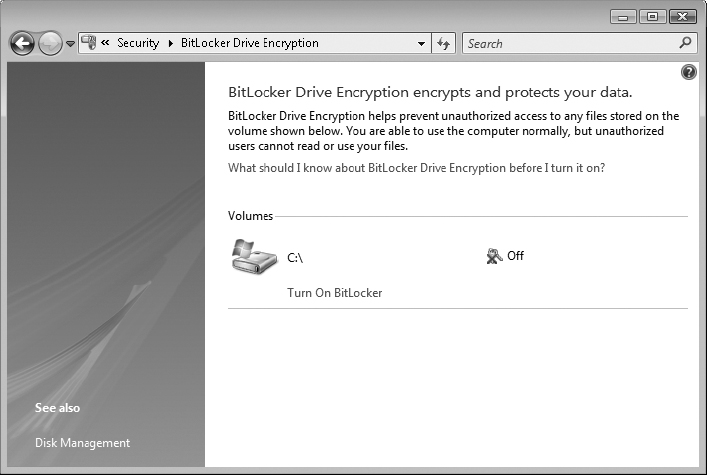
3. Click the Turn On BitLocker link. Click the Require Startup USB Key At Every Startup option. This is the only option for a non-TPM system.

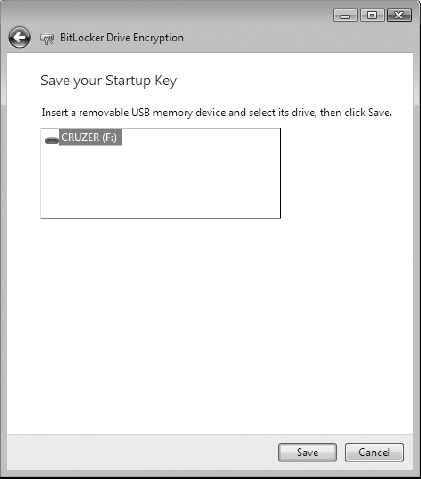
4. Select the USB thumb drive and click the Save button. The BitLocker Encryption Key is a small, binary (unreadable) file about 1KB in size, and it has a .bek extension.

You may need to remove and reinsert the USB thumb drive to have it recognized by BitLocker.
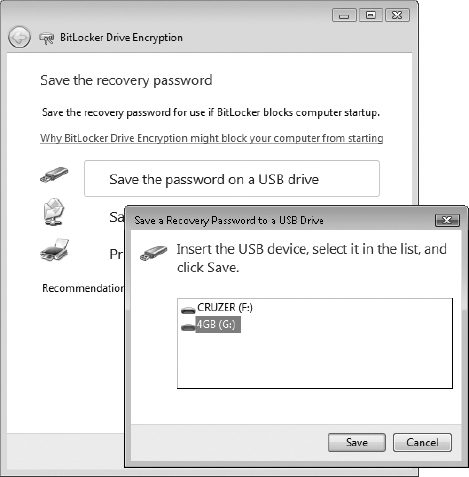
5. Next, BitLocker prompts you about where to save the BitLocker Recovery Password. You would use this password to access the operating system if you ever lost the USB thumb drive containing the BitLocker key. Notice that you can save the BitLocker Recovery Password on a USB thumb drive or in a folder, or you can print it out.

Microsoft recommends that you do not store the BitLocker Recovery Password on the same USB thumb drive that holds the BitLocker key. If you want to save the BitLocker Recovery Password on a USB device, connect a second USB device to the system and select the second USB device as the storage location.
Even though Microsoft recommends making several copies of the BitLocker Recovery Password to protect against losing it, all copies of the password must be strictly protected from unauthorized disclosure. This password allows access to the encrypted hard drive.
6. When BitLocker reports that it successfully saved the BitLocker Recovery Password on the second USB thumb drive, click Next.

The BitLocker Recovery Password is an ASCII text file and reads something like this:
The recovery password is used to recover the data on a BitLocker
protected drive.
Recovery Password:
279697-193534-062755-443344-016808-619696-579029-211155
To verify that this is the correct recovery password compare
these tags with tags presented on the recovery screen.
Drive Label: MILLER-PC C: 6/14/2008.
Password ID:
{94FF4CF7-4A04-4DCD-AD75-E8DDDA63931D}
Implementing BitLocker Drive Encryption
1. BitLocker prompts you to perform a test of the BitLocker key and recovery password. This requires a reboot of the system. This reboot could be avoided by deselecting the check box and clicking the Continue button, but it is better to perform this test prior to encrypting the entire C: drive. Leave the check box enabled and click the Continue button.
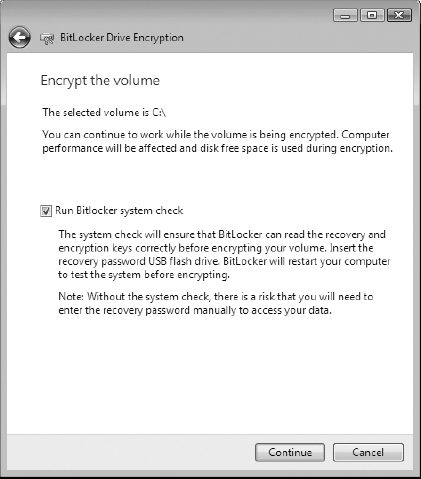
Notice the warning about degraded performance of the system while BitLocker is encrypting the drive. It could take anywhere from a few minutes to a few hours to complete the encryption process, depending on the amount of content on the drive and the performance of the hardware.
2. Click the Restart Now button to initialize the BitLocker test and reboot the system.
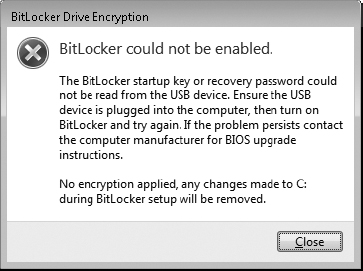
3. If BitLocker is unable to initialize the BitLocker key, you will receive an error message.
4. If the BitLocker Encryption Key is read correctly at startup, you will see a brief message stating “Windows BitLocker Drive Encryption key loaded. Remove key storage media.”
5. You should remove and secure the USB thumb drive that holds the BitLocker key. The system will continue to boot up, and the drive encryption process will begin. This encryption process can take several hours to complete and system performance will be degraded until the process is complete. You can pause the encryption process and resume it later if necessary.

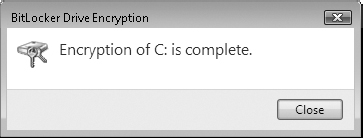
6. BitLocker will report completion of the drive encryption process.
7. Other than requiring the USB thumb drive that holds the BitLocker key at startup, you should see no difference in the operation of the system.
Criteria for Completion
You have completed this task when you have successfully recorded the BitLocker Encryption Key and the BitLocker Recovery Password on two different USB thumb drives, and have successfully encrypted the C: drive of your computer.