
Task 6.9: Implementing a Personal Firewall
Earlier in this chapter you implemented a packet filter on a Windows Server 2003 server to block undesirable traffic inbound to the server. A packet filter is a first-generation firewall. You’ll probably recall that most contemporary firewalls combine the packet filter (called a generation 1 firewall) with a proxy service (called a generation 2 firewall) and a stateful inspection engine (called a generation 3 firewall). These are the types of firewalls you find at the edges of a corporate network, where the corporate LAN meets the Internet, to protect the LAN from unwanted activity.
As the risk of attack has increased over the years, the use of a firewall on each network node, like on each workstation, has grown popular. These are called personal firewalls. Most personal firewalls include the generation 1 packet filter firewall and the generation 3 stateful inspection engine. The generation 2 proxy server firewall usually is too heavy a load on most workstations, decreasing network performance to unacceptable levels.
In a corporate environment, the personal firewalls on workstations are typically controlled en masse by the network administrators through Group Policies and users cannot make adjustments to the firewalls. On your home computers and personal laptop computers, you may need to make these adjustments yourself.
Scenario
You will be collecting music files on your personal computer at home. You want to be able to copy these files to your laptop computer using your home network. To do so, you must create the folder share and be sure the personal firewall will allow the connection from your laptop.
Scope of Task
Duration
This task should take 20 minutes.
Setup
Your home computer has a fresh installation of Windows 7 and is configured with only the default settings.
Caveat
Allowing a program through the firewall usually requires that you open a port on the firewall that is associated with the application or service. Opening ports on the firewall may allow malicious traffic into the system. Because malware will often try to open backdoors into your system, only open the firewall for applications you know you want, and make sure you trust the source of the application. In this case, the source of the application, the Microsoft File And Printer Sharing service, is trusted, but the service listens for inbound traffic. This opens this legitimate, trusted, and desirable service to attack from remote systems.
Procedure
You will first review the default settings and configuration options for the Windows 7 personal firewall. Next you will create a shared folder, which will initiate changes to the personal firewall to allow this new network function to operate properly. Finally, you will observe the changes to the personal firewall configuration.
Equipment Used
For this task, you must have:
- Windows 7 system with default settings
- Network connectivity
- Administrator access
Details
Reviewing the Personal Firewall
1. Log on to the Windows 7 system as the Administrator.
2. Click Start ⇒ Control Panel.
3. In the Control Panel, select System And Security ⇒ Windows Firewall.
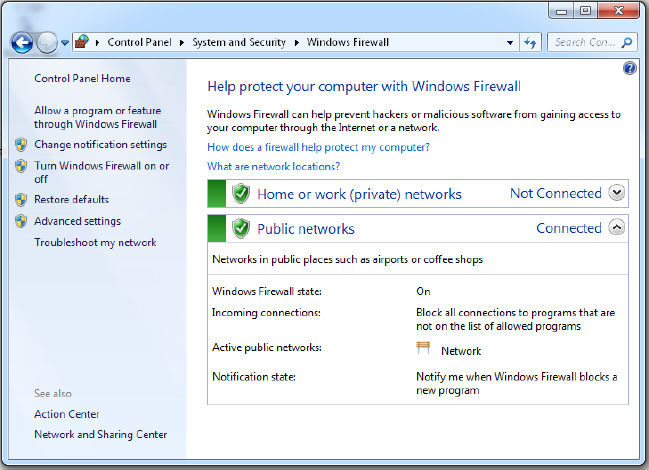

Because your computer may be connected to your home network or used on a company-managed network, the personal firewall has more relaxed settings for these more trusted environments (home or work [private] networks). This Private profile opens just a few ports in the firewall that are commonly needed at home or at work.
Your computer (for instance, a laptop computer) may periodically be attached to a less trusted network, such as at a hotel, a coffee shop, or a meeting center (public networks). This Public profile has fewer firewall openings than the Private profile.
You select a profile for each network to which you connect your computer at the time of the first connection. In essence, you are configuring the personal firewall for that network when you choose a Public or Private profile.
Notice that you can perform the following configuration adjustments from this dialog box:
- Allow A Program Or Feature Through The Windows Firewall (used to open or close ports in the firewall)
- Change Notification Settings (used to increase or decrease warnings when the firewall takes action)
- Turn Windows Firewall On Or Off
- Restore Defaults (used when you want to purge your customizations)
- Advanced settings (for the savvy user)
4. In the left pane, click the Allow A Program Or Feature Through The Windows Firewall link.
Notice the settings are grayed out, disallowing any changes.
5. Click the Change Settings button. If you are prompted for confirmation by User Account Control, click Yes to confirm your desire to proceed.
6. Scroll down and observe the Allowed Programs And Features list. Notice the two different settings for the Private and Public profiles. Also notice that the Public profile is more restricted, because it is more risky.
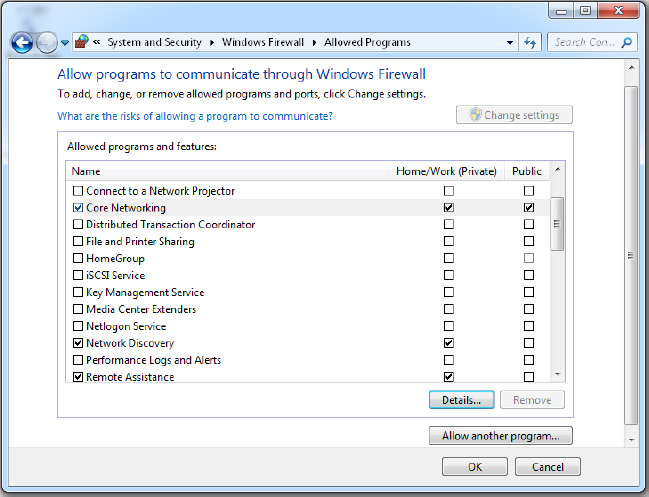
7. Notice the following default settings:
Core Networking
- Enabled for Private and Public
File And Printer Sharing
- Disabled for Private and Public
Network Discovery
- Enabled for Private
- Disabled for Public
Core networking allows for basic IP network connectivity, primarily enabling the stateful inspection firewall.
File And Printer Sharing is the server service on a system and allows you to share folders and printers.
Network Discovery allows you to identify (find or see) other systems on the network and be identified (be found or be seen) on the network.
8. Observe that you can enable (allow) a service or application in this list on none, one, or both profiles by checking or clearing the check boxes. Each checked box represents a network path, an opening into your computer, for good use or for malicious attack.
Do not add any new programs to the firewall list in the next step.
9. Click the Allow Another Program button.
This is how you would add a new program to the list to enable it to pass traffic through the firewall. You can select the applications from the list provided, or browse to the executable, and then you would click Add. Also notice that you can preconfigure which profile the new program is enabled for, once added, by clicking the Network Location Types button.
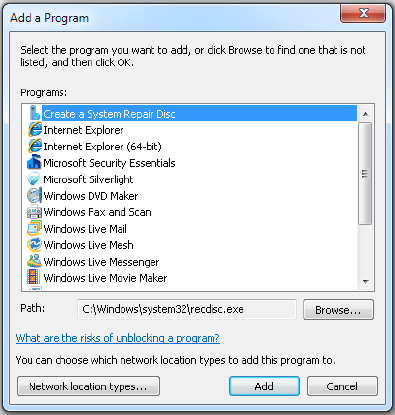
10. Click the Cancel button without adding any programs.
11. Click the Cancel button to close the Allowed Programs dialog box.
12. Click the red X in the upper-right corner of the Windows Firewall dialog box to close the Control Panel.
Create a Folder Share to Initiate the File And Printer Sharing Service
1. Right-click the Start button and select Open Windows Explorer.
2. In the left pane, click Computer ⇒ Local Disk (C:).
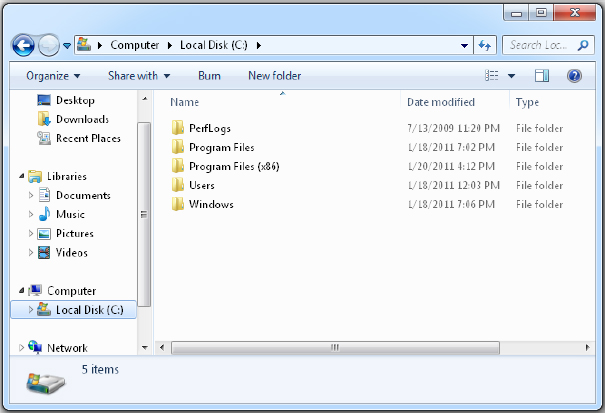
3. In the right pane, right-click in the white space and select New ⇒ Folder. Rename the folder AA.
4. Double-click the AA folder.
5. In the right pane, right-click in the white space and select New ⇒ Text Document. Accept the default name for the text document by pressing the Enter key.
6. In the left pane, expand Local Disk (C:). Right-click the AA folder and hover your mouse over the Share With option.
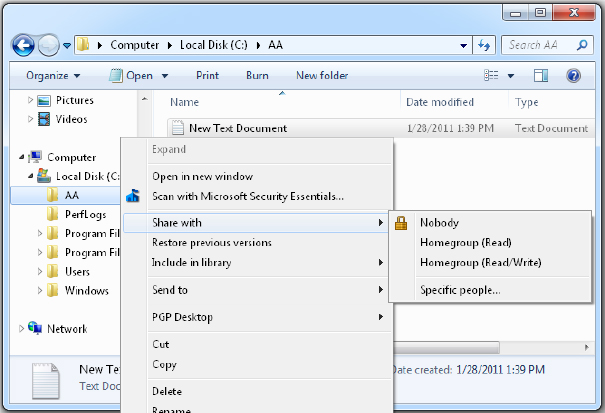
7. Notice that you can quickly share a folder in several preconfigured manners by using these menu options. In this exercise, you will use a different, more customizable procedure to create the folder share and initialize the File And Printer Sharing service.
8. In the right pane, right-click in the white space to clear the menu from the display.
9. In the left pane, right-click the AA folder and select Properties from the menu. Select the Sharing tab.
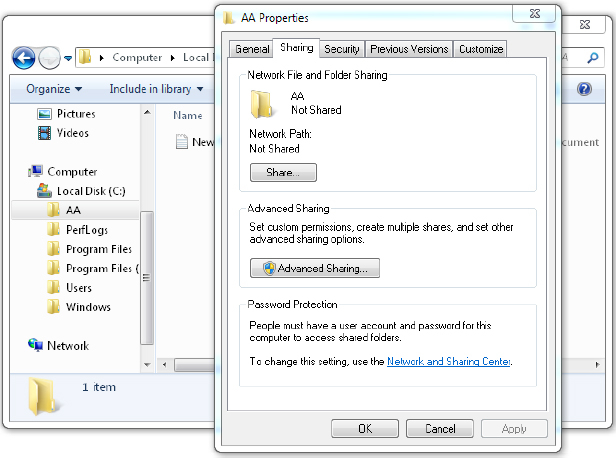
10. Click the Advanced Sharing button.
11. Check the Share This Folder check box. Change the Limit The Number Of Simultaneous Users To value to 1. This will now reject the number of inbound connections to this share, reducing the load on the system and limiting the vulnerability to this particular type of denial-of-service (DoS) attack.
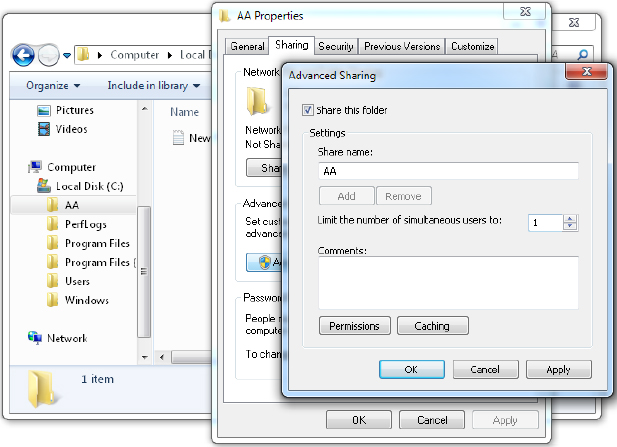
12. To adjust the permissions accordingly, click the Permissions button. By default, new folder shares are configured with the Allow Read permission for Everyone. In this case, you will be the only one accessing this share, and on occasion you might need to copy content from the laptop to this computer.

13. Click the Add button to add your user account to the Group Or User Names list. Type your username into the Enter The Object Names To Select field.
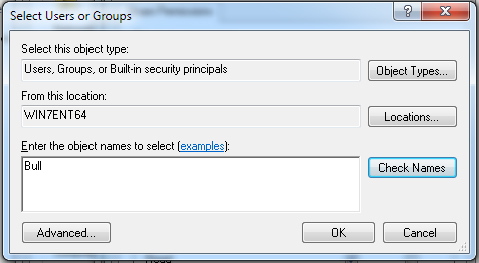
14. Click the Check Names button. The system should respond by adding the object COMPUTERNAMEUSERNAME in the list.
15. Click OK to return to the Permissions dialog box, where you should see your username on the Group Or User Names list.
16. Be sure your username is selected and then grant your user the Allow Change permission. This gives the user the ability to read, copy files and folders from this folder, copy or create new files and folders into this folder, and delete files and folders from this folder.
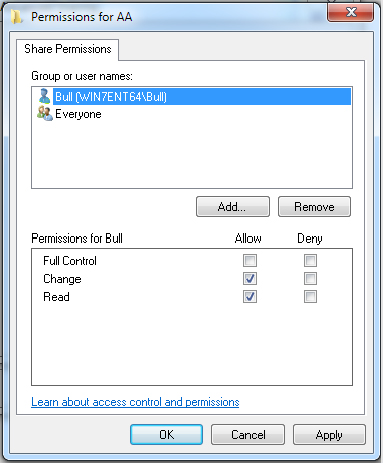
17. Select the Everyone group from the list. Click the Remove button to disallow anyone but you access to this folder share. Click OK to return to the Advanced Sharing dialog box.
18. Click OK to return to the Sharing tab on the AA folder Properties dialog box. Click the Close button.
Verifying Settings on the Personal Firewall
1. Select Start ⇒ Control Panel.
2. In the Control Panel, select System And Security ⇒ Windows Firewall.
3. In the left pane, click the Allow A Program Or Feature Through The Windows Firewall link.
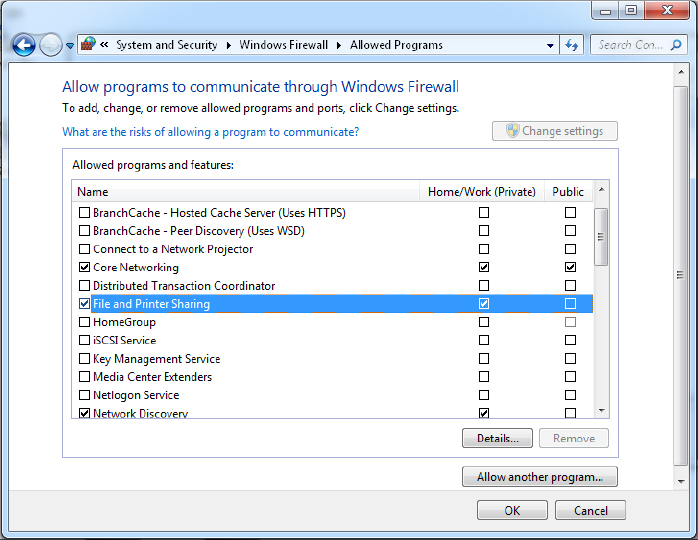
4. Scroll down and observe the Allowed Programs And Features list. Notice the following settings:
Core Networking
- Enabled for Private and Public
File And Printer Sharing
- Disabled for Private
- Enabled for Public
Network Discovery
- Enabled for Private
- Disabled for Public
Since you will only need to copy files over your home network, on the newly enabled File And Printer Sharing program, you want private networks enabled and public networks disabled.
5. Click the Change Settings button. Check the box for File And Printer Sharing under Home/Work (Private), and clear the check box under Public.
6. Click OK.
7. Click the red X button in the upper-right corner of the Windows Firewall dialog box to close the Control Panel.
Criteria for Completion
You have completed this task when you have reviewed the default Windows 7 personal firewall configuration, created a secured shared folder for your personal use, and then tuned the personal firewall to allow inbound connections to that share only on trusted (private) networks.