
Task 7.4: Using Internet Connection Sharing
When is a computer more than just a computer? When you make it into a router. That’s what Internet Connection Sharing (ICS) can do. ICS allows you to use one computer to route the Internet to one or more secondary computers.
Without the Internet, some may consider the network a boring place. The typical network without Internet access consists of one or more computers connected by means of a hub or switch. With ICS, the network will be configured with the ICS computer bridging the connection between the hub and the Internet. Its role will be to act as the gateway, provide Network Address Translation (NAT), and provide dial-on demand if needed.

NAT translates client internal network IP addresses into the appropriate address on the NAT-enabled gateway device and protects internal client IP addresses by making them invisible to Internet hosts.
Scenario
You have been asked to set up a branch office that is short on funds. They have asked if you can use an existing computer to route Internet traffic to three other computers in this small office.
Scope of Task
Duration
This task should take about 30 minutes.
Setup
For this task, you need two Windows computers. The primary computer will need two NIC cards and the secondary Windows computer will need one NIC card. You will also need access to the Administrator account on each system and an Internet connection.
Caveat
Although ICS does bypass the need for a router, it places priority on the system providing access. This computer must be running for other computers in the network to have Internet access.
Procedure
In this task, you will learn how to install and configure ICS.
Equipment Used
For this task, you must have:
- Two Windows 7 computers
- Access to the Administrator accounts
- An Internet connection
- Three NICs
Details
This task will show you how to install and configure ICS. This method allows you to share Internet access when a router is not available.
Configuring the ICS Server
1. The first step in this process is to set up the system that will be running ICS. It will be referred to as the ICS server. Before starting any software configuration, you will need to install two NICs into this computer.
While only one Ethernet card is required for modem-based ICS sharing, a high-speed, Ethernet-based Internet connection such as Digital Subscriber Line (DSL) or a cable modem requires the ICS server to have two Ethernet cards installed.
2. Once the NICs are installed, select Start ⇒ Control Panel ⇒ Network And Internet ⇒ Network And Sharing Center.
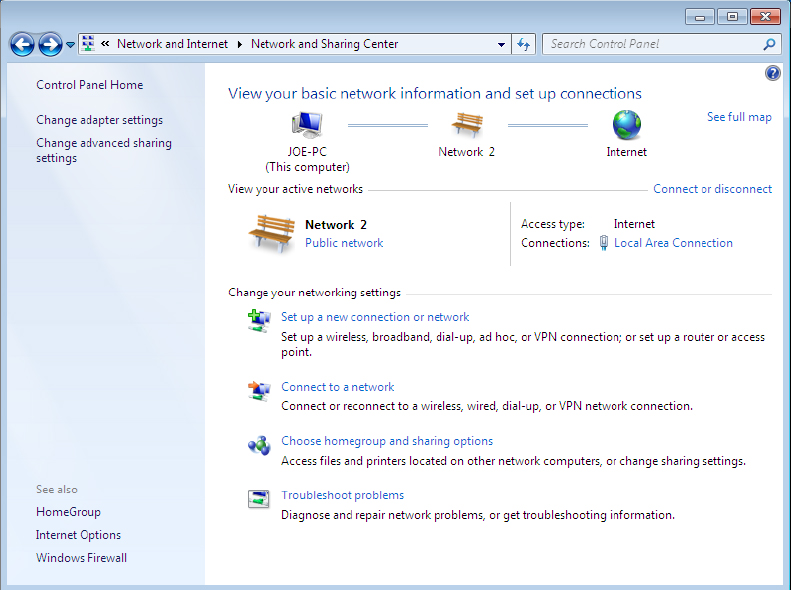
3. From the Network And Sharing Center window, click Change Adapter Settings on the left side of the window.
If one or more of the required protocols are not present, you can add them by choosing the install option of the network properties page.
4. When the Network Connections window opens, it will display the connections available on the computer. No wireless connections will be displayed unless wireless is installed on the computer.
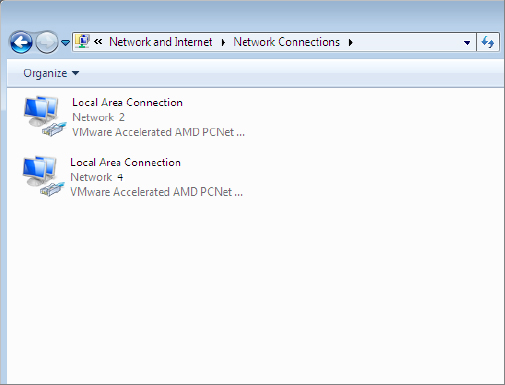
5. Double-click on Wireless Network Connection, or the connection you wish to share, to open the Wireless Network Connection Properties dialog box.
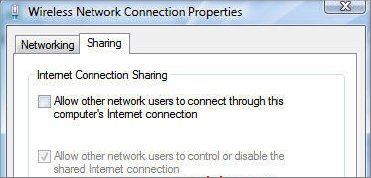
6. When you have verified the settings, click OK to close the dialog box. Click the Close button to close the Wireless Network Connection Properties dialog box, and close the Network Connections window.
If a modem is being used on-demand, dialing can be implemented. This service automatically activates the modem when a computer on the LAN attempts to access external resources.
Configuring ICS Clients
1. Clients using ICS do not need any special software installed. They simply have to be configured to recognize the proper gateway to access external resources. On the client systems that will be using the ICS server to access the Internet, select Start ⇒ Control Panel ⇒ Network And Internet to start the configuration.
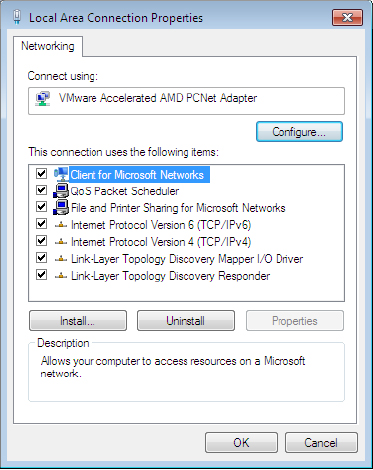
2. At least one network connection should be listed for your local area connection. Right-click on the network connection and choose Properties.
3. You should see several protocols and services installed. Once of these should be Internet Protocol TCP/IPv4. Highlight the Internet Protocol services and select Properties.
4. In the Internet Protocol (TCP/IP) Properties dialog box, there are two settings:
- Obtain An IP Address Automatically
- Use The Following IP Address
Choose the first option, Obtain An IP Address Automatically. Also, make sure Obtain DNS Server Address Automatically is selected.
5. Click the Advanced button and make sure the various lists in the IP Settings, DNS, and WINS tabs are all empty. Click OK and then click OK again. This will complete the ICS configuration on the client computer and you should now have access.
6. You can check this access by opening a command prompt and pinging www.google.com. Then open Internet Explorer and browse to www.google.com.
If you cannot connect from an open command prompt, type IPCONFIG /all and verify that your IP address, subnet mask, and default gateway are correct.
Criteria for Completion
You have completed this task when you have configured one system with ICS and configured a second to use the ICS connection to access the Internet.