
Task 9.3: Forcing a Memory Dump
The memory dump takes the contents of physical random access memory (RAM) and writes it to a file on the hard drive, to serve as a persistent copy for later analysis. Memory dumps may be useful for two main purposes: debugging problematic applications (not our issue here) and investigating an attack incident. As a record of what was going on in RAM, it can reveal to the trained analyst many details of the interactions among applications and between applications and the operating system. Many forms of exploit software—the type of code used in viruses, worms, Trojans, and so forth—implement code that interacts with applications and the operating system in an atypical manner. This software attempts to interact in ways that it should not. Understanding the method of attack, or the attack vector, is essential in developing the proper defense against this form of attack.
Most forensic investigation guidelines declare that this memory dump is an essential component of a post-incident investigation. This seems to contradict the other golden rule of incident investigation: to pull the plug on the system, and go down “dirty” to avoid altering the contents of the hard drive(s). But this book isn’t here to debate forensic-investigation issues. That is for the company Chief Information Security Officer (CISO) and the CIRT policies to define. At this point, it is important to know how to accomplish the task.
Sophisticated forensic investigators have tools and techniques to gather this information without violating the integrity of the hard drives, but these tools can be quite expensive and the procedures require specialized training and rehearsal.
Scenario
You are operating a system and you suspect that it might have a virus. You observe several unexpected systemic activities that concern you, and you hope to gather information to identify what might be going on in the system.
Scope of Task
Duration
This task should take 20 minutes.
Setup
The function of forcing the memory dump is not built into the operating system by default. This capability must be added by editing the Registry and rebooting the system. This means that you must have this capability in place on each system where you desire the forced memory dump prior to needing to utilize this feature.
Caveat
In Task 9.3, you will be editing the Registry, which is always dangerous. The forced memory dump performs an abnormal shutdown, an “abend,” or abnormal end (termination). It is a “dirty” shutdown and it does not properly close files and applications. This can corrupt many types of critical files that are being accessed by the system, and can cause the loss of data in files you have open. If your hardware includes any type of write or disk caching, shutting the system down dirty can cause serious problems regarding data loss and file system corruption. If you have either hardware or software disk caching enabled, to avoid this risk you may not want to perform this task.
If you elect to proceed, you should have backups of your data, and you should generate a system restore point before editing the Registry, and a second restore point before performing the forced memory dump, just in case.

To review the manual creation of a system restore point, see Task 10.3.
Procedure
First you’ll configure the memory dump in system properties to get the desired amount of information and specify the location of the output file.
You must then perform an edit in the Registry and reboot the system to have the change mounted by the operating system. After the reboot, you’ll launch an application or two—nothing too important or volatile, though.
Then you’ll push the magic buttons. Boom! Blue screen! This is followed by a reboot.
After the reboot completes, you’ll open and examine the contents of the dump file. There may not be much to see by the untrained eye. Much of the file contains machine language code that is not human-readable. There is a series of analytical tools that experts use to extract the most detail out of these files. This investigative procedure almost always includes sending this memory dump file to one of these types of individuals or companies for the hard-core analysis.
Recognize that this Registry edit and reboot must be configured on your systems prior to an attack. If the attack has occurred before these settings are in place, this technique cannot be used to capture the contents of RAM.
Equipment Used
For this task, you must have:
- Windows XP Professional system, a member of the domain
- Administrator access
Details
Configuring the Minidump
1. Log on to the Windows XP Professional system as the Administrator.
2. Right-click on My Computer and select Properties.
System properties are also available by choosing the System applet in the Control Panel.
3. Click the Advanced tab.
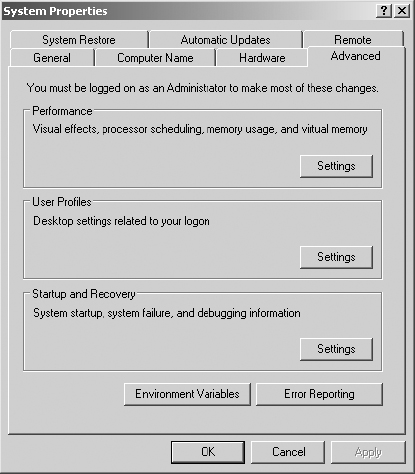
4. In the Startup And Recovery section, click the Settings button.

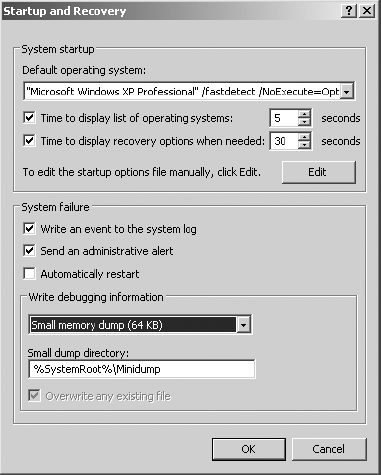
5. In the System Failure section, observe that the three check boxes are enabled. If you needed to, you could disable any one of these three configuration parameters. Clearing the Automatically Restart check box leaves the blue screen on the display until a manual power-down is initiated. However, system functions and processes have been halted at that point.
6. Clear the Automatically Restart check box. For this exercise, you’ll want to view the information from the blue screen on the video display. In practice, you may choose to perform the reboot.
7. In the subsection Write Debugging Information, select the drop-down list to view the three choices:
Small Memory Dump (64 KB) This is called the minidump.
Kernel Memory Dump This represents the larger amount of content, with no user data, and only includes memory contents related to the OS.
Complete Memory Dump This represents the largest amount of information, historically too much to send via the Internet, but that has pretty well been eliminated as a concern due to improved Internet bandwidth connectivity.
8. Alternately select the three different dump types and observe the dialog box. Select the Small Memory Dump (64 KB) for this exercise.
9. In the Small Dump Directory field, notice the location where the dump file will be written. %SystemRoot% means the Windows directory (or whatever else you may have called it during installation of the system). Minidump indicates that, upon triggering, the system will build a folder if it doesn’t already exist and store the minidump files in it. You could relocate this to any local, writable disk in case this drive is too full, or if you are fighting a hardware/driver issue that is supporting the spindle holding the boot partition. Leave this at its default setting of %SystemRoot%Minidump.
10. Click OK to close the Startup And Recovery dialog box.
11. Click OK to close the System Properties dialog box.
Implementing the Registry Edit (the “Reg Hack”)
1. Still logged on to the Windows XP Professional system as the Administrator, select Start ⇒ Run. In the Open field, type regedit and click OK to launch the Registry editing tool.
2. In the Registry Editor, in the left pane, expand the folders to the following location: HKEY_LOCAL_MACHINE ⇒ System ⇒ CurrentControlSet ⇒ Services ⇒ i8042prt. Select the Parameters folder.

Editing the Registry is a potentially dangerous action. You should always manually trigger a system restore point and perform a backup of all data on the system. Follow the instructions precisely. Double-check (and then triple-check) your entries. Treat all entries as if they are case sensitive.
3. In the right pane, right-click the white space and select New ⇒ DWORD Value.
4. Name the new DWORD value CrashOnCtrlScroll and press Enter.
5. Right-click on the new CrashOnCtrlScroll DWORD value and select Modify.
6. In the Edit DWORD Value dialog box, first select Decimal in the Base section, and then in the Value Data field, type the number 1.
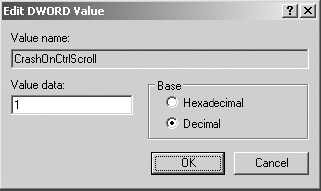
7. Click OK to close the Edit DWORD Value dialog box.
8. Confirm your settings carefully. Close the Registry Editor application.
If you wish to disable the system from being able to perform the manually triggered memory dump, all you have to do is delete the DWORD Value CrashOnCtrlScroll from the Registry, and restart the system.
9. Close all applications and restart the system.
Triggering the Memory Dump
1. Log on to the Windows XP Professional system as the Administrator.
2. Launch Notepad, Calculator, and Paint, and minimize all three.
3. Press and hold the Ctrl key and press the Scroll Lock button twice. You should get a blue screen.
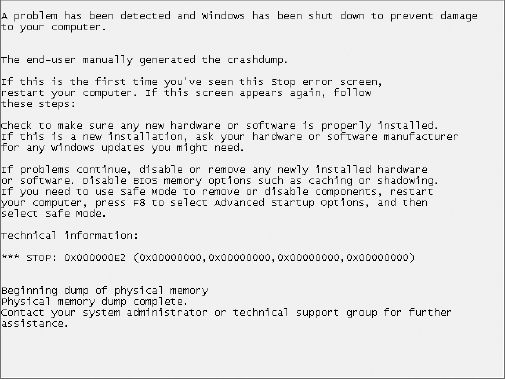
4. Review the blue-screen message.
5. Power down the system.
Reviewing the Memory Dump
1. Power up the system and log on to the Windows XP Professional system as the Administrator.
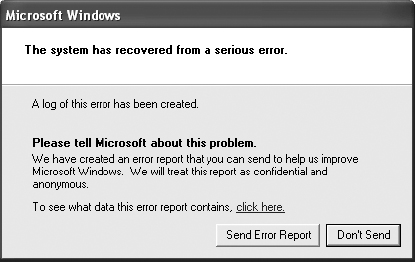
2. As the desktop stabilizes, you should receive a Microsoft Windows error message. Review the message.
3. Click on the Click Here link to review the data the error report contains related to the blue screen. Review the Error signature and recognize information regarding the operating system version, OSVer; the service pack level, SP; and the Microsoft product ID, Product.
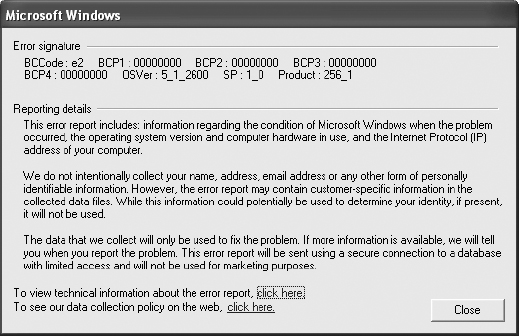
4. Select the Click Here link to view technical information about the error report.
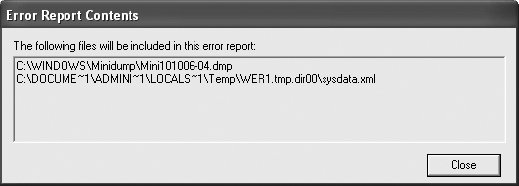
5. Notice that Microsoft wants two files:
- The memory dump named Mini101006-04.dmp (the numbers represent a date code, followed by a sequential number)
- sysdata.xml, which is a file that logs system details and all hardware devices and drivers that were loaded at the time of the system crash
You might want to locate and copy this file to the desktop for later review. It contains an excellent summary of details. Notice the path to the file in the dialog box. The parent folder name will begin with WER (Windows Error Report), but the number(s) behind it will vary. The extension should be .dir00.
6. Click Close to exit the Error Report Contents dialog box. Click Close to exit the Error Signature dialog box. Click the Don’t Send button to close the Windows Error Reporting dialog box without sending crash information to Microsoft. You—not a real application or operating system problem—triggered the crash.
7. Launch Windows Explorer. In the left pane, expand the folders as necessary to locate the WINDOWSMinidump folder.
8. If there is more than one file in the Minidump folder, locate the file with today’s date and the timestamp that matched the triggered blue screen.
9. Right-click on the correct Minidump file and select Open.
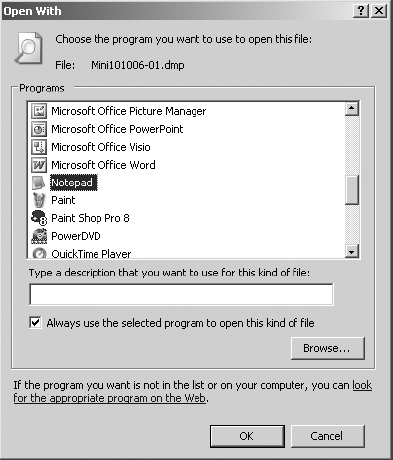
10. Enable the Select The Program From A List option and click OK.
11. In the Programs list, select Notepad and click OK.
12. Adjust the window size of Notepad as desired. Select Format ⇒ Word Wrap.
13. Scroll through the memory dump. Notice the reference to PageDump. The memory dump gets written first to the pagefile, and then on reboot it gets written to the minidump file, Mini101006-04.dmp in this case.
14. Notice the reference to SYS, DLL, and possibly some EXE files. You may also see some BIOS and hardware device information.
15. Scroll to the top of the file and click in the very first space. From the menu, select Edit ⇒ Find. Type KDBG in the Find What field, and then click Find Next. KDBG refers to the Kernel Debugger, a tool used to diagnose kernel-related processes.
16. Scroll back to the top of the file and click in the very first space. From the menu, select Edit ⇒ Find. Type TRGD in the Find What field, and then click Find Next. TRGD refers to the Triage Data (it may also be referred to as Triggered Data). Triage implies sorting, based on an evaluation and categorization into three levels of severity to be able to address the most critical issues first. This TRGD tag indicates the end of the memory dump, but the file may continue with additional system-related information.
17. Your conclusion regarding the memory dump is probably that it is cryptic and largely unreadable. If you did have to extract information from this file, you would solicit the services of a worthy forensic investigator or contact Microsoft for additional analytical assistance. The good news is that you now know how to create the file for further analysis.
18. Close Notepad.
Criteria for Completion
You have completed this task when you have configured the system to be able to force a memory dump, and then performed and reviewed the memory dump.