© Adam Freeman 2020
A. FreemanPro ASP.NET Core 3https://doi.org/10.1007/978-1-4842-5440-0_8

8. SportsStore: Navigation and Cart

Adam Freeman1 
(1)
London, UK
 

In this chapter, I continue to build out the SportsStore example app. I add support for navigating around the application and start building a shopping cart.

Tip

You can download the example project for this chapter—and for all the other chapters in this book—from https://github.com/apress/pro-asp.net-core-3. See Chapter 1 for how to get help if you have problems running the examples.

Adding Navigation Controls

The SportsStore application will be more useful if customers can navigate products by category. I will do this in three phases.
  • Enhance the Index action method in the HomeController class so that it can filter the Product objects in the repository

  • Revisit and enhance the URL scheme

  • Create a category list that will go into the sidebar of the site, highlighting the current category and linking to others

Filtering the Product List

I am going to start by enhancing the view model class, ProductsListViewModel, which I added to the SportsStore project in the previous chapter. I need to communicate the current category to the view to render the sidebar, and this is as good a place to start as any. Listing 8-1 shows the changes I made to the ProductsListViewModel.cs file in the Models/ViewModels folder.
using System.Collections.Generic;
using SportsStore.Models;
namespace SportsStore.Models.ViewModels {
    public class ProductsListViewModel {
        public IEnumerable<Product> Products { get; set; }
        public PagingInfo PagingInfo { get; set; }
        public string CurrentCategory { get; set; }
    }
}
Listing 8-1.

Modifying the ProductsListViewModel.cs File in the SportsStore/Models/ViewModels Folder

I added a property called CurrentCategory. The next step is to update the Home controller so that the Index action method will filter Product objects by category and use the property I added to the view model to indicate which category has been selected, as shown in Listing 8-2.
using Microsoft.AspNetCore.Mvc;
using SportsStore.Models;
using System.Linq;
using SportsStore.Models.ViewModels;
namespace SportsStore.Controllers {
    public class HomeController : Controller {
        private IStoreRepository repository;
        public int PageSize = 4;
        public HomeController(IStoreRepository repo) {
            repository = repo;
        }
        public ViewResult Index(string category, int productPage = 1)
            => View(new ProductsListViewModel {
                Products = repository.Products
                    .Where(p => category == null || p.Category == category)
                    .OrderBy(p => p.ProductID)
                    .Skip((productPage - 1) * PageSize)
                    .Take(PageSize),
                PagingInfo = new PagingInfo {
                   CurrentPage = productPage,
                   ItemsPerPage = PageSize,
                   TotalItems = repository.Products.Count()
                },
                CurrentCategory = category
            });
    }
}
Listing 8-2.

Adding Category Support in the HomeController.cs File in the SportsStore/Controllers Folder

I made three changes to the action method. First, I added a parameter called category. This category parameter is used by the second change in the listing, which is an enhancement to the LINQ query: if category is not null, only those Product objects with a matching Category property are selected. The last change is to set the value of the CurrentCategory property I added to the ProductsListViewModel class. However, these changes mean that the value of PagingInfo.TotalItems is incorrectly calculated because it doesn’t take the category filter into account. I will fix this in a while.

Unit Test: Updating Existing Unit Tests
I changed the signature of the Index action method, which will prevent some of the existing unit test methods from compiling. To address this, I need to pass null as the first parameter to the Index method in those unit tests that work with the controller. For example, in the Can_Use_Repository test in the HomeControllerTests.cs file, the action section of the unit test becomes as follows:
...
[Fact]
public void Can_Use_Repository() {
    // Arrange
    Mock<IStoreRepository> mock = new Mock<IStoreRepository>();
    mock.Setup(m => m.Products).Returns((new Product[] {
        new Product {ProductID = 1, Name = "P1"},
        new Product {ProductID = 2, Name = "P2"}
    }).AsQueryable<Product>());
    HomeController controller = new HomeController(mock.Object);
    // Act
    ProductsListViewModel result =
        controller.Index(null).ViewData.Model as ProductsListViewModel;
    // Assert
    Product[] prodArray = result.Products.ToArray();
    Assert.True(prodArray.Length == 2);
    Assert.Equal("P1", prodArray[0].Name);
    Assert.Equal("P2", prodArray[1].Name);
}
...
By using null for the category argument, I receive all the Product objects that the controller gets from the repository, which is the same situation I had before adding the new parameter. I need to make the same change to the Can_Paginate and Can_Send_Pagination_View_Model tests as well.
...
[Fact]
public void Can_Paginate() {
    // Arrange
    Mock<IStoreRepository> mock = new Mock<IStoreRepository>();
    mock.Setup(m => m.Products).Returns((new Product[] {
        new Product {ProductID = 1, Name = "P1"},
        new Product {ProductID = 2, Name = "P2"},
        new Product {ProductID = 3, Name = "P3"},
        new Product {ProductID = 4, Name = "P4"},
        new Product {ProductID = 5, Name = "P5"}
    }).AsQueryable<Product>());
    HomeController controller = new HomeController(mock.Object);
    controller.PageSize = 3;
    // Act
    ProductsListViewModel result =
        controller.Index(null, 2).ViewData.Model as ProductsListViewModel;
    // Assert
    Product[] prodArray = result.Products.ToArray();
    Assert.True(prodArray.Length == 2);
    Assert.Equal("P4", prodArray[0].Name);
    Assert.Equal("P5", prodArray[1].Name);
}
[Fact]
public void Can_Send_Pagination_View_Model() {
    // Arrange
    Mock<IStoreRepository> mock = new Mock<IStoreRepository>();
    mock.Setup(m => m.Products).Returns((new Product[] {
        new Product {ProductID = 1, Name = "P1"},
        new Product {ProductID = 2, Name = "P2"},
        new Product {ProductID = 3, Name = "P3"},
        new Product {ProductID = 4, Name = "P4"},
        new Product {ProductID = 5, Name = "P5"}
    }).AsQueryable<Product>());
    // Arrange
    HomeController controller =
        new HomeController(mock.Object) { PageSize = 3 };
    // Act
    ProductsListViewModel result =
        controller.Index(null, 2).ViewData.Model as ProductsListViewModel;
    // Assert
    PagingInfo pageInfo = result.PagingInfo;
    Assert.Equal(2, pageInfo.CurrentPage);
    Assert.Equal(3, pageInfo.ItemsPerPage);
    Assert.Equal(5, pageInfo.TotalItems);
    Assert.Equal(2, pageInfo.TotalPages);
}
...

Keeping your unit tests synchronized with your code changes quickly becomes second nature when you get into the testing mindset.

To see the effect of the category filtering, start ASP.NET Core and select a category using the following URL, taking care to use an uppercase S for Soccer:
http://localhost:5000/?category=Soccer
You will see only the products in the Soccer category, as shown in Figure 8-1.
../images/338050_8_En_8_Chapter/338050_8_En_8_Fig1_HTML.jpg
Figure 8-1.

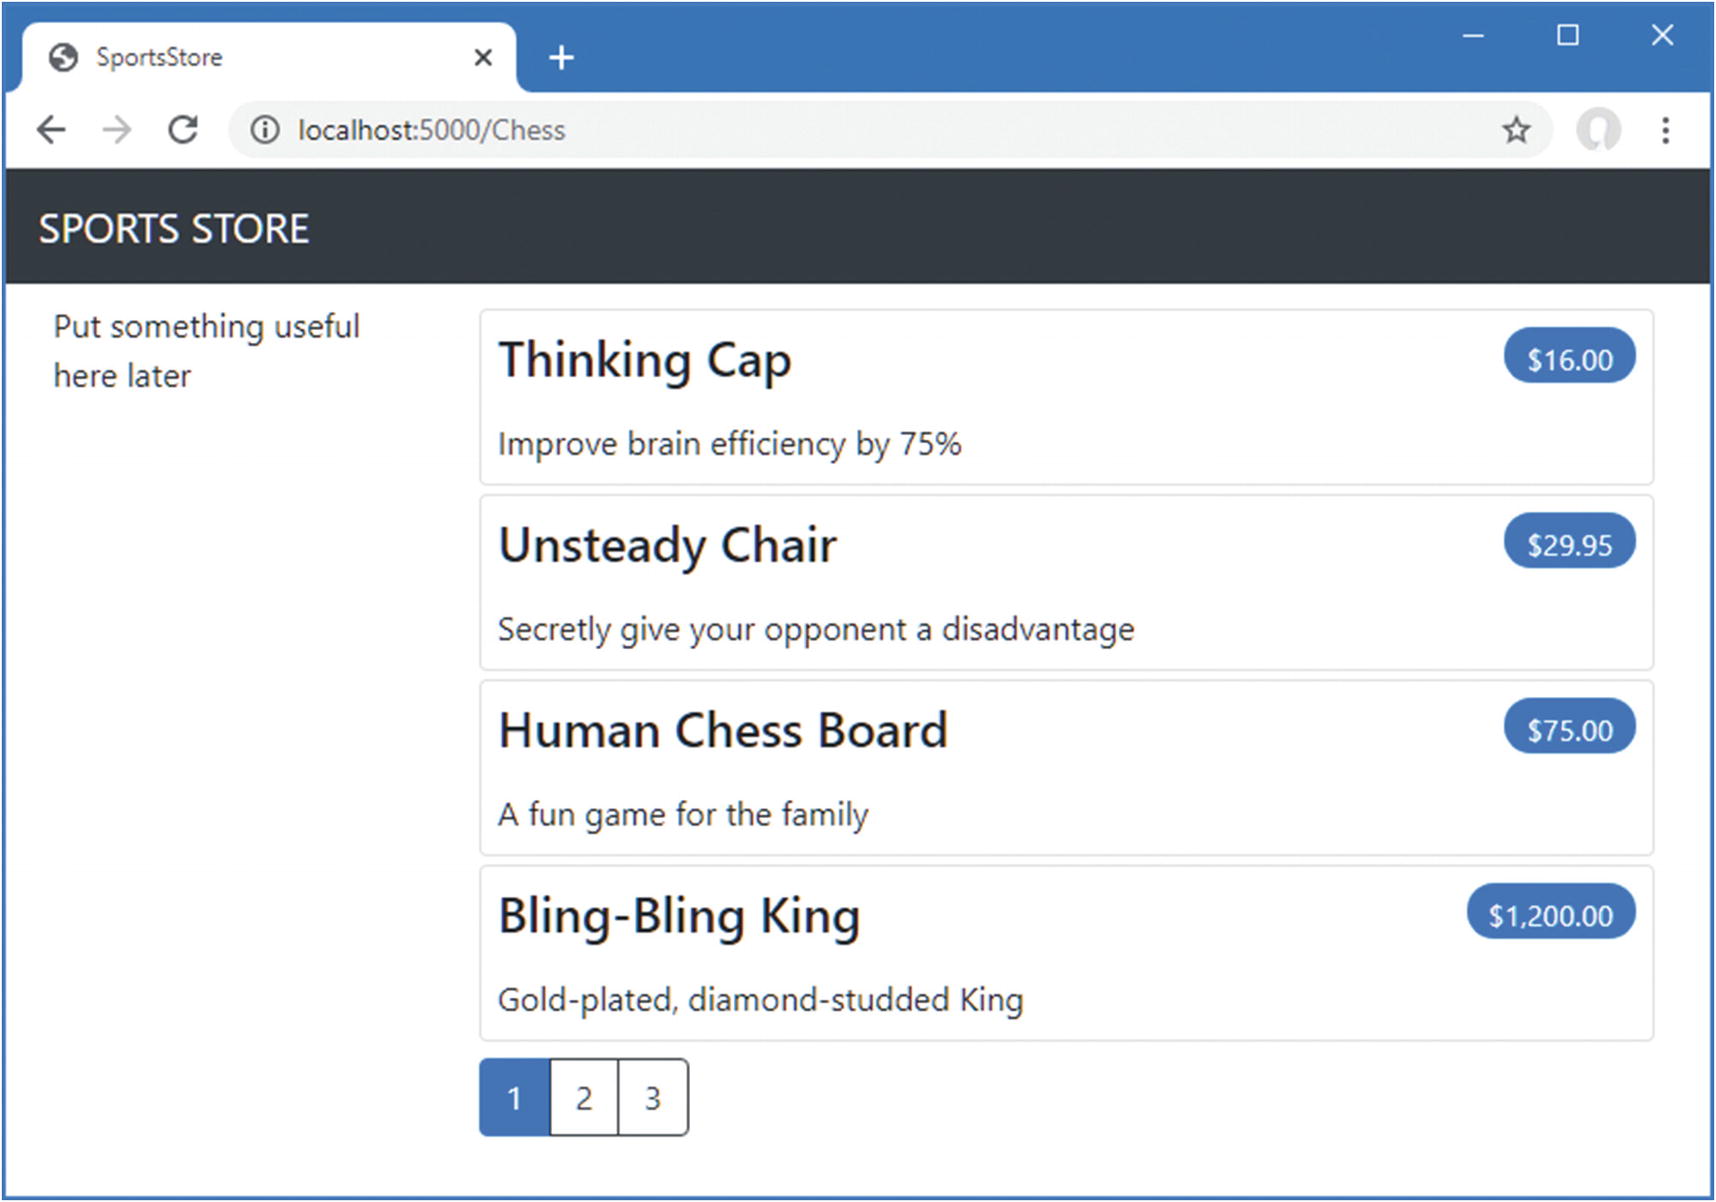
Using the query string to filter by category

Obviously, users won’t want to navigate to categories using URLs, but you can see how small changes can have a big impact once the basic structure of an ASP.NET Core application is in place.

Unit Test: Category Filtering
I need a unit test to properly test the category filtering function to ensure that the filter can correctly generate products in a specified category. Here is the test method I added to the ProductControllerTests class:
...
[Fact]
public void Can_Filter_Products() {
    // Arrange
    // - create the mock repository
    Mock<IStoreRepository> mock = new Mock<IStoreRepository>();
    mock.Setup(m => m.Products).Returns((new Product[] {
        new Product {ProductID = 1, Name = "P1", Category = "Cat1"},
        new Product {ProductID = 2, Name = "P2", Category = "Cat2"},
        new Product {ProductID = 3, Name = "P3", Category = "Cat1"},
        new Product {ProductID = 4, Name = "P4", Category = "Cat2"},
        new Product {ProductID = 5, Name = "P5", Category = "Cat3"}
    }).AsQueryable<Product>());
    // Arrange - create a controller and make the page size 3 items
    HomeController controller = new HomeController(mock.Object);
    controller.PageSize = 3;
    // Action
    Product[] result =
        (controller.Index("Cat2", 1).ViewData.Model as ProductsListViewModel)
            .Products.ToArray();
    // Assert
    Assert.Equal(2, result.Length);
    Assert.True(result[0].Name == "P2" && result[0].Category == "Cat2");
    Assert.True(result[1].Name == "P4" && result[1].Category == "Cat2");
}
...

This test creates a mock repository containing Product objects that belong to a range of categories. One specific category is requested using the action method, and the results are checked to ensure that the results are the right objects in the right order.

Refining the URL Scheme

No one wants to see or use ugly URLs such as /?category=Soccer. To address this, I am going to change the routing configuration in the Configure method of the Startup class to create a more useful set of URLs, as shown in Listing 8-3.

Caution

It is important to add the new routes in Listing 8-3 in the order they are shown. Routes are applied in the order in which they are defined, and you will get some odd effects if you change the order.

using System;
using System.Collections.Generic;
using System.Linq;
using System.Threading.Tasks;
using Microsoft.AspNetCore.Builder;
using Microsoft.AspNetCore.Hosting;
using Microsoft.AspNetCore.Http;
using Microsoft.Extensions.DependencyInjection;
using Microsoft.Extensions.Hosting;
using Microsoft.Extensions.Configuration;
using Microsoft.EntityFrameworkCore;
using SportsStore.Models;
namespace SportsStore {
    public class Startup {
        public Startup(IConfiguration config) {
            Configuration = config;
        }
        private IConfiguration Configuration { get; set; }
        public void ConfigureServices(IServiceCollection services) {
            services.AddControllersWithViews();
            services.AddDbContext<StoreDbContext>(opts => {
                opts.UseSqlServer(
                    Configuration["ConnectionStrings:SportsStoreConnection"]);
            });
            services.AddScoped<IStoreRepository, EFStoreRepository>();
        }
        public void Configure(IApplicationBuilder app, IWebHostEnvironment env) {
            app.UseDeveloperExceptionPage();
            app.UseStatusCodePages();
            app.UseStaticFiles();
            app.UseRouting();
            app.UseEndpoints(endpoints => {
                endpoints.MapControllerRoute("catpage",
                    "{category}/Page{productPage:int}",
                    new { Controller = "Home", action = "Index" });
                endpoints.MapControllerRoute("page", "Page{productPage:int}",
                    new { Controller = "Home", action = "Index", productPage = 1 });
                endpoints.MapControllerRoute("category", "{category}",
                    new { Controller = "Home", action = "Index", productPage = 1 });
                endpoints.MapControllerRoute("pagination",
                    "Products/Page{productPage}",
                    new { Controller = "Home", action = "Index", productPage = 1 });
                endpoints.MapDefaultControllerRoute();
            });
            SeedData.EnsurePopulated(app);
        }
    }
}
Listing 8-3.

Changing the Routing Schema in the Startup.cs File in the SportsStore Folder

Table 8-1 describes the URL scheme that these routes represent. I explain the routing system in detail in Chapter 13.
Table 8-1.

Route Summary

URL

Leads To

/

Lists the first page of products from all categories

/Page2

Lists the specified page (in this case, page 2), showing items from all categories

/Soccer

Shows the first page of items from a specific category (in this case, the Soccer category)

/Soccer/Page2

Shows the specified page (in this case, page 2) of items from the specified category (in this case, Soccer)

The ASP.NET Core routing system handles incoming requests from clients, but it also generates outgoing URLs that conform to the URL scheme and that can be embedded in web pages. By using the routing system both to handle incoming requests and to generate outgoing URLs, I can ensure that all the URLs in the application are consistent.

The IUrlHelper interface provides access to URL-generating functionality. I used this interface and the Action method it defines in the tag helper I created in the previous chapter. Now that I want to start generating more complex URLs, I need a way to receive additional information from the view without having to add extra properties to the tag helper class. Fortunately, tag helpers have a nice feature that allows properties with a common prefix to be received all together in a single collection, as shown in Listing 8-4.
using Microsoft.AspNetCore.Mvc;
using Microsoft.AspNetCore.Mvc.Rendering;
using Microsoft.AspNetCore.Mvc.Routing;
using Microsoft.AspNetCore.Mvc.ViewFeatures;
using Microsoft.AspNetCore.Razor.TagHelpers;
using SportsStore.Models.ViewModels;
using System.Collections.Generic;
namespace SportsStore.Infrastructure {
    [HtmlTargetElement("div", Attributes = "page-model")]
    public class PageLinkTagHelper : TagHelper {
        private IUrlHelperFactory urlHelperFactory;
        public PageLinkTagHelper(IUrlHelperFactory helperFactory) {
            urlHelperFactory = helperFactory;
        }
        [ViewContext]
        [HtmlAttributeNotBound]
        public ViewContext ViewContext { get; set; }
        public PagingInfo PageModel { get; set; }
        public string PageAction { get; set; }
        [HtmlAttributeName(DictionaryAttributePrefix = "page-url-")]
        public Dictionary<string, object> PageUrlValues { get; set; }
            = new Dictionary<string, object>();
        public bool PageClassesEnabled { get; set; } = false;
        public string PageClass { get; set; }
        public string PageClassNormal { get; set; }
        public string PageClassSelected { get; set; }
        public override void Process(TagHelperContext context,
                TagHelperOutput output) {
            IUrlHelper urlHelper = urlHelperFactory.GetUrlHelper(ViewContext);
            TagBuilder result = new TagBuilder("div");
            for (int i = 1; i <= PageModel.TotalPages; i++) {
                TagBuilder tag = new TagBuilder("a");
                PageUrlValues["productPage"] = i;
                tag.Attributes["href"] = urlHelper.Action(PageAction, PageUrlValues);
                if (PageClassesEnabled) {
                    tag.AddCssClass(PageClass);
                    tag.AddCssClass(i == PageModel.CurrentPage
                        ? PageClassSelected : PageClassNormal);
                }
                tag.InnerHtml.Append(i.ToString());
                result.InnerHtml.AppendHtml(tag);
            }
            output.Content.AppendHtml(result.InnerHtml);
        }
    }
}
Listing 8-4.

Prefixed Values in the PageLinkTagHelper.cs File in the SportsStore/Infrastructure Folder

Decorating a tag helper property with the HtmlAttributeName attribute allows me to specify a prefix for attribute names on the element, which in this case will be page-url-. The value of any attribute whose name begins with this prefix will be added to the dictionary that is assigned to the PageUrlValues property, which is then passed to the IUrlHelper.Action method to generate the URL for the href attribute of the a elements that the tag helper produces.

In Listing 8-5, I have added a new attribute to the div element that is processed by the tag helper, specifying the category that will be used to generate the URL. I have added only one new attribute to the view, but any attribute with the same prefix would be added to the dictionary.
@model ProductsListViewModel
@foreach (var p in Model.Products) {
    <partial name="ProductSummary" model="p" />
}
<div page-model="@Model.PagingInfo" page-action="Index" page-classes-enabled="true"
     page-class="btn" page-class-normal="btn-outline-dark"
     page-class-selected="btn-primary" page-url-category="@Model.CurrentCategory"
     class="btn-group pull-right m-1">
</div>
Listing 8-5.

Adding a New Attribute in the Index.cshtml File in the SportsStore/Views/Home Folder

Prior to this change, the links generated for the pagination links looked like this:
http://localhost:5000/Page1
If the user clicked a page link like this, the category filter would be lost, and the application would present a page containing products from all categories. By adding the current category, taken from the view model, I generate URLs like this instead:
http://localhost:5000/Chess/Page1
When the user clicks this kind of link, the current category will be passed to the Index action method, and the filtering will be preserved. To see the effect of this change, start ASP.NET Core and request http://localhost:5000/Chess, which will display just the products in the Chess category, as shown in Figure 8-2.
../images/338050_8_En_8_Chapter/338050_8_En_8_Fig2_HTML.jpg
Figure 8-2.

Filtering data by category

Building a Category Navigation Menu

I need to provide users with a way to select a category that does not involve typing in URLs. This means presenting a list of the available categories and indicating which, if any, is currently selected.

ASP.NET Core has the concept of view components, which are perfect for creating items such as reusable navigation controls. A view component is a C# class that provides a small amount of reusable application logic with the ability to select and display Razor partial views. I describe view components in detail in Chapter 24.

In this case, I will create a view component that renders the navigation menu and integrate it into the application by invoking the component from the shared layout. This approach gives me a regular C# class that can contain whatever application logic I need and that can be unit tested like any other class.

Creating the Navigation View Component

I created a folder called Components, which is the conventional home of view components, in the SportsStore project and added to it a class file named NavigationMenuViewComponent.cs, which I used to define the class shown in Listing 8-6.
using Microsoft.AspNetCore.Mvc;
namespace SportsStore.Components {
    public class NavigationMenuViewComponent : ViewComponent {
        public string Invoke() {
            return "Hello from the Nav View Component";
        }
    }
}
Listing 8-6.

The Contents of the NavigationMenuViewComponent.cs File in the SportsStore/Components Folder

The view component’s Invoke method is called when the component is used in a Razor view, and the result of the Invoke method is inserted into the HTML sent to the browser. I have started with a simple view component that returns a string, but I’ll replace this with HTML shortly.

I want the category list to appear on all pages, so I am going to use the view component in the shared layout, rather than in a specific view. Within a view, view components are applied using a tag helper, as shown in Listing 8-7.
<!DOCTYPE html>
<html>
<head>
    <meta name="viewport" content="width=device-width" />
    <title>SportsStore</title>
    <link href="/lib/twitter-bootstrap/css/bootstrap.min.css" rel="stylesheet" />
</head>
<body>
    <div class="bg-dark text-white p-2">
        <span class="navbar-brand ml-2">SPORTS STORE</span>
    </div>
    <div class="row m-1 p-1">
        <div id="categories" class="col-3">
            <vc:navigation-menu />
        </div>
        <div class="col-9">
            @RenderBody()
        </div>
    </div>
</body>
</html>
Listing 8-7.

Using a View Component in the _Layout.cshtml File in the SportsStore/Views/Shared Folder

I removed the placeholder text and replaced it with the vc:navigation-menu element, which inserts the view component. The element omits the ViewComponent part of the class name and hyphenates it, such that vc:navigation-menu specifies the NavigationMenuViewComponent class.

Restart ASP.NET Core and request http://localhost:5000, and you will see that the output from the Invoke method is included in the HTML sent to the browser, as shown in Figure 8-3.
../images/338050_8_En_8_Chapter/338050_8_En_8_Fig3_HTML.jpg
Figure 8-3.

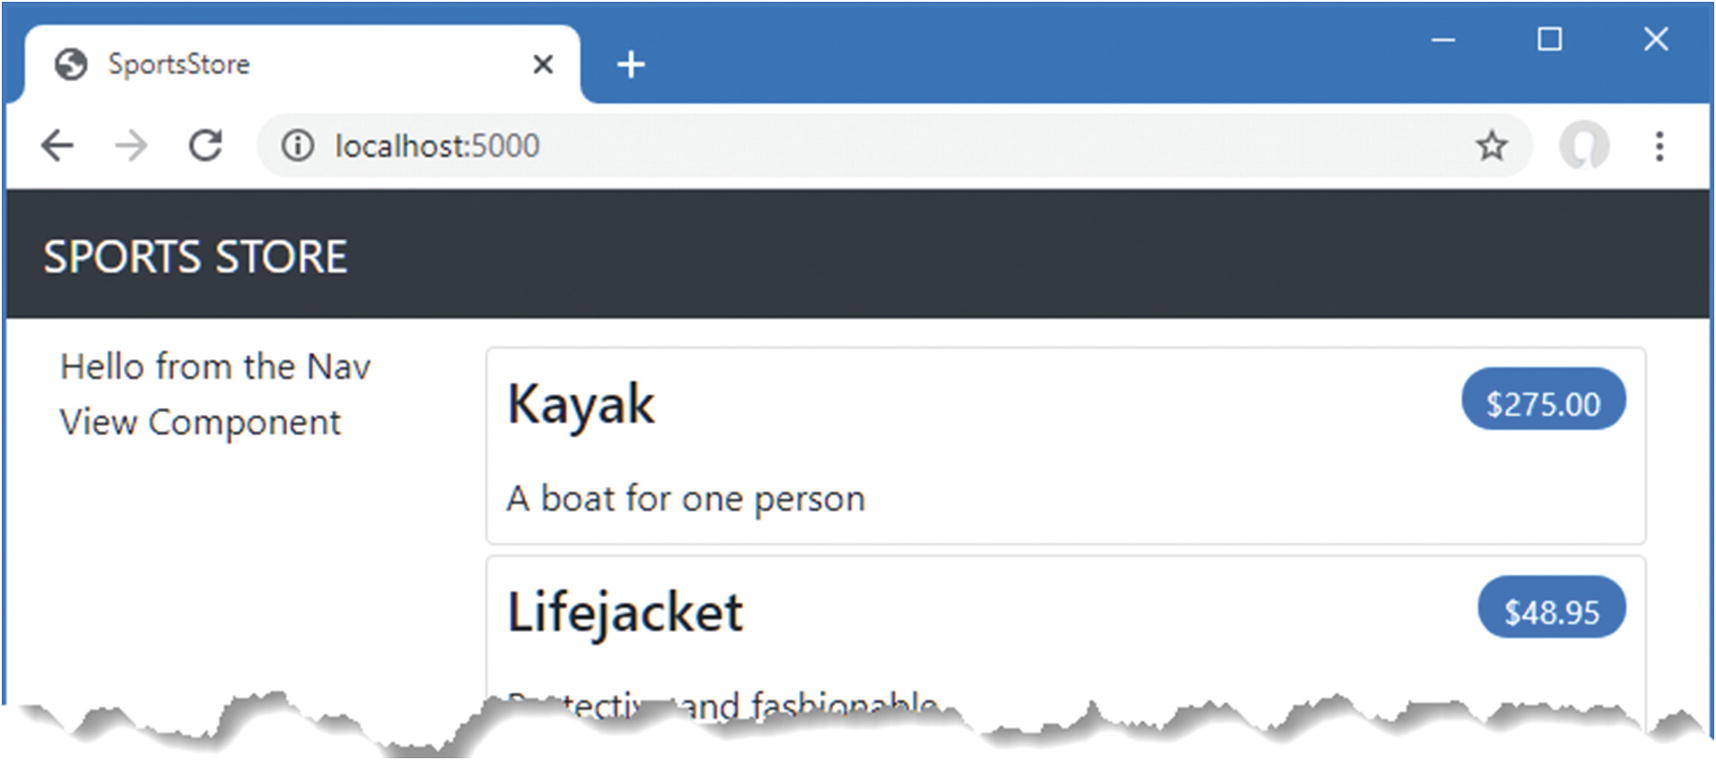
Using a view component

Generating Category Lists

I can now return to the navigation view component and generate a real set of categories. I could build the HTML for the categories programmatically, as I did for the page tag helper, but one of the benefits of working with view components is they can render Razor partial views. That means I can use the view component to generate the list of components and then use the more expressive Razor syntax to render the HTML that will display them. The first step is to update the view component, as shown in Listing 8-8.
using Microsoft.AspNetCore.Mvc;
using System.Linq;
using SportsStore.Models;
namespace SportsStore.Components {
    public class NavigationMenuViewComponent : ViewComponent {
        private IStoreRepository  repository;
        public NavigationMenuViewComponent(IStoreRepository repo) {
            repository = repo;
        }
        public IViewComponentResult Invoke() {
            return View(repository.Products
                .Select(x => x.Category)
                .Distinct()
                .OrderBy(x => x));
        }
    }
}
Listing 8-8.

Adding Categories in the NavigationMenuViewComponent.cs File in the SportsStore/Components Folder

The constructor defined in Listing 8-8 defines an IStoreRepository parameter. When ASP.NET Core needs to create an instance of the view component class, it will note the need to provide a value for this parameter and inspect the configuration in the Startup class to determine which implementation object should be used. This is the same dependency injection feature that I used in the controller in Chapter 7, and it has the same effect, which is to allow the view component to access data without knowing which repository implementation will be used, a feature I describe in detail in Chapter 14.

In the Invoke method, I use LINQ to select and order the set of categories in the repository and pass them as the argument to the View method, which renders the default Razor partial view, details of which are returned from the method using an IViewComponentResult object, a process I describe in more detail in Chapter 24.

Unit Test: Generating The Category List
The unit test for my ability to produce a category list is relatively simple. The goal is to create a list that is sorted in alphabetical order and contains no duplicates, and the simplest way to do this is to supply some test data that does have duplicate categories and that is not in order, pass this to the tag helper class, and assert that the data has been properly cleaned up. Here is the unit test, which I defined in a new class file called NavigationMenuViewComponentTests.cs in the SportsStore.Tests project:
using System.Collections.Generic;
using System.Linq;
using Microsoft.AspNetCore.Components;
using Microsoft.AspNetCore.Mvc.Rendering;
using Microsoft.AspNetCore.Mvc.ViewComponents;
using Moq;
using SportsStore.Components;
using SportsStore.Models;
using Xunit;
namespace SportsStore.Tests {
    public class NavigationMenuViewComponentTests {
        [Fact]
        public void Can_Select_Categories() {
            // Arrange
            Mock<IStoreRepository> mock = new Mock<IStoreRepository>();
            mock.Setup(m => m.Products).Returns((new Product[] {
                new Product {ProductID = 1, Name = "P1", Category = "Apples"},
                new Product {ProductID = 2, Name = "P2", Category = "Apples"},
                new Product {ProductID = 3, Name = "P3", Category = "Plums"},
                new Product {ProductID = 4, Name = "P4", Category = "Oranges"},
            }).AsQueryable<Product>());
            NavigationMenuViewComponent target =
                new NavigationMenuViewComponent(mock.Object);
            // Act = get the set of categories
            string[] results = ((IEnumerable<string>)(target.Invoke()
                as ViewViewComponentResult).ViewData.Model).ToArray();
            // Assert
            Assert.True(Enumerable.SequenceEqual(new string[] { "Apples",
                "Oranges", "Plums" }, results));
        }
    }
}

I created a mock repository implementation that contains repeating categories and categories that are not in order. I assert that the duplicates are removed and that alphabetical ordering is imposed.

Creating the View

Razor uses different conventions for locating with views that are selected by view components. Both the default name of the view and the locations that are searched for the view are different from those used for controllers. To that end, I created the Views/Shared/Components/NavigationMenu folder in the SportsStore project and added to it a Razor view named Default.cshtml, to which I added the content shown in Listing 8-9.
@model IEnumerable<string>
<a class="btn btn-block btn-outline-secondary"asp-action="Index"
   asp-controller="Home" asp-route-category="">
    Home
</a>
@foreach (string category in Model) {
    <a class="btn btn-block btn-outline-secondary"
       asp-action="Index" asp-controller="Home"
       asp-route-category="@category"
       asp-route-productPage="1">
        @category
    </a>
}
Listing 8-9.

The Contents of the Default.cshtml File in the SportsStore/Views/Shared/Components/NavigationMenu Folder

This view uses one of the built-in tag helpers, which I describe in Chapters 2527, to create anchor elements whose href attribute contains a URL that selects a different product category.

Restart ASP.NET Core and request http://localhost:5000 to see the category navigation buttons. If you click a button, the list of items is updated to show only items from the selected category, as shown in Figure 8-4.
../images/338050_8_En_8_Chapter/338050_8_En_8_Fig4_HTML.jpg
Figure 8-4.

Generating category links with a view component

Highlighting the Current Category

There is no feedback to the user to indicate which category has been selected. It might be possible to infer the category from the items in the list, but some clear visual feedback seems like a good idea. ASP.NET Core components such as controllers and view components can receive information about the current request by asking for a context object. Most of the time, you can rely on the base classes that you use to create components to take care of getting the context object for you, such as when you use the Controller base class to create controllers.

The ViewComponent base class is no exception and provides access to context objects through a set of properties. One of the properties is called RouteData, which provides information about how the request URL was handled by the routing system.

In Listing 8-10, I use the RouteData property to access the request data in order to get the value for the currently selected category. I could pass the category to the view by creating another view model class (and that’s what I would do in a real project), but for variety, I am going to use the view bag feature, which allows unstructured data to be passed to a view alongside the view model object. I describe how this feature works in detail in Chapter 22.
using Microsoft.AspNetCore.Mvc;
using System.Linq;
using SportsStore.Models;
namespace SportsStore.Components {
    public class NavigationMenuViewComponent : ViewComponent {
        private IStoreRepository  repository;
        public NavigationMenuViewComponent(IStoreRepository repo) {
            repository = repo;
        }
        public IViewComponentResult Invoke() {
            ViewBag.SelectedCategory = RouteData?.Values["category"];
            return View(repository.Products
                .Select(x => x.Category)
                .Distinct()
                .OrderBy(x => x));
        }
    }
}
Listing 8-10.

Passing the Selected Category in the NavigationMenuViewComponent.cs File in the SportsStore/Components Folder

Inside the Invoke method, I have dynamically assigned a SelectedCategory property to the ViewBag object and set its value to be the current category, which is obtained through the context object returned by the RouteData property. The ViewBag is a dynamic object that allows me to define new properties simply by assigning values to them.

Unit Test: Reporting The Selected Category
I can test that the view component correctly adds details of the selected category by reading the value of the ViewBag property in a unit test, which is available through the ViewViewComponentResult class. Here is the test, which I added to the NavigatioMenuViewComponentTests class:
...
[Fact]
public void Indicates_Selected_Category() {
    // Arrange
    string categoryToSelect = "Apples";
    Mock<IStoreRepository> mock = new Mock<IStoreRepository>();
    mock.Setup(m => m.Products).Returns((new Product[] {
        new Product {ProductID = 1, Name = "P1", Category = "Apples"},
        new Product {ProductID = 4, Name = "P2", Category = "Oranges"},
    }).AsQueryable<Product>());
    NavigationMenuViewComponent target =
        new NavigationMenuViewComponent(mock.Object);
    target.ViewComponentContext = new ViewComponentContext {
        ViewContext = new ViewContext {
            RouteData = new Microsoft.AspNetCore.Routing.RouteData()
        }
    };
    target.RouteData.Values["category"] = categoryToSelect;
    // Action
    string result = (string)(target.Invoke() as
        ViewViewComponentResult).ViewData["SelectedCategory"];
    // Assert
    Assert.Equal(categoryToSelect, result);
}
...

This unit test provides the view component with routing data through the ViewComponentContext property, which is how view components receive all their context data. The ViewComponentContext property provides access to view-specific context data through its ViewContext property, which in turn provides access to the routing information through its RouteData property. Most of the code in the unit test goes into creating the context objects that will provide the selected category in the same way that it would be presented when the application is running and the context data is provided by ASP.NET Core MVC.

Now that I am providing information about which category is selected, I can update the view selected by the view component and vary the CSS classes used to style the links so that the one representing the current category is distinct. Listing 8-11 shows the change I made to the Default.cshtml file.
@model IEnumerable<string>
<a class="btn btn-block btn-outline-secondary"asp-action="Index"
   asp-controller="Home" asp-route-category="">
    Home
</a>
@foreach (string category in Model) {
    <a class="btn btn-block
       @(category == ViewBag.SelectedCategory
           ? "btn-primary": "btn-outline-secondary")"
       asp-action="Index" asp-controller="Home"
       asp-route-category="@category"
       asp-route-productPage="1">
        @category
    </a>
}
Listing 8-11.

Highlighting in the Default.cshtml File in the SportsStore/Views/Shared/Components/NavigationMenu Folder

I have used a Razor expression within the class attribute to apply the btn-primary class to the element that represents the selected category and the btn-secondary class otherwise. These classes apply different Bootstrap styles and make the active button obvious, which you can see by restarting ASP.NET Core, requesting http://localhost:5000, and clicking one of the category buttons, as shown in Figure 8-5.
../images/338050_8_En_8_Chapter/338050_8_En_8_Fig5_HTML.jpg
Figure 8-5.

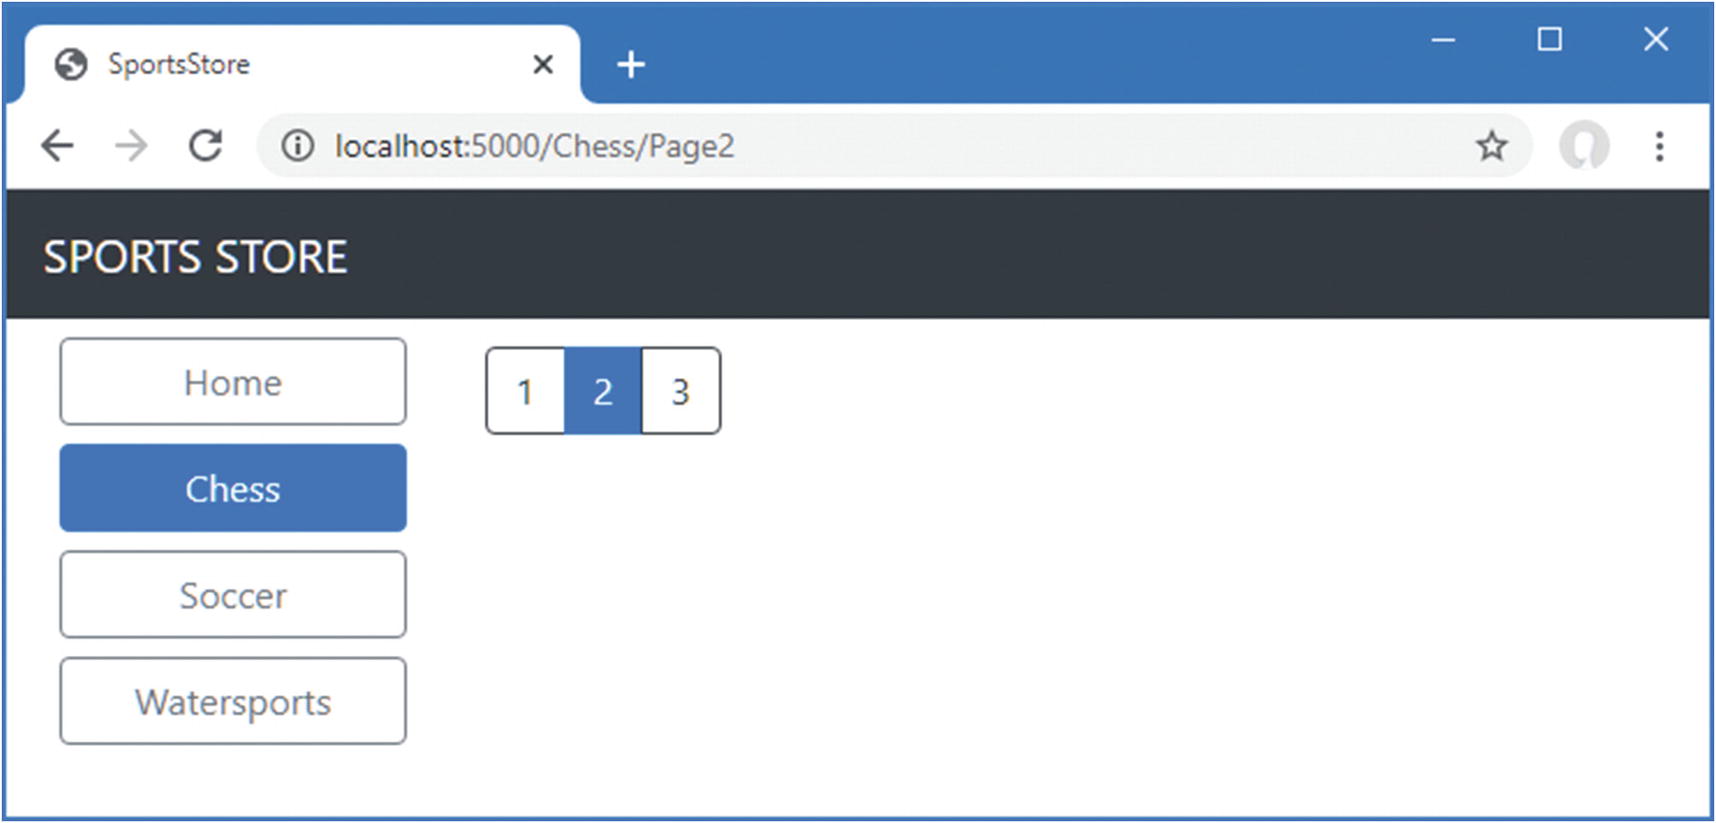
Highlighting the selected category

Correcting the Page Count

I need to correct the page links so that they work correctly when a category is selected. Currently, the number of page links is determined by the total number of products in the repository and not the number of products in the selected category. This means that the customer can click the link for page 2 of the Chess category and end up with an empty page because there are not enough chess products to fill two pages. You can see the problem in Figure 8-6.
../images/338050_8_En_8_Chapter/338050_8_En_8_Fig6_HTML.jpg
Figure 8-6.

Displaying the wrong page links when a category is selected

I can fix this by updating the Index action method in the Home controller so that the pagination information takes the categories into account, as shown in Listing 8-12.
using Microsoft.AspNetCore.Mvc;
using SportsStore.Models;
using System.Linq;
using SportsStore.Models.ViewModels;
namespace SportsStore.Controllers {
    public class HomeController : Controller {
        private IStoreRepository repository;
        public int PageSize = 4;
        public HomeController(IStoreRepository repo) {
            repository = repo;
        }
        public ViewResult Index(string category, int productPage = 1)
            => View(new ProductsListViewModel {
                Products = repository.Products
                    .Where(p => category == null || p.Category == category)
                    .OrderBy(p => p.ProductID)
                    .Skip((productPage - 1) * PageSize)
                    .Take(PageSize),
                PagingInfo = new PagingInfo {
                    CurrentPage = productPage,
                    ItemsPerPage = PageSize,
                    TotalItems = category == null ?
                        repository.Products.Count() :
                        repository.Products.Where(e =>
                            e.Category == category).Count()
                },
                CurrentCategory = category
            });
    }
}
Listing 8-12.

Creating Category Pagination Data in the HomeController.cs File in the SportsStore/Controllers Folder

If a category has been selected, I return the number of items in that category; if not, I return the total number of products. Restart ASP.NET Core and request http://localhost:5000 to see the changes when a category is selected, as shown in Figure 8-7.
../images/338050_8_En_8_Chapter/338050_8_En_8_Fig7_HTML.jpg
Figure 8-7.

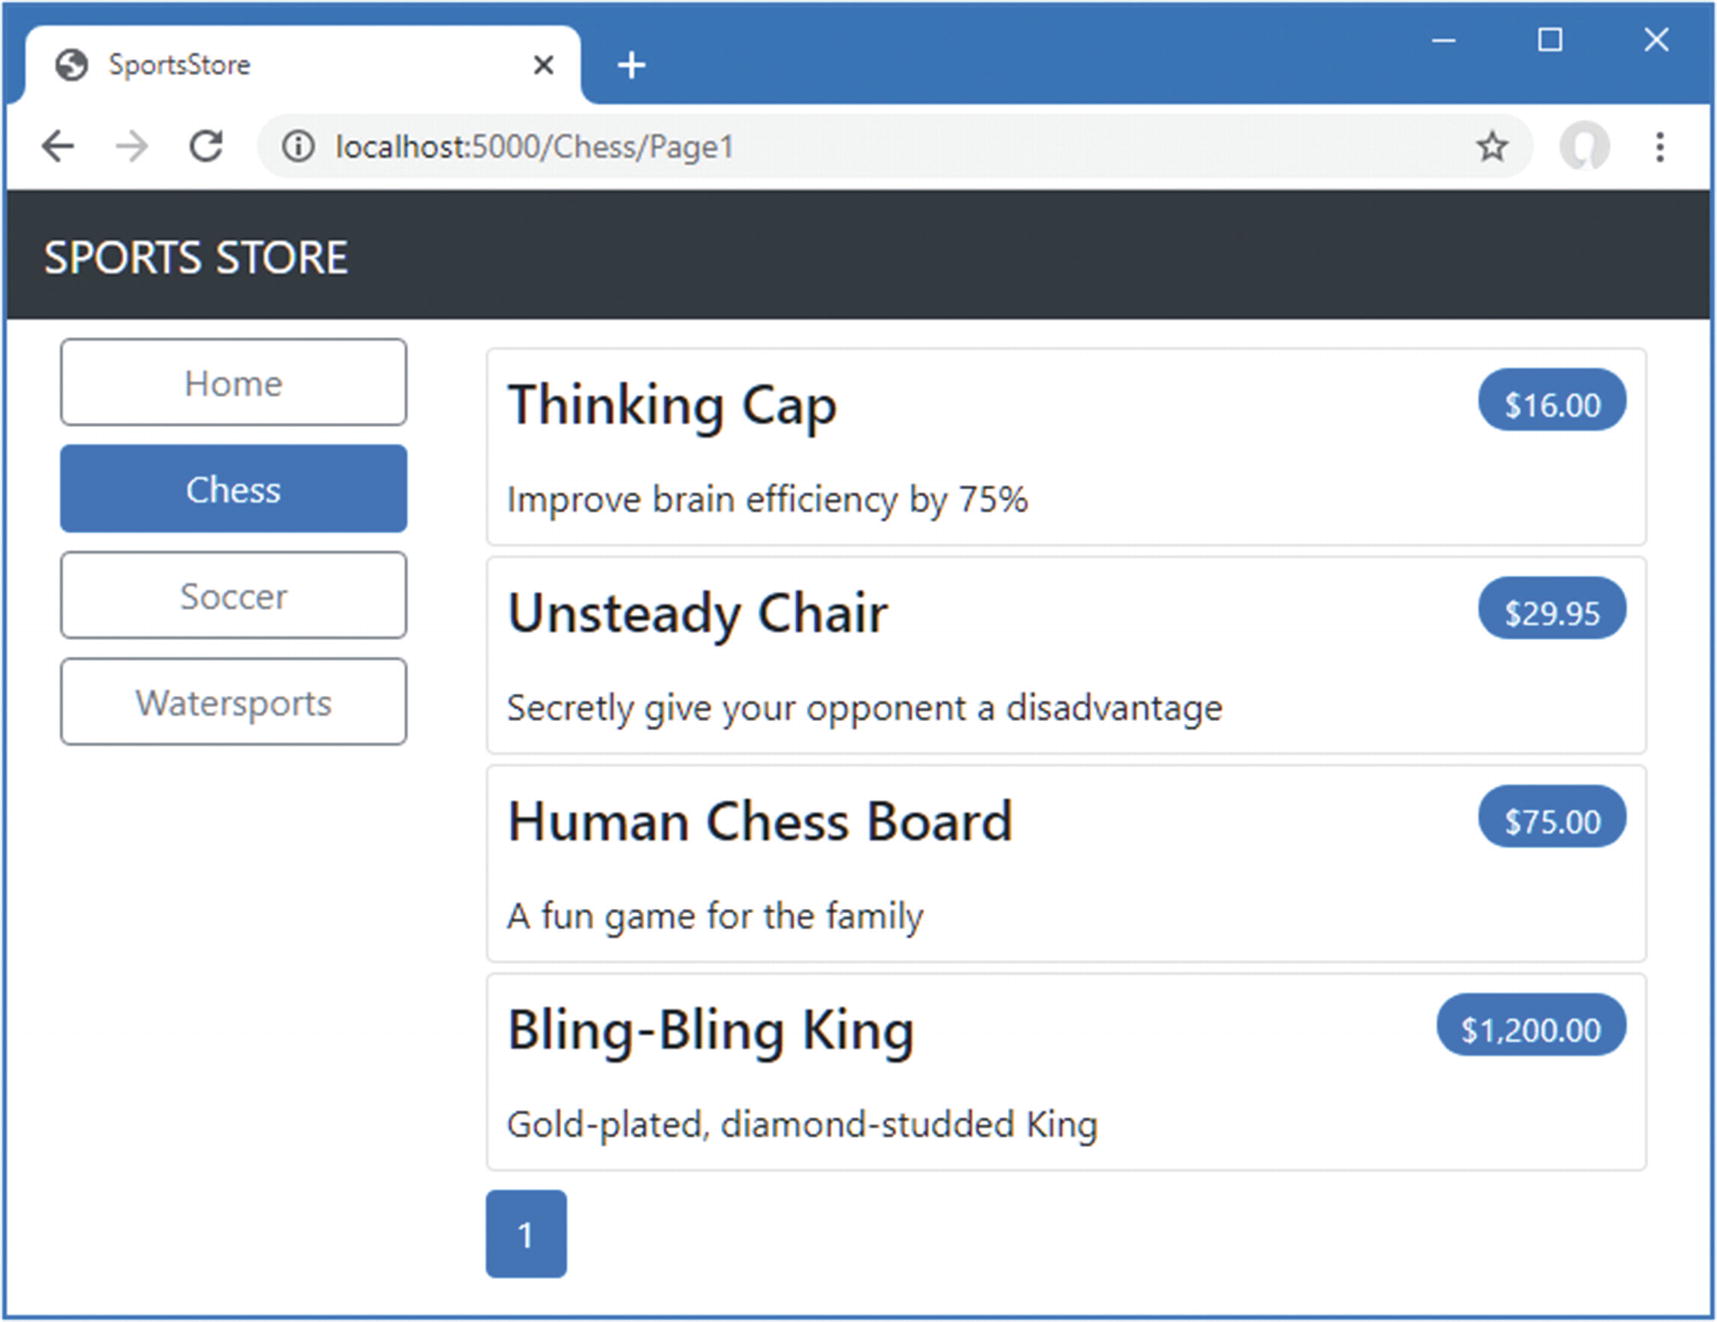
Displaying category-specific page counts

Unit Test: Category-Specific Product Counts
Testing that I am able to generate the current product count for different categories is simple. I create a mock repository that contains known data in a range of categories and then call the List action method requesting each category in turn. Here is the unit test method that I added to the HomeControllerTests class (you will need to import the System namespace for this test):
...
[Fact]
public void Generate_Category_Specific_Product_Count() {
    // Arrange
    Mock<IStoreRepository> mock = new Mock<IStoreRepository>();
    mock.Setup(m => m.Products).Returns((new Product[] {
        new Product {ProductID = 1, Name = "P1", Category = "Cat1"},
        new Product {ProductID = 2, Name = "P2", Category = "Cat2"},
        new Product {ProductID = 3, Name = "P3", Category = "Cat1"},
        new Product {ProductID = 4, Name = "P4", Category = "Cat2"},
        new Product {ProductID = 5, Name = "P5", Category = "Cat3"}
    }).AsQueryable<Product>());
    HomeController target = new HomeController(mock.Object);
    target.PageSize = 3;
    Func<ViewResult, ProductsListViewModel> GetModel = result =>
        result?.ViewData?.Model as ProductsListViewModel;
    // Action
    int? res1 = GetModel(target.Index("Cat1"))?.PagingInfo.TotalItems;
    int? res2 = GetModel(target.Index("Cat2"))?.PagingInfo.TotalItems;
    int? res3 = GetModel(target.Index("Cat3"))?.PagingInfo.TotalItems;
    int? resAll = GetModel(target.Index(null))?.PagingInfo.TotalItems;
    // Assert
    Assert.Equal(2, res1);
    Assert.Equal(2, res2);
    Assert.Equal(1, res3);
    Assert.Equal(5, resAll);
}
...

Notice that I also call the Index method, specifying no category, to make sure I get the correct total count as well.

Building the Shopping Cart

The application is progressing nicely, but I cannot sell any products until I implement a shopping cart. In this section, I will create the shopping cart experience shown in Figure 8-8. This will be familiar to anyone who has ever made a purchase online.
../images/338050_8_En_8_Chapter/338050_8_En_8_Fig8_HTML.jpg
Figure 8-8.

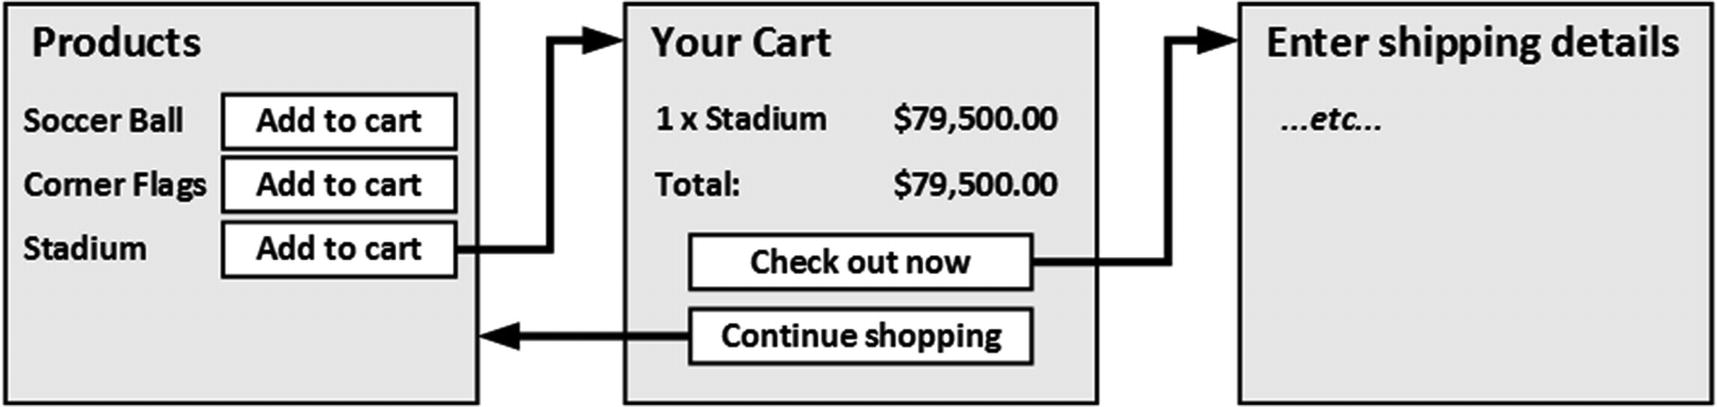
The basic shopping cart flow

An Add To Cart button will be displayed alongside each of the products in the catalog. Clicking this button will show a summary of the products the customer has selected so far, including the total cost. At this point, the user can click the Continue Shopping button to return to the product catalog or click the Checkout Now button to complete the order and finish the shopping session.

Configuring Razor Pages

So far, I have used the MVC Framework to define the SportsStore project features. For variety, I am going to use Razor Pages—another application framework supported by ASP.NET Core—to implement the shopping cart. Listing 8-13 configures the Startup class to enable Razor Pages in the SportsStore application.
using System;
using System.Collections.Generic;
using System.Linq;
using System.Threading.Tasks;
using Microsoft.AspNetCore.Builder;
using Microsoft.AspNetCore.Hosting;
using Microsoft.AspNetCore.Http;
using Microsoft.Extensions.DependencyInjection;
using Microsoft.Extensions.Hosting;
using Microsoft.Extensions.Configuration;
using Microsoft.EntityFrameworkCore;
using SportsStore.Models;
namespace SportsStore {
    public class Startup {
        public Startup(IConfiguration config) {
            Configuration = config;
        }
        private IConfiguration Configuration { get; set; }
        public void ConfigureServices(IServiceCollection services) {
            services.AddControllersWithViews();
            services.AddDbContext<StoreDbContext>(opts => {
                opts.UseSqlServer(
                    Configuration["ConnectionStrings:SportsStoreConnection"]);
            });
            services.AddScoped<IStoreRepository, EFStoreRepository>();
            services.AddRazorPages();
        }
        public void Configure(IApplicationBuilder app, IWebHostEnvironment env) {
            app.UseDeveloperExceptionPage();
            app.UseStatusCodePages();
            app.UseStaticFiles();
            app.UseRouting();
            app.UseEndpoints(endpoints => {
                endpoints.MapControllerRoute("catpage",
                    "{category}/Page{productPage:int}",
                    new { Controller = "Home", action = "Index" });
                endpoints.MapControllerRoute("page", "Page{productPage:int}",
                    new { Controller = "Home", action = "Index", productPage = 1 });
                endpoints.MapControllerRoute("category", "{category}",
                    new { Controller = "Home", action = "Index", productPage = 1 });
                endpoints.MapControllerRoute("pagination",
                    "Products/Page{productPage}",
                    new { Controller = "Home", action = "Index", productPage = 1 });
                endpoints.MapDefaultControllerRoute();
                endpoints.MapRazorPages();
            });
            SeedData.EnsurePopulated(app);
        }
    }
}
Listing 8-13.

Enabling Razor Pages in the Startup.cs File in the SportsStore Folder

The AddRazorPages method sets up the services used by Razor Pages, and the MapRazorPages method registers Razor Pages as endpoints that the URL routing system can use to handle requests.

Add a folder named Pages, which is the conventional location for Razor Pages, to the SportsStore project. Add a Razor View Imports file named _ViewImports.cshtml to the Pages folder with the content shown in Listing 8-14. These expressions set the namespace that the Razor Pages will belong to and allow the SportsStore classes to be used in Razor Pages without needing to specify their namespace.
@namespace SportsStore.Pages
@using Microsoft.AspNetCore.Mvc.RazorPages
@using SportsStore.Models
@using SportsStore.Infrastructure
@addTagHelper *, Microsoft.AspNetCore.Mvc.TagHelpers
Listing 8-14.

The Contents of the _ViewImports.cshtml File in the SportsStore/Pages Folder

Next, add a Razor View Start file named _ViewStart.cshtml to the Pages folder, with the content shown in Listing 8-15. Razor Pages have their own configuration files, and this one specifies that the Razor Pages in the SportsStore project will use a layout file named _CartLayout by default.
@{
    Layout = "_CartLayout";
}
Listing 8-15.

The Contents of the _ViewStart.cshtml File in the SportsStore/Pages Folder

Finally, to provide the layout the Razor Pages will use, add a Razor View named _CartLayout.cshtml to the Pages folder with the content shown in Listing 8-16.
<!DOCTYPE html>
<html>
<head>
    <meta name="viewport" content="width=device-width" />
    <title>SportsStore</title>
    <link href="/lib/twitter-bootstrap/css/bootstrap.min.css" rel="stylesheet" />
</head>
<body>
    <div class="bg-dark text-white p-2">
        <span class="navbar-brand ml-2">SPORTS STORE</span>
    </div>
    <div class="m-1 p-1">
            @RenderBody()
    </div>
</body>
</html>
Listing 8-16.

The Contents of the _CartLayout.cshtml File in the SportsStore/Pages Folder

Creating a Razor Page

If you are using Visual Studio, use the Razor Page template item and set the item name to Cart.cshtml. This will create a Cart.cshtml file and a Cart.cshtml.cs class file. Replace the contents of the file with those shown in Listing 8-17. If you are using Visual Studio Code, just create a Cart.cshtml file with the content shown in Listing 8-17.
@page
<h4>This is the Cart Page</h4>
Listing 8-17.

The Contents of the Cart.cshtml File in the SportsStore/Pages Folder

Restart ASP.NET Core and request http://localhost:5000/cart to see the placeholder content from Listing 8-17, which is shown in Figure 8-9. Notice that I have not had to register the page and that the mapping between the /cart URL path and the Razor Page has been handled automatically.
../images/338050_8_En_8_Chapter/338050_8_En_8_Fig9_HTML.jpg
Figure 8-9.

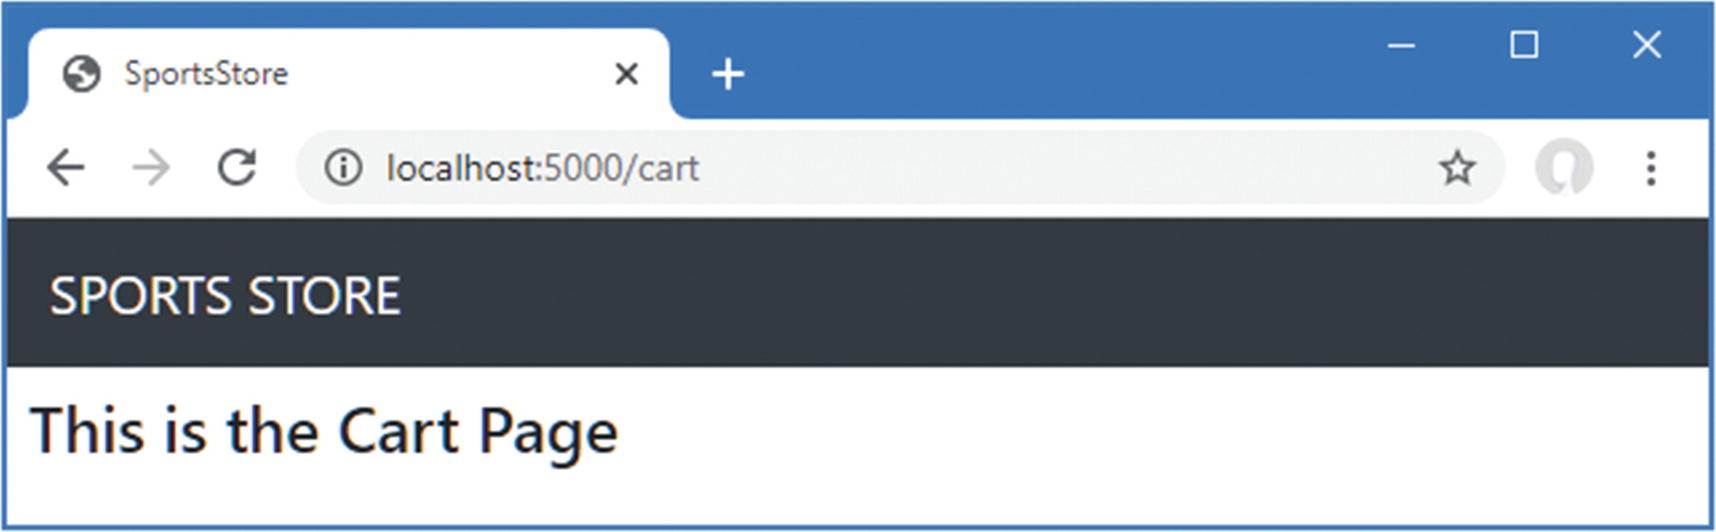
Placeholder content from a Razor Page

Creating the Add To Cart Buttons

I have some preparation to do before I can implement the cart feature. First, I need to create the buttons that will add products to the cart. To prepare for this, I added a class file called UrlExtensions.cs to the Infrastructure folder and defined the extension method shown in Listing 8-18.
using Microsoft.AspNetCore.Http;
namespace SportsStore.Infrastructure {
    public static class UrlExtensions {
        public static string PathAndQuery(this HttpRequest request) =>
            request.QueryString.HasValue
                ? $"{request.Path}{request.QueryString}"
                : request.Path.ToString();
    }
}
Listing 8-18.

The Contents of the UrlExtensions.cs File in the SportsStore/Infrastructure Folder

The PathAndQuery extension method operates on the HttpRequest class, which ASP.NET Core uses to describe an HTTP request. The extension method generates a URL that the browser will be returned to after the cart has been updated, taking into account the query string, if there is one. In Listing 8-19, I have added the namespace that contains the extension method to the view imports file so that I can use it in the partial view.

Note

This is the view imports file in the Views folder and not the one added to the Pages folder.

@using SportsStore.Models
@using SportsStore.Models.ViewModels
@using SportsStore.Infrastructure
@addTagHelper *, Microsoft.AspNetCore.Mvc.TagHelpers
@addTagHelper *, SportsStore
Listing 8-19.

Adding a Namespace in the _ViewImports.cshtml File in the SportsStore/Views Folder

In Listing 8-20, I have updated the partial view that describes each product so that it contains an Add to Cart button.
@model Product
<div class="card card-outline-primary m-1 p-1">
    <div class="bg-faded p-1">
        <h4>
            @Model.Name
            <span class="badge badge-pill badge-primary" style="float:right">
                <small>@Model.Price.ToString("c")</small>
            </span>
        </h4>
    </div>
    <form id="@Model.ProductID" asp-page="/Cart" method="post">
        <input type="hidden" asp-for="ProductID" />
        <input type="hidden" name="returnUrl"
               value="@ViewContext.HttpContext.Request.PathAndQuery()" />
        <span class="card-text p-1">
            @Model.Description
            <button type="submit"
                class="btn btn-success btn-sm pull-right" style="float:right">
                Add To Cart
            </button>
        </span>
    </form>
</div>
Listing 8-20.

Adding the Buttons to the ProductSummary.cshtml File View in the SportsStore/Views/Shared Folder

I have added a form element that contains hidden input elements specifying the ProductID value from the view model and the URL that the browser should be returned to after the cart has been updated. The form element and one of the input elements are configured using built-in tag helpers, which are a useful way of generating forms that contain model values and that target controllers or Razor Pages, as described in Chapter 27. The other input element uses the extension method I created to set the return URL. I also added a button element that will submit the form to the application.

Note

Notice that I have set the method attribute on the form element to post, which instructs the browser to submit the form data using an HTTP POST request. You can change this so that forms use the GET method, but you should think carefully about doing so. The HTTP specification requires that GET requests must be idempotent, meaning that they must not cause changes, and adding a product to a cart is definitely a change.

Enabling Sessions

I am going to store details of a user’s cart using session state, which is data associated with a series of requests made by a user. ASP.NET provides a range of different ways to store session state, including storing it in memory, which is the approach that I am going to use. This has the advantage of simplicity, but it means that the session data is lost when the application is stopped or restarted. Enabling sessions requires adding services and middleware in the Startup class, as shown in Listing 8-21.
using System;
using System.Collections.Generic;
using System.Linq;
using System.Threading.Tasks;
using Microsoft.AspNetCore.Builder;
using Microsoft.AspNetCore.Hosting;
using Microsoft.AspNetCore.Http;
using Microsoft.Extensions.DependencyInjection;
using Microsoft.Extensions.Hosting;
using Microsoft.Extensions.Configuration;
using Microsoft.EntityFrameworkCore;
using SportsStore.Models;
namespace SportsStore {
    public class Startup {
        public Startup(IConfiguration config) {
            Configuration = config;
        }
        private IConfiguration Configuration { get; set; }
        public void ConfigureServices(IServiceCollection services) {
            services.AddControllersWithViews();
            services.AddDbContext<StoreDbContext>(opts => {
                opts.UseSqlServer(
                    Configuration["ConnectionStrings:SportsStoreConnection"]);
            });
            services.AddScoped<IStoreRepository, EFStoreRepository>();
            services.AddRazorPages();
            services.AddDistributedMemoryCache();
            services.AddSession();
        }
        public void Configure(IApplicationBuilder app, IWebHostEnvironment env) {
            app.UseDeveloperExceptionPage();
            app.UseStatusCodePages();
            app.UseStaticFiles();
            app.UseSession();
            app.UseRouting();
            app.UseEndpoints(endpoints => {
                endpoints.MapControllerRoute("catpage",
                    "{category}/Page{productPage:int}",
                    new { Controller = "Home", action = "Index" });
                endpoints.MapControllerRoute("page", "Page{productPage:int}",
                    new { Controller = "Home", action = "Index", productPage = 1 });
                endpoints.MapControllerRoute("category", "{category}",
                    new { Controller = "Home", action = "Index", productPage = 1 });
                endpoints.MapControllerRoute("pagination",
                    "Products/Page{productPage}",
                    new { Controller = "Home", action = "Index", productPage = 1 });
                endpoints.MapDefaultControllerRoute();
                endpoints.MapRazorPages();
            });
            SeedData.EnsurePopulated(app);
        }
    }
}
Listing 8-21.

Enabling Sessions in the Startup.cs File in the SportsStore Folder

The AddDistributedMemoryCache method call sets up the in-memory data store. The AddSession method registers the services used to access session data, and the UseSession method allows the session system to automatically associate requests with sessions when they arrive from the client.

Implementing the Cart Feature

Now that the preparations are complete, I can implement the cart features. I started by adding a class file called Cart.cs to the Models folder in the SportsStore project and used it to define the classes shown in Listing 8-22.
using System.Collections.Generic;
using System.Linq;
namespace SportsStore.Models {
    public class Cart {
        public List<CartLine> Lines { get; set; } = new List<CartLine>();
        public void AddItem(Product product, int quantity) {
            CartLine line = Lines
                .Where(p => p.Product.ProductID == product.ProductID)
                .FirstOrDefault();
            if (line == null) {
                Lines.Add(new CartLine {
                    Product = product,
                    Quantity = quantity
                });
            } else {
                line.Quantity += quantity;
            }
        }
        public void RemoveLine(Product product) =>
            Lines.RemoveAll(l => l.Product.ProductID == product.ProductID);
        public decimal ComputeTotalValue() =>
            Lines.Sum(e => e.Product.Price * e.Quantity);
        public void Clear() => Lines.Clear();
    }
    public class CartLine {
        public int CartLineID { get; set; }
        public Product Product { get; set; }
        public int Quantity { get; set; }
    }
}
Listing 8-22.

The Contents of the Cart.cs File in the SportsStore/Models Folder

The Cart class uses the CartLine class, defined in the same file, to represent a product selected by the customer and the quantity the user wants to buy. I defined methods to add an item to the cart, remove a previously added item from the cart, calculate the total cost of the items in the cart, and reset the cart by removing all the items.

Unit Test: Testing The Cart

The Cart class is relatively simple, but it has a range of important behaviors that must work properly. A poorly functioning cart would undermine the entire SportsStore application. I have broken down the features and tested them individually. I created a new unit test file called CartTests.cs in the SportsStore.Tests project to contain these tests.

The first behavior relates to when I add an item to the cart. If this is the first time that a given Product has been added to the cart, I want a new CartLine to be added. Here is the test, including the unit test class definition:
using System.Linq;
using SportsStore.Models;
using Xunit;
namespace SportsStore.Tests {
    public class CartTests {
        [Fact]
        public void Can_Add_New_Lines() {
            // Arrange - create some test products
            Product p1 = new Product { ProductID = 1, Name = "P1" };
            Product p2 = new Product { ProductID = 2, Name = "P2" };
            // Arrange - create a new cart
            Cart target = new Cart();
            // Act
            target.AddItem(p1, 1);
            target.AddItem(p2, 1);
            CartLine[] results = target.Lines.ToArray();
            // Assert
            Assert.Equal(2, results.Length);
            Assert.Equal(p1, results[0].Product);
            Assert.Equal(p2, results[1].Product);
        }
    }
}
However, if the customer has already added a Product to the cart, I want to increment the quantity of the corresponding CartLine and not create a new one. Here is the test:
...
[Fact]
public void Can_Add_Quantity_For_Existing_Lines() {
    // Arrange - create some test products
    Product p1 = new Product { ProductID = 1, Name = "P1" };
    Product p2 = new Product { ProductID = 2, Name = "P2" };
    // Arrange - create a new cart
    Cart target = new Cart();
    // Act
    target.AddItem(p1, 1);
    target.AddItem(p2, 1);
    target.AddItem(p1, 10);
    CartLine[] results = target.Lines
        .OrderBy(c => c.Product.ProductID).ToArray();
    // Assert
    Assert.Equal(2, results.Length);
    Assert.Equal(11, results[0].Quantity);
    Assert.Equal(1, results[1].Quantity);
}
...
I also need to check that users can change their mind and remove products from the cart. This feature is implemented by the RemoveLine method. Here is the test:
...
[Fact]
public void Can_Remove_Line() {
    // Arrange - create some test products
    Product p1 = new Product { ProductID = 1, Name = "P1" };
    Product p2 = new Product { ProductID = 2, Name = "P2" };
    Product p3 = new Product { ProductID = 3, Name = "P3" };
    // Arrange - create a new cart
    Cart target = new Cart();
    // Arrange - add some products to the cart
    target.AddItem(p1, 1);
    target.AddItem(p2, 3);
    target.AddItem(p3, 5);
    target.AddItem(p2, 1);
    // Act
    target.RemoveLine(p2);
    // Assert
    Assert.Empty(target.Lines.Where(c => c.Product == p2));
    Assert.Equal(2, target.Lines.Count());
}
...
The next behavior I want to test is the ability to calculate the total cost of the items in the cart. Here’s the test for this behavior:
...
[Fact]
public void Calculate_Cart_Total() {
    // Arrange - create some test products
    Product p1 = new Product { ProductID = 1, Name = "P1", Price = 100M };
    Product p2 = new Product { ProductID = 2, Name = "P2", Price = 50M };
    // Arrange - create a new cart
    Cart target = new Cart();
    // Act
    target.AddItem(p1, 1);
    target.AddItem(p2, 1);
    target.AddItem(p1, 3);
    decimal result = target.ComputeTotalValue();
    // Assert
    Assert.Equal(450M, result);
}
...
The final test is simple. I want to ensure that the contents of the cart are properly removed when reset. Here is the test:
...
[Fact]
public void Can_Clear_Contents() {
    // Arrange - create some test products
    Product p1 = new Product { ProductID = 1, Name = "P1", Price = 100M };
    Product p2 = new Product { ProductID = 2, Name = "P2", Price = 50M };
    // Arrange - create a new cart
    Cart target = new Cart();
    // Arrange - add some items
    target.AddItem(p1, 1);
    target.AddItem(p2, 1);
    // Act - reset the cart
    target.Clear();
    // Assert
    Assert.Empty(target.Lines);
}
...

Sometimes, as in this case, the code required to test the functionality of a class is longer and more complex than the class itself. Do not let that put you off writing the unit tests. Defects in simple classes can have huge impacts, especially ones that play such an important role as Cart does in the example application.

Defining Session State Extension Methods

The session state feature in ASP.NET Core stores only int, string, and byte[] values. Since I want to store a Cart object, I need to define extension methods to the ISession interface, which provides access to the session state data to serialize Cart objects into JSON and convert them back. I added a class file called SessionExtensions.cs to the Infrastructure folder and defined the extension methods shown in Listing 8-23.
using Microsoft.AspNetCore.Http;
using System.Text.Json;
namespace SportsStore.Infrastructure {
    public static class SessionExtensions {
        public static void SetJson(this ISession session, string key, object value) {
            session.SetString(key, JsonSerializer.Serialize(value));
        }
        public static T GetJson<T>(this ISession session, string key) {
            var sessionData = session.GetString(key);
            return sessionData == null
                ? default(T) : JsonSerializer.Deserialize<T>(sessionData);
        }
    }
}
Listing 8-23.

The Contents of the SessionExtensions.cs File in the SportsStore/Infrastructure Folder

These methods serialize objects into the JavaScript Object Notation format, making it easy to store and retrieve Cart objects.

Completing the Razor Page

The Cart Razor Page will receive the HTTP POST request that the browser sends when the user clicks an Add To Cart button. It will use the request form data to get the Product object from the database and use it to update the user’s cart, which will be stored as session data for use by future requests. Listing 8-24 implements these features.
@page
@model CartModel
<h2>Your cart</h2>
<table class="table table-bordered table-striped">
    <thead>
        <tr>
            <th>Quantity</th>
            <th>Item</th>
            <th class="text-right">Price</th>
            <th class="text-right">Subtotal</th>
        </tr>
    </thead>
    <tbody>
        @foreach (var line in Model.Cart.Lines) {
            <tr>
                <td class="text-center">@line.Quantity</td>
                <td class="text-left">@line.Product.Name</td>
                <td class="text-right">@line.Product.Price.ToString("c")</td>
                <td class="text-right">
                    @((line.Quantity * line.Product.Price).ToString("c"))
                </td>
            </tr>
        }
    </tbody>
    <tfoot>
        <tr>
            <td colspan="3" class="text-right">Total:</td>
            <td class="text-right">
                @Model.Cart.ComputeTotalValue().ToString("c")
            </td>
        </tr>
    </tfoot>
</table>
<div class="text-center">
    <a class="btn btn-primary" href="@Model.ReturnUrl">Continue shopping</a>
</div>
Listing 8-24.

Handling Requests in the Cart.cshtml File in the SportsStore/Pages Folder

Razor Pages allow HTML content, Razor expressions, and code to be combined in a single file, as I explain in Chapter 23, but if you want to unit test a Razor Page, then you need to use a separate class file. If you are using Visual Studio, there will already be a class file named Cart.cshtml.cs in the Pages folder, which was created by the Razor Page template item. If you are using Visual Studio Code, you will need to create the class file separately. Use the class file, however it has been created, to define the class shown in Listing 8-25.
using Microsoft.AspNetCore.Mvc;
using Microsoft.AspNetCore.Mvc.RazorPages;
using SportsStore.Infrastructure;
using SportsStore.Models;
using System.Linq;
namespace SportsStore.Pages {
    public class CartModel : PageModel {
        private IStoreRepository repository;
        public CartModel(IStoreRepository repo) {
            repository = repo;
        }
        public Cart Cart { get; set; }
        public string ReturnUrl { get; set; }
        public void OnGet(string returnUrl) {
            ReturnUrl = returnUrl ?? "/";
            Cart = HttpContext.Session.GetJson<Cart>("cart") ?? new Cart();
        }
        public IActionResult OnPost(long productId, string returnUrl) {
            Product product = repository.Products
                .FirstOrDefault(p => p.ProductID == productId);
            Cart = HttpContext.Session.GetJson<Cart>("cart") ?? new Cart();
            Cart.AddItem(product, 1);
            HttpContext.Session.SetJson("cart", Cart);
            return RedirectToPage(new { returnUrl = returnUrl });
        }
    }
}
Listing 8-25.

The Contents of the Cart.cshtml.cs File in the SportsStore/Pages Folder

The class associated with a Razor Page is known as its page model class, and it defines handler methods that are invoked for different types of HTTP requests, which update state before rendering the view. The page model class in Listing 8-25, which is named CartModel, defines an OnPost hander method, which is invoked to handle HTTP POST requests. It does this by retrieving a Product from the database, retrieving the user’s Cart from the session data, and updating its content using the Product. The modified Cart is stored, and the browser is redirected to the same Razor Page, which it will do using a GET request (which prevents reloading the browser from triggering a duplicate POST request).

The GET request is handled by the OnGet handler method, which sets the values of the ReturnUrl and Cart properties, after which the Razor content section of the page is rendered. The expressions in the HTML content are evaluated using the CartModel as the view model object, which means that the values assigned to the ReturnUrl and Cart properties can be accessed within the expressions. The content generated by the Razor Page details the products added to the user’s cart and provides a button to navigate back to the point where the product was added to the cart.

The handler methods use parameter names that match the input elements in the HTML forms produced by the ProductSummary.cshtml view. This allows ASP.NET Core to associate incoming form POST variables with those parameters, meaning I do not need to process the form directly. This is known as model binding and is a powerful tool for simplifying development, as I explain in detail in Chapter 28.

Understanding Razor Pages

Razor Pages can feel a little odd when you first start using them, especially if you have previous experience with the MVC Framework features provided by ASP.NET Core. But Razor Pages are complementary to the MVC Framework, and I find myself using them alongside controllers and views because they are well-suited to self-contained features that don’t require the complexity of the MVC Framework. I describe Razor Pages in Chapter 23 and show their use alongside controllers throughout Part 3 and Part 4 of this book.

The result is that the basic functions of the shopping cart are in place. First, products are listed along with a button to add them to the cart, which you can see by restarting ASP.NET Core and requesting http://localhost:5000, as shown in Figure 8-10.
../images/338050_8_En_8_Chapter/338050_8_En_8_Fig10_HTML.jpg
Figure 8-10.

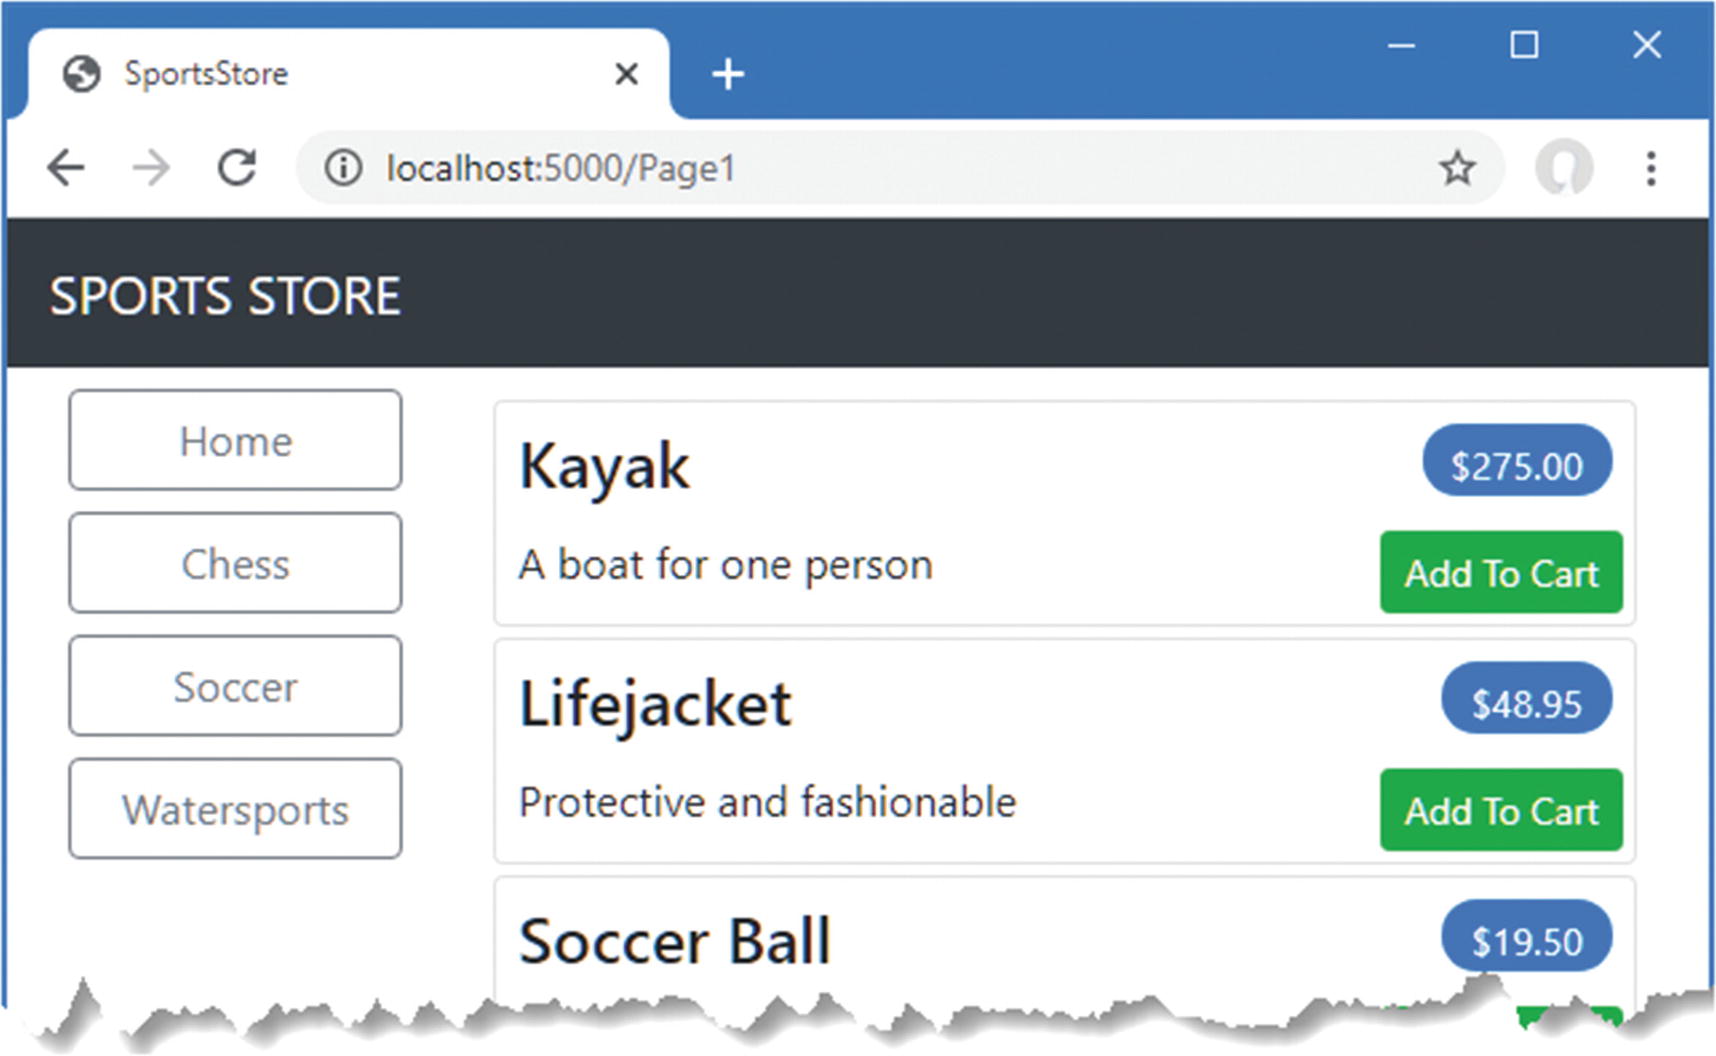
The Add To Cart buttons

Second, when the user clicks an Add To Cart button, the appropriate product is added to their cart, and a summary of the cart is displayed, as shown in Figure 8-11. Clicking the Continue Shopping button returns the user to the product page they came from.
../images/338050_8_En_8_Chapter/338050_8_En_8_Fig11_HTML.jpg
Figure 8-11.

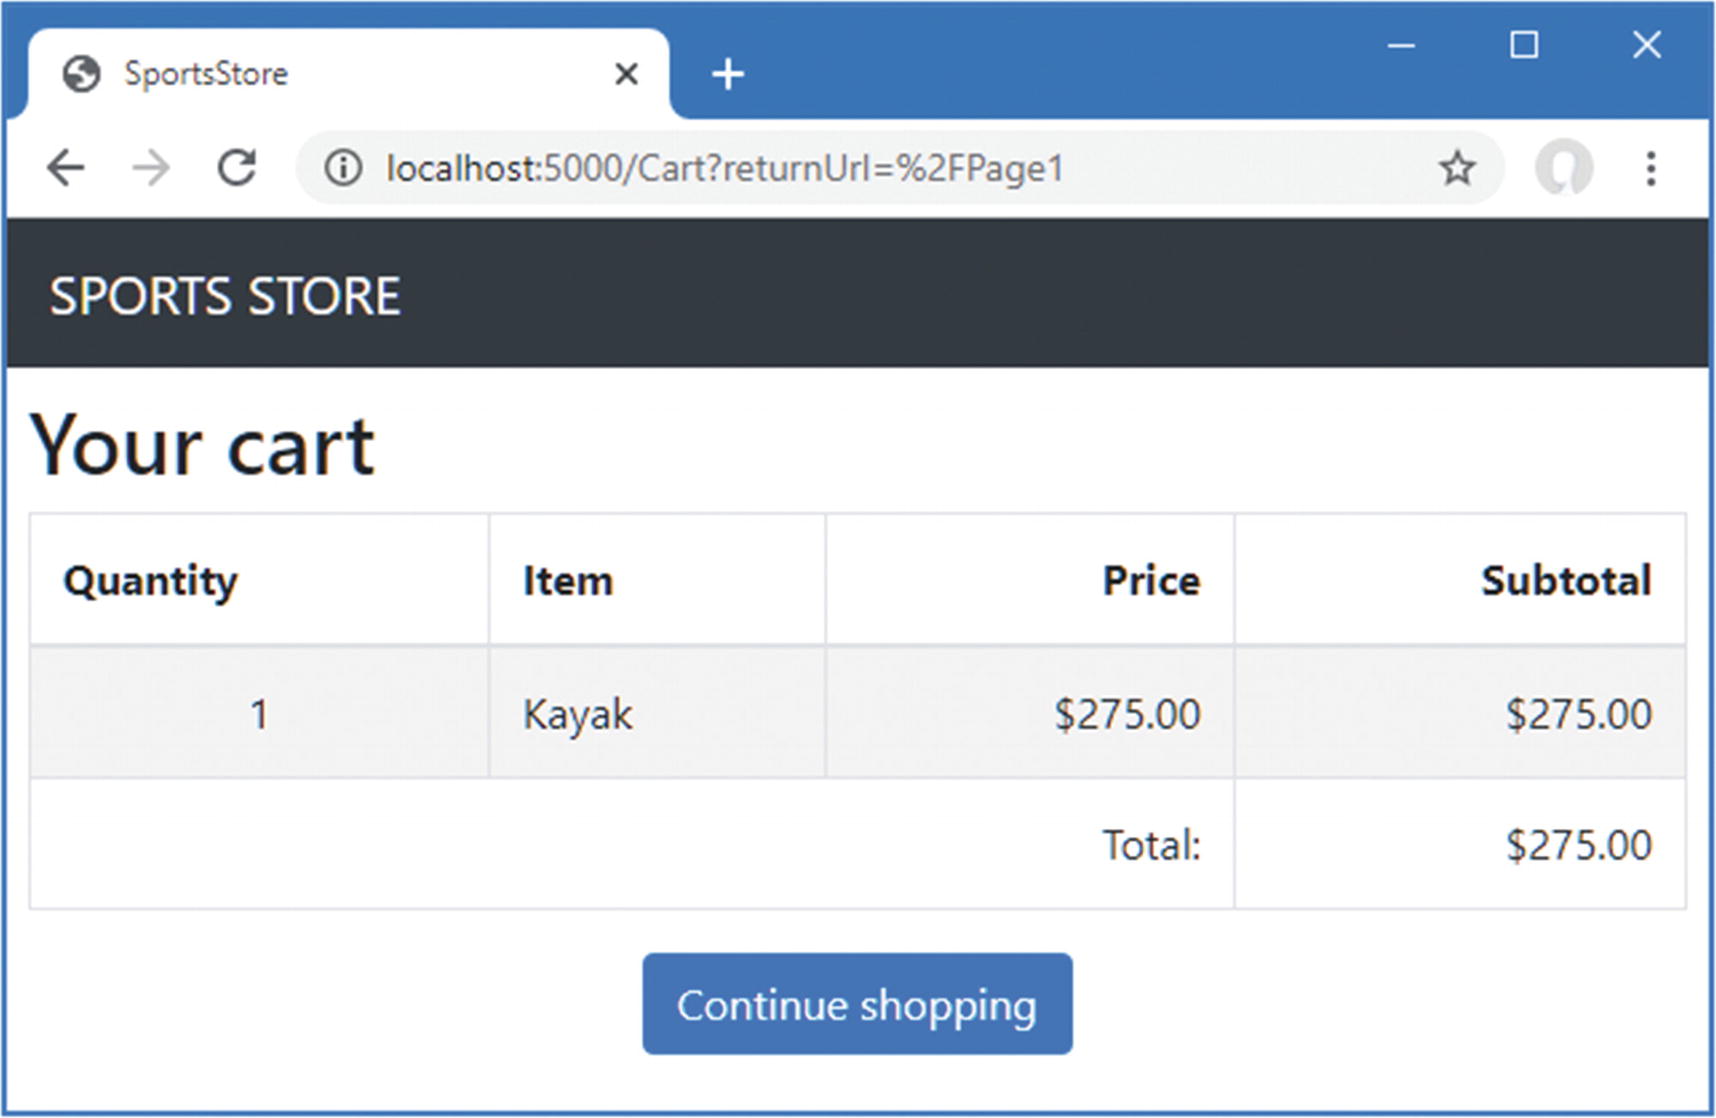
Displaying the contents of the shopping cart

Unit Testing: Razor Pages
Testing Razor Pages can require a lot of mocking to create the context objects that the page model class requires. To test the behavior of the OnGet method defined by the CartModel class, I added a class file named CartPageTests.cs to the SportsStore.Tests project and defined this test:
using Microsoft.AspNetCore.Http;
using Microsoft.AspNetCore.Mvc;
using Microsoft.AspNetCore.Mvc.RazorPages;
using Microsoft.AspNetCore.Routing;
using Moq;
using SportsStore.Models;
using SportsStore.Pages;
using System.Linq;
using System.Text;
using System.Text.Json;
using Xunit;
namespace SportsStore.Tests {
    public class CartPageTests {
        [Fact]
        public void Can_Load_Cart() {
            // Arrange
            // - create a mock repository
            Product p1 = new Product { ProductID = 1, Name = "P1" };
            Product p2 = new Product { ProductID = 2, Name = "P2" };
            Mock<IStoreRepository> mockRepo = new Mock<IStoreRepository>();
            mockRepo.Setup(m => m.Products).Returns((new Product[] {
                p1, p2
            }).AsQueryable<Product>());
            // - create a cart
            Cart testCart = new Cart();
            testCart.AddItem(p1, 2);
            testCart.AddItem(p2, 1);
            // - create a mock page context and session
            Mock<ISession> mockSession = new Mock<ISession>();
            byte[] data =
                Encoding.UTF8.GetBytes(JsonSerializer.Serialize(testCart));
            mockSession.Setup(c => c.TryGetValue(It.IsAny<string>(), out data));
            Mock<HttpContext> mockContext = new Mock<HttpContext>();
            mockContext.SetupGet(c => c.Session).Returns(mockSession.Object);
            // Action
            CartModel cartModel = new CartModel(mockRepo.Object) {
                PageContext = new PageContext(new ActionContext {
                    HttpContext = mockContext.Object,
                    RouteData = new RouteData(),
                    ActionDescriptor = new PageActionDescriptor()
                })
            };
            cartModel.OnGet("myUrl");
            //Assert
            Assert.Equal(2, cartModel.Cart.Lines.Count());
            Assert.Equal("myUrl", cartModel.ReturnUrl);
        }
    }
}

I am not going to describe these unit tests in detail because there is a simpler way to perform these tests, which I explain in the next chapter. The complexity in this test is mocking the ISession interface so that the page model class can use extension methods to retrieve a JSON representation of a Cart object. The ISession interface only stored byte arrays, and getting and deserializing a string is performed by extension methods. Once the mock objects are defined, they can be wrapped in context objects and used to configure an instance of the page model class, which can be subjected to tests.

The process of testing the OnPost method of the page model class means capturing the byte array that is passed to the ISession interface mock and then deserializing it to ensure that it contains the expected content. Here is the unit test I added to the CartTestsPage class:
...
[Fact]
public void Can_Update_Cart() {
    // Arrange
    // - create a mock repository
    Mock<IStoreRepository> mockRepo = new Mock<IStoreRepository>();
    mockRepo.Setup(m => m.Products).Returns((new Product[] {
        new Product { ProductID = 1, Name = "P1" }
    }).AsQueryable<Product>());
    Cart testCart = new Cart();
    Mock<ISession> mockSession = new Mock<ISession>();
    mockSession.Setup(s => s.Set(It.IsAny<string>(), It.IsAny<byte[]>()))
        .Callback<string, byte[]>((key, val) => {
            testCart =
                JsonSerializer.Deserialize<Cart>(Encoding.UTF8.GetString(val));
        });
    Mock<HttpContext> mockContext = new Mock<HttpContext>();
    mockContext.SetupGet(c => c.Session).Returns(mockSession.Object);
    // Action
    CartModel cartModel = new CartModel(mockRepo.Object) {
        PageContext = new PageContext(new ActionContext {
            HttpContext = mockContext.Object,
            RouteData = new RouteData(),
            ActionDescriptor = new PageActionDescriptor()
        })
    };
    cartModel.OnPost(1, "myUrl");
    //Assert
    Assert.Single(testCart.Lines);
    Assert.Equal("P1", testCart.Lines.First().Product.Name);
    Assert.Equal(1, testCart.Lines.First().Quantity);
}
...

Patience and a little experimentation are required to write effective unit tests, especially when the feature you are testing operates on the context objects that ASP.NET Core provides.

Summary

In this chapter, I started to flesh out the customer-facing parts of the SportsStore app. I provided the means by which the user can navigate by category and put the basic building blocks in place for adding items to a shopping cart. I have more work to do, and I continue the development of the application in the next chapter.

..................Content has been hidden....................

You can't read the all page of ebook, please click here login for view all page.
Reset
18.118.23.147