Tag helpers are C# classes that transform HTML elements in a view or page. Common uses for tag helpers include generating URLs for forms using the application’s routing configuration, ensuring that elements of a specific type are styled consistently, and replacing custom shorthand elements with commonly used fragments of content. In this chapter, I describe how tag helpers work and how custom tag helpers are created and applied. In Chapter 26, I describe the built-in tag helpers, and in Chapter 27, I use tag helpers to explain how HTML forms are created. Table 25-1 puts tag helpers in context.
Table 25-1.
Putting Tag Helpers in Context
Question
Answer
What are they?
Tag helpers are classes that manipulate HTML elements, either to change them in some way, to supplement them with additional content, or to replace them entirely with new content.
Why are they useful?
Tag helpers allow view content to be generated or transformed using C# logic, ensuring that the HTML sent to the client reflects the state of the application.
How are they used?
The HTML elements to which tag helpers are applied are selected based on the name of the class or with the HTMLTargetElement attribute. When a view is rendered, elements are transformed by tag helpers and included in the HTML sent to the client.
Are there any pitfalls or limitations?
It can be easy to get carried away and generate complex sections of HTML content using tag helpers, which is something that is more readily achieved using view components, described in Chapter 24.
Are there any alternatives?
You don’t have to use tag helpers, but they make it easy to generate complex HTML in ASP.NET Core applications.
Define a class that is derived from the TagHelper class
1–7
Controlling the scope of a tag helper
Alter the range of elements specified by the HtmlTargetElement attribute
8–11
Creating custom HTML elements that are replaced with content
Use shorthand elements
12, 13
Creating elements programmatically
Use the TagBuilder class
14
Controlling where content is inserted
Use the prepend and append features
15–18
Getting context data
Use the context object
19, 20
Operating on the view model or page model
Use a model expression
21–24
Creating coordinating tag helpers
Use the Items property
25–26
Suppressing content
Use the SuppressOutput method
27, 28
Defining tag helper as services
Create tag helper components
29–32
Preparing for This Chapter
This chapter uses the WebApp project from Chapter 24. To prepare for this chapter, replace the contents of the Startup.cs file with those in Listing 25-1, removing some of the configuration statements used in earlier chapters.
Tip
You can download the example project for this chapter—and for all the other chapters in this book—from https://github.com/apress/pro-asp.net-core-3. See Chapter 1 for how to get help if you have problems running the examples.
using Microsoft.AspNetCore.Builder;
using Microsoft.Extensions.DependencyInjection;
using Microsoft.Extensions.Configuration;
using Microsoft.EntityFrameworkCore;
using WebApp.Models;
namespace WebApp {
public class Startup {
public Startup(IConfiguration config) {
Configuration = config;
}
public IConfiguration Configuration { get; set; }
public void ConfigureServices(IServiceCollection services) {
The Contents of the Index.cshtml File in the Views/Home Folder
The view in Listing 25-2 relies on a new layout. Add a Razor view file named _SimpleLayout.cshtml in the Views/Shared folder with the content shown in Listing 25-3.
The Contents of the _SimpleLayout.cshtml File in the Views/Shared Folder
Dropping the Database
Open a new PowerShell command prompt, navigate to the folder that contains the WebApp.csproj file, and run the command shown in Listing 25-4 to drop the database.
dotnet ef database drop --force
Listing 25-4.
Dropping the Database
Running the Example Application
Select Start Without Debugging or Run Without Debugging from the Debug menu or use the PowerShell command prompt to run the command shown in Listing 25-5.
dotnet run
Listing 25-5.
Running the Example Application
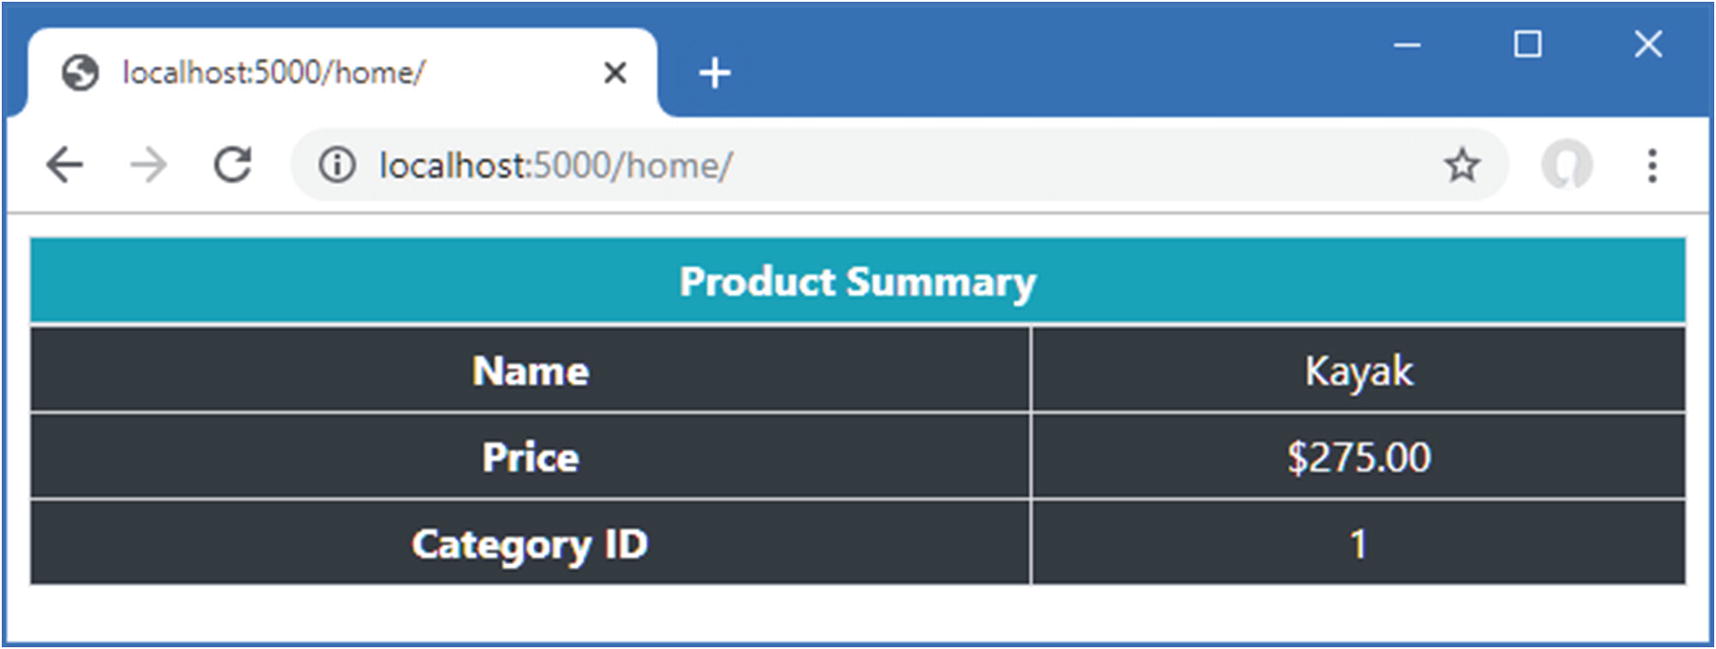
Use a browser to request http://localhost:5000/home, which will produce the response shown in Figure 25-1.
Figure 25-1.
Running the example application
Creating a Tag Helper
The best way to understand tag helpers is to create one, which reveals how they operate and how they fit into an ASP.NET Core application. In the sections that follow, I go through the process of creating and applying a tag helper that will set the Bootstrap CSS classes for a tr element so that an element like this:
...
<tr tr-color="primary">
<th colspan="2">Product Summary</th>
</tr>
...
will be transformed into this:
...
<tr class="bg-primary text-white text-center">
<th colspan="2">Product Summary</th>
</tr>
...
The tag helper will recognize the tr-color attribute and use its value to set the class attribute on the element sent to the browser. This isn’t the most dramatic—or useful—transformation, but it provides a foundation for explaining how tag helpers work.
Defining the Tag Helper Class
Tag helpers can be defined anywhere in the project, but it helps to keep them together because they need to be registered before they can be used. Create the WebApp/TagHelpers folder and add to it a class file named TrTagHelper.cs with the code shown in Listing 25-6.
using Microsoft.AspNetCore.Razor.TagHelpers;
namespace WebApp.TagHelpers {
public class TrTagHelper: TagHelper {
public string BgColor { get; set; } = "dark";
public string TextColor { get; set; } = "white";
public override void Process(TagHelperContext context,
TagHelperOutput output) {
output.Attributes.SetAttribute("class",
$"bg-{BgColor} text-center text-{TextColor}");
}
}
}
Listing 25-6.
The Contents of the TrTagHelper.cs File in the TagHelpers Folder
Tag helpers are derived from the TagHelper class, which is defined in the Microsoft.AspNetCore.Razor.TagHelpers namespace. The TagHelper class defines a Process method, which is overridden by subclasses to implement the behavior that transforms elements.
The name of the tag helper combines the name of the element it transforms followed by TagHelper. In the case of the example, the class name TrTagHelper indicates this is a tag helper that operates on tr elements. The range of elements to which a tag helper can be applied can be broadened or narrowed using attributes, as described later in this chapter, but the default behavior is defined by the class name.
Tip
Asynchronous tag helpers can be created by overriding the ProcessAsync method instead of the Process method, but this isn’t required for most helpers, which tend to make small and focused changes to HTML elements. You can see an example of an asynchronous tag helper in the “Advanced Tag Helper Features” section.
Receiving Context Data
Tag helpers receive information about the element they are transforming through an instance of the TagHelperContext class, which is received as an argument to the Process method and which defines the properties described in Table 25-3.
Table 25-3.
The TagHelperContext Properties
Name
Description
AllAttributes
This property returns a read-only dictionary of the attributes applied to the element being transformed, indexed by name and by index.
Items
This property returns a dictionary that is used to coordinate between tag helpers, as described in the “Coordinating Between Tag Helpers” section.
UniqueId
This property returns a unique identifier for the element being transformed.
Although you can access details of the element’s attributes through the AllAttributes dictionary, a more convenient approach is to define a property whose name corresponds to the attribute you are interested in, like this:
...
public string BgColor { get; set; } = "dark";
public string TextColor { get; set; } = "white";
...
When a tag helper is being used, the properties it defines are inspected and assigned the value of any whose name matches attributes applied to the HTML element. As part of this process, the attribute value will be converted to match the type of the C# property so that bool properties can be used to receive true and false attribute values and int properties can be used to receive numeric attribute values such as 1 and 2.
Properties for which there are no corresponding HTML element attributes are not set, which means you should check to ensure that you are not dealing with null or provide default values, which is the approach taken in Listing 25-6.
The name of the attribute is automatically converted from the default HTML style, bg-color, to the C# style, BgColor. You can use any attribute prefix except asp- (which Microsoft uses) and data- (which is reserved for custom attributes that are sent to the client). The example tag helper will be configured using bg-color and text-color attributes, which will provide values for the BgColor and TextColor properties and be used to configure the tr element in the Process method, as follows:
...
output.Attributes.SetAttribute("class",
$"bg-{BgColor} text-center text-{TextColor}");
...
Tip
Using the HTML attribute name for tag helper properties doesn’t always lead to readable or understandable classes. You can break the link between the name of the property and the attribute it represents using the HtmlAttributeName attribute, which can be used to specify the HTML attribute that the property represents.
Producing Output
The Process method transforms an element by configuring the TagHelperOutput object that is received as an argument. The TagHelperOuput object starts by describing the HTML element as it appears in the view and is modified through the properties and methods described in Table 25-4.
Table 25-4.
The TagHelperOutput Properties and Methods
Name
Description
TagName
This property is used to get or set the tag name for the output element.
Attributes
This property returns a dictionary containing the attributes for the output element.
Content
This property returns a TagHelperContent object that is used to set the content of the element.
GetChildContentAsync()
This asynchronous method provides access to the content of the element that will be transformed, as demonstrated in the “Creating Shorthand Elements” section.
PreElement
This property returns a TagHelperContext object that is used to insert content in the view before the output element. See the “Prepending and Appending Content and Elements” section.
PostElement
This property returns a TagHelperContext object that is used to insert content in the view after the output element. See the “Prepending and Appending Content and Elements” section.
PreContent
This property returns a TagHelperContext object that is used to insert content before the output element’s content. See the “Prepending and Appending Content and Elements” section.
PostContent
This property returns a TagHelperContext object that is used to insert content after the output element’s content. See the “Prepending and Appending Content and Elements” section.
TagMode
This property specifies how the output element will be written, using a value from the TagMode enumeration. See the “Creating Shorthand Elements” section.
SupressOuput()
Calling this method excludes an element from the view. See the “Suppressing the Output Element” section.
In the TrTagHelper class, I used the Attributes dictionary to add a class attribute to the HTML element that specifies Bootstrap styles, including the value of the BgColor and TextColor properties. The effect is that the background color for tr elements can be specified by setting bg-color and text-color attributes to Bootstrap names, such as primary, info, and danger.
Registering Tag Helpers
Tag helper classes must be registered with the @addTagHelper directive before they can be used. The set of views or pages to which a tag helper can be applied depends on where the @addTagHelper directive is used.
For a single view or page, the directive appears in the CSHTML file itself. To make a tag helper available more widely, it can be added to the view imports file, which is defined in the Views folder for controllers and the Pages folder for Razor Pages.
I want the tag helpers that I create in this chapter to be available anywhere in the application, which means that the @addTagHelper directive is added to the _ViewImports.cshtml files in the Views and Pages folders. The vc element used in Chapter 24 to apply view components is a tag helper, which is why the directive required to enable tag helpers is already in the _ViewImports.cshtml file.
The first part of the argument specifies the names of the tag helper classes, with support for wildcards, and the second part specifies the name of the assembly in which they are defined. This @addTagHelper directive uses the wildcard to select all namespaces in the WebApp assembly, with the effect that tag helpers defined anywhere in the project can be used in any controller view. There is an identical statement in the Razor Pages _ViewImports.cshtml file in the Pages folder.
The other @addTagHelper directive enables the built-in tag helpers that Microsoft provides, which are described in Chapter 26.
Using a Tag Helper
The final step is to use the tag helper to transform an element. In Listing 25-7, I have added the attribute to the tr element, which will apply the tag helper.
Using a Tag Helper in the Index.cshtml File in the Views/Home Folder
Restart ASP.NET Core and use a browser to request http://localhost:5000/home, which produces the response shown in Figure 25-2.
Figure 25-2.
Using a tag helper
The tr element to which the attributes were applied in Listing 25-7 has been transformed, but that isn’t the only change shown in the figure. By default, tag helpers apply to all elements of a specific type, which means that all the tr elements in the view have been transformed using the default values defined in the tag helper class, since no attributes were defined.
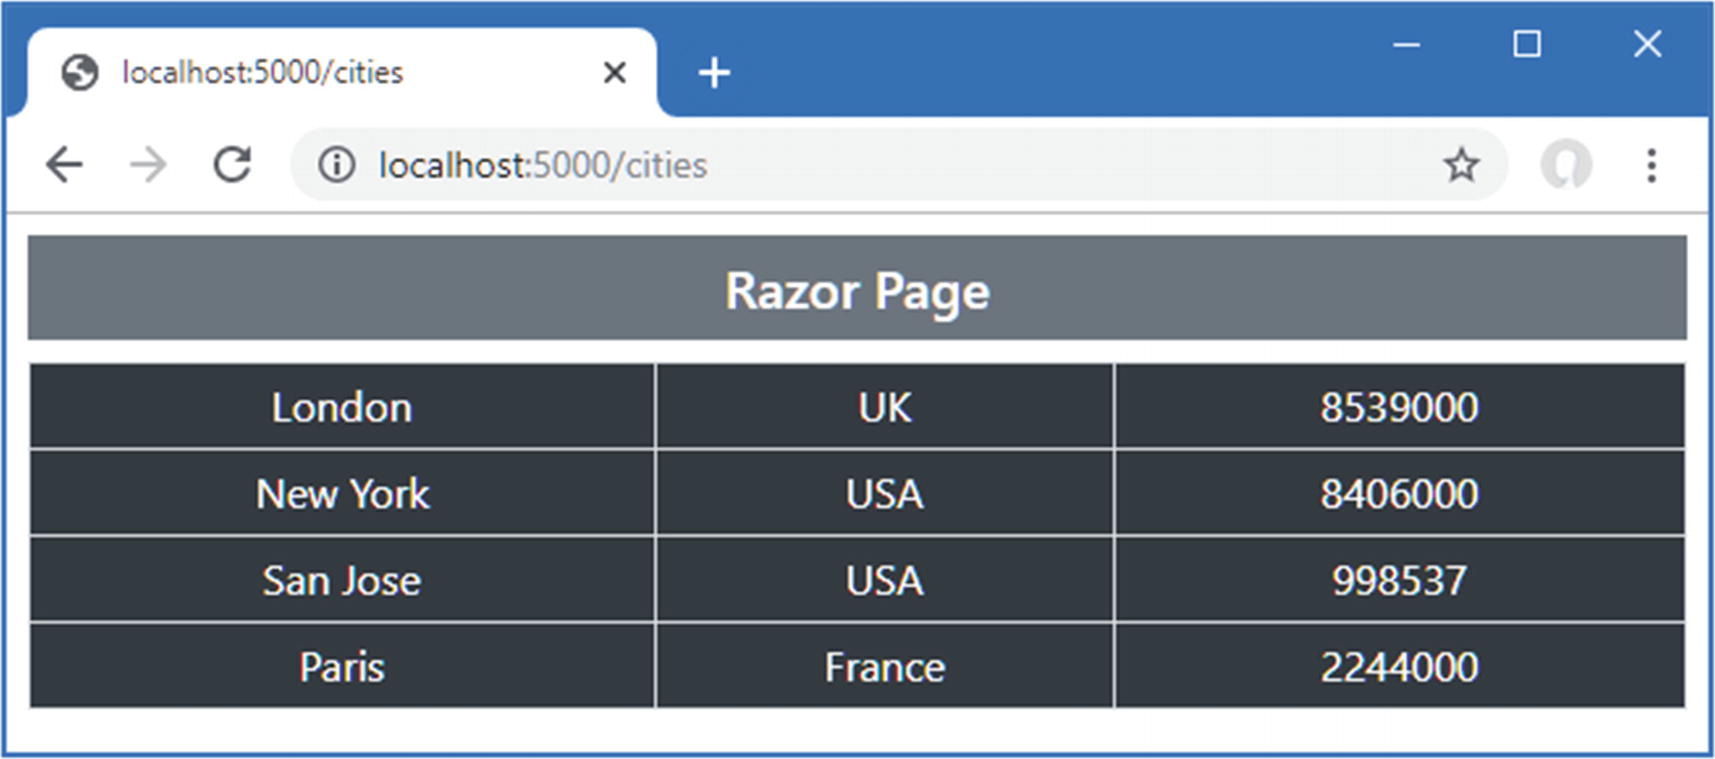
In fact, the problem is more serious because the @addTagHelper directives in the view import files mean that the example tag helper is applied to all tr elements used in any view rendered by controllers and Razor Pages. Use a browser to request http://localhost:5000/cities, for example, and you will see the tr elements in the response from Cities Razor Page have also been transformed, as shown in Figure 25-3.
Figure 25-3.
Unexpectedly modifying elements with a tag helper
Narrowing the Scope of a Tag Helper
The range of elements that are transformed by a tag helper can be controlled using the HtmlTargetElement element, as shown in Listing 25-8.
public override void Process(TagHelperContext context,
TagHelperOutput output) {
output.Attributes.SetAttribute("class",
$"bg-{BgColor} text-center text-{TextColor}");
}
}
}
Listing 25-8.
Narrowing Scope in the TrTagHelper.cs File in the TagHelpers Folder
The HtmlTargetElement attribute describes the elements to which the tag helper applies. The first argument specifies the element type and supports the additional named properties described in Table 25-5.
Table 25-5.
The HtmlTargetElement Properties
Name
Description
Attributes
This property is used to specify that a tag helper should be applied only to elements that have a given set of attributes, supplied as a comma-separated list. An attribute name that ends with an asterisk will be treated as a prefix so that bg-* will match bg-color, bg-size, and so on.
ParentTag
This property is used to specify that a tag helper should be applied only to elements that are contained within an element of a given type.
TagStructure
This property is used to specify that a tag helper should be applied only to elements whose tag structure corresponds to the given value from the TagStructure enumeration, which defines Unspecified, NormalOrSelfClosing, and WithoutEndTag.
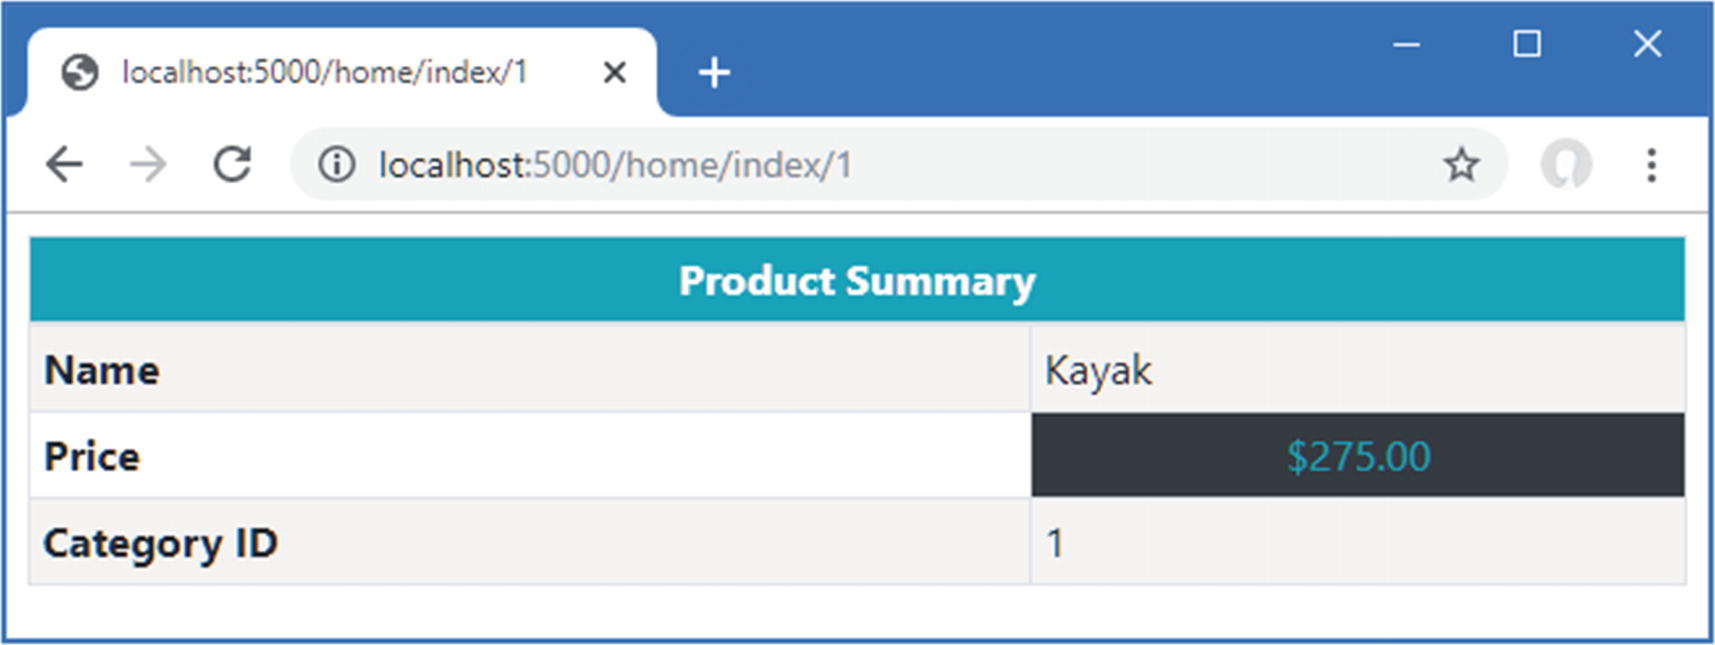
The Attributes property supports CSS attribute selector syntax so that [bg-color] matches elements that have a bg-color attribute, [bg-color=primary] matches elements that have a bg-color attribute whose value is primary, and [bg-color^=p] matches elements with a bg-color attribute whose value begins with p. The attribute applied to the tag helper in Listing 25-8 matches tr elements with both bg-color and text-color attributes that are children of a thead element. Restart ASP.NET Core and use a browser to request http://localhost:5000/home/index/1, and you will see the scope of the tag helper has been narrowed, as shown in Figure 25-4.
Figure 25-4.
Narrowing the scope of a tag helper
Widening the Scope of a Tag Helper
The HtmlTargetElement attribute can also be used to widen the scope of a tag helper so that it matches a broader range of elements. This is done by setting the attribute’s first argument to an asterisk (the * character), which matches any element. Listing 25-9 changes the attribute applied to the example tag helper so that it matches any element that has bg-color and text-color attributes.
public override void Process(TagHelperContext context,
TagHelperOutput output) {
output.Attributes.SetAttribute("class",
$"bg-{BgColor} text-center text-{TextColor}");
}
}
}
Listing 25-9.
Widening Scope in the TrTagHelper.cs File in the TagHelpers Folder
Care must be taken when using the asterisk because it is easy to match too widely and select elements that should not be transformed. A safer middle ground is to apply the HtmlTargetElement attribute for each type of element, as shown in Listing 25-10.
public override void Process(TagHelperContext context,
TagHelperOutput output) {
output.Attributes.SetAttribute("class",
$"bg-{BgColor} text-center text-{TextColor}");
}
}
}
Listing 25-10.
Balancing Scope in the TrTagHelper.cs File in the TagHelpers Folder
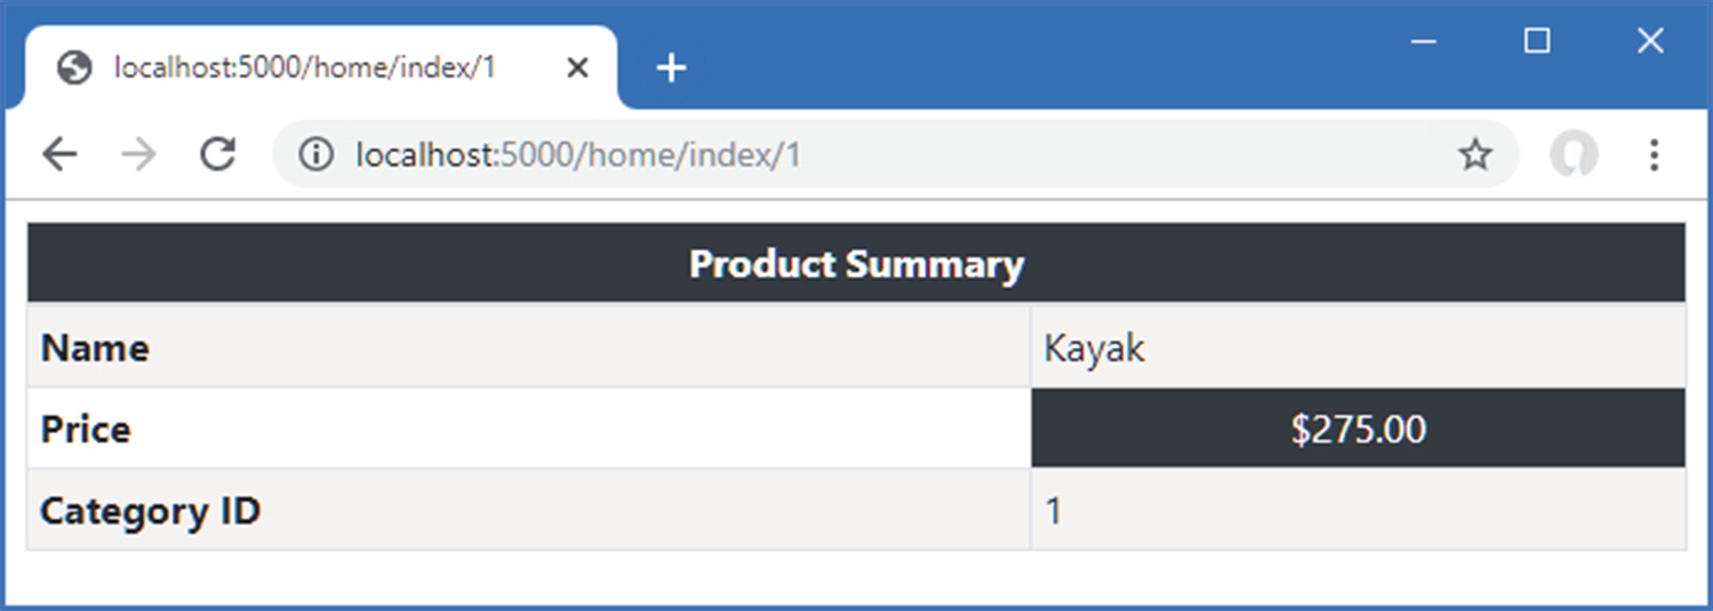
Each instance of the attribute can use different selection criteria. This tag helper matches tr elements with bg-color and text-color attributes and matches td elements with bg-color attributes. Listing 25-11 adds an element to be transformed to the Index view to demonstrate the revised scope.
Adding Attributes in the Index.cshtml File in the Views/Home Folder
Restart ASP.NET Core and use a browser to request http://localhost:5000/home/index/1. The response will contain two transformed elements, as shown in Figure 25-5.
Figure 25-5.
Managing the scope of a tag helper
Ordering Tag Helper Execution
If you need to apply multiple tag helpers to an element, you can control the sequence in which they execute by setting the Order property, which is inherited from the TagHelper base class. Managing the sequence can help minimize the conflicts between tag helpers, although it is still easy to encounter problems.
Advanced Tag Helper Features
The previous section demonstrated how to create a basic tag helper, but that just scratches the surface of what’s possible. In the sections that follow, I show more advanced uses for tag helpers and the features they provide.
Creating Shorthand Elements
Tag helpers are not restricted to transforming the standard HTML elements and can also be used to replace custom elements with commonly used content. This can be a useful feature for making views more concise and making their intent more obvious. To demonstrate, Listing 25-12 replaces the thead element in the Index view with a custom HTML element.
Adding a Custom HTML Element in the Index.cshtml File in the Views/Home Folder
The tablehead element isn’t part of the HTML specification and won’t be understood by browsers. Instead, I am going to use this element as shorthand for generating the thead element and its content for the HTML table. Add a class named TableHeadTagHelper.cs to the TagHelpers folder and use it to define the class shown in Listing 25-13.
Tip
When dealing with custom elements that are not part of the HTML specification, you must apply the HtmlTargetElement attribute and specify the element name, as shown in Listing 25-13. The convention of applying tag helpers to elements based on the class name works only for standard element names.
using Microsoft.AspNetCore.Razor.TagHelpers;
using System.Threading.Tasks;
namespace WebApp.TagHelpers {
[HtmlTargetElement("tablehead")]
public class TableHeadTagHelper: TagHelper {
public string BgColor { get; set; } = "light";
public override async Task ProcessAsync(TagHelperContext context,
The Contents of TableHeadTagHelper.cs in the TagHelpers Folder
This tag helper is asynchronous and overrides the ProcessAsync method so that it can access the existing content of the elements it transforms. The ProcessAsync method uses the properties of the TagHelperOuput object to generate a completely different element: the TagName property is used to specify a thead element, the TagMode property is used to specify that the element is written using start and end tags, the Attributes.SetAttribute method is used to define a class attribute, and the Content property is used to set the element content.
The existing content of the element is obtained through the asynchronous GetChildContentAsync method, which returns a TagHelperContent object. This is the same object that is returned by the TagHelperOutput.Content property and allows the content of the element to be inspected and changed using the same type, through the methods described in Table 25-6.
Table 25-6.
Useful TagHelperContent Methods
Name
Description
GetContent()
This method returns the contents of the HTML element as a string.
SetContent(text)
This method sets the content of the output element. The string argument is encoded so that it is safe for inclusion in an HTML element.
SetHtmlContent(html)
This method sets the content of the output element. The string argument is assumed to be safely encoded. Use with caution.
Append(text)
This method safely encodes the specified string and adds it to the content of the output element.
AppendHtml(html)
This method adds the specified string to the content of the output element without performing any encoding. Use with caution.
Clear()
This method removes the content of the output element.
In Listing 25-13, the existing content of the element is read through the GetContent element and then set using the SetHtmlContent method. The effect is to wrap the existing content in the transformed element in tr and th elements.
Restart ASP.NET Core and navigate to http://localhost:5000/home/index/1, and you will see the effect of the tag helper, which is shown in Figure 25-6.
Notice that the transformed elements do not include the bg-color attribute. Attributes matched to properties defined by the tag helper are removed from the output element and must be explicitly redefined if they are required.
Creating Elements Programmatically
When generating new HTML elements, you can use standard C# string formatting to create the content you require, which is the approach I took in Listing 25-13. This works, but it can be awkward and requires close attention to avoid typos. A more robust approach is to use the TagBuilder class, which is defined in the Microsoft.AspNetCore.Mvc.Rendering namespace and allows elements to be created in a more structured manner. The TagHelperContent methods described in Table 25-6 accept TagBuilder objects, which makes it easy to create HTML content in tag helpers, as shown in Listing 25-14.
using Microsoft.AspNetCore.Razor.TagHelpers;
using System.Threading.Tasks;
using Microsoft.AspNetCore.Mvc.Rendering;
namespace WebApp.TagHelpers {
[HtmlTargetElement("tablehead")]
public class TableHeadTagHelper: TagHelper {
public string BgColor { get; set; } = "light";
public override async Task ProcessAsync(TagHelperContext context,
Creating HTML Elements in the TableHeadTagHelper.cs File in the TagHelpers Folder
This example creates each new element using a TagBuilder object and composes them to produce the same HTML structure as the string-based version in Listing 25-13.
Prepending and Appending Content and Elements
The TagHelperOutput class provides four properties that make it easy to inject new content into a view so that it surrounds an element or the element’s content, as described in Table 25-7. In the sections that follow, I explain how you can insert content around and inside the target element.
Table 25-7.
The TagHelperOutput Properties for Appending Context and Elements
Name
Description
PreElement
This property is used to insert elements into the view before the target element.
PostElement
This property is used to insert elements into the view after the target element.
PreContent
This property is used to insert content into the target element, before any existing content.
PostContent
This property is used to insert content into the target element, after any existing content.
Inserting Content Around the Output Element
The first TagHelperOuput properties are PreElement and PostElement, which are used to insert elements into the view before and after the output element. To demonstrate the use of these properties, add a class file named ContentWrapperTagHelper.cs to the WebApp/TagHelpers folder with the content shown in Listing 25-15.
The Contents of the WrapperTagHelper.cs File in the TagHelpers Folder
This tag helper transforms elements that have a wrap attribute whose value is true, which it does using the PreElement and PostElement properties to add a div element before and after the output element. Listing 25-16 adds an element to the Index view that is transformed by the tag helper.
Adding an Element in the Index.cshtml File in the Views/Index Folder
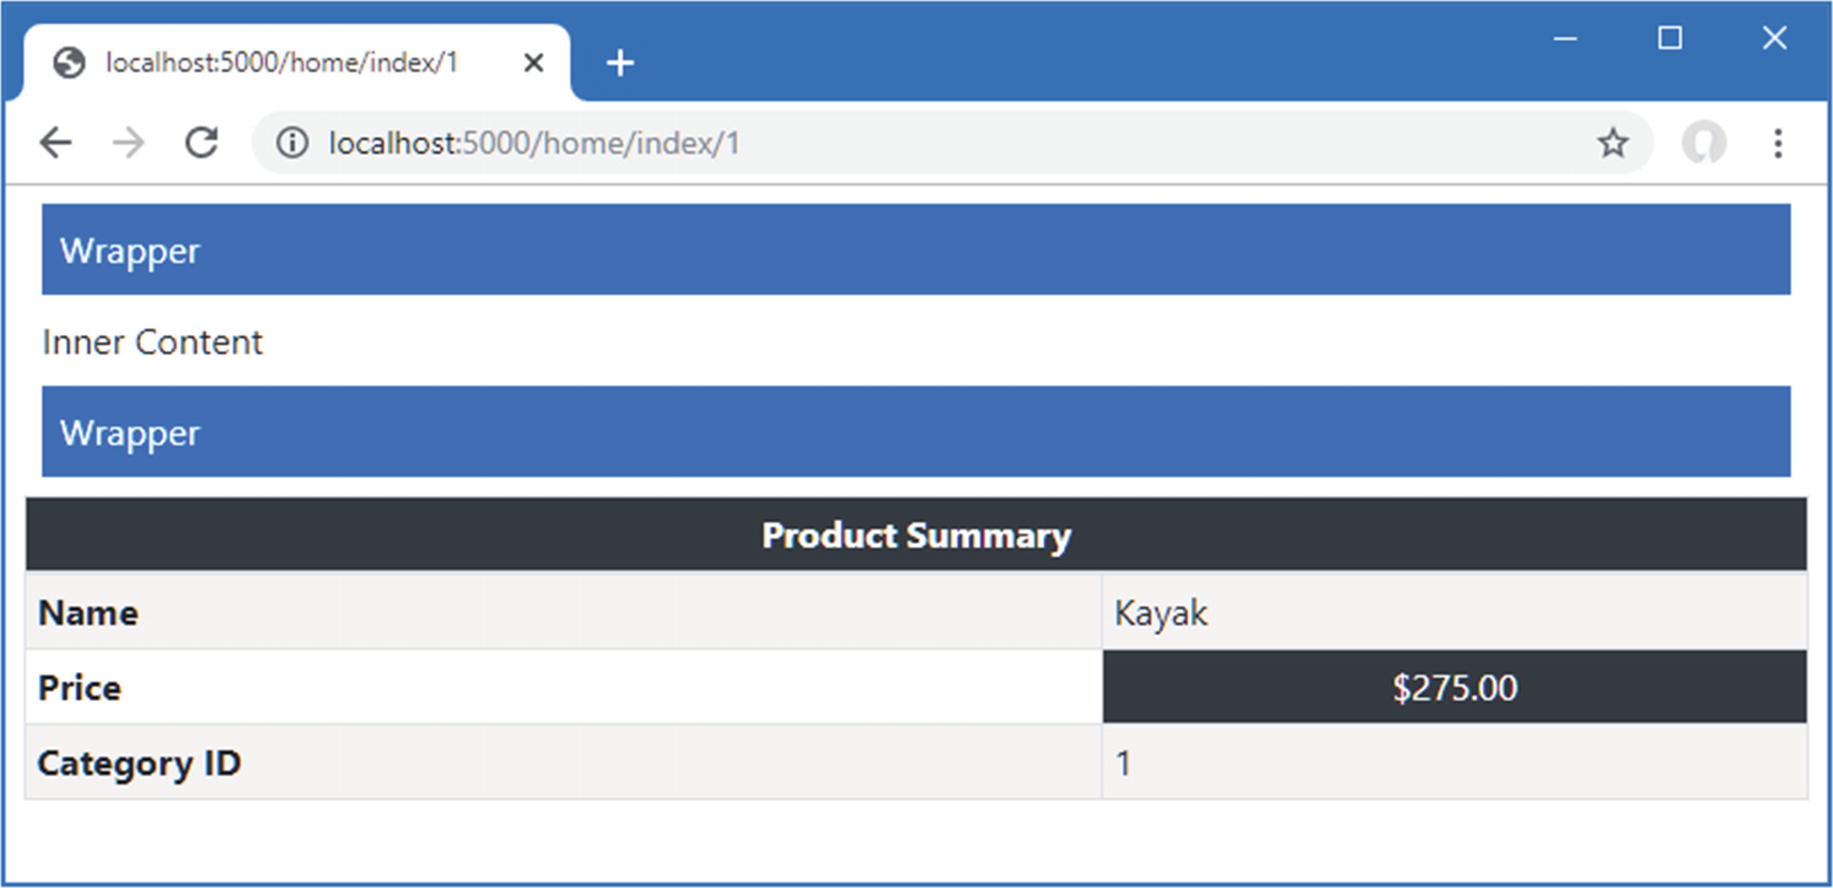
Restart ASP.NET Core and use a browser to request http://localhost:5000/home/index/1. The response includes the transformed element, as shown in Figure 25-7.
Figure 25-7.
Inserting content around the output element
If you examine the HTML sent to the browser, you will see that this element:
Notice that the wrap attribute has been left on the output element. This is because I didn’t define a property in the tag helper class that corresponds to this attribute. If you want to prevent attributes from being included in the output, then define a property for them in the tag helper class, even if you don’t use the attribute value.
Inserting Content Inside the Output Element
The PreContent and PostContent properties are used to insert content inside the output element, surrounding the original content. To demonstrate this feature, add a class file named HighlightTagHelper.cs to the TagHelpers folder and use it to define the tag helper shown in Listing 25-17.
public override void Process(TagHelperContext context,
TagHelperOutput output) {
output.PreContent.SetHtmlContent("<b><i>");
output.PostContent.SetHtmlContent("</i></b>");
}
}
}
Listing 25-17.
The Contents of the HighlightTagHelper.cs File in the TagHelpers Folder
This tag helper inserts b and i elements around the output element’s content. Listing 25-18 adds the wrap attribute to one of the table cells in the Index view.
Adding an Attribute in the Index.cshtml File in the Views/Home Folder
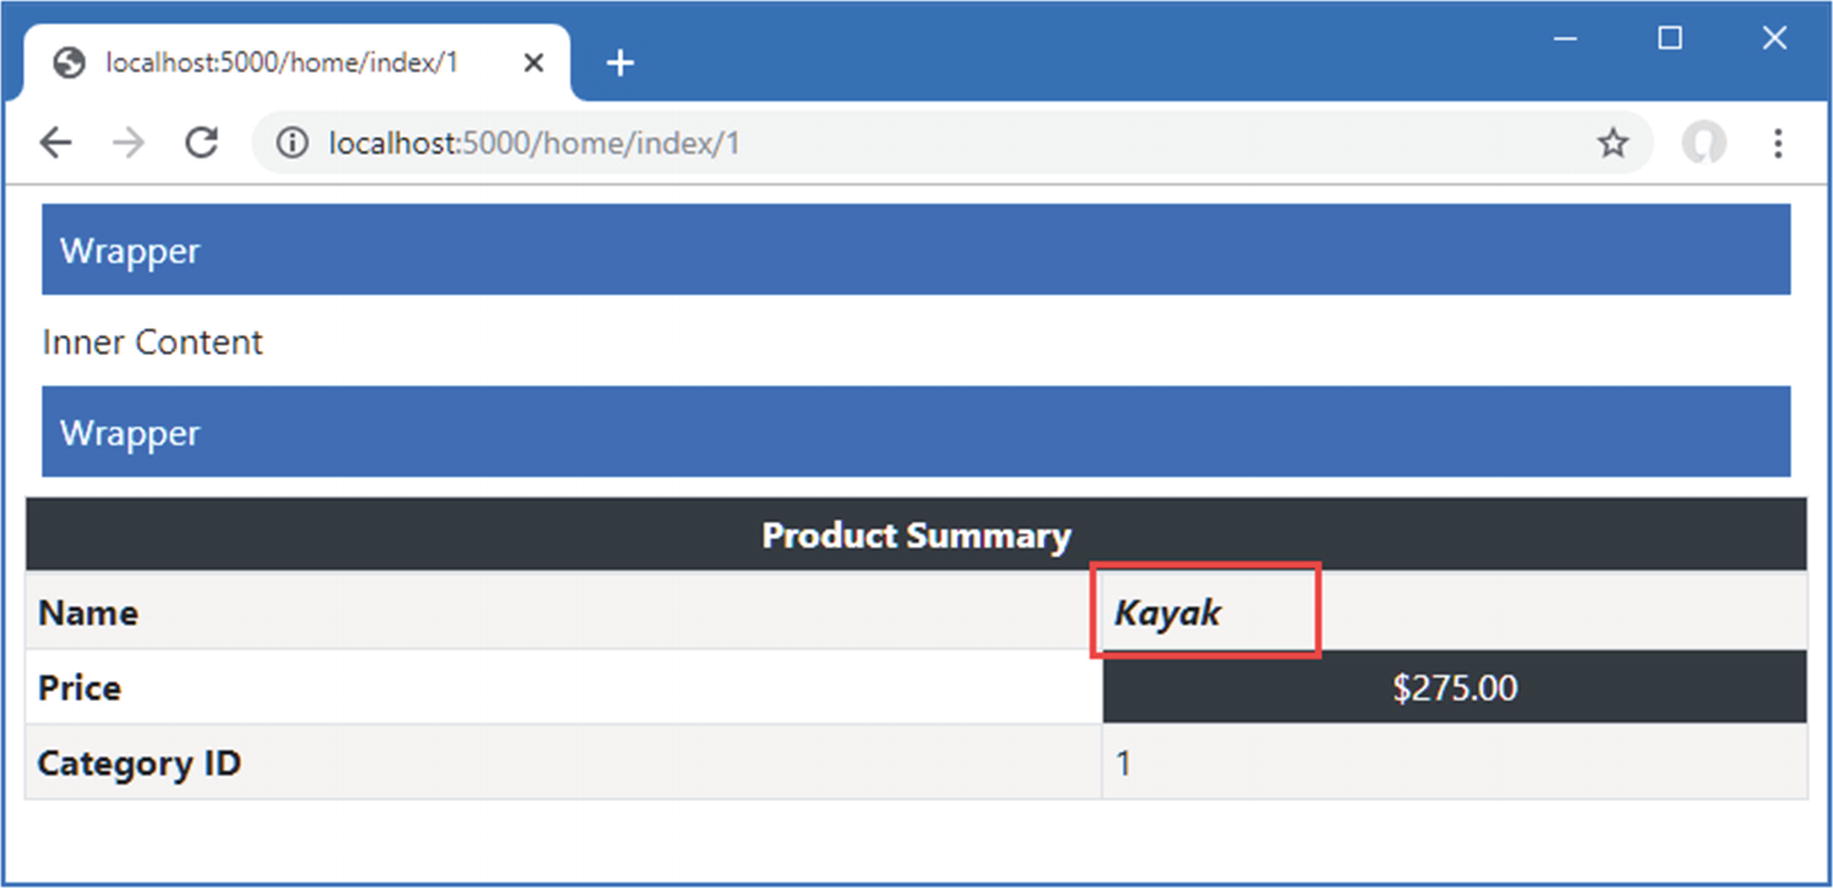
Restart ASP.NET Core and use a browser to request http://localhost:5000/home/index/1. The response includes the transformed element, as shown in Figure 25-8.
Figure 25-8.
Inserting content inside an element
If you examine the HTML sent to the browser, you will see that this element:
...
<td highlight="true">@Model.Name</td>
...
has been transformed into these elements:
...
<td highlight="true"><b><i>Kayak</i></b></td>
...
Getting View Context Data
A common use for tag helpers is to transform elements so they contain details of the current request or the view model/ page model, which requires access to context data. To create this type of tag helper, add a file named RouteDataTagHelper.cs to the TagHelpers folder, with the content shown in Listing 25-19.
The Contents of the RouteDataTagHelper.cs File in the WebApps/TagHelpers Folder
The tag helper transforms div elements that have a route-data attribute whose value is true and populates the output element with a list of the segment variables obtained by the routing system.
To get the route data, I added a property called Context and decorated it with two attributes, like this:
...
[ViewContext]
[HtmlAttributeNotBound]
public ViewContext Context { get; set; }
...
The ViewContext attribute denotes that the value of this property should be assigned a ViewContext object when a new instance of the tag helper class is created, which provides details of the view that is being rendered, including the routing data, as described in Chapter 13.
The HtmlAttributeNotBound attribute prevents a value from being assigned to this property if there is a matching attribute defined on the div element. This is good practice, especially if you are writing tag helpers for other developers to use.
Tip
Tag helpers can declare dependencies on services in their constructors, which are resolved using the dependency injection feature described in Chapter 14.
Listing 25-20 adds an element to the Home controller’s Index view that will be transformed by the new tag helper.
Adding an Element in the Index.cshtml File in the Views/Home Folder
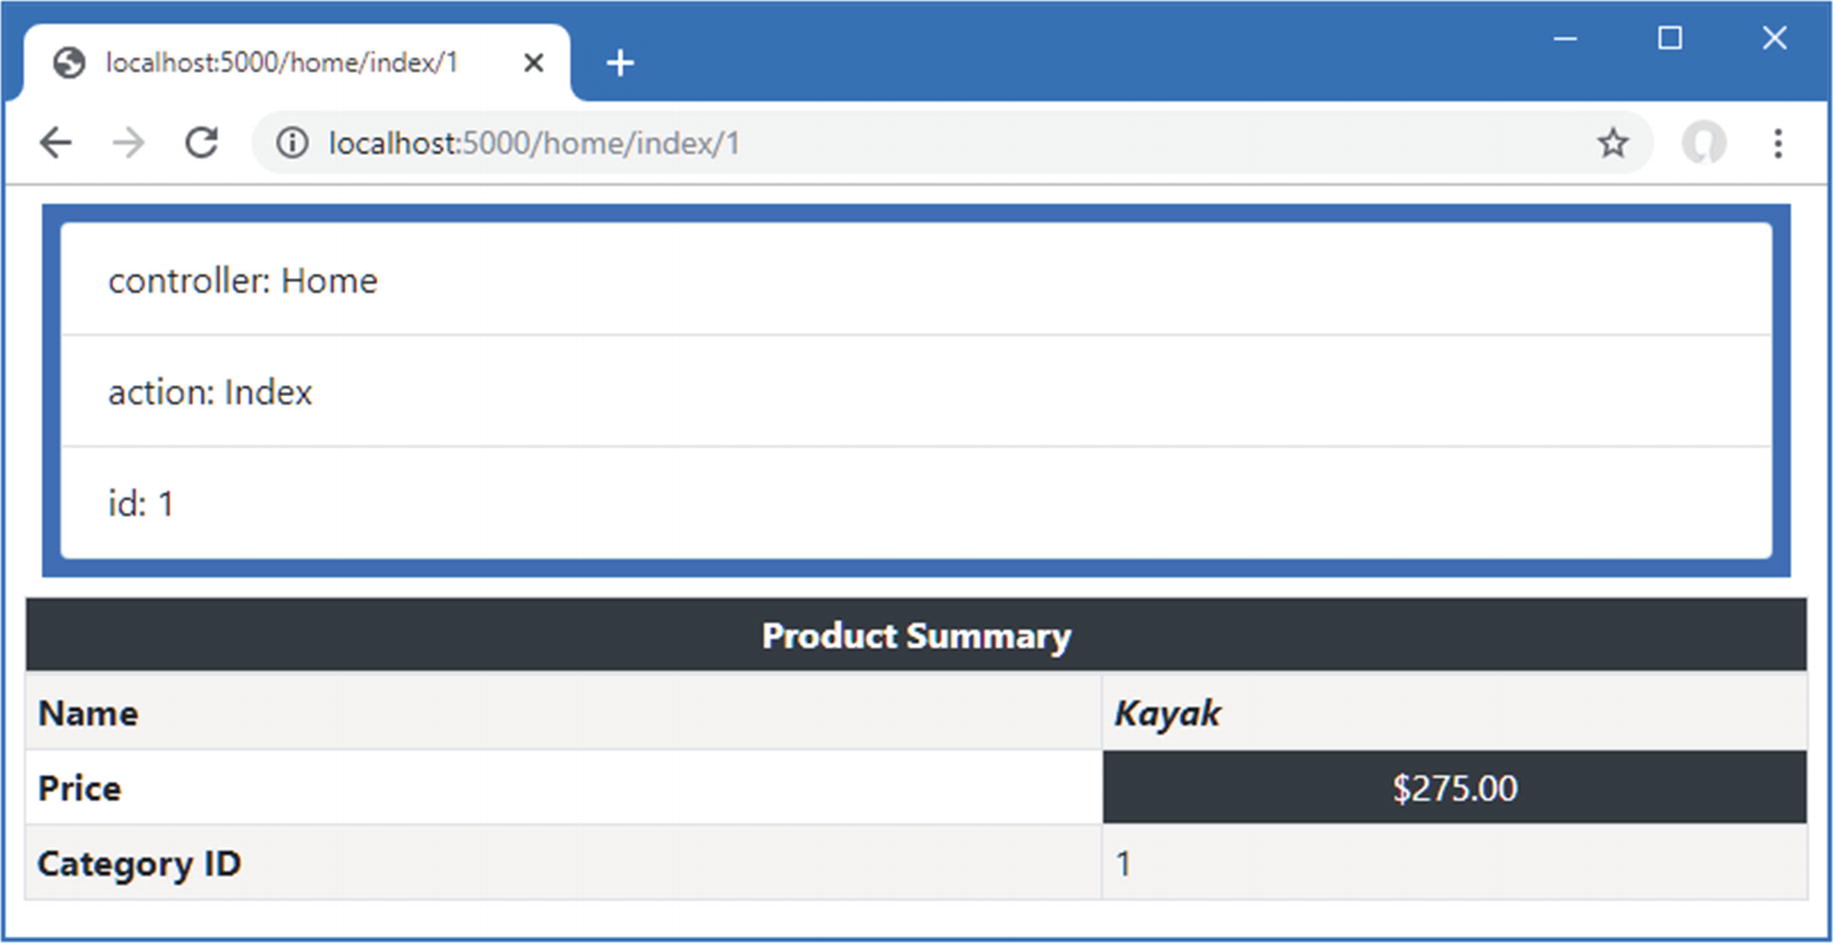
Restart ASP.NET Core and use a browser to request http://localhost:5000/home/index/1. The response will include a list of the segment variables the routing system has matched, as shown in Figure 25-9.
Figure 25-9.
Displaying context data with a tag helper
Working with Model Expressions
Tag helpers can operate on the view model, tailoring the transformations they perform or the output they create. To see how this feature works, add a class file named ModelRowTagHelper.cs to the TagHelpers folder, with the code shown in Listing 25-21.
using Microsoft.AspNetCore.Mvc.Rendering;
using Microsoft.AspNetCore.Mvc.ViewFeatures;
using Microsoft.AspNetCore.Razor.TagHelpers;
namespace WebApp.TagHelpers {
[HtmlTargetElement("tr", Attributes = "for")]
public class ModelRowTagHelper : TagHelper {
public string Format { get; set; }
public ModelExpression For { get; set; }
public override void Process(TagHelperContext context,
TagHelperOutput output) {
output.TagMode = TagMode.StartTagAndEndTag;
TagBuilder th = new TagBuilder("th");
th.InnerHtml.Append(For.Name);
output.Content.AppendHtml(th);
TagBuilder td = new TagBuilder("td");
if (Format != null && For.Metadata.ModelType == typeof(decimal)) {
The Contents of the ModelRowTagHelper.cs File in the TagHelpers Folder
This tag helper transforms tr elements that have a for attribute. The important part of this tag helper is the type of the For property, which is used to receive the value of the for attribute.
...
public ModelExpression For { get; set; }
...
The ModelExpression class is used when you want to operate on part of the view model, which is most easily explained by jumping forward and showing how the tag helper is applied in the view, as shown in Listing 25-22.
Note
The ModelExpression feature can be used only on view models or page models. It cannot be used on variables that are created within a view, such as with an @foreach expression.
Using the Tag Helper in the Index.cshtml File in the Views/Home Folder
The value of the for attribute is the name of a property defined by the view model class. When the tag helper is created, the type of the For property is detected and assigned a ModelExpression object that describes the selected property.
I am not going to describe the ModelExpression class in any detail because any introspection on types leads to endless lists of classes and properties. Further, ASP.NET Core provides a useful set of built-in tag helpers that use the view model to transform elements, as described in Chapter 26, which means you don’t need to create your own.
For the example tag helper, I use three basic features that are worth describing. The first is to get the name of the model property so that I can include it in the output element, like this:
...
th.InnerHtml.Append(For.Name);
...
The Name property returns the name of the model property. The second feature is to get the type of the model property so that I can determine whether to format the value, like this:
...
if (Format != null && For.Metadata.ModelType == typeof(decimal)) {
...
The third feature is to get the value of the property so that it can be included in the response.
...
td.InnerHtml.Append(For.Model.ToString());
...
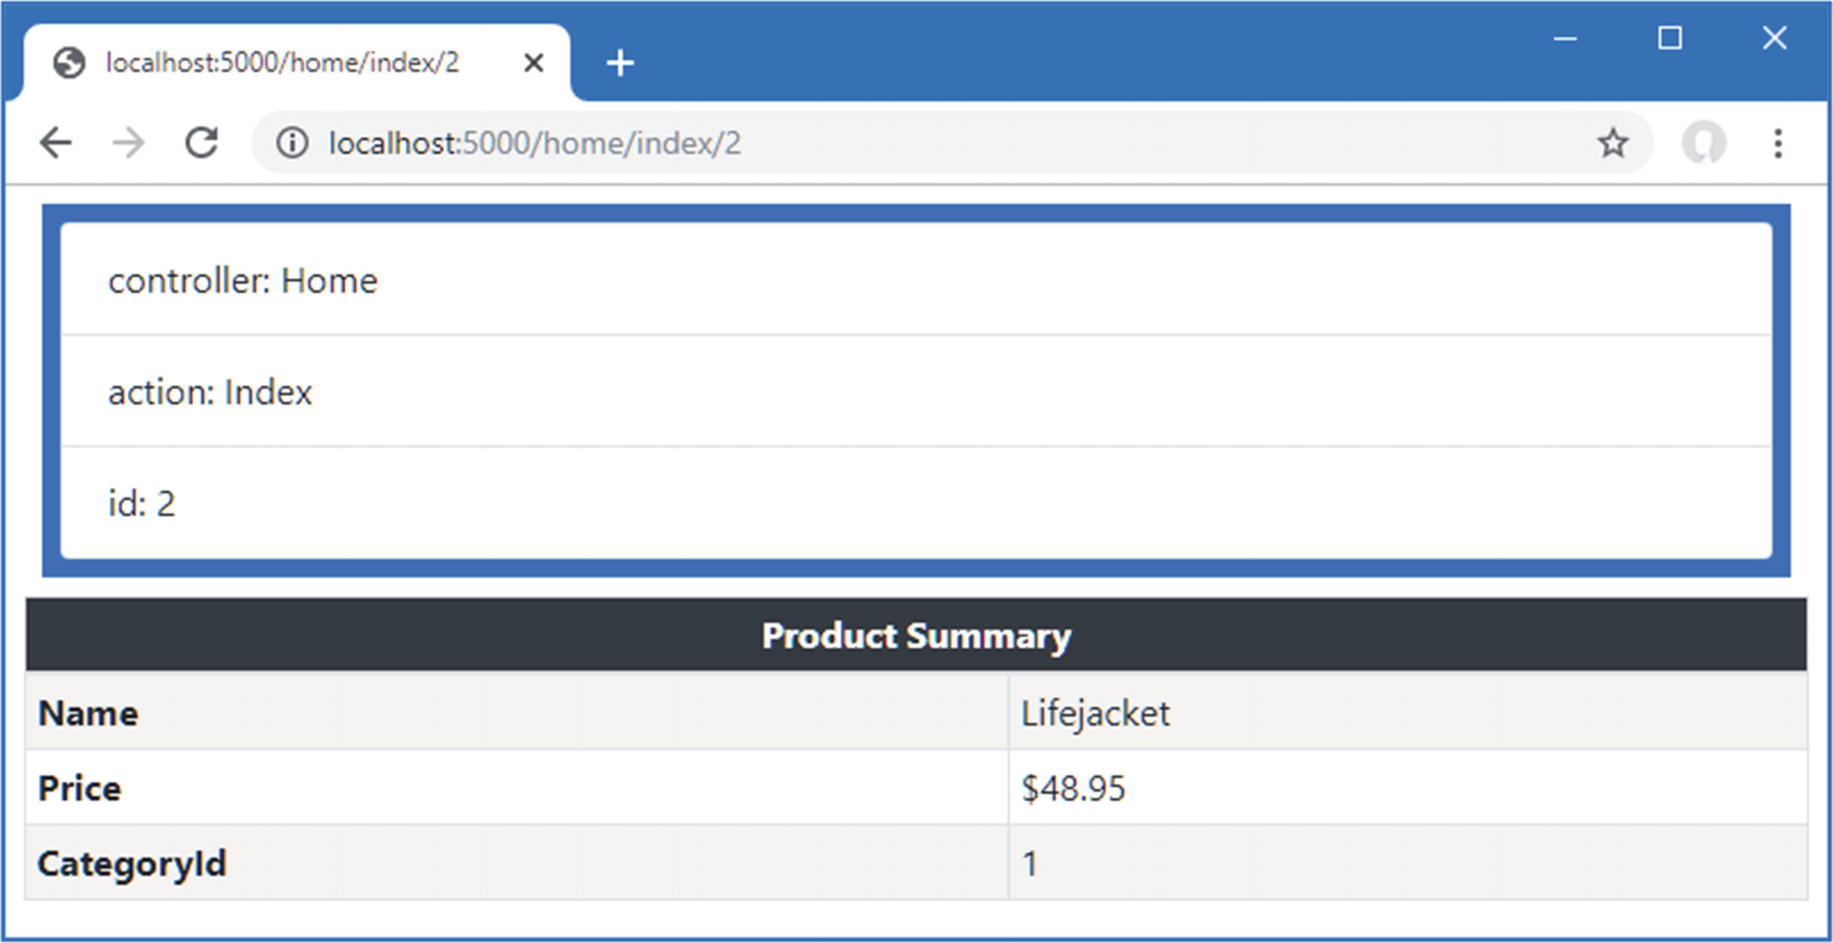
Restart ASP.NET Core and use a browser to request http://localhost:5000/home/index/2, and you will see the response shown in Figure 25-10.
Figure 25-10.
Using the view model in a tag helper
Working with the Page Model
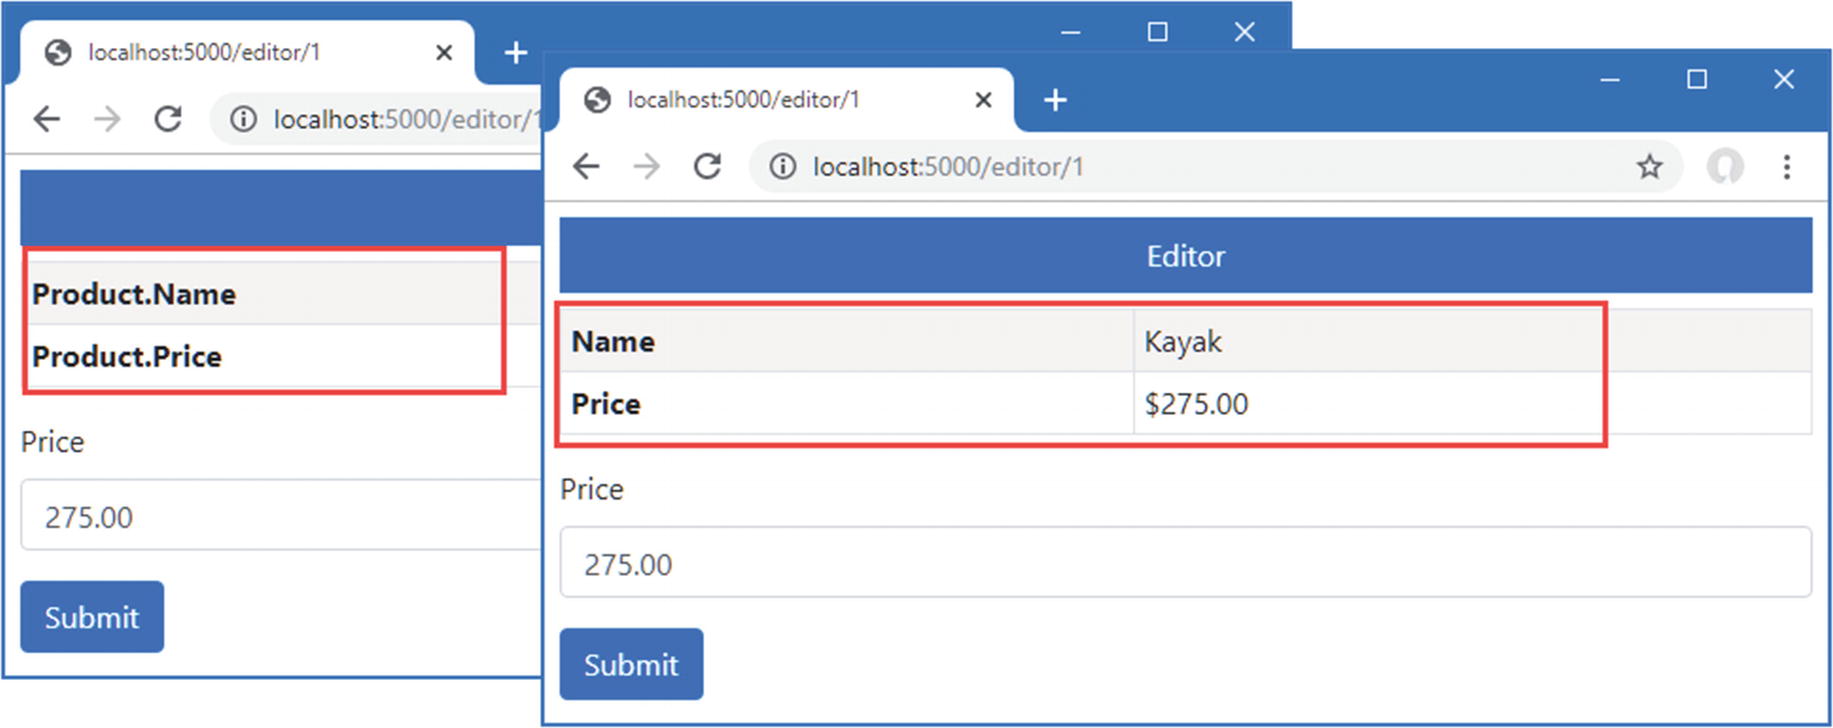
Tag helpers with model expressions can be applied in Razor Pages, although the expression that selects the property must account for the way that the Model property returns the page model class. Listing 25-23 applies the tag helper to the Editor Razor Page, whose page model defines a Product property.
Applying a Tag Helper in the Editor.cshtml File in the Pages Folder
The value for the for attribute selects the nested properties through the Product property, which provides the tag helper with the ModelExpression it requires. Use a browser to request http://localhost:5000/editor/1 to see the response from the page, which is shown on the left of Figure 25-11.
Figure 25-11.
Using a model expression tag helper with a Razor Page
One consequence of the page model is that the ModelExpression.Name property will return Product.Name, for example, instead of just Name. Listing 25-24 updates the tag helper so that it will display just the last part of the model expression name.
Note
This example is intended to highlight the effect of the page model on model expressions. Instead of displaying just the last part of the name, a more flexible approach is to add support for another attribute that allows the display value to be overridden as needed.
using Microsoft.AspNetCore.Mvc.Rendering;
using Microsoft.AspNetCore.Mvc.ViewFeatures;
using Microsoft.AspNetCore.Razor.TagHelpers;
using System.Linq;
namespace WebApp.TagHelpers {
[HtmlTargetElement("tr", Attributes = "for")]
public class ModelRowTagHelper : TagHelper {
public string Format { get; set; }
public ModelExpression For { get; set; }
public override void Process(TagHelperContext context,
TagHelperOutput output) {
output.TagMode = TagMode.StartTagAndEndTag;
TagBuilder th = new TagBuilder("th");
th.InnerHtml.Append(For.Name.Split(".").Last());
output.Content.AppendHtml(th);
TagBuilder td = new TagBuilder("td");
if (Format != null && For.Metadata.ModelType == typeof(decimal)) {
Processing Names in the ModelRowTagHelper.cs File in the TagHelpers Folder
Restart ASP.NET Core and use a browser to request http://localhost:5000/editor/1; you will see the revised response, which is shown on the right of Figure 25-11.
Coordinating Between Tag Helpers
The TagHelperContext.Items property provides a dictionary used by tag helpers that operate on elements and those that operate on their descendants. To demonstrate the use of the Items collection, add a class file named CoordinatingTagHelpers.cs to the WebApp/TagHelpers folder and add the code shown in Listing 25-25.
using Microsoft.AspNetCore.Razor.TagHelpers;
namespace WebApp.TagHelpers {
[HtmlTargetElement("tr", Attributes = "theme")]
public class RowTagHelper: TagHelper {
public string Theme { get; set; }
public override void Process(TagHelperContext context,
TagHelperOutput output) {
context.Items["theme"] = Theme;
}
}
[HtmlTargetElement("th")]
[HtmlTargetElement("td")]
public class CellTagHelper : TagHelper {
public override void Process(TagHelperContext context,
TagHelperOutput output) {
if (context.Items.ContainsKey("theme")) {
output.Attributes.SetAttribute("class",
$"bg-{context.Items["theme"]} text-white");
}
}
}
}
Listing 25-25.
The Contents of the CoordinatingTagHelpers.cs File in the TagHelpers Folder
The first tag helper operates on tr elements that have a theme attribute. Coordinating tag helpers can transform their own elements, but this example simply adds the value of the theme attribute to the Items dictionary so that it is available to tag helpers that operate on elements contained within the tr element. The second tag helper operates on th and td elements and uses the theme value from the Items dictionary to set the Bootstrap style for its output elements.
Listing 25-26 adds elements to the Home controller’s Index view that apply the coordinating tag helpers.
Note
Notice that I have added the th and td elements that are transformed in Listing 25-26, instead of relying on a tag helper to generate them. Tag helpers are not applied to elements generated by other tag helpers and affect only the elements defined in the view.
Applying a Tag Helper in the Index.cshtml File in the Views/Home Folder
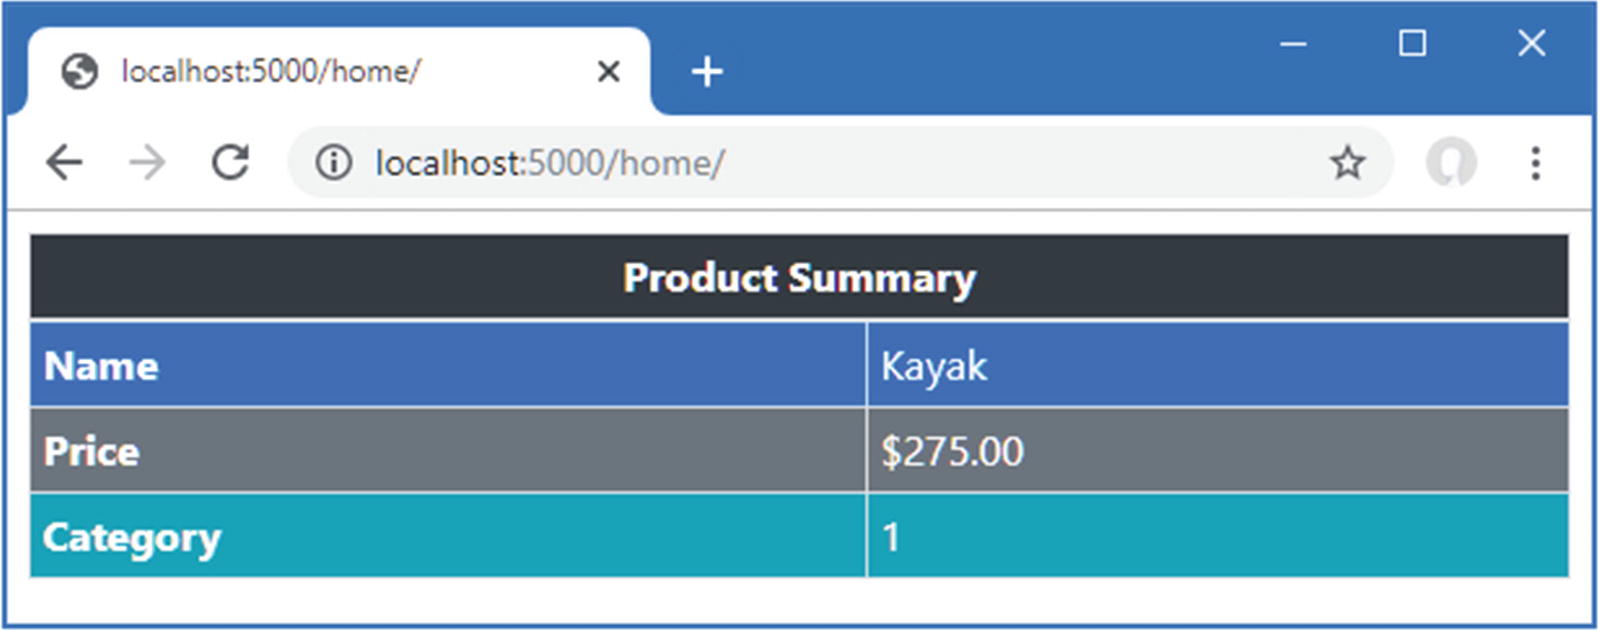
Restart ASP.NET Core and use a browser to request http://localhost:5000/home, which produces the response shown in Figure 25-12. The value of the theme element has been passed from one tag helper to another, and a color theme is applied without needing to define attributes on each of the elements that is transformed.
Figure 25-12.
Coordination between tag helpers
Suppressing the Output Element
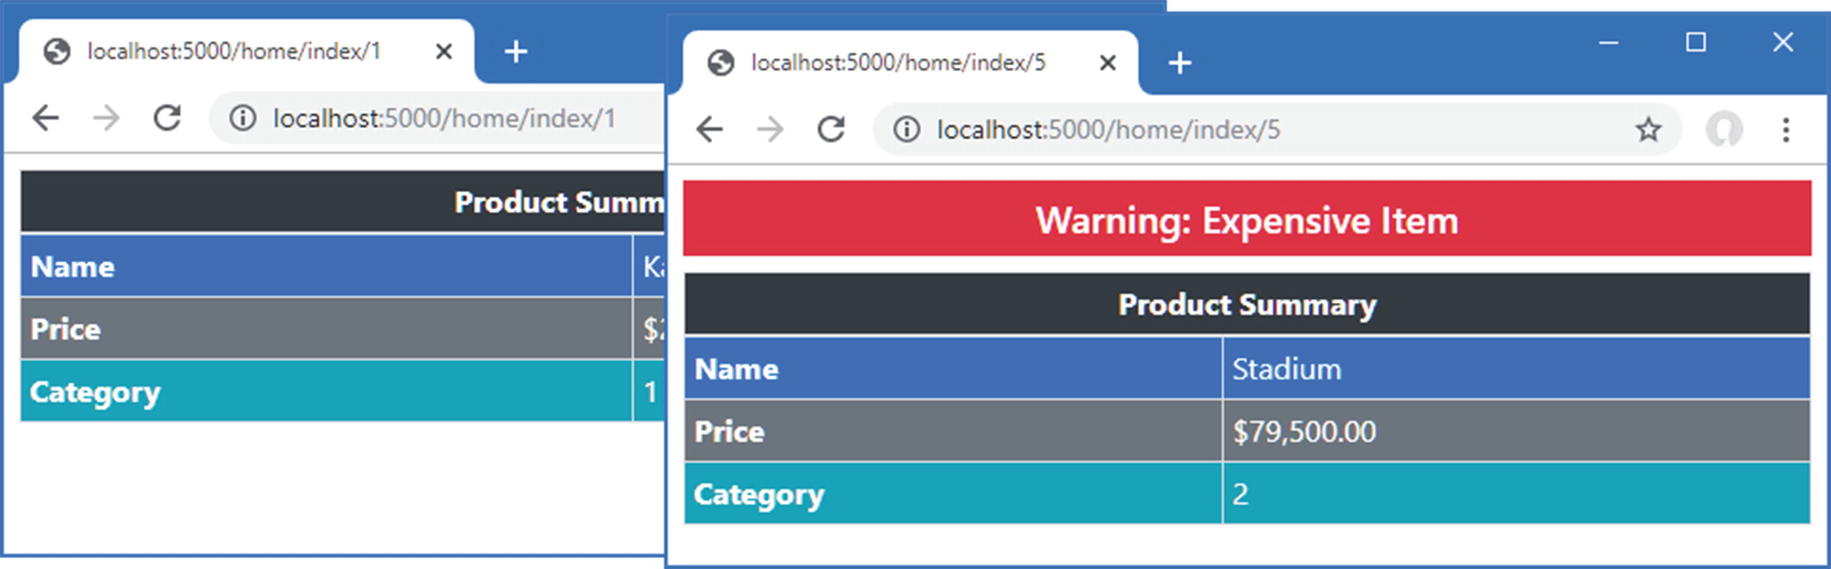
Tag helpers can be used to prevent an element from being included in the HTML response by calling the SuppressOuput method on the TagHelperOutput object that is received as an argument to the Process method. In Listing 25-27, I have added an element to the Home controller’s Index view that should be displayed only if the Price property of the view model exceeds a specified value.
Adding an Element in the Index.cshtml File in the Views/Home Folder
The show-when-gt attribute specifies the value above which the div element should be displayed, and the for property selects the model property that will be inspected. To create the tag helper that will manage the elements, including the response, add a class file named SelectiveTagHelper.cs to the WebApp/TagHelpers folder with the code shown in Listing 25-28.
public override void Process(TagHelperContext context,
TagHelperOutput output) {
if (For.Model.GetType() == typeof(decimal)
&& (decimal)For.Model <= ShowWhenGt) {
output.SuppressOutput();
}
}
}
}
Listing 25-28.
The Contents of the SelectiveTagHelper.cs File in the TagHelpers Folder
The tag helper uses the model expression to access the property and calls the SuppressOutput method unless the threshold is exceeded. To see the effect, restart ASP.NET Core and use a browser to request http://localhost:5000/home/index/1 and http://localhost:5000/home/index/5. The value for the Price property of the Product selected by the first URL is less than the threshold, so the element is suppressed. The value for the Price property of the Product selected by the second URL is more than the threshold, so the element is displayed. Figure 25-13 shows both responses.
Figure 25-13.
Suppressing output elements
Using Tag Helper Components
Tag helper components provide an alternative approach to applying tag helpers as services. This feature can be useful when you need to set up tag helpers to support another service or middleware component, which is typically the case for diagnostic tools or functionality that has both a client-side component and a server-side component, such as Blazor, which is described in Part 4. In the sections that follow, I show you how to create and apply tag helper components.
Creating a Tag Helper Component
Tag helper components are derived from the TagHelperComponent class, which provides a similar API to the TagHelper base class used in earlier examples. To create a tag helper component, add a class file called TimeTagHelperComponent.cs in the TagHelpers folder with the content shown in Listing 25-29.
using Microsoft.AspNetCore.Mvc.Rendering;
using Microsoft.AspNetCore.Razor.TagHelpers;
using System;
namespace WebApp.TagHelpers {
public class TimeTagHelperComponent: TagHelperComponent {
public override void Process(TagHelperContext context,
The Contents of the TimeTagHelperComponent.cs File in the TagHelpers Folder
Tag helper components do not specify the elements they transform, and the Process method is invoked for every element for which the tag helper component feature has been configured. By default, tag helper components are applied to transform head and body elements. This means that tag helper component classes must check the TagName property of the output element to ensure they perform only their intended transformations. The tag helper component in Listing 25-29 looks for body elements and uses the PreContent property to insert a div element containing a timestamp before the rest of the element’s content.
Tip
I show you how to increase the range of elements handled by tag helper components in the next section.
Tag helper components are registered as services that implement the ITagHelperComponent interface, as shown in Listing 25-30.
using Microsoft.AspNetCore.Builder;
using Microsoft.Extensions.DependencyInjection;
using Microsoft.Extensions.Configuration;
using Microsoft.EntityFrameworkCore;
using WebApp.Models;
using Microsoft.AspNetCore.Razor.TagHelpers;
using WebApp.TagHelpers;
namespace WebApp {
public class Startup {
public Startup(IConfiguration config) {
Configuration = config;
}
public IConfiguration Configuration { get; set; }
public void ConfigureServices(IServiceCollection services) {
public void Configure(IApplicationBuilder app, DataContext context) {
app.UseDeveloperExceptionPage();
app.UseStaticFiles();
app.UseRouting();
app.UseEndpoints(endpoints => {
endpoints.MapControllers();
endpoints.MapDefaultControllerRoute();
endpoints.MapRazorPages();
});
SeedData.SeedDatabase(context);
}
}
}
Listing 25-30.
Registering a Tag Helper Component in the Startup.cs File in the WebApp Folder
The AddTransient method is used to ensure that each request is handled using its own instance of the tag helper component class. To see the effect of the tag helper component, restart ASP.NET Core and use a browser to request http://localhost:5000/home. This response—and all other HTML responses from the application—contain the content generated by the tag helper component, as shown in Figure 25-14.
Figure 25-14.
Using a tag helper component
Expanding Tag Helper Component Element Selection
By default, only the head and body elements are processed by the tag helper components, but additional elements can be selected by creating a class derived from the terribly named TagHelperComponentTagHelper class. Add a class file named TableFooterTagHelperComponent.cs to the TagHelpers folder and use it to define the classes shown in Listing 25-31.
using Microsoft.AspNetCore.Mvc.Razor.TagHelpers;
using Microsoft.AspNetCore.Mvc.Rendering;
using Microsoft.AspNetCore.Razor.TagHelpers;
using Microsoft.Extensions.Logging;
namespace WebApp.TagHelpers {
[HtmlTargetElement("table")]
public class TableFooterSelector: TagHelperComponentTagHelper {
public TableFooterSelector(ITagHelperComponentManager mgr,
ILoggerFactory log): base(mgr, log) { }
}
public class TableFooterTagHelperComponent: TagHelperComponent {
public override void Process(TagHelperContext context,
The Contents of the TableFooterTagHelperComponent.cs File in the TagHelpers Folder
The TableFooterSelector class is derived from TagHelperComponentTagHelper, and it is decorated with the HtmlTargetElement attribute that expands the range of elements processed by the application’s tag helper components. In this case, the attribute selects table elements.
The TableFooterTagHelperComponent class, defined in the same file, is a tag helper component that transforms table elements by adding a tfoot element, which represents a table footer.
Caution
Bear in mind that when you create a new TagHelperComponentTagHelper, all the tag helper components will receive the elements selected by the HtmlTargetAttribute element.
The tag helper component must be registered as a service to receive elements for transformation, but the tag helper component tag helper (which is one of the worst naming choices I have seen for some years) is discovered and applied automatically. Listing 25-32 adds the tag helper component service.
...
public void ConfigureServices(IServiceCollection services) {
Registering a Tag Helper Component in the Startup.cs File in the WebApp Folder
Restart ASP.NET Core and use a browser to request a URL that renders a table, such as http://localhost:5000/home or http://localhost:5000/cities. Each table will contain a table footer, as shown in Figure 25-15.
Figure 25-15.
Expanding tag helper component element selection
Summary
In this chapter, I explained how tag helpers work and their role in transforming HTML elements in views and pages. I showed you how to create and apply tag helpers, how to control the elements that are selected for transformation, and how to use the advanced features to get specific results. I finished the chapter by explaining the tag helper component feature, which are defined as services. In the next chapter, I describe the built-in tag helpers that ASP.NET Core provides.