In this chapter, I describe advanced features that can be used to create RESTful web services. I explain how to deal with related data in Entity Framework Core queries, how to add support for the HTTP PATCH method, how to use content negations, and how to use OpenAPI to describe your web services. Table 20-1 puts this chapter in context.
Table 20-1.
Putting Advanced Web Service Features in Context
Question
Answer
What are they?
The features described in this chapter provide greater control over how ASP.NET Core web services work, including managing the data sent to the client and the format used for that data.
Why are they useful?
The default behaviors provided by ASP.NET Core don’t meet the needs of every project, and the features described in this chapter allow web services to be reshaped to fit specific requirements.
How are they used?
The common theme for the features in this chapter is altering the responses produced by action methods.
Are there any pitfalls or limitations?
It can be hard to decide how to implement web services, especially if they are consumed by third-party clients. The behavior of a web service becomes fixed as soon as clients start using a web service, which means that careful thought is required when using the features described in this chapter.
Are there any alternatives?
The features described in this chapter are optional, and you can rely on the default behaviors of ASP.NET Core web services.
Use the Include and ThenInclude methods in LINQ queries
4
Breaking circular references
Explicitly set navigation properties to null
5
Allowing clients to selectively update data
Support the HTTP PATCH method
6–9
Supporting a range of response data types
Support content formatting and negotiation
10–24
Documenting a web service
Use OpenAPI to describe the web service
25–29
Preparing for This Chapter
This chapter uses the WebApp project created in Chapter 18 and modified in Chapter 19. To prepare for this chapter, add a file named SuppliersController.cs to the WebApp/Controllers folder with the content shown in Listing 20-1.
using Microsoft.AspNetCore.Mvc;
using WebApp.Models;
using System.Threading.Tasks;
namespace WebApp.Controllers {
[ApiController]
[Route("api/[controller]")]
public class SuppliersController: ControllerBase {
private DataContext context;
public SuppliersController(DataContext ctx) {
context = ctx;
}
[HttpGet("{id}")]
public async Task<Supplier> GetSupplier(long id) {
return await context.Suppliers.FindAsync(id);
}
}
}
Listing 20-1.
The Contents of the SuppliersController.cs File in the Controllers Folder
The controller extends the ControllerBase class, declares a dependency on the DataContext service, and defines an action named GetSupplier that handles GET requests for the /api/[controller]/{id} URL pattern.
Dropping the Database
Open a new PowerShell command prompt, navigate to the folder that contains the WebApp.csproj file, and run the command shown in Listing 20-2 to drop the database.
Tip
You can download the example project for this chapter—and for all the other chapters in this book—from https://github.com/apress/pro-asp.net-core-3. See Chapter 1 for how to get help if you have problems running the examples.
dotnet ef database drop --force
Listing 20-2.
Dropping the Database
Running the Example Application
Once the database has been dropped, select Start Without Debugging or Run Without Debugging from the Debug menu or use the PowerShell command prompt to run the command shown in Listing 20-3.
dotnet run
Listing 20-3.
Running the Example Application
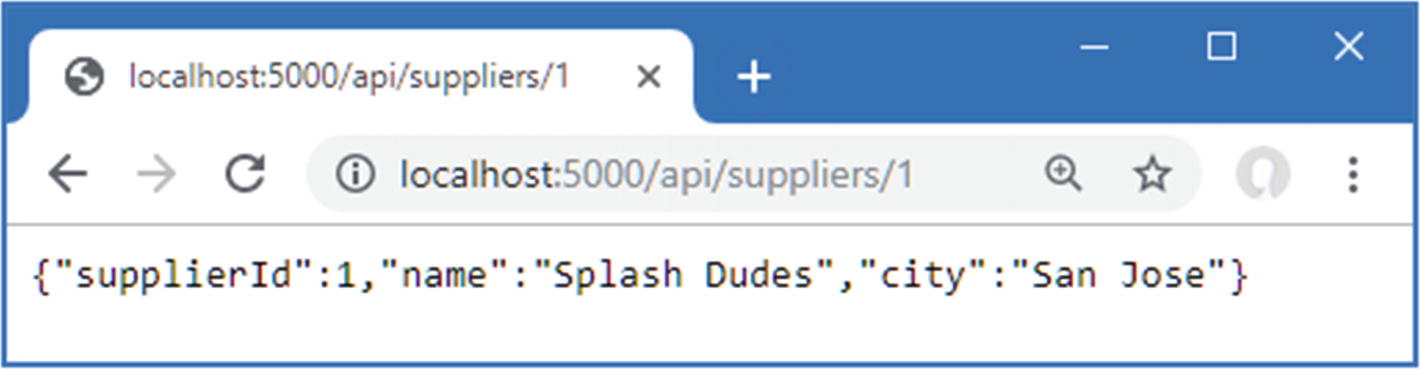
The database will be seeded as part of the application startup. Once ASP.NET Core is running, use a web browser to request http://localhost:5000/api/suppliers/1, which will produce the response shown in Figure 20-1.
Figure 20-1.
Running the example application
The response shows the Supplier object whose primary key matches the last segment of the request URL. In Chapter 19, the JSON serializer was configured to ignore properties with null values, which is why the response doesn’t include the navigation property defined by the Supplier data model class.
Dealing with Related Data
Although this isn’t a book about Entity Framework Core, there is one aspect of querying for data that most web services encounter. The data model classes defined in Chapter 18 include navigation properties, which Entity Framework Core can populate by following relationships in the database when the Include method is used, as shown in Listing 20-4.
using Microsoft.AspNetCore.Mvc;
using WebApp.Models;
using System.Threading.Tasks;
using Microsoft.EntityFrameworkCore;
namespace WebApp.Controllers {
[ApiController]
[Route("api/[controller]")]
public class SuppliersController: ControllerBase {
private DataContext context;
public SuppliersController(DataContext ctx) {
context = ctx;
}
[HttpGet("{id}")]
public async Task<Supplier> GetSupplier(long id) {
return await context.Suppliers
.Include(s => s.Products)
.FirstAsync(s => s.SupplierId == id);
}
}
}
Listing 20-4.
Requesting Related Data in the SuppliersController.cs File in the Controllers Folder
The Include method tells Entity Framework Core to follow a relationship in the database and load the related data. In this case, the Include method selects the Products navigation property defined by the Supplier class, which causes Entity Framework Core to load the Product objects associated with the selected Supplier and assign them to the Products property.
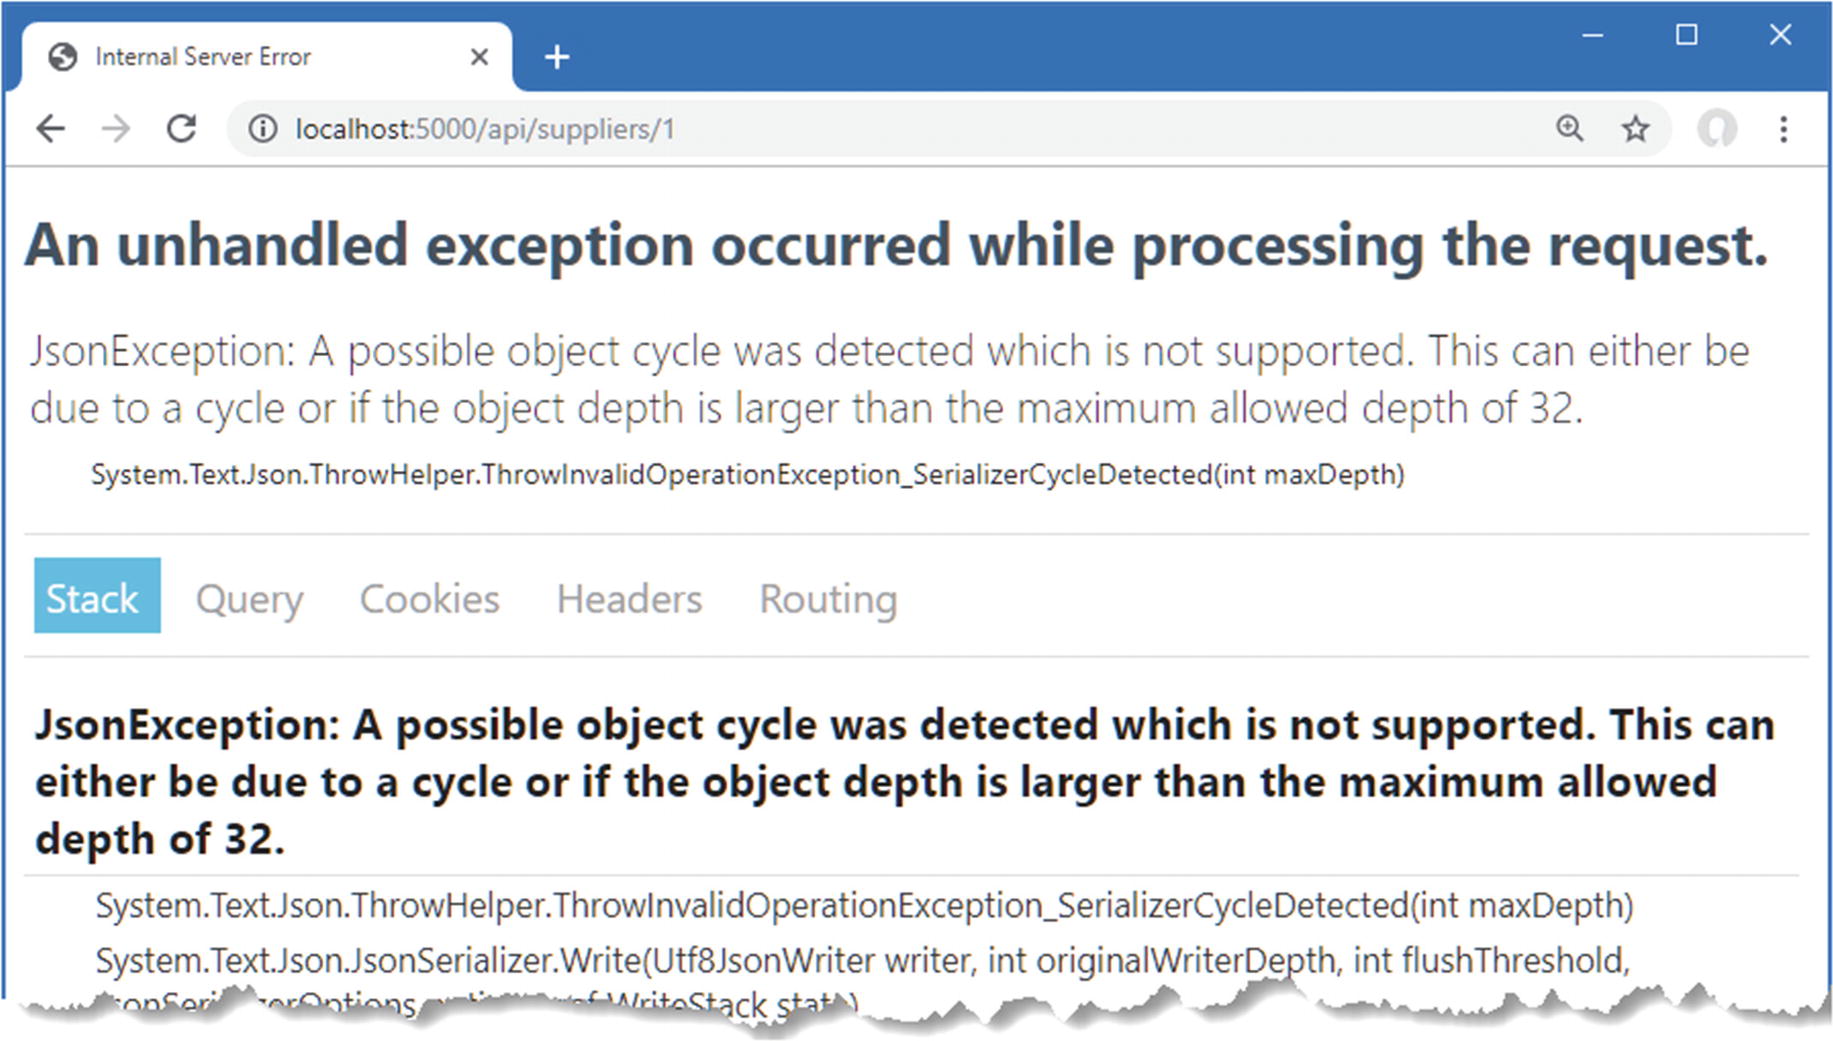
Restart ASP.NET Core and use a browser to request http://localhost:5000/api/suppliers/1, which will target the GetSupplier action method. The request fails, and you will see the exception shown in Figure 20-2.
Figure 20-2.
An exception caused by querying for related data
The JSON serializer has reported an “object cycle,” which means there is a circular reference in the data that is being serialized for the response.
Looking at the code in Listing 20-4, you might struggle to see why using the Include method has created a circular reference. The problem is caused by an Entity Framework Core feature that attempts to minimize the amount of data read from the database but that causes problems in ASP.NET Core applications.
When Entity Framework Core creates objects, it populates navigation properties with objects that have already been created by the same database context. This can be a useful feature in some kinds of applications, such as desktop apps, where a database context object has a long life and is used to make many requests over time. It isn’t useful for ASP.NET Core applications, where a new context object is created for each HTTP request.
Entity Framework Core queries the database for the Product objects associated with the selected Supplier and assigns them to the Supplier.Products navigation property. The problem is that Entity Framework Core then looks at each Product object it has created and uses the query response to populate the Product.Supplier navigation property as well. For an ASP.NET Core application, this is an unhelpful step to take because it creates a circular reference between the navigation properties of the Supplier and Product objects, as shown in Figure 20-3.
Figure 20-3.
Understanding how Entity Framework Core uses related data
When the Supplier object is returned by the controller’s action method, the JSON serializer works its way through the properties and follows the references to the Product objects, each of which has a reference back to the Supplier object, which it follows in a loop until the maximum depth is reached and the exception shown in Figure 20-2 is thrown.
Breaking Circular References in Related Data
There is no way to stop Entity Framework Core from creating circular references in the data it loads in the database. Preventing the exception means presenting the JSON serializer with data that doesn’t contain circular references, which is most easily done by altering the objects after they have been created by Entity Framework Core and before they are serialized, as shown in Listing 20-5.
using Microsoft.AspNetCore.Mvc;
using WebApp.Models;
using System.Threading.Tasks;
using Microsoft.EntityFrameworkCore;
namespace WebApp.Controllers {
[ApiController]
[Route("api/[controller]")]
public class SuppliersController: ControllerBase {
private DataContext context;
public SuppliersController(DataContext ctx) {
context = ctx;
}
[HttpGet("{id}")]
public async Task<Supplier> GetSupplier(long id) {
Breaking References in the SuppliersController.cs File in the Controllers Folder
The foreach loop sets the Supplier property of each Product object to null, which breaks the circular references. Restart ASP.NET Core and request http://localhost:5000/api/suppliers/1 to query for a supplier and its related products, which produces the response shown in Figure 20-4.
Figure 20-4.
Querying for related data
Supporting the HTTP PATCH Method
For simple data types, edit operations can be handled by replacing the existing object using the PUT method, which is the approach I took in Chapter 19. Even if you only need to change a single property value in the Product class, for example, it isn’t too much trouble to use a PUT method and include the values for all the other Product properties, too.
Not all data types are as easy to work with, either because they define too many properties or because the client has only received values for selected properties. The solution is to use a PATCH request, which sends just the changes to the web service rather than a complete replacement object.
Understanding JSON Patch
ASP.NET Core has support for working with the JSON Patch standard, which allows changes to be specified in a uniform way. The JSON Patch standard allows for a complex set of changes to be described, but for this chapter, I am going to focus on just the ability to change the value of a property.
I am not going to go into the details of the JSON Patch standard, which you can read at https://tools.ietf.org/html/rfc6902, but the client is going to send the web service JSON data like this in its HTTP PATCH requests:
A JSON Patch document is expressed as an array of operations. Each operation has an op property, which specifies the type of operation, and a path property, which specifies where the operation will be applied.
For the example application—and, in fact, for most applications—only the replace operation is required, which is used to change the value of a property. This JSON Patch document sets new values for the Name and City properties. The properties defined by the Supplier class not mentioned in the JSON Patch document will not be modified.
Installing and Configuring the JSON Patch Package
Support for JSON Patch isn’t installed when a project is created with the Empty template. To install the JSON Patch package, open a new PowerShell command prompt, navigate to the folder that contains the WebApp.csproj file, and run the command shown in Listing 20-6. If you are using Visual Studio, you can install the package by selecting Project ➤ Manage NuGet Packages.
The Microsoft implementation of JSON Patch relies on the third-party Newtonsoft JSON.NET serializer that was used in ASP.NET Core 2.x but that has been replaced with a bespoke JSON serializer in ASP.NET Core 3.x. Add the statement shown in Listing 20-7 to the ConfigureServices method of the Startup class to enable the old serializer.
...
public void ConfigureServices(IServiceCollection services) {
Enabling the JSON.NET Serializer in the Startup.cs File in the WebApp Folder
The AddNewtonsoftJson method enables the JSON.NET serializer, which replaces the standard ASP.NET Core serializer. The JSON.NET serializer has its own configuration class, MvcNewtonsoftJsonOptions, which is applied through the options pattern. Listing 20-7 sets the NullValueHandling value, which tells the serializer to discard properties with null values.
public async Task<Supplier> PatchSupplier(long id,
JsonPatchDocument<Supplier> patchDoc) {
Supplier s = await context.Suppliers.FindAsync(id);
if (s != null) {
patchDoc.ApplyTo(s);
await context.SaveChangesAsync();
}
return s;
}
}
}
Listing 20-8.
Adding an Action in the SuppliersController.cs File in the Controller Folder
The action method is decorated with the HttpPatch attribute, which denotes that it will handle HTTP requests. The model binding feature is used to process the JSON Patch document through a JsonPatchDocument<T> method parameter. The JsonPatchDocument<T> class defines an ApplyTo method, which applies each operation to an object. The action method in Listing 20-8 retrieves a Supplier object from the database, applies the JSON PATCH, and stores the modified object.
Restart ASP.NET Core and use a PowerShell command prompt to run the command shown in Listing 20-9, which sends an HTTP PATCH request with a JSON PATCH document that changes the value of the City property to Los Angeles.
The PatchSupplier action method returns the modified Supplier object as its result, which is serialized and sent to the client in the HTTP response. You can also see the effect of the change by using a web browser to request http://localhost:5000/suppliers/1, which produces the response shown in Figure 20-5.
Figure 20-5.
Updating using a PATCH request
Understanding Content Formatting
The web service examples so far have produced JSON results, but this is not the only data format that action methods can produce. The content format selected for an action result depends on four factors: the formats that the client will accept, the formats that the application can produce, the content policy specified by the action method, and the type returned by the action method. Figuring out how everything fits together can be daunting, but the good news is that the default policy works just fine for most applications, and you only need to understand what happens behind the scenes when you need to make a change or when you are not getting results in the format that you expect.
Understanding the Default Content Policy
The best way to get acquainted with content formatting is to understand what happens when neither the client nor the action method applies any restrictions to the formats that can be used. In this situation, the outcome is simple and predictable.
1.
If the action method returns a string, the string is sent unmodified to the client, and the Content-Type header of the response is set to text/plain.
2.
For all other data types, including other simple types such as int, the data is formatted as JSON, and the Content-Type header of the response is set to application/json.
Strings get special treatment because they cause problems when they are encoded as JSON. When you encode other simple types, such as the C# int value 2, then the result is a quoted string, such as "2". When you encode a string, you end up with two sets of quotes so that "Hello" becomes ""Hello"". Not all clients cope well with this double encoding, so it is more reliable to use the text/plain format and sidestep the issue entirely. This is rarely an issue because few applications send string values; it is more common to send objects in the JSON format. To see the default policy, add a class file named ContentController.cs to the WebApps/Controllers folder with the code shown in Listing 20-10.
using Microsoft.AspNetCore.Mvc;
using Microsoft.EntityFrameworkCore;
using System.Threading.Tasks;
using WebApp.Models;
namespace WebApp.Controllers {
[ApiController]
[Route("/api/[controller]")]
public class ContentController : ControllerBase {
private DataContext context;
public ContentController(DataContext dataContext) {
context = dataContext;
}
[HttpGet("string")]
public string GetString() => "This is a string response";
[HttpGet("object")]
public async Task<Product> GetObject() {
return await context.Products.FirstAsync();
}
}
}
Listing 20-10.
The Contents of the ContentController.cs File in the Controllers Folder
The controller defines actions that return string and object results. Restart ASP.NET Core and use a PowerShell prompt to run the command shown in Listing 20-11; this command sends a request that invokes the GetString action method, which returns a string.
This command sends a GET request to the /api/content/string URL and processes the response to display the Content-Type header and the content from the response. The command produces the following output, which shows the Content-Type header for the response:
Content-Type Content
------------ -------
text/plain; charset=utf-8 This is a string response
Next, run the command shown in Listing 20-12, which sends a request that will be handled by the GetObject action method.
Most clients include an Accept header in a request, which specifies the set of formats that they are willing to receive in the response, expressed as a set of MIME types. Here is the Accept header that Google Chrome sends in requests:
This header indicates that Chrome can handle the HTML and XHTML formats (XHTML is an XML-compliant dialect of HTML), XML, and the WEBP image format (which is the animated PNG image format).
The q values in the header specify relative preference, where the value is 1.0 by default. Specifying a q value for 0.9 for application/xml tells the server that Chrome will accept XML data but prefers to deal with HTML or XHTML. The */* item tells the server that Chrome will accept any format, but its q value specifies that it is the lowest preference of the specified types. Putting this together means that the Accept header sent by Chrome provides the server with the following information:
1.
Chrome prefers to receive HTML or XHTML data or WEBP and APNG images.
2.
If those formats are not available, then the next most preferred format is XML.
3.
If none of the preferred formats is available, then Chrome will accept any format.
You might assume from this that you can change the format produced by the ASP.NET Core application by setting the Accept header, but it doesn’t work that way—or, rather, it doesn’t work that way just yet because there is some preparation required.
To see what happens when the Accept header is changed, use a PowerShell prompt to run the command shown in Listing 20-13, which sets the Accept header to tell ASP.NET Core that the client is willing to receive only XML data.
Including the Accept header has no effect on the format, even though the ASP.NET Core application sent the client a format that it hasn’t specified. The problem is that, by default, the MVC Framework is configured to only use JSON. Rather than return an error, the MVC Framework sends JSON data in the hope that the client can process it, even though it was not one of the formats specified by the request Accept header.
Enabling XML Formatting
For content negotiation to work, the application must be configured so there is some choice in the formats that can be used. Although JSON has become the default format for web applications, the MVC Framework can also support encoding data as XML, as shown in Listing 20-14.
Tip
You can create your own content format by deriving from the Microsoft.AspNetCore.Mvc.Formatters.OutputFormatter class. This is rarely used because creating a custom data format isn’t a useful way of exposing the data in your application, and the most common formats—JSON and XML—are already implemented.
...
public void ConfigureServices(IServiceCollection services) {
Enabling XML Formatting in the Startup.cs File in the WebApp Folder
The XML Serializer has some limitations, including the inability to deal with Entity Framework Core navigation properties because they are defined through an interface. To create an object that can be serialized, Listing 20-15 uses ProductBindingTarget defined in Chapter 19.
using Microsoft.AspNetCore.Mvc;
using Microsoft.EntityFrameworkCore;
using System.Threading.Tasks;
using WebApp.Models;
namespace WebApp.Controllers {
[ApiController]
[Route("/api/[controller]")]
public class ContentController : ControllerBase {
private DataContext context;
public ContentController(DataContext dataContext) {
context = dataContext;
}
[HttpGet("string")]
public string GetString() => "This is a string response";
[HttpGet("object")]
public async Task<ProductBindingTarget> GetObject() {
Product p = await context.Products.FirstAsync();
return new ProductBindingTarget() {
Name = p.Name, Price = p.Price, CategoryId = p.CategoryId,
SupplierId = p.SupplierId
};
}
}
}
Listing 20-15.
Creating a Serializable Object in the ContentController.cs File in the Controllers Folder
When the MVC Framework had only the JSON format available, it had no choice but to encode responses as JSON. Now that there is a choice, you can see the content negotiation process working more fully. Restart ASP.NET Core MVC and run the command in Listing 20-13 again to request XML data, and you will see the following output (from which I have omitted he namespace attributes for brevity):
The MVC Framework will always use the JSON format if the Accept header contains */*, indicating any format, even if there are other supported formats with a higher preference. This is an odd feature that is intended to deal with requests from browsers consistently, although it can be a source of confusion. Run the command shown in Listing 20-16 to send a request with an Accept header that requests XML but will accept any other format if XML isn’t available.
Even though the Accept header tells the MVC Framework that the client prefers XML, the presence of the */* fallback means that a JSON response is sent. A related problem is that a JSON response will be sent when the client requests a format that the MVC Framework hasn’t been configured to produce, which you can see by running the command shown in Listing 20-17.
In both cases, the MVC Framework returns JSON data, which may not be what the client is expecting. Two configuration settings are used to tell the MVC Framework to respect the Accept setting sent by the client and not send JSON data by default. To change the configuration, add the statements shown in Listing 20-18 to the Startup class.
...
public void ConfigureServices(IServiceCollection services) {
Configuring Content Negotiation in the Startup.cs File in the WebApp Folder
The options pattern is used to set the properties of a MvcOptions object. Setting RespectBrowserAcceptHeader to true disables the fallback to JSON when the Accept header contains */*. Setting ReturnHttpNotAcceptable to true disables the fallback to JSON when the client requests an unsupported data format.
Restart ASP.NET Core and repeat the command from Listing 20-16. Instead of a JSON response, the format preferences specified by the Accept header will be respected, and an XML response will be sent. Repeat the command from Listing 20-17, and you will receive a response with the 406 status code.
...
Invoke-WebRequest : The remote server returned an error: (406) Not Acceptable.
...
Sending a 406 code indicates there is no overlap between the formats the client can handle and the formats that the MVC Framework can produce, ensuring that the client doesn’t receive a data format it cannot process.
Specifying an Action Result Format
The data formats that the MVC Framework can use for an action method result can be constrained using the Produces attribute, as shown in Listing 20-19.
Tip
The Produces attribute is an example of a filter, which allows attributes to alter requests and responses. See Chapter 30 for more details.
using Microsoft.AspNetCore.Mvc;
using Microsoft.EntityFrameworkCore;
using System.Threading.Tasks;
using WebApp.Models;
namespace WebApp.Controllers {
[ApiController]
[Route("/api/[controller]")]
public class ContentController : ControllerBase {
private DataContext context;
public ContentController(DataContext dataContext) {
context = dataContext;
}
[HttpGet("string")]
public string GetString() => "This is a string response";
[HttpGet("object")]
[Produces("application/json")]
public async Task<ProductBindingTarget> GetObject() {
Product p = await context.Products.FirstAsync();
return new ProductBindingTarget() {
Name = p.Name, Price = p.Price, CategoryId = p.CategoryId,
SupplierId = p.SupplierId
};
}
}
}
Listing 20-19.
Specifying a Data Format in the ContentController.cs File in the Controllers Folder
The argument for the attribute specifies the format that will be used for the result from the action, and more than one type can be specified. The Produces attribute restricts the types that the MVC Framework will consider when processing an Accept header. To see the effect of the Produces attribute, use a PowerShell prompt to run the command shown in Listing 20-20.
The Accept header tells the MVC Framework that the client prefers XML data but will accept JSON. The Produces attribute means that XML data isn’t available as the data format for the GetObject action method and so the JSON serializer is selected, which produces the following response:
The Accept header isn’t always under the control of the programmer who is writing the client. In such situations, it can be helpful to allow the data format for the response to be requested using the URL. This feature is enabled by decorating an action method with the FormatFilter attribute and ensuring there is a format segment variable in the action method’s route, as shown in Listing 20-21.
using Microsoft.AspNetCore.Mvc;
using Microsoft.EntityFrameworkCore;
using System.Threading.Tasks;
using WebApp.Models;
namespace WebApp.Controllers {
[ApiController]
[Route("/api/[controller]")]
public class ContentController : ControllerBase {
private DataContext context;
public ContentController(DataContext dataContext) {
context = dataContext;
}
[HttpGet("string")]
public string GetString() => "This is a string response";
[HttpGet("object/{format?}")]
[FormatFilter]
[Produces("application/json", "application/xml")]
public async Task<ProductBindingTarget> GetObject() {
Product p = await context.Products.FirstAsync();
return new ProductBindingTarget() {
Name = p.Name, Price = p.Price, CategoryId = p.CategoryId,
SupplierId = p.SupplierId
};
}
}
}
Listing 20-21.
Enabling Formatting in the ContentController.cs File in the Controllers Folder
The FormatFilter attribute is an example of a filter, which is an attribute that can modify requests and responses, as described in Chapter 30. This filter gets the value of the format segment variable from the route that matched the request and uses it to override the Accept header sent by the client. I have also expanded the range of types specified by the Produces attribute so that the action method can return both JSON and XML responses.
Each data format supported by the application has a shorthand: xml for XML data and json for JSON data. When the action method is targeted by a URL that contains one of these shorthand names, the Accept header is ignored, and the specified format is used. To see the effect, restart ASP.NET Core and use the browser to request http://localhost:5000/api/content/object/json and http://localhost:5000/api/content/object/xml, which produce the responses shown in Figure 20-6.
Figure 20-6.
Requesting data formats in the URL
Restricting the Formats Received by an Action Method
Most content formatting decisions focus on the data formats the ASP.NET Core application sends to the client, but the same serializers that deal with results are used to deserialize the data sent by clients in request bodies. The deserialization process happens automatically, and most applications will be happy to accept data in all the formats they are configured to send. The example application is configured to send JSON and XML data, which means that clients can send JSON and XML data in requests.
The Consumes attribute can be applied to action methods to restrict the data types it will handle, as shown in Listing 20-22.
using Microsoft.AspNetCore.Mvc;
using Microsoft.EntityFrameworkCore;
using System.Threading.Tasks;
using WebApp.Models;
namespace WebApp.Controllers {
[ApiController]
[Route("/api/[controller]")]
public class ContentController : ControllerBase {
private DataContext context;
public ContentController(DataContext dataContext) {
context = dataContext;
}
[HttpGet("string")]
public string GetString() => "This is a string response";
[HttpGet("object/{format?}")]
[FormatFilter]
[Produces("application/json", "application/xml")]
public async Task<ProductBindingTarget> GetObject() {
Product p = await context.Products.FirstAsync();
return new ProductBindingTarget() {
Name = p.Name, Price = p.Price, CategoryId = p.CategoryId,
SupplierId = p.SupplierId
};
}
[HttpPost]
[Consumes("application/json")]
public string SaveProductJson(ProductBindingTarget product) {
return $"JSON: {product.Name}";
}
[HttpPost]
[Consumes("application/xml")]
public string SaveProductXml(ProductBindingTarget product) {
return $"XML: {product.Name}";
}
}
}
Listing 20-22.
Adding Action Methods in the ContentController.cs File in the Controllers Folder
The new action methods are decorated with the Consumes attribute, restricting the data types that each can handle. The combination of attributes means that HTTP POST attributes whose Content-Type header is application/json will be handled by the SaveProductJson action method. HTTP POST requests whose Content-Type header is application/xml will be handled by the SaveProductXml action method. Restart ASP.NET Core and use a PowerShell command prompt to run the command shown in Listing 20-23 to send JSON data to the example application.
The request is automatically routed to the correct action method, which produces the following response:
JSON: Swimming Goggles
Run the command shown in Listing 20-24 to send XML data to the example application.
Invoke-RestMethod http://localhost:5000/api/content -Method POST -Body "<ProductBindingTarget><Name>Kayak</Name><Price>275.00</Price><CategoryId>1</CategoryId><SupplierId>1</SupplierId></ProductBindingTarget>" -ContentType "application/xml"
Listing 20-24.
Sending XML Data
The request is routed to the SaveProductXml action method and produces the following response:
XML: Kayak
The MVC Framework will send a 415 - Unsupported Media Type response if a request is sent with a Content-Type header that doesn’t match the data types that the application supports.
Documenting and Exploring Web Services
When you are responsible for developing both the web service and its client, the purpose of each action and its results are obvious and are usually written at the same time. If you are responsible for a web service that is consumed by third-party developers, then you may need to provide documentation that describes how the web service works. The OpenAPI specification, which is also known as Swagger, describes web services in a way that can be understood by other programmers and consumed programmatically. In this section, I demonstrate how to use OpenAPI to describe a web service and show you how to fine-tune that description.
Resolving Action Conflicts
The OpenAPI discovery process requires a unique combination of the HTTP method and URL pattern for each action method. The process doesn’t support the Consumes attribute, so a change is required to the ContentController to remove the separate actions for receiving XML and JSON data, as shown in Listing 20-25.
using Microsoft.AspNetCore.Mvc;
using Microsoft.EntityFrameworkCore;
using System.Threading.Tasks;
using WebApp.Models;
namespace WebApp.Controllers {
[ApiController]
[Route("/api/[controller]")]
public class ContentController : ControllerBase {
private DataContext context;
public ContentController(DataContext dataContext) {
context = dataContext;
}
[HttpGet("string")]
public string GetString() => "This is a string response";
[HttpGet("object/{format?}")]
[FormatFilter]
[Produces("application/json", "application/xml")]
public async Task<ProductBindingTarget> GetObject() {
Product p = await context.Products.FirstAsync();
return new ProductBindingTarget() {
Name = p.Name, Price = p.Price, CategoryId = p.CategoryId,
SupplierId = p.SupplierId
};
}
[HttpPost]
[Consumes("application/json")]
public string SaveProductJson(ProductBindingTarget product) {
Removing an Action in the ContentController.cs File in the Controllers Folder
Commenting out one of the action methods ensures that each remaining action has a unique combination of HTTP method and URL.
Installing and Configuring the Swashbuckle Package
The Swashbuckle package is the most popular ASP.NET Core implementation of the OpenAPI specification and will automatically generate a description for the web services in an ASP.NET Core application. The package also includes tools that consume that description to allow the web service to be inspected and tested.
Open a new PowerShell command prompt, navigate to the folder that contains the WebApp.csproj file, and run the commands shown in Listing 20-26 to install the NuGet package. If you are using Visual Studio, you can select Project ➤ Manage Nuget Packages and install the package through the Visual Studio package user interface.
Configuring Swashbuckle in the Startup.cs File in the WebApp Folder
There are two features set up by the statements in Listing 20-27. The feature generates an OpenAPI description of the web services that the application contains. You can see the description by restarting ASP.NET Core and using the browser to request the URL http://localhost:5000/swagger/v1/swagger.json, which produces the response shown in Figure 20-7. The OpenAPI format is verbose, but you can see each URL that the web service controllers support, along with details of the data each expects to receive and the range of responses that it will generate.
Figure 20-7.
The OpenAPI description of the web service
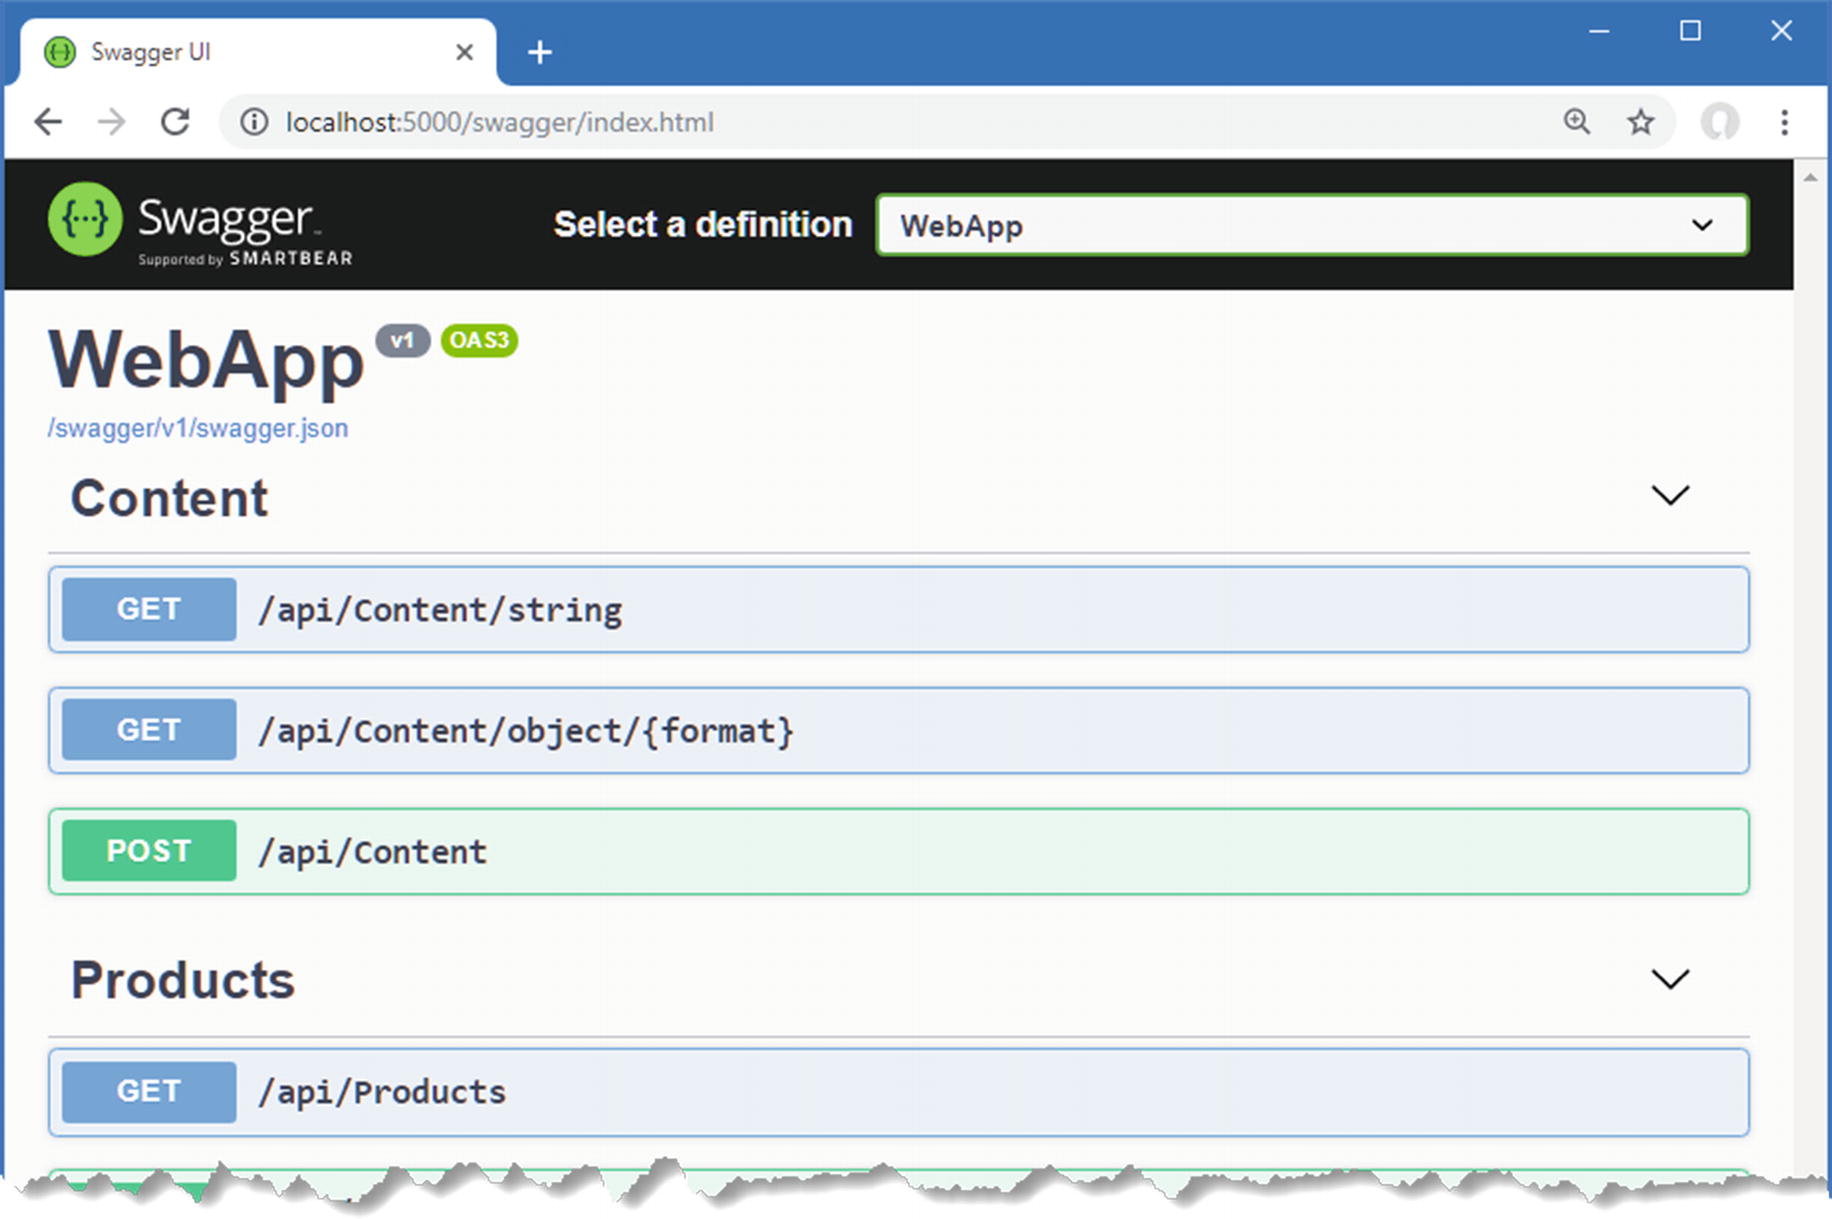
The second feature is a UI that consumes the OpenAPI description of the web service and presents the information in a more easily understood way, along with support for testing each action. Use the browser to request http://localhost:5000/swagger, and you will see the interface shown in Figure 20-8. You can expand each action to see details, including the data that is expected in the request and the different responses that the client can expect.
Figure 20-8.
The OpenAPI explorer interface
Fine-Tuning the API Description
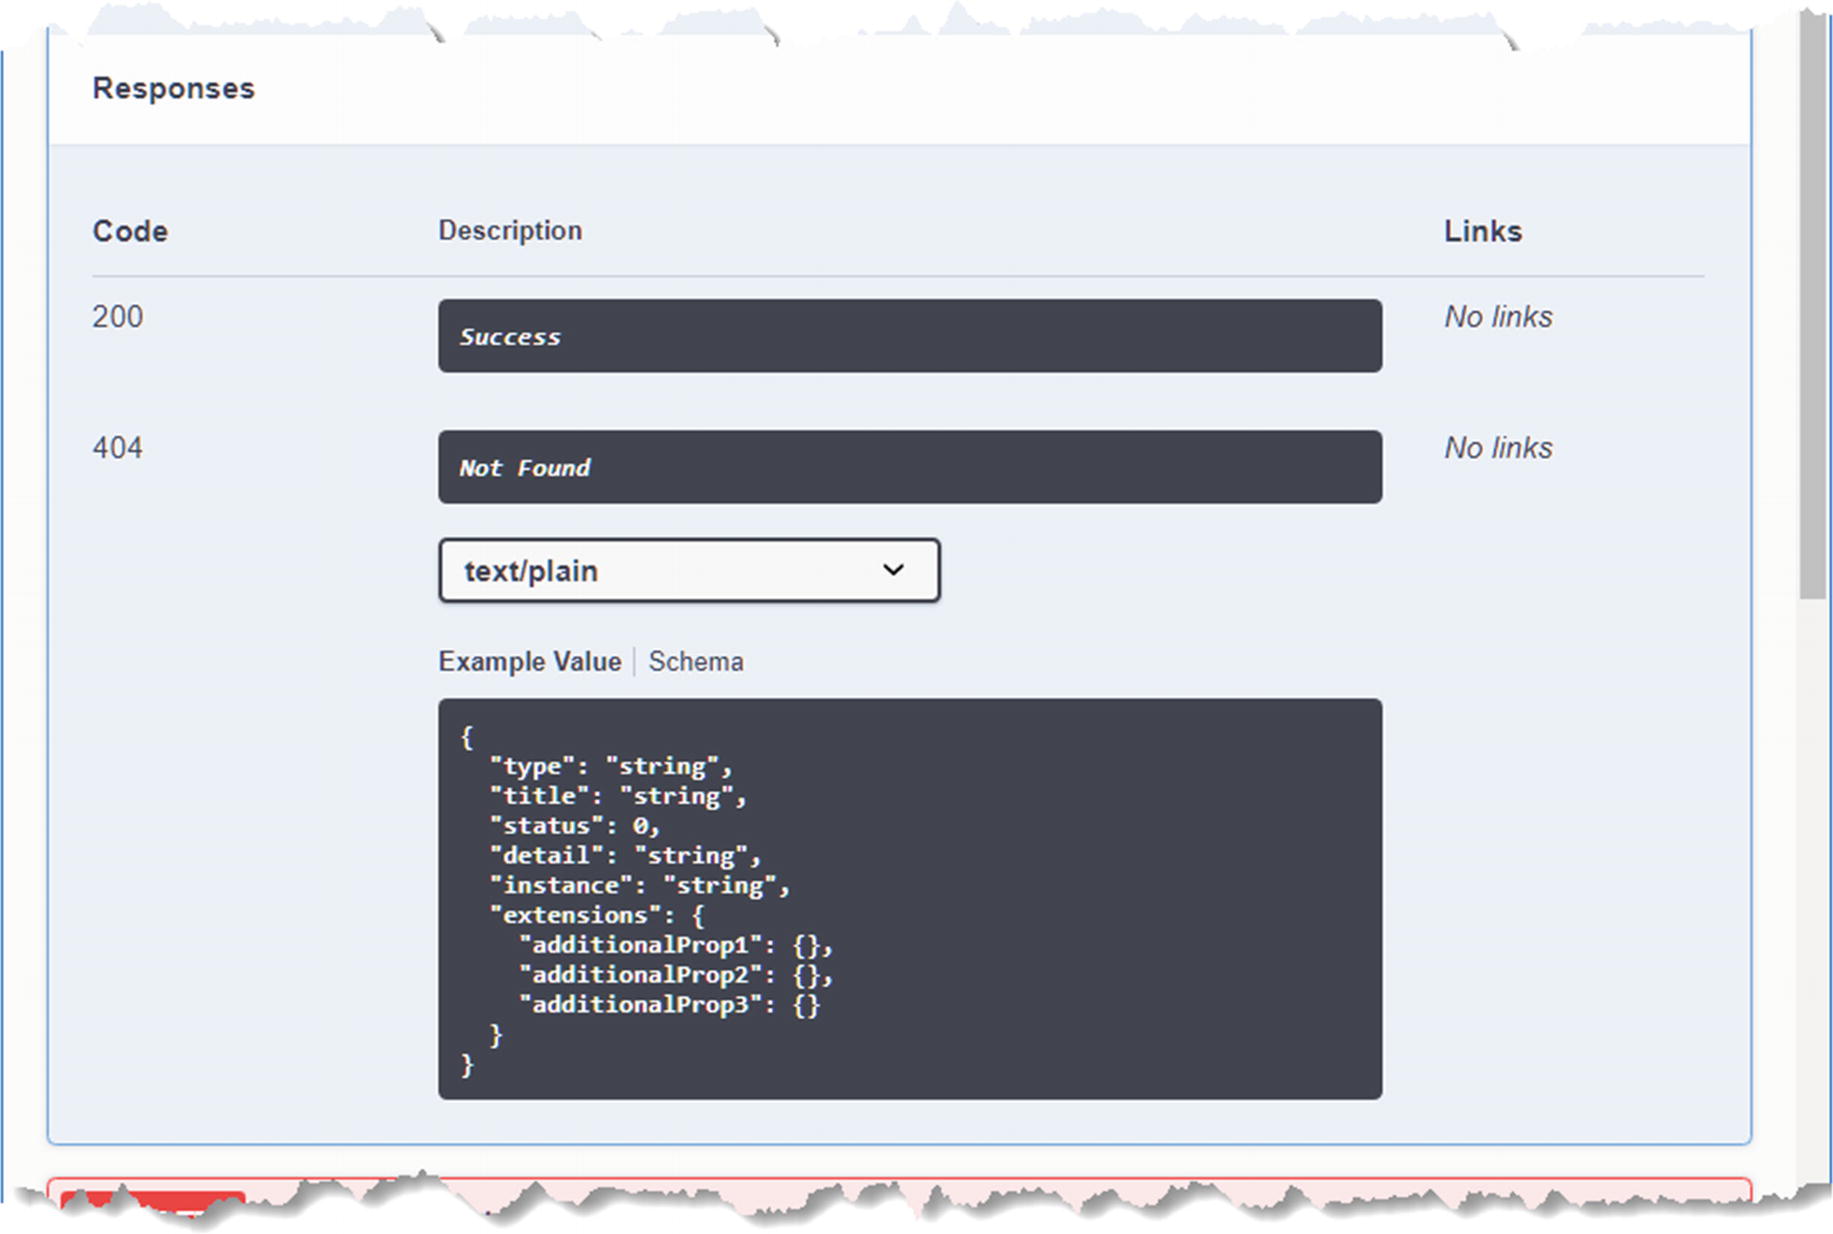
Relying on the API discovery process can produce a result that doesn’t truly capture the web service. You can see this by examining the entry in the Products section that describes GET requests matched by the /api/Product/{id} URL pattern. Expand this item and examine the response section, and you will see there is only one status code response that will be returned, as shown in Figure 20-9.
Figure 20-9.
The data formats listed in the OpenAPI web service description
The API discovery process makes assumptions about the responses produced by an action method and doesn’t always reflect what can really happen. In this case, the GetProduct action method in the ProductController class can return another response that the discovery process hasn’t detected.
...
[HttpGet("{id}")]
public async Task<IActionResult> GetProduct(long id) {
Product p = await context.Products.FindAsync(id);
if (p == null) {
return NotFound();
}
return Ok(new {
ProductId = p.ProductId, Name = p.Name,
Price = p.Price, CategoryId = p.CategoryId,
SupplierId = p.SupplierId
});
}
...
If a third-party developer attempts to implement a client for the web service using the OpenAPI data, they won’t be expecting the 404 - Not Found response that the action sends when it can’t find an object in the database.
Running the API Analyzer
ASP.NET Core includes an analyzer that inspects web service controllers and highlights problems like the one described in the previous section. To enable the analyzer, add the elements shown in Listing 20-28 to the WebApp.cspoj file. (If you are using Visual Studio, right-click the WebApp project item in the Solution Explorer and select Edit Project File from the popup menu.)
Enabling the Analyzer in the WebApp.csproj File in the WebApp Folder
If you are using Visual Studio, you will see any problems detected by the API analyzer shown in the controller class file, as shown in Figure 20-10.
Figure 20-10.
A problem detected by the API analyzer
If you are using Visual Studio Code, you will see warning messages when the project is compiled, either using the dotnet build command or when it is executed using the dotnet run command. When the project is compiled, you will see this message that describes the issue in the ProductController class:
To fix the problem detected by the analyzer, the ProducesResponseType attribute can be used to declare each of the response types that the action method can produce, as shown in Listing 20-29.
using Microsoft.AspNetCore.Mvc;
using WebApp.Models;
using System.Collections.Generic;
using Microsoft.Extensions.Logging;
using System.Linq;
using System.Threading.Tasks;
using Microsoft.AspNetCore.Http;
namespace WebApp.Controllers {
[ApiController]
[Route("api/[controller]")]
public class ProductsController : ControllerBase {
public async Task<IActionResult> GetProduct(long id) {
Product p = await context.Products.FindAsync(id);
if (p == null) {
return NotFound();
}
return Ok(new {
ProductId = p.ProductId, Name = p.Name,
Price = p.Price, CategoryId = p.CategoryId,
SupplierId = p.SupplierId
});
}
// ...action methods omitted for brevity...
}
}
Listing 20-29.
Declaring the Result in the ProductsController.cs File in the Controllers Folder
Restart ASP.NET Core and use a browser to request http://localhost:5000/swagger, and you will see the description for the action method has been updated to reflect the 404 response, as shown in Figure 20-11.
Figure 20-11.
Reflecting all the status codes produced by an action method
Summary
In this chapter, I described some of the advanced features available for creating web services. I explained how to deal with related data in Entity Framework Core queries, how to support the HTTP PATCH method for handling selective updates, how content negotiation works, and how to use OpenAPI to describe the web services you create. In the next chapter, I describe how controllers can generate HTML responses.