ASP.NET Core includes a set of built-in services and middleware components that provide features that are commonly required by web applications. In this chapter, I describe three of the most important and widely used features: application configuration, logging, and serving static content. In Chapter 16, I continue to describe the platform features, focusing on the more advanced built-in services and middleware. Table 15-1 puts the chapter in context.
Table 15-1.
Putting Platform Features in Context
Question
Answer
What are they?
The platform features deal with common web application requirements, such as configuration, logging, static files, sessions, authentication, and database access.
Why are they useful?
Using these features means you don’t have to re-create their functionality in your own projects.
How are they used?
The built-in middleware components are added to the request pipeline in the Startup.Configure method using extension methods whose name starts with Use. Services are set up in the Startup.ConfigureServices method using methods that start with Add.
Are there any pitfalls or limitations?
The most common problems relate to the order in which middleware components are added to the request pipeline. Remember that middleware components form a chain along which requests pass, as described in Chapter 12.
Are there any alternatives?
You don’t have to use any of the services or middleware components that ASP.NET Core provides.
Install the package with LibMan and deliver it with the static content middleware
27–30
Preparing for This Chapter
In this chapter, I continue to use the Platform project created in Chapter 14. To prepare for this chapter, update the Startup class to remove middleware and services, as shown in Listing 15-1.
using System;
using System.Collections.Generic;
using System.Linq;
using System.Threading.Tasks;
using Microsoft.AspNetCore.Builder;
using Microsoft.AspNetCore.Hosting;
using Microsoft.AspNetCore.Http;
using Microsoft.Extensions.DependencyInjection;
using Microsoft.Extensions.Hosting;
using Microsoft.Extensions.Options;
namespace Platform {
public class Startup {
public void ConfigureServices(IServiceCollection services) {
}
public void Configure(IApplicationBuilder app, IWebHostEnvironment env) {
Removing Middleware and Services in the Startup.cs File in the Platform Folder
One of the main topics in this chapter is configuration data. Replace the contents of the appsettings.Development.json file with the contents of Listing 15-2 to remove the setting added in Chapter 14.
{
"Logging": {
"LogLevel": {
"Default": "Debug",
"System": "Information",
"Microsoft": "Information"
}
}
}
Listing 15-2.
Replacing the Contents of the appsettings.Development.json File in the Platform Folder
Start the application by selecting Start Without Debugging or Run Without Debugging from the Debug menu or by opening a new PowerShell command prompt, navigating to the Platform project folder (which contains the Platform.csproj file), and running the command shown in Listing 15-3.
Tip
You can download the example project for this chapter—and for all the other chapters in this book—from https://github.com/apress/pro-asp.net-core-3. See Chapter 1 for how to get help if you have problems running the examples.
dotnet run
Listing 15-3.
Starting the ASP.NET Core Runtime
If the application was started using Visual Studio or Visual Studio Code, a new browser window will open and display the content shown in Figure 15-1. If the application was started from the command line, open a new browser tab and navigate to http://localhost:5000; you will see the content shown in Figure 15-1.
Figure 15-1.
Running the example application
Using the Configuration Service
One of the built-in features provided by ASP.NET Core is access to the application’s configuration settings, which is then presented as a service.
The main source of configuration data is the appsettings.json file. The appsettings.json file created by the Empty template contains the following settings:
{
"Logging": {
"LogLevel": {
"Default": "Information",
"Microsoft": "Warning",
"Microsoft.Hosting.Lifetime": "Information"
}
},
"AllowedHosts": "*"
}
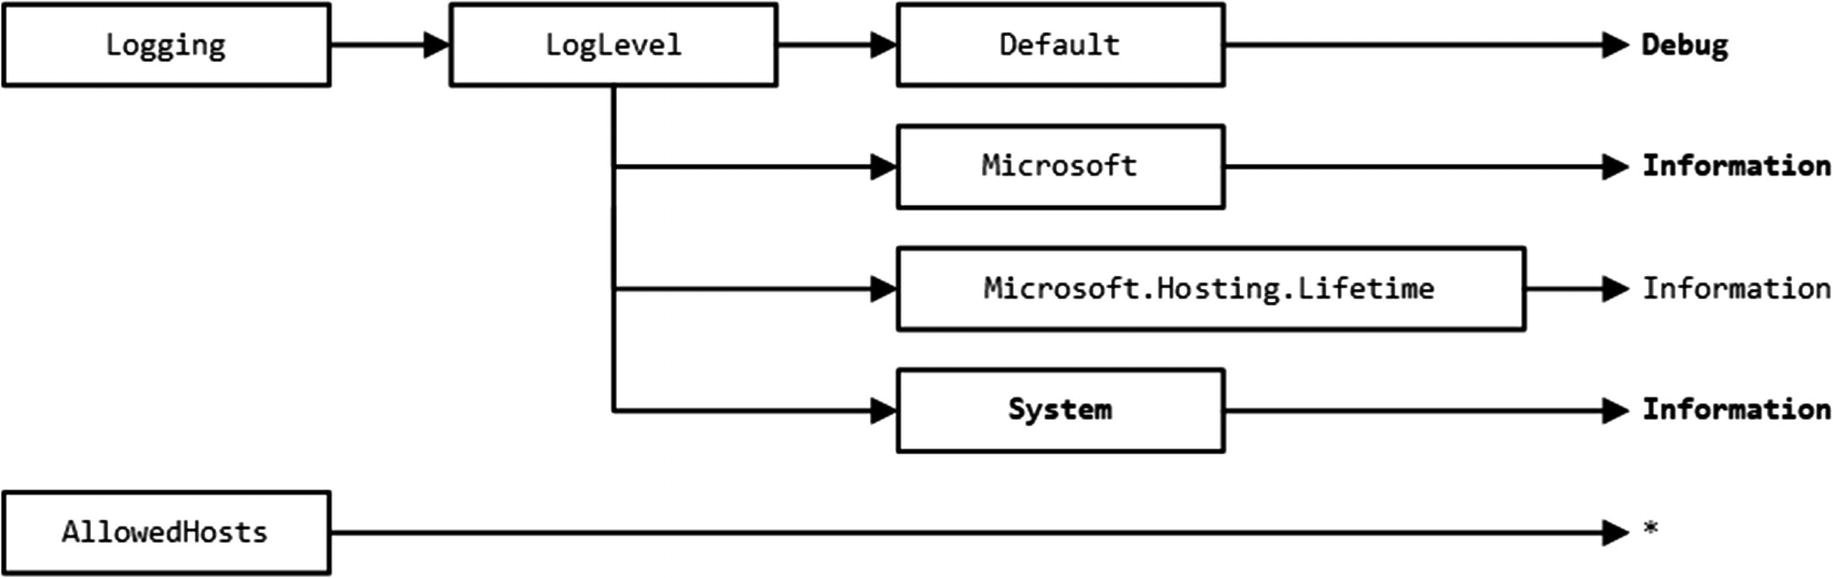
The configuration service will process the JSON configuration file and create nested configuration sections that contain individual settings. For the appsettings.json file in the example application, the configuration service will create a Logging configuration section that contains a LogLevel section. The LogLevel section will contain settings for Default, Microsoft, and Microsoft.Hosting.Lifetime settings. There will also be an AllowedHosts setting that isn’t part of a configuration section and whose value is an asterisk (the * character).
The configuration service doesn’t understand the meaning of the configuration sections or settings in the appsettings.json file and is just responsible for processing the JSON data file and merging the configuration settings with the values obtained from other sources, such as environment variables or command-line arguments. The result is a hierarchical set of configuration properties, as shown in Figure 15-2.
Figure 15-2.
The hierarchy of configuration properties in the appsettings.json File
Understanding the Environment-Specific Configuration File
Most projects contain more than one JSON configuration file, allowing different settings to be defined for different parts of the development cycle. There are three predefined environments, named Development, Staging, and Production, each of which corresponds to a commonly used phase of development. During startup, the configuration service looks for a JSON file whose name includes the current environment. The default environment is Development, which means the configuration service will load the appsettings.Development.json file and use its contents to supplement the contents of the main appsettings.json file.
Note
The Visual Studio Solution Explorer nests the appsettings.Development.json file in the appsettings.json item. You can expand the appsettings.json file to see and edit the nested entries or click the button at the top of the Solution Explorer that disables the nesting feature.
Here are the configuration settings added to the appsettings.Development.json file in Listing 15-2:
{
"Logging": {
"LogLevel": {
"Default": "Debug",
"System": "Information",
"Microsoft": "Information"
}
}
}
Where the same setting is defined in both files, the value in the appsettings.Development.json file will replace the one in the appsettings.json file, which means that the contents of the two JSON files will produce the hierarchy of configuration settings shown in Figure 15-3.
Figure 15-3.
Merging JSON configuration settings
The effect of the additional configuration settings is to increase the detail level of logging messages, which I describe in more detail in the “Using the Logging Service” section.
Accessing Configuration Settings
The configuration data is accessed through a service. If you only require the configuration data to configure middleware, then the dependency on the configuration service can be declared using a parameter of the Configure method, as shown in Listing 15-4.
using System;
using System.Collections.Generic;
using System.Linq;
using System.Threading.Tasks;
using Microsoft.AspNetCore.Builder;
using Microsoft.AspNetCore.Hosting;
using Microsoft.AspNetCore.Http;
using Microsoft.Extensions.DependencyInjection;
using Microsoft.Extensions.Hosting;
using Microsoft.Extensions.Options;
using Microsoft.Extensions.Configuration;
namespace Platform {
public class Startup {
public void ConfigureServices(IServiceCollection services) {
}
public void Configure(IApplicationBuilder app, IWebHostEnvironment env,
Accessing Configuration Data in the Startup.cs File in the Platform Folder
Configuration data is provided through the IConfiguration interface; this interface is defined in the Microsoft.Extensions.Configuration namespace and provides an API for navigating through the configuration hierarchy and reading configuration settings. To receive the configuration data in the Startup class, an IConfiguration parameter is added to the Configure method. Configuration settings can be read by specifying the path through the configuration sections, like this:
This statement reads the value of the Default setting, which is defined in the LogLevel section of the Logging part of the configuration. The names of the configuration sections and the configuration settings are separated by colons (the : character).
The value of the configuration setting read in Listing 15-4 is used to provide a result for a middleware component that handles the /config URL. Restart the ASP.NET Core platform by selecting Degug ➤ Start Without Debugging or by using Control+C at the command prompt and running the command shown in Listing 15-5 in the Platform folder.
dotnet run
Listing 15-5.
Starting the ASP.NET Core Platform
Once the runtime has restarted, navigate to the http://localhost:5000/config URL, and you will see the value of the configuration setting displayed in the browser tab, as shown in Figure 15-4.
Figure 15-4.
Reading configuration data
Using the Configuration Data in Services
A slightly different approach is required to access configuration data in the ConfigureServices method, where adding parameters to receive the IConfiguration object isn’t supported. As explained in Chapter 14, some services are created before the Startup class is instantiated, which allows dependencies on them to be declared using a constructor parameter. Listing 15-6 adds a constructor parameter to the Startup class that declares a dependency on the IConfiguration service and assigns the object used to resolve the dependency to a property that can be accessed in both the ConfigureServices and Configure methods.
Using Configuration Data in the Startup.cs File in the Platform Folder
The constructor assigns the object received through the IConfiguration parameter to the property named Configuration, which allows the access to the configuration data in both the Configure and ConfigureServices methods.
Using Configuration Data with the Options Pattern
Configuration data in the ConfigureServices method is used with the options pattern that I described in Chapter 14. In that chapter, I showed you how default option values can be changed using a lambda function. An alternative approach is to use configuration settings to set options.
To prepare, add the configuration settings shown in Listing 15-7 to the appsettings.json file.
{
"Location": {
"CityName": "Buffalo"
},
"Logging": {
"LogLevel": {
"Default": "Information",
"Microsoft": "Warning",
"Microsoft.Hosting.Lifetime": "Information"
}
},
"AllowedHosts": "*"
}
Listing 15-7.
Adding Configuration Data in the appsettings.json File in the Platform Folder
In Listing 15-8, I have used the options pattern to configure the LocationMiddleware component created in Chapter 14, using the configuration data defined in Listing 15-7.
Using Configuration Data in the Startup.cs File in the Platform Folder
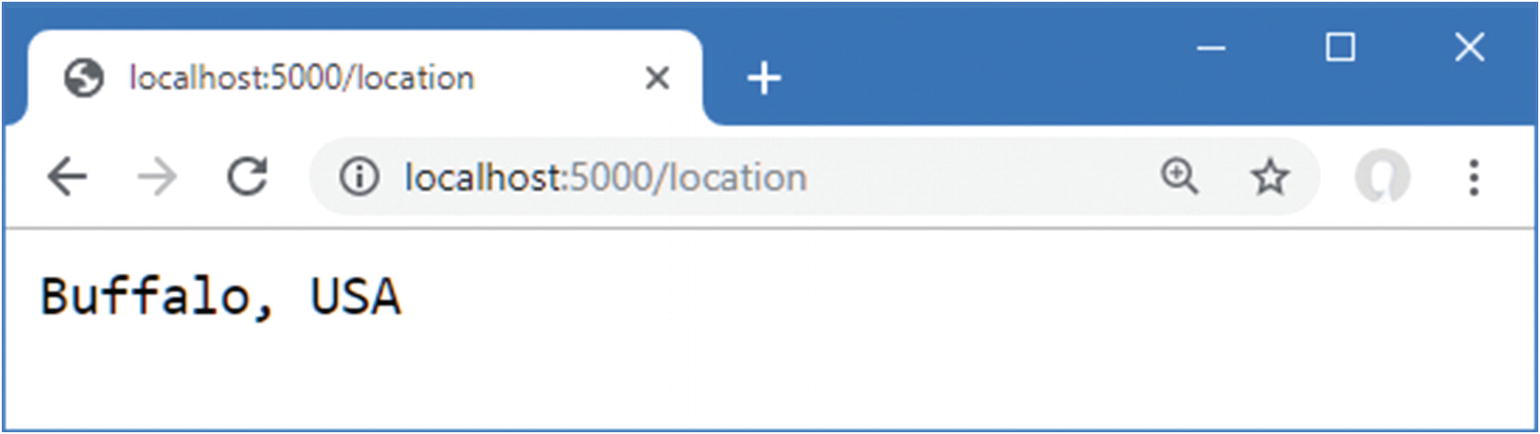
The section of the configuration data is obtained using the GetSection method and passed to the Configure method when the options are created. The configuration values in the selected section are inspected and used to replace the default values with the same names in the options class. To see the effect, restart ASP.NET Core and use the browser to navigate to the http://localhost:5000/location URL. You will see the results shown in Figure 15-5, where the CityName option is taken from the configuration data and the CountryName option is taken from the default value in the options class.
Figure 15-5.
Using configuration data in the options pattern
Understanding the Launch Settings File
The launchSettings.json file in the Properties folder contains the configuration settings for starting the ASP.NET Core platform, including the TCP ports that are used to listen for HTTP and HTTPS requests and the environment used to select the additional JSON configuration files.
Tip
Visual Studio often hides the Properties folder by default. Click the Show All Files button at the top of the Solution Explorer to reveal the folder and the launchSettings.json file.
Here is the content added to the launchSettings.json file when the Empty template is used to create a project:
{
"iisSettings": {
"windowsAuthentication": false,
"anonymousAuthentication": true,
"iisExpress": {
"applicationUrl": "http://localhost:5000",
"sslPort": 0
}
},
"profiles": {
"IIS Express": {
"commandName": "IISExpress",
"launchBrowser": true,
"environmentVariables": {
"ASPNETCORE_ENVIRONMENT": "Development"
}
},
"Platform": {
"commandName": "Project",
"launchBrowser": true,
"applicationUrl": "http://localhost:5000",
"environmentVariables": {
"ASPNETCORE_ENVIRONMENT": "Development"
}
}
}
}
The iisSettings section is used to configure the HTTP and HTTPS ports used when the ASP.NET Core platform is started through IIS Express, which happens when Visual Studio is used.
These settings are supplemented by the IIS Express section, which specifies whether a new browser window should be opened when the application starts and which contains environmentVariables, which is used to define environment variables that are added to the application’s configuration data.
The Platform section contains the configuration that is used when the application is started using Visual Studio Code or directly using the dotnet run command at the command prompt, and the section specifies the settings for the ASP.NET Core Kestrel HTTP server.
The most important part of both sections is the environmentVariables section, which defines the ASPNETCORE_ENVIRONMENT setting. During startup, the value of the ASPNETCORE_ENVIRONMENT setting is used to select the additional JSON configuration file so that a value of Development, for example, will cause the appsettings.Development.json file to be loaded.
If you are using Visual Studio Code, ASPNETCORE_ENVIRONMENT is set in a different file. Select Debug ➤ Open Configurations to open the launch.json file in the .vscode folder, which is created when a project is edited with Visual Studio Code. Here is the default configuration for the example project, showing the current ASPNETCORE_ENVIRONMENT value:
To display the value of the ASPNETCORE_ENVIRONMENT setting, add the statements to the middleware component that responds to the /config URL, as shown in Listing 15-9.
Displaying the Configuration Setting in the Startup.cs File in the Platform Folder
Restart ASP.NET Core and navigate to http://localhost:5000/config, and you will see the value of the ASPNETCORE_ENVIRONMENT setting, as shown in Figure 15-6.
Figure 15-6.
Displaying the environment configuration setting
To see the effect that the ASPNETCORE_ENVIRONMENT setting has on the overall configuration, change the value in the launchSettings.json file, as shown in Listing 15-10.
{
"iisSettings": {
"windowsAuthentication": false,
"anonymousAuthentication": true,
"iisExpress": {
"applicationUrl": "http://localhost:5000",
"sslPort": 0
}
},
"profiles": {
"IIS Express": {
"commandName": "IISExpress",
"launchBrowser": true,
"environmentVariables": {
"ASPNETCORE_ENVIRONMENT": "Production"
}
},
"Platform": {
"commandName": "Project",
"launchBrowser": true,
"applicationUrl": "http://localhost:5000",
"environmentVariables": {
"ASPNETCORE_ENVIRONMENT": "Production"
}
}
}
}
Listing 15-10.
Changing the Environment in the launchSettings.json File in the Platform/Properties Folder
If you are using Visual Studio, you can change the environment variables by selecting Project ➤ Platform Properties and navigating to the Debug tab. Double-click the value for the ASPNETCORE_ENVIRONMENT variable, and you will be able to change the value to Production, as shown in Figure 15-7.
Figure 15-7.
Changing an environment variable using Visual Studio
If you are using Visual Studio Code, select Debug ➤ Open Configurations and change the value in the env section, as shown in Listing 15-11.
Changing the Environment in the launch.json File in the Platform/.vscode Folder
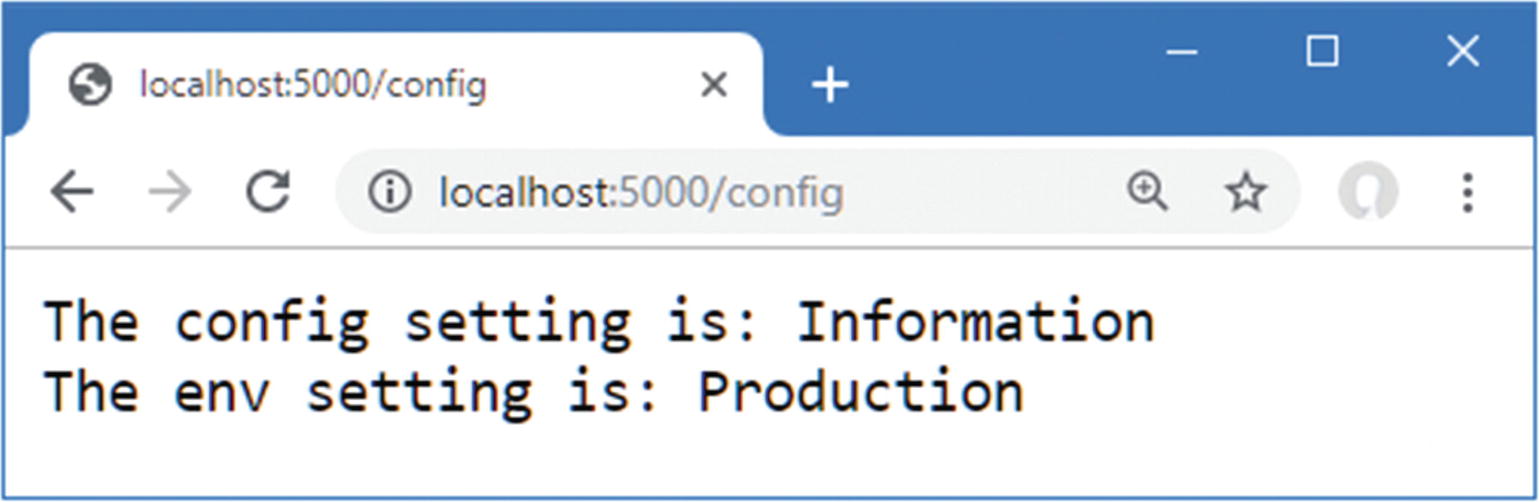
Save the changes to the property page or configuration file and restart ASP.NET Core. Navigate to http://localhost:5000/config, and you will see the effect of the environment change, as shown in Figure 15-8.
Figure 15-8.
The effect of changing the environment configuration setting
Notice that both configuration values displayed in the browser have changed. The appsettings.Development.json file is no longer loaded, and there is no appsettings.Production.json file in the project, so only the configuration settings in the appsettings.json file are used.
Determining the Environment in the Startup Class
The ASP.NET Core platform provides the IWebHostEnvironment service for determining the current environment, which avoids the need to get the configuration setting manually. The IWebHostEnvironment service defines the methods shown in Table 15-3. These methods are extension methods that are defined in the Microsoft.Extensions.Hosting namespace, which must be imported with a using statement before they can be used.
Table 15-3.
The IWebHostEnvironment Extension Methods
Name
Description
IsDevelopment()
This method returns true when the Development environment has been selected.
IsStaging()
This method returns true when the Staging environment has been selected.
IsProduction()
This method returns true when the Production environment has been selected.
IsEnvironment(env)
This method returns true when the environment specified by the argument has been selected.
The Configure method in the Startup class already has an IWebHostEnvironment parameter, which was added when the project was created using the Empty template in Chapter 14. This is often used with the methods described in Table 15-3 to select the middleware components that are added to the request pipeline. The most common example is to determine whether the UseDeveloperExceptionPage method is used, because UseDeveloperExceptionPage adds middleware that generates responses that should be used only in development. To ensure that the middleware is used only during development, Listing 15-12 uses the IWebHostEnvironment service and the IsDevelopment method.
...
public void Configure(IApplicationBuilder app, IWebHostEnvironment env) {
Selecting Middleware in the Startup.cs File in the Platform Folder
This middleware catches exceptions thrown when a request is processed and displays a detailed stack trace, which is something that should not be seen once the application has been deployed. I demonstrate the error handling middleware in Chapter 16.
Tip
The IWebHostEnvironment service also defines properties that can be used to get details of the file location for the application, as demonstrated in Chapter 16.
Storing User Secrets
During development, it is often necessary to use sensitive data to work with the services that an application depends on. This data can include API keys, database connection passwords, or default administration accounts, and it is used both to access services and to reinitialize them to test application changes with a fresh database or user configuration.
If the sensitive data is included in the C# classes or JSON configuration files, it will be checked into the source code version control repository and become visible to all developers and to anyone else who can see the code—which may mean visible to the world for projects that have open repositories or repositories that are poorly secured.
The user secrets service allows sensitive data to be stored in a file that isn’t part of the project and won’t be checked in to version control, allowing each developer to have their own sensitive data that won’t be accidentally exposed through a version control check-in.
Storing User Secrets
The first step is to prepare the file that will be used to store sensitive data. Open a new PowerShell command prompt and run the commands shown in Listing 15-13 in the Platform folder (the folder that contains the Platform.csproj file).
These commands remove the package if it has been installed previously and install the version required by this chapter. Next, run the command shown in Listing 15-14 in the Platform folder.
Note
If you have problems running the commands in this section, then close the PowerShell prompt and open a new one after installing the global tools package.
dotnet user-secrets init
Listing 15-14.
Initializing User Secrets
This command adds an element to the Platform.csproj project file that contains a unique ID for the project that will be associated with the secrets on each developer machine. Next, run the commands shown in Listing 15-15 in the Platform folder.
dotnet user-secrets set "WebService:Id" "MyAccount"
dotnet user-secrets set "WebService:Key" "MySecret123$"
Listing 15-15.
Storing a User Secret
Each secret has a key and a value, and related secrets can be grouped together by using a common prefix, followed by a colon (the : character), followed by the secret name. The commands in Listing 15-15 create related Id and Key secrets that have the WebService prefix.
After each command, you will see a message confirming that a secret has been added to the secret store. To check the secrets for the project, use the command prompt to run the command shown in Listing 15-16 in the Platform folder.
dotnet user-secrets list
Listing 15-16.
Listing the User Secrets
This command produces the following output:
WebService:Key = MySecret123$
WebService:Id = MyAccount
Behind the scenes, a JSON file has been created in the %APPDATA%MicrosoftUserSecrets folder (or the ~/.microsoft/usersecrets folder for Linux) to store the secrets. Each project its own folder (whose name corresponds to the unique ID created by the init command in Listing 15-14).
Tip
If you are using Visual Studio, you can create and edit the JSON file directly by right-clicking the project in the Solution Explorer and selecting Manage User Secrets from the popup menu.
Reading User Secrets
User secrets are merged with the normal configuration settings and accessed in the same way. In Listing 15-17, I have added a statement that displays the secrets to the middleware component that handles the /config URL.
.WriteAsync($"The config setting is: {defaultDebug}");
string environ = Configuration["ASPNETCORE_ENVIRONMENT"];
await context.Response
.WriteAsync($"
The env setting is: {environ}");
string wsID = Configuration["WebService:Id"];
string wsKey = Configuration["WebService:Key"];
await context.Response.WriteAsync($"
The secret ID is: {wsID}");
await context.Response.WriteAsync($"
The secret Key is: {wsKey}");
});
...
Listing 15-17.
Using User Secrets in the Startup.cs File in the Platform Folder
User secrets are loaded only when the application is set to the Development environment. Edit the launchSettings.json file to change the environment to Development, as shown in Listing 15-18. (If you prefer, you can use the Visual Studio interface by selecting Project ➤ Platform Properties.)
{
"iisSettings": {
"windowsAuthentication": false,
"anonymousAuthentication": true,
"iisExpress": {
"applicationUrl": "http://localhost:5000",
"sslPort": 0
}
},
"profiles": {
"IIS Express": {
"commandName": "IISExpress",
"launchBrowser": true,
"environmentVariables": {
"ASPNETCORE_ENVIRONMENT": "Development"
}
},
"Platform": {
"commandName": "Project",
"launchBrowser": true,
"applicationUrl": "http://localhost:5000",
"environmentVariables": {
"ASPNETCORE_ENVIRONMENT": "Development"
}
}
}
}
Listing 15-18.
Changing the Environment in the launchSettings.json File in the Platform/Properties Folder
If you are launching the application from within Visual Studio Code, you must also edit the environment by selecting Debug ➤ Open Configurations and changing the value in the env section, as shown in Listing 15-19.
Changing the Environment in the launch.json File in the .vscode Folder
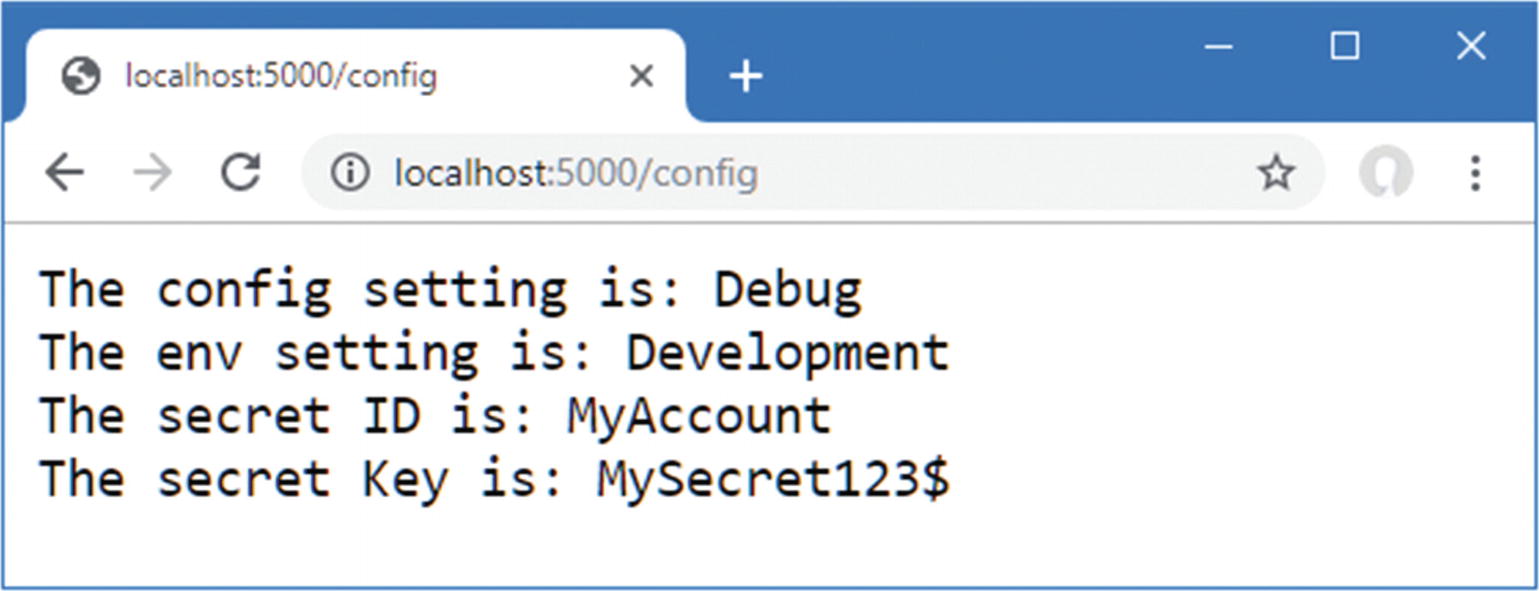
Save the changes, restart the ASP.NET Core runtime, and request the http://localhost:5000/config URL to see the user secrets, as shown in Figure 15-9.
Figure 15-9.
Displaying user secrets
Using the Logging Service
ASP.NET Core provides a logging service that can be used to record messages that describe the state of the application to track errors, monitor performance, and help diagnose problems.
Log messages are sent to logging providers, which are responsible for forwarding messages to where they can be seen, stored, and processed. There are built-in providers for basic logging, and there is a range of third-party providers available for feeding messages into logging frameworks that allow messages to be collated and analyzed.
Three of the built-in providers are enabled by default: the console provider, the debug provider, and the EventSource provider. The debug provider forwards messages so they can be processed through the System.Diagnostics.Debug class, and the EventSource provider forwards messages for event tracing tools, such as PerfView (https://github.com/Microsoft/perfview). I use the console provider in this chapter because it is simple and doesn’t require any additional configuration to display logging messages.
Logging messages are generated using the unbounded ILogger<T> service. Listing 15-20 declares a dependency on the service in the Startup.Configure method and removes the middleware from the previous examples for brevity.
Generating a Logging Message in the Startup.cs File in the Platform Folder
The logging service groups log messages together based on the category assigned to messages. Log messages are written using the ILogger<T> interface, where the generic parameter T is used to specify the category. The convention is to use the type of the class that generates the messages as the category type, which is why Listing 15-20 declares a dependency on the unbound service using Startup for the type argument, like this:
This ensures that log messages generated in the Configure method will be assigned the category Startup. Log messages are created using the extension methods shown in Table 15-4.
Table 15-4.
The ILogger<T> Extension Methods
Name
Description
LogTrace
This method generates a Trace-level message, used for low-level debugging during development.
LogDebug
This method generates a Debug-level message, used for low-level debugging during development or production problem resolution.
LogInformation
This method generates an Information-level message, used to provide information about the general state of the application.
LogError
This method generates an Error-level message, used to record exceptions or errors that are not handled by the application.
LogCritical
This method generates a Critical-level message, used to record serious failures.
Log messages are assigned a level that reflects their importance and detail. The levels range from Trace, for detailed diagnostics, to Critical, for the most important information that requires an immediate response. There are overloaded versions of each method that allow log messages to be generated using strings or exceptions. In Listing 15-20, I used the LogDebug method to generate logging messages when a request is handled.
...
logger.LogDebug("Response for / started");
...
The result is log messages at the Debug level that are generated when the response is started and completed. To see the log messages, select Debug ➤ Start Without Debugging. If you are using the command line, use Control+C to stop the ASP.NET Core runtime and use the command shown in Listing 15-21 in the Platform folder to start it again.
dotnet run
Listing 15-21.
Starting the Example Application
Once the application has started, use a browser tab to request the http://localhost:5000 URL. If you are using the command line, you will see the logging messages displayed in the output from the application, like this:
...
info: Microsoft.AspNetCore.Hosting.Diagnostics[1]
Request starting HTTP/1.1 GET http://localhost:5000/
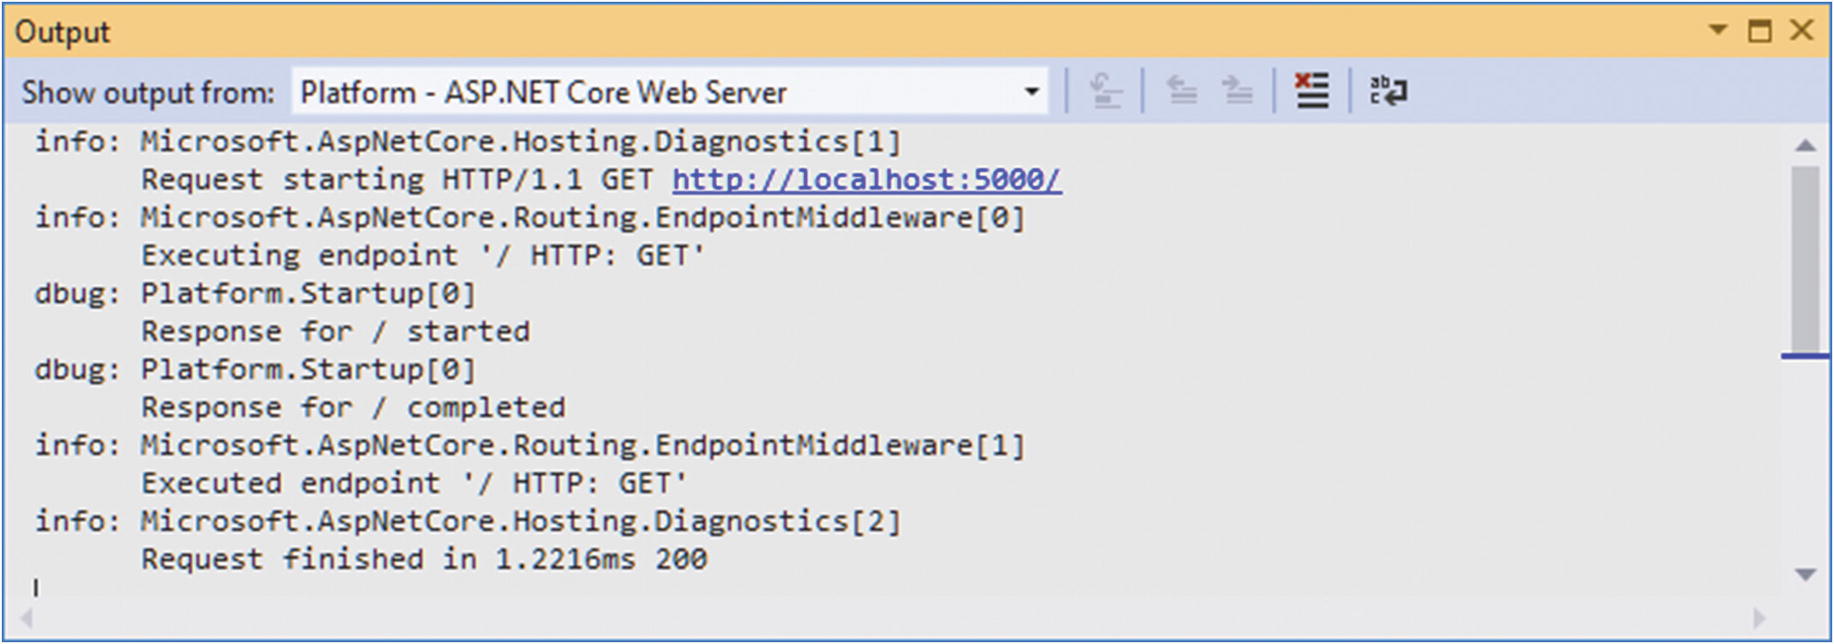
If you are using Visual Studio, the output from the application is shown in the Output window, which can be selected from the View menu. Select ASP.NET Core Web Server from the drop-down menu to see the output, as shown in Figure 15-10.
Figure 15-10.
Selecting the logging messages in the Visual Studio Output window
If you are using Visual Studio Code, the log messages will be displayed in the Debug Console window, as shown in Figure 15-11, which can be selected from the View menu.
Figure 15-11.
Viewing logging messages in the Visual Studio Code Debug Console window
Configuring Minimum Logging Levels
In Chapter 14, I showed you the default contents of the appsettings.json and appsettings.Development.json files and explained how they are merged to create the application’s configuration settings. The settings in the JSON file are used to configure the logging service, which ASP.NET Core provides to record messages about the state of the application.
The Logging:LogLevel section of the appsettings.json file is used to set the minimum level for logging messages. Log messages that are below the minimum level are discarded. The appsettings.json file contains the following levels:
...
"Default": "Information",
"Microsoft": "Warning",
"Microsoft.Hosting.Lifetime": "Information",
...
The category for the log messages—which is set using the generic type argument in Listing 15-20—is used to select a minimum filter level. For the log messages generated by the startup class, for example, the category will be Platform.Startup, which means that they can be matched directly by adding a Platform.Startup entry to the appsettings.json file or indirectly by specifying just the Platform namespace. Any category for which there is no minimum log level is matched by the Default entry, which is set to Information.
It is common to increase the detail of the log messages displayed during development, which is why the levels in the appsettings.Development.json file specify more detailed logging levels, like this:
...
"Default": "Debug",
"System": "Information",
"Microsoft": "Information"
...
When the application is configured for the Development environment, the default logging level is Debug. The levels for the System and Microsoft categories are set to Information, which affects the logging messages generated by ASP.NET Core and the other packages and frameworks provided by Microsoft.
You can tailor the logging levels to focus the log on those parts of the application that are of interest by setting a level to Trace, Debug, Information, Error, or Critical. Logging messages can be disabled for a category using the None value.
In Listing 15-22, I added a new logging level to the appsettings.Development.json file that will disable the messages that report the time taken to respond to requests. I also increased the level to Trace for the Microsoft setting, which will increase the detail displayed for the classes in the ASP.NET Core platform.
Tip
If you are using Visual Studio, you may have to expand the appsettings.json item in the Solution Explorer to see the appsettings.Development.json file.
Selecting a Log Level in the appsettings.Development.json File in the Platform Folder
Restart ASP.NET Core and request the http://localhost:5000 URL, and you will see that the amount of detail displayed for each request has changed. The amount of detail will depend on how the application is run. If you are using Visual Studio Code or using the dotnet run command, you may see additional details about the generation of HTTP/2 responses. You won’t see these messages if you use Visual Studio because the application will be run using IIS Express, which handles the incoming HTTP requests on behalf of the ASP.NET Core platform. There are some messages that will always be seen, however:
These messages are generated by the Host Filter middleware, which is used to restrict requests based on the Hosts header, as described in Chapter 16.
Using Static Content and Client-Side Packages
Most web applications rely on a mix of dynamically generated and static content. The dynamic content is generated by the application based on the user’s identity and actions, such as the contents of a shopping cart or the detail of a specific product and is generated fresh for each request. I describe the different ways that dynamic content can be created using ASP.NET Core in Part 3.
Static content doesn’t change and is used to provide images, CSS stylesheets, JavaScript files, and anything else on which the application relies but which doesn’t have to be generated for every request. The conventional location for static content in an ASP.NET Core project is the wwwroot folder.
To prepare static content to use in the examples for this section, create the Platform/wwwroot folder and add to it a file called static.html, with the content shown in Listing 15-23. You can create the file with the HTML Page template if you are using Visual Studio.
<!DOCTYPE html>
<html lang="en">
<head>
<title>Static Content</title>
</head>
<body>
<h3>This is static content</h3>
</body>
</html>
Listing 15-23.
The Contents of the static.html File in the wwwroot Folder
The file contains a basic HTML document with just the basic elements required to display a message in the browser.
Adding the Static Content Middleware
ASP.NET Core provides a middleware component that handles requests for static content, which is added to the request pipeline in Listing 15-24.
Adding Middleware in the Startup.cs File in the Platform Folder
The UseStaticFiles extension method adds the static file middleware to the request pipeline. This middleware responds to requests that correspond to the names of disk files and passes on all other requests to the next component in the pipeline. This middleware is usually added close to the start of the request pipeline so that other components don’t handle requests that are for static files.
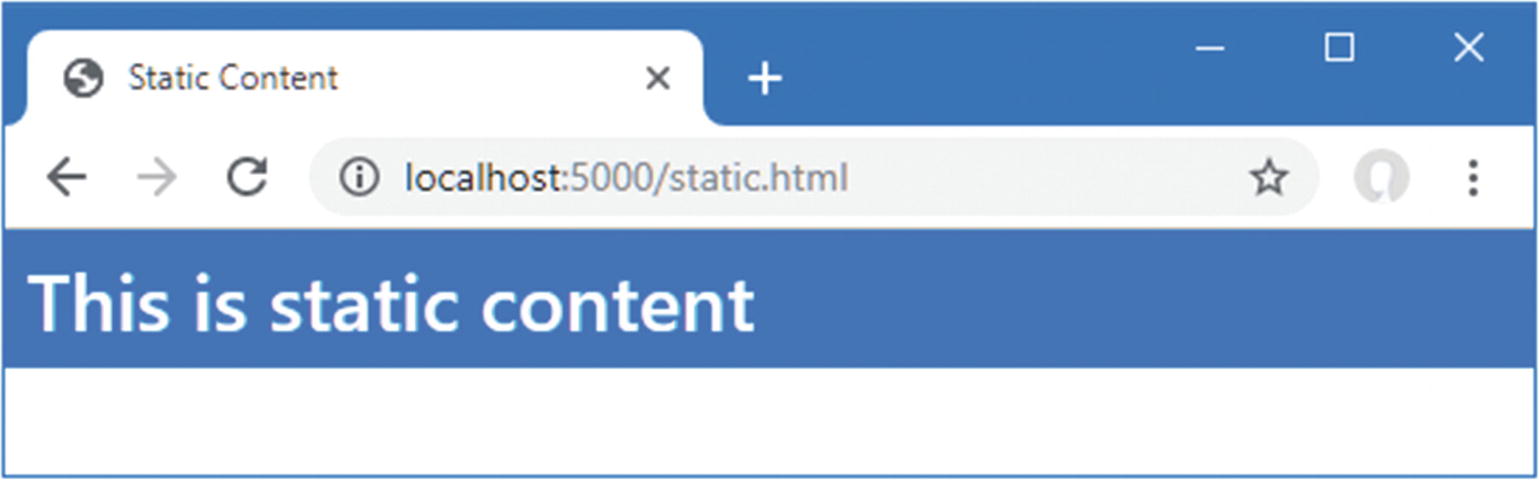
Restart ASP.NET Core and navigate to http://localhost:5000/static.html. The static file middleware will receive the request and respond with the contents of the static.html file in the wwwroot folder, as shown in Figure 15-12.
Figure 15-12.
Serving static content
The middleware component returns the content of the requested file and sets the response headers, such as Content-Type and Content-Length, that describe the content to the browser.
Changing the Default Options for the Static Content Middleware
When the UseStaticFiles method is invoked without arguments, the middleware will use the wwwroot folder to locate files that match the path of the requested URL.
This behavior can be adjusted by passing a StaticFileOptions object to the UseStaticFiles method. Table 15-5 describes the properties defined by the StaticFileOptions class.
Table 15-5.
The Properties Defined by the StaticFileOptions Class
Name
Description
ContentTypeProvider
This property is used to get or set the IContentTypeProvider object that is responsible for producing the MIME type for a file. The default implementation of the interface uses the file extension to determine the content type and supports the most common file types.
DefaultContentType
This property is used to set the default content type if the IContentTypeProvider cannot determine the type of the file.
FileProvider
This property is used to locate the content for requests, as shown below.
OnPrepareResponse
This property can be used to register an action that will be invoked before the static content response is generated.
RequestPath
This property is used to specify the URL path that the middleware will respond to, as shown below.
ServeUnknownFileTypes
By default, the static content middleware will not serve files whose content type cannot be determined by the IContentTypeProvider. This behavior is changed by setting this property to true.
The FileProvider and RequestPath properties are the most commonly used. The FileProvider property is used to select a different location for static content, and the RequestPath property is used to specify a URL prefix that denotes requests for static context. Listing 15-25 uses both properties to configure the static file middleware in the Startup class.
Tip
There is also a version of the UseStaticFiles method that accepts a single string argument, which is used to set the RequestPath configuration property. This is a convenient way of adding support for URLs without needing to create an options object.
Configuring the Static File Middleware in the Startup.cs File in the Platform Folder
Multiple instances of the middleware component can be added to the pipeline, each of which handles a separate mapping between URLs and file locations. In the listing, a second instance of the static files middleware is added to the request pipeline so that requests for URLs that start with /files will be handled using files from a folder named staticfiles. Reading files from the folder is done with an instance of the PhysicalFileProvider class, which is responsible for reading disk files. The PhysicalFileProvider class requires an absolute path to work with, which I based on the value of the ContentRootPath property defined by the IWebHostEnvironment interface, which is the same interface used to determine whether the application is running in the Development or Production environment.
To provide content for the new middleware component to use, create the Platform/staticfiles folder and add to it an HTML file named hello.html with the content shown in Listing 15-26.
<!DOCTYPE html>
<html lang="en">
<head>
<title>Static Content</title>
</head>
<body>
<h3>This is additional static content</h3>
</body>
</html>
Listing 15-26.
The Contents of the hello.html File in the Platform/staticfiles Folder
Restart ASP.NET Core and use the browser to request the http://localhost:5000/files/hello.html URL. Requests for URLs that begin with /files and that correspond to files in the staticfiles folder are handled by the new middleware, as shown in Figure 15-13.
Figure 15-13.
Configuring the static files middleware
Using Client-Side Packages
Most web applications rely on client-side packages to support the content they generate, using CSS frameworks to style content or JavaScript packages to create rich functionality in the browser. Microsoft provides the Library Manager tool, known as LibMan, for downloading and managing client-side packages.
What Happened To Bower?
Earlier versions of ASP.NET Core relied on a tool named Bower to manage client-side packages. Bower was widely used in JavaScript development until its creator retired the project and recommended migration to other tools. Microsoft’s introduction of Library Manager, which is a .NET Core application, should help provide a consistent experience for dealing with client-side packages and avoid the turbulence that can arise around tools in the dynamic (and sometimes chaotic) world of JavaScript development.
Preparing the Project for Client-Side Packages
Use the command prompt to run the command shown in Listing 15-27, which installs LibMan as a global .NET Core tool (although you may find that LibMan has already been installed).
The next step is to create the LibMan configuration file, which specifies the repository that will be used to get client-side packages and the directory into which packages will be downloaded. Open a PowerShell command prompt and run the command shown in Listing 15-28 in the Platform folder.
libman init -p cdnjs
Listing 15-28.
Initialzing LibMan
The -p argument specifies the provider that will get packages. I have used cdnjs, which selects cdnjs.com. The other option is unpkg, which selects unpkg.com. If you don’t have existing experience with package repositories, then you should start with the cdnjs option.
The command in Listing 15-28 creates a file named libman.json in the Platform folder; the file contains the following settings:
...
{
"version": "1.0",
"defaultProvider": "cdnjs",
"libraries": []
}
...
If you are using Visual Studio, you can create and edit the libman.json file directly by selecting Project ➤ Manage Client-Side Libraries.
Installing Client-Side Packages
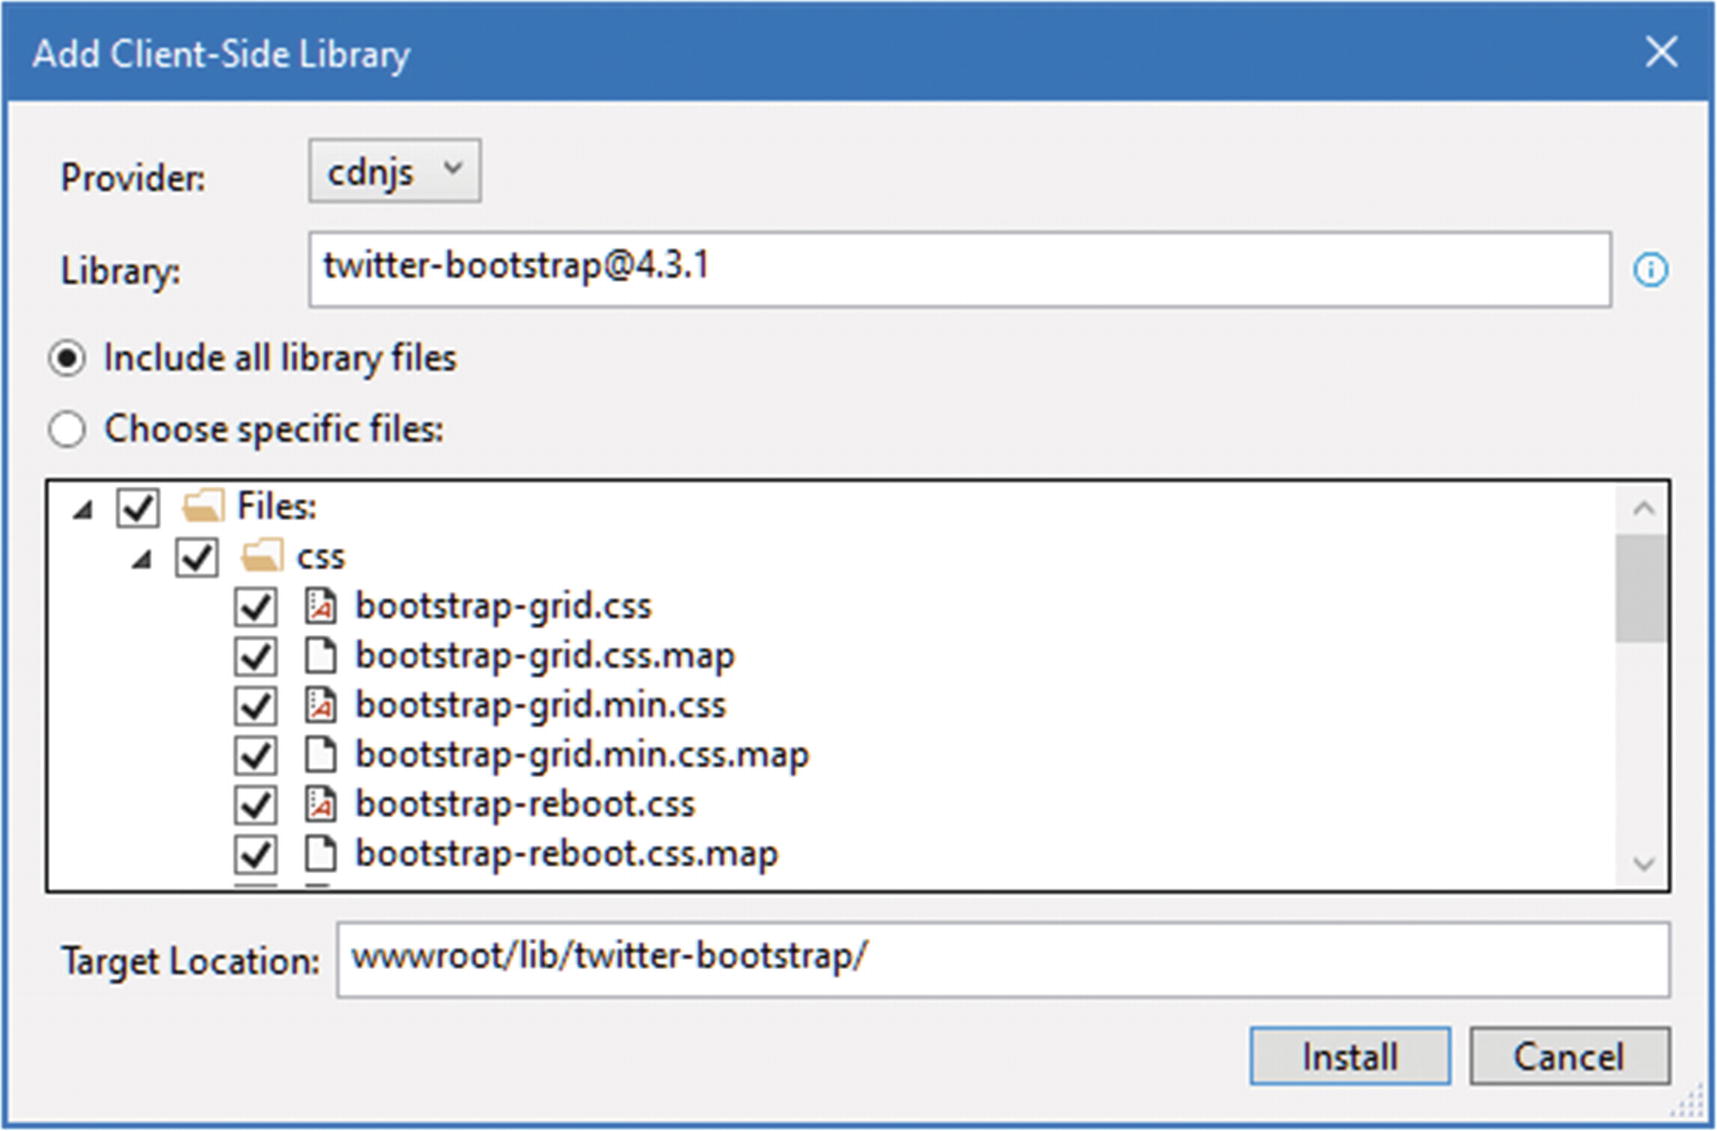
If you are using Visual Studio, you can install client-side packages by right-clicking the Platform project item in the Solution Explorer and selecting Add ➤ Client-Side Library from the popup menu. Visual Studio will present a simple user interface that allows packages to be located in the repository and installed into the project. As you type into the Library text field, the repository is queried for packages with matching names. Enter twitter-bootstrap into the text field, and the popular Bootstrap CSS framework will be selected, as shown in Figure 15-14.
Figure 15-14.
Selecting a client-side package in Visual Studio
The latest version of the package is selected, which is 4.3.1 at the time of writing. Click the Install button to download and install the Bootstrap package.
Package Names And Repositories
The same package may be known by different names in different repositories. If you are accustomed to using Bower or the Node Package Manager tool (NPM) to install packages, then you may be used to referring to the Bootstrap CSS framework as just bootstrap. The CDNJS repository refers to the same package as twitter-bootstrap, even though the package and its contents are the same. The best way to figure out what package you require is to go to the repository website and perform a search directly. For the LibMan configuration I use in this chapter, that means going to cdnjs.com.
Packages can also be installed from the command line. If you are using Visual Studio Code (or simply prefer the command line, as I do), then run the command shown in Listing 15-29 in the Platform folder to install the Bootstrap package.
The required version is separated from the package name by the @ character, and the -d argument is used to specify where the package will be installed. The wwwroot/lib folder is the conventional location for installing client-side packages in ASP.NET Core projects.
Regardless of which approach you take to install the client-side package, the result will be the wwwroot/lib/twitter-boostrap folder that contains the CSS stylesheets and JavaScript files that are provided by the Bootstrap CSS framework.
Using a Client-Side Package
Once a client-side package has been installed, its files can be referenced by script or link HTML elements or by using the features provided by the higher-level ASP.NET Core features described in later chapters.
For simplicity in this chapter, Listing 15-30 adds a link element to the static HTML file created earlier in this section.
<h3 class="p-2 bg-primary text-white">This is static content</h3>
</body>
</html>
Listing 15-30.
Using a Client-Side Package in the static.html File in the Platform/wwwroot Folder
Restart ASP.NET Core and request http://localhost:5000/static.html. When the browser receives and processes the contents of the static.html file, it will encounter the link element and send an HTTP request to the ASP.NET Core runtime for the /lib/twitter-bootstrap/css/bootstrap.min.css URL. The original static file middleware component added in Listing 15-24 will receive this request, determine that it corresponds to a file in the wwwroot folder, and return its contents, providing the browser with the Bootstrap CSS stylesheet. The Bootstrap styles are applied through the classes to which the h3 element has been assigned, producing the result shown in Figure 15-15.
Figure 15-15.
Using a client-side package
Summary
In this chapter, I described some of the most important and useful features that ASP.NET Core provides for web applications. I showed you how ASP.NET Core applications are configured, how logging messages are generated and managed, and how to serve static content, including the contents of client-side packages. In the next chapter, I continue to describe the ASP.NET Core platform features.