
Web services accept HTTP requests and generate responses that contain data. In this chapter, I explain how the features provided by the MVC Framework, which is an integral part of ASP.NET Core, can be used to build on the capabilities described in Part 2 to create web services.
Putting RESTful Web Services in Context
Question | Answer |
|---|---|
What are they? | Web services provide access to an application’s data, typically expressed in the JSON format. |
Why are they useful? | Web services are most often used to provide rich client-side applications with data. |
How are they used? | The combination of the URL and an HTTP method describes an operation that is handled by an action method defined by an ASP.NET Core controller. |
Are there any pitfalls or limitations? | There is no widespread agreement about how web services should be implemented, and care must be taken to produce just the data the client expects. |
Are there any alternatives? | There are a number of different approaches to providing clients with data, although RESTful web services are the most common. |
Chapter Summary
Problem | Solution | Listing |
|---|---|---|
Defining a web service | Create a controller with action methods that correspond to the operations that you require | 1–14 |
Generating data sequences over time | Use the IAsyncEnumerable<T> response, which will prevent the request thread from blocking while results are generated. | 15 |
Preventing request values being used for sensitive data properties | Use a binding target to restrict the model binding process to only safe properties | 16–18 |
Expressing nondata outcomes | Use action results to describe the response that ASP.NET Core should send | 19–24 |
Validating data | Use the ASP.NET Core model binding and model validation features | 25–27 |
Automatically validating requests | Use the ApiController attribute | 28 |
Omitting null values from data responses | Map the data objects to filter out properties or configure the JSON serializer to ignore null properties | 29–31 |
Preparing for This Chapter
In this chapter, I continue to use the WebApp project created in Chapter 18. To prepare for this chapter, drop the database by opening a new PowerShell command prompt, navigating to the folder that contains the WebApp.csproj file, and running the command shown in Listing 19-1.
You can download the example project for this chapter—and for all the other chapters in this book—from https://github.com/apress/pro-asp.net-core-3. See Chapter 1 for how to get help if you have problems running the examples.
Dropping the Database
Starting the Example Application

Running the example application
Understanding RESTful Web Services
Web services respond to HTTP requests with data that can be consumed by clients, such as JavaScript applications. There are no hard-and-fast rules for how web services should work, but the most common approach is to adopt the Representational State Transfer (REST) pattern. There is no authoritative specification for REST, and there is no consensus about what constitutes a RESTful web service, but there are some common themes that are widely used for web services. The lack of a detailed specification leads to endless disagreement about what REST means and how RESTful web services should be created, all of which can be safely ignored if the web services you create work for your projects.
Understanding Request URLs and Methods
The core premise of REST—and the only aspect for which there is broad agreement—is that a web service defines an API through a combination of URLs and HTTP methods such as GET and POST, which are also known as the HTTP verbs. The method specifies the type of operation, while the URL specifies the data object or objects that the operation applies to.
HTTP Methods and Operations
HTTP Method | Description |
|---|---|
GET | This method is used to retrieve one or more data objects. |
POST | This method is used to create a new object. |
PUT | This method is used to update an existing object. |
PATCH | This method is used to update part of an existing object. |
DELETE | This method is used to delete an object. |
Understanding JSON
Most RESTful web services format the response data using the JavaScript Object Notation (JSON) format. JSON has become popular because it is simple and easily consumed by JavaScript clients. JSON is described in detail at www.json.org, but you don’t need to understand every aspect of JSON to create web services because ASP.NET Core provides all the features required to create JSON responses.
REST isn’t the only way to design web services, and there are some popular alternatives. GraphQL is most closely associated with the React JavaScript framework, but it can be used more widely. Unlike REST web services, which provide specific queries through individual combinations of a URL and an HTTP method, GraphQL provides access to all an application’s data and lets clients query for just the data they require in the format they require. GraphQL can be complex to set up—and can require more sophisticated clients—but the result is a more flexible web service that puts the developers of the client in control of the data they consume. GraphQL isn’t supported directly by ASP.NET Core, but there are .NET implementations available. See https://graphql.org for more detail.
A new alternative is gRPC, a full remote procedure call framework that focuses on speed and efficiency. At the time of writing, gRPC cannot be used in web browsers, such as by the Angular or React framework, because browsers don’t provide the fine-grained access that gRPC requires to formulate its HTTP requests.
Creating a Web Service Using a Custom Endpoint
The Contents of the WebServiceEndpoint.cs File in the WebApp Folder
The MapWebService extension method creates three routes that form a basic web service using only the features that have been described in earlier chapters. The routes match URLs that start with /api, which is the conventional URL prefix for web services. The endpoint for the first route receives a value from a segment variable that is used to locate a single Product object in the database. The endpoint for the second route retrieves all the Product objects in the database. The third endpoint handles POST requests and reads the request body to get a JSON representation of a new object to add to the database.
Adding Routes in the Startup.cs File in the WebApp Folder
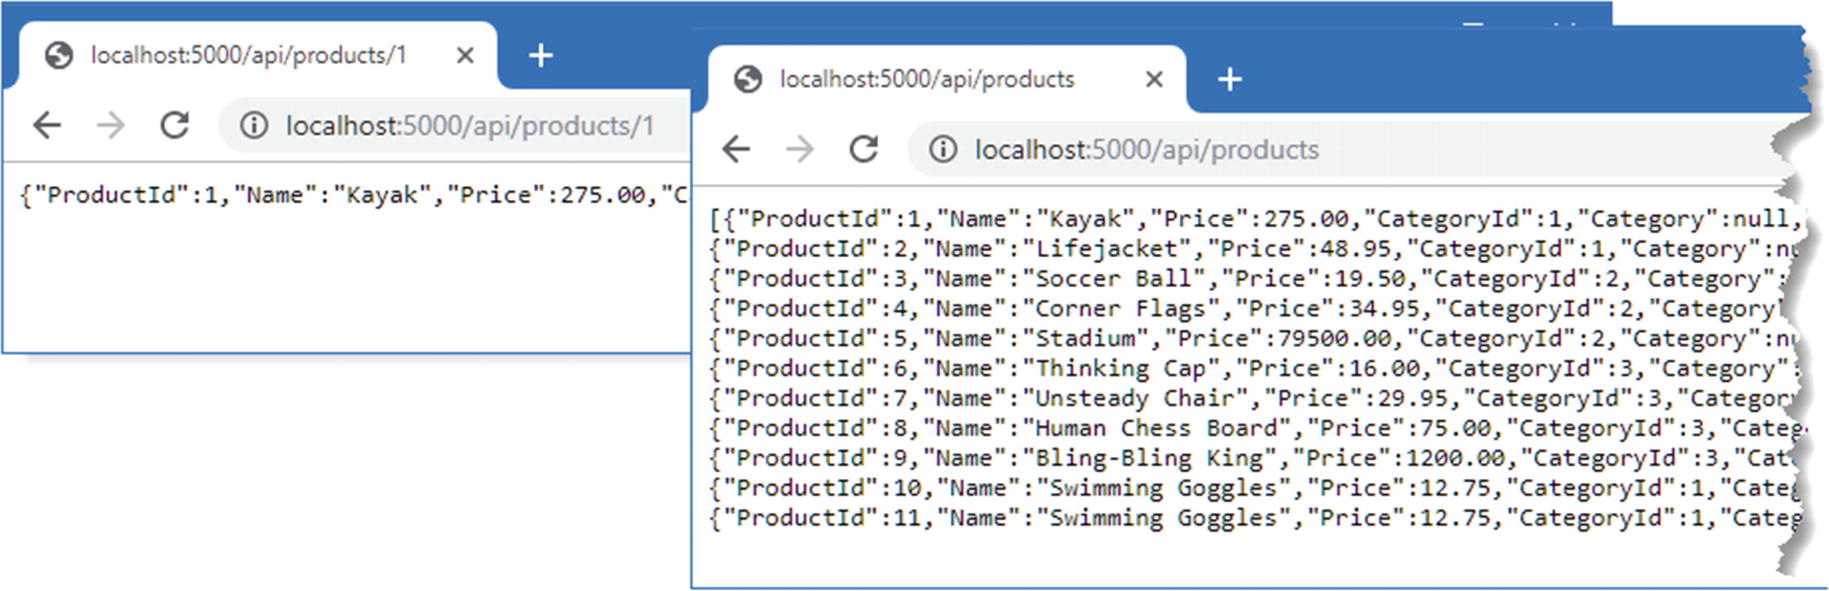
Web service response
The responses shown in the figure contain null values for the Supplier and Category properties because the LINQ queries do not include related data. See Chapter 20 for details.
Testing the third route requires a different approach because it isn’t possible to send HTTP POST requests using the browser. Open a new PowerShell command prompt and run the command shown in Listing 19-5. It is important to enter the command exactly as shown because the Invoke-RestMethod command is fussy about the syntax of its arguments.
You may receive an error when you use the Invoke-RestMethod or Invoke-WebRequest command to test the examples in this chapter if you have not performed the initial setup for Microsoft Edge or Internet Explorer. The problem can be fixed by running IE and selecting the initial configurations you require.
Sending a POST Request
Storing new data using the web service
Creating a Web Service Using a Controller
The drawback of using endpoints to create a web service is that each endpoint has to duplicate a similar set of steps to produce a response: get the Entity Framework Core service so that it can query the database, set the Content-Type header for the response, serialize the objects into JSON, and so on. As a result, web services created with endpoints are difficult to understand and awkward to maintain.
A more elegant approach is to use a controller, which allows a web service to be defined in a single class. Controllers are part of the MVC Framework, which builds on the ASP.NET Core platform and takes care of handling data in the same way that endpoints take care of processing URLs.
The MVC Framework is an implementation of the Model-View-Controller pattern, which describes one way to structure an application. The examples in this chapter use two of the three pillars of the pattern: a data model (the M in MVC) and controllers (the C in MVC). Chapter 21 provides the missing piece and explains how views can be used to create HTML responses using Razor.
The MVC pattern was an important step in the evolution of ASP.NET and allowed the platform to break away from the Web Forms model that predated it. Web Forms applications were easy to start but quickly became difficult to manage and hid details of HTTP requests and responses from the developer. By contrast, the adherence to the MVC pattern provided a strong and scalable structure for applications written with the MVC Framework and hid nothing from the developer. The MVC Framework revitalized ASP.NET and provided the foundation for what became ASP.NET Core, which dropped support for Web Forms and focused solely on using the MVC pattern.
As ASP.NET Core evolved, other styles of web application have been embraced, and the MVC Framework is only one of the ways that applications can be created. That doesn’t undermine the utility of the MVC pattern, but it doesn’t have the central role that it used to in ASP.NET Core development, and the features that used to be unique to the MVC Framework can now be accessed through other approaches, such as Razor Pages and Blazor.
A consequence of this evolution is that understanding the MVC pattern is no longer a prerequisite for effective ASP.NET Core development. If you are interested in understanding the MVC pattern, then https://en.wikipedia.org/wiki/Model–view–controller is a good place to start. But for this book, understanding how the features provided by the MVC Framework build on the ASP.NET Core platform is all the context that is required.
Enabling the MVC Framework
Enabling the MVC Framework in the Startup.cs File in the WebApp Folder
The AddControllers method defines the services that are required by the MVC framework, and the MapControllers method defines routes that will allow controllers to handle requests. You will see other methods used to configure the MVC framework used in later chapters, which provide access to different features, but the methods used in Listing 19-6 are the ones that configure the MVC framework for web services.
Creating a Controller
Controllers are classes whose methods, known as actions, can process HTTP requests. Controllers are discovered automatically when the application is started. The basic discovery process is simple: any public class whose name ends with Controller is a controller, and any public method a controller defines is an action. To demonstrate how simple a controller can be, create the WebApp/Controllers folder and add to it a file named ProductsController.cs with the code shown in Listing 19-7.
Controllers are conventionally defined in the Controllers folder, but they can be defined anywhere in the project, and they will still be discovered.
The Contents of the ProductsController.cs File in the Controllers Folder
The ProductsController class meets the criteria that the MVC framework looks for in a controller. It defines public methods named GetProducts and GetProduct, which will be treated as actions.
Understanding the Base Class
Useful ControllerBase Properties
Name | Description |
|---|---|
HttpContext | This property returns the HttpContext object for the current request. |
ModelState | This property returns details of the data validation process, as demonstrated in the “Validating Data” section later in the chapter and described in detail in Chapter 29. |
Request | This property returns the HttpRequest object for the current request. |
Response | This property returns the HttpResponse object for the current response. |
RouteData | This property returns the data extracted from the request URL by the routing middleware, as described in Chapter 13. |
User | This property returns an object that describes the user associated with the current request, as described in Chapter 38. |
Although controllers are typically derived from the ControllerBase or Controller classes (described in Chapter 21), this is just convention, and the MVC Framework will accept any class whose name ends with Controller, that is derived from a class whose name ends with Controller, or that has been decorated with the Controller attribute. Apply the NonController attribute to classes that meet these criteria but that should not receive HTTP requests.
A new instance of the controller class is created each time one of its actions is used to handle a request, which means the properties in Table 19-4 describe only the current request.
Understanding the Controller Attributes
The [controller] part of the attribute argument is used to derive the URL from the name of the controller class. The Controller part of the class name is dropped, which means that the attribute in Listing 19-7 sets the URL for the controller to /api/products.
The name given to action methods doesn’t matter in controllers used for web services. There are other uses for controllers, described in Chapter 21, where the name does matter, but for web services, it is the HTTP method attributes and the route patterns that are important.
The HTTP Method Attributes
Name | Description |
|---|---|
HttpGet | This attribute specifies that the action can be invoked only by HTTP requests that use the GET verb. |
HttpPost | This attribute specifies that the action can be invoked only by HTTP requests that use the POST verb. |
HttpDelete | This attribute specifies that the action can be invoked only by HTTP requests that use the DELETE verb. |
HttpPut | This attribute specifies that the action can be invoked only by HTTP requests that use the PUT verb. |
HttpPatch | This attribute specifies that the action can be invoked only by HTTP requests that use the PATCH verb. |
HttpHead | This attribute specifies that the action can be invoked only by HTTP requests that use the HEAD verb. |
AcceptVerbs | This attribute is used to specify multiple HTTP verbs. |
This attribute tells the MVC framework that the GetProduct action method handles GET requests for the URL pattern api/products/{id}. During the discovery process, the attributes applied to the controller are used to build the set of URL patterns that the controller can handle, summarized in Table 19-6.
When writing a controller, it is important to ensure that each combination of the HTTP method and URL pattern that the controller supports is mapped to only one action method. An exception will be thrown when a request can be handled by multiple actions because the MVC Framework is unable to decide which to use.
The URL Patterns
HTTP Method | URL Pattern | Action Method Name |
|---|---|---|
GET | api/products | GetProducts |
GET | api/products/{id} | GetProduct |
You can see how the combination of attributes is equivalent to the MapGet methods I used for the same URL patterns when I used endpoints to create a web service earlier in the chapter.
The rule of thumb is that GET requests should be used for all read-only information retrieval, while POST requests should be used for any operation that changes the application state. In standards-compliance terms, GET requests are for safe interactions (having no side effects besides information retrieval), and POST requests are for unsafe interactions (making a decision or changing something). These conventions are set by the World Wide Web Consortium (W3C), at www.w3.org/Protocols/rfc2616/rfc2616-sec9.html.
GET requests are addressable: all the information is contained in the URL, so it’s possible to bookmark and link to these addresses. Do not use GET requests for operations that change state. Many web developers learned this the hard way in 2005 when Google Web Accelerator was released to the public. This application prefetched all the content linked from each page, which is legal within the HTTP because GET requests should be safe. Unfortunately, many web developers had ignored the HTTP conventions and placed simple links to “delete item” or “add to shopping cart” in their applications. Chaos ensued.
Understanding Action Method Results
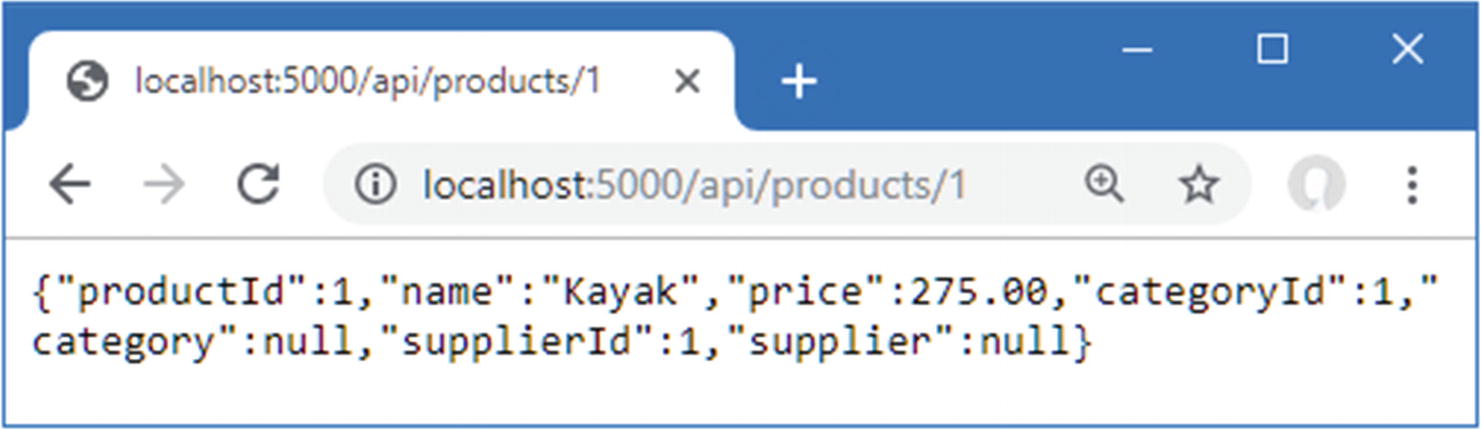
When I used an endpoint, I had to work directly with the JSON serializer to create a string that can be written to the response and set the Content-Type header to tell the client that the response contained JSON data. The action method returns a Product object, which is processed automatically.

Using a controller
Using Dependency Injection in Controllers
Using Services in the ProductsController.cs File in the Controllers Folder
The constructor declares a dependency on the DataContext service, which provides access to the application’s data. The services are resolved using the request scope, which means that a controller can request all services, without needing to understand their lifecycle.
A new Entity Framework Core context object is created for each controller. Some developers will try to refuse context objects as a perceived performance improvement, but this causes problems because data from one query can affect subsequent queries, as described in Chapter 20. Behind the scenes, Entity Framework Core efficiently manages the connections to the database, and you should not try to store or reuse context objects outside of the controller for which they are created.
Using services in a controller
One consequence of the controller lifecycle is that you can’t rely on side effects caused by methods being called in a specific sequence. So, for example, I can’t assign the ILogger<T> object received by the GetProduct method in Listing 19-8 to a property that can be read by the GetProducts action in later requests. Each controller object is used to handle one request, and only one action method will be invoked by the MVC Framework for each object.
Using Model Binding to Access Route Data
Using Model Binding in the ProductsController.cs File in the Controllers Folder
Using model binding in an action
Model Binding from the Request Body
Adding an Action in the ProductsController.cs File in the Controllers Folder
Sending a POST Request to the Example Application

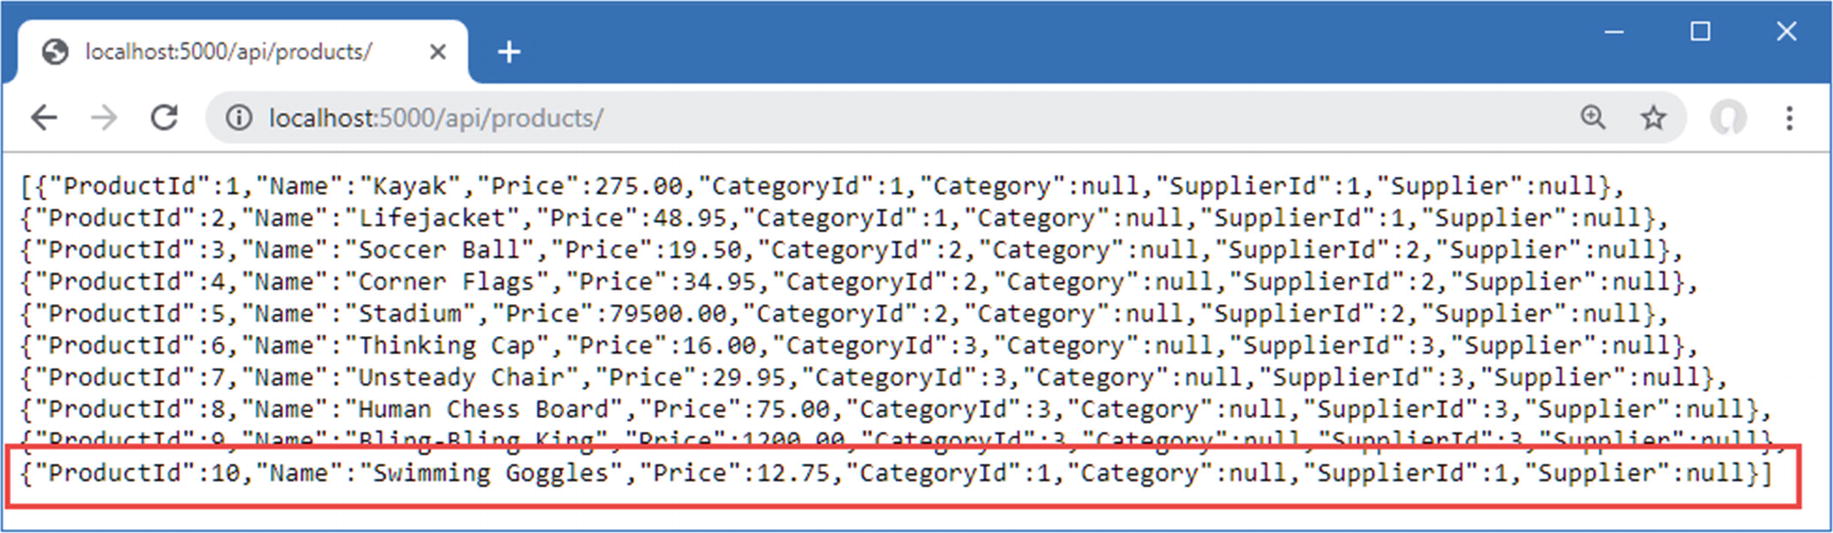
Storing new data using a controller
Adding Additional Actions
Adding Actions in the ProductsController.cs File in the Controllers Folder
The UpdateProduct action is similar to the SaveProduct action and uses model binding to receive a Product object from the request body. The DeleteProduct action receives a primary key value from the URL and uses it to create a Product that has a value only for the ProductId property, which is required because Entity Framework Core works only with objects, but web service clients typically expect to be able to delete objects using just a key value.
Updating an Object
Deleting an Object

Updating and deleting objects
Improving the Web Service
The controller in Listing 19-14 re-creates all the functionality provided by the separate endpoints, but there are still improvements that can be made, as described in the following sections.
If you are supporting third-party JavaScript clients, you may need to enable support for cross-origin requests (CORS). Browsers protect users by only allowing JavaScript code to make HTTP requests within the same origin, which means to URLs that have the same scheme, host, and port as the URL used to load the JavaScript code. CORS loosens this restriction by performing an initial HTTP request to check that the server will allow requests originating from a specific URL, helping prevent malicious code using your service without the user’s consent.
The options pattern is used to configure CORS with the CorsOptions class defined in the Microsoft.AspNetCore.Cors.Infrastructure namespace. See https://docs.microsoft.com/en-gb/aspnet/core/security/cors?view=aspnetcore-3.1 for details.
Using Asynchronous Actions
The ASP.NET Core platform processes each request by assigning a thread from a pool. The number of requests that can be processed concurrently is limited to the size of the pool, and a thread can’t be used to process any other request while it is waiting for an action to produce a result.
Actions that depend on external resources can cause a request thread to wait for an extended period. A database server, for example, may have its own concurrency limits and may queue up queries until they can be executed. The ASP.NET Core request thread is unavailable to process any other requests until the database produces a result for the action, which then produces a response that can be sent to the HTTP client.
This problem can be addressed by defining asynchronous actions, which allow ASP.NET Core threads to process other requests when they would otherwise be blocked, increasing the number of HTTP requests that the application can process simultaneously. Listing 19-15 revises the controller to use asynchronous actions.
Asynchronous actions don’t produce responses any quicker, and the benefit is only to increase the number of requests that can be processed concurrently.
Asynchronous Actions in the ProductsController.cs File in the Controllers Folder
Entity Framework Core provides asynchronous versions of some methods, such as FindAsync, AdddAsync, and SaveChangesAsync, and I have used these with the await keyword. Not all operations can be performed asynchronously, which is why the Update and Remove methods are unchanged.
For some operations—including LINQ queries to the database—the IAsyncEnumerable<T> interface can be used, which denotes a sequence of objects that should be enumerated asynchronously and prevents the ASP.NET Core request thread from waiting for each object to be produced by the database, as explained in Chapter 5.
There is no change to the responses produced by the controller, but the threads that ASP.NET Core assigns to process each request are not necessarily blocked by the action methods.
Preventing Over-Binding
Saving a Product
By default, Entity Framework Core configures the database to assign primary key values when new objects are stored. This means the application doesn’t have to worry about keeping track of which key values have already been assigned and allows multiple applications to share the same database without the need to coordinate key allocation. The Product data model class needs a ProductId property, but the model binding process doesn’t understand the significance of the property and adds any values that the client provides to the objects it creates, which causes the exception in the SaveProduct action method.
This is known as over-binding, and it can cause serious problems when a client provides values that the developer wasn’t expecting. At best, the application will behave unexpectedly, but this technique has been used to subvert application security and grant users more access than they should have.
The Contents of the ProductBindingTarget.cs File in the WebApp/Models Folder
Using a Binding Target in the ProductsController.cs File in the Controllers Folder

Discarding unwanted data values
Using Action Results
Sending a GET Request
There is no matching object in the database, which means that the GetProduct action method returns null. When the MVC Framework receives null from an action method, it returns the 204 status code, which indicates a successful request that has produced no data. Not all web services behave this way, and a common alternative is to return a 404 response, indicating not found.
Similarly, the SaveProducts action will return a 200 response when it stores an object, but since the primary key isn’t generated until the data is stored, the client doesn’t know what key value was assigned.
There is no right or wrong when it comes to these kinds of web service implementation details, and you should pick the approaches that best suit your project and personal preferences. This section is an example of how to change the default behavior and not a direction to follow any specific style of web service.
Action methods can direct the MVC Framework to send a specific response by returning an object that implements the IActionResult interface, which is known as an action result. This allows the action method to specify the type of response that is required without having to produce it directly using the HttpResponse object.
Useful ControllerBase Action Result Methods
Name | Description |
|---|---|
Ok | The IActionResult returned by this method produces a 200 OK status code and sends an optional data object in the response body. |
NoContent | The IActionResult returned by this method produces a 204 NO CONTENT status code. |
BadRequest | The IActionResult returned by this method produces a 400 BAD REQUEST status code. The method accepts an optional model state object that describes the problem to the client, as demonstrated in the “Validating Data” section. |
File | The IActionResult returned by this method produces a 200 OK response, sets the Content-Type header to the specified type, and sends the specified file to the client. |
NotFound | The IActionResult returned by this method produces a 404 NOT FOUND status code. |
RedirectRedirectPermanent | The IActionResult returned by these methods redirects the client to a specified URL. |
RedirectToRoute RedirectToRoutePermanent | The IActionResult returned by these methods redirects the client to the specified URL that is created using the routing system, using convention routing, as described in the “Redirecting Using Route Values” sidebar. |
LocalRedirectLocalRedirectPermanent | The IActionResult returned by these methods redirects the client to the specified URL that is local to the application. |
RedirectToActionRedirectToActionPermanent | The IActionResult returned by these methods redirects the client to an action method. The URL for the redirection is created using the URL routing system. |
RedirectToPageRedirectToPagePermanent | The IActionResult returned by these methods redirects the client to a Razor Page, described in Chapter 23. |
StatusCode | The IActionResult returned by this method produces a response with a specific status code. |
Using Action Results in the ProductsController.cs File in the Controllers Folder
Restart ASP.NET Core and repeat the command from Listing 19-19, and you will see an exception, which is how the Invoke-WebRequest command responds to error status codes, such as the 404 Not Found returned by the GetProduct action method.
Sending a POST Request
Performing Redirections
Many of the action result methods in Table 19-7 relate to redirections, which direct the client to another URL. The most basic way to perform a direction is to call the Redirect method, as shown in Listing 19-22.
The LocalRedirect and LocalRedirectPermanent methods throw an exception if a controller tries to perform a redirection to any URL that is not local. This is useful when you are redirecting to URLs provided by users, where an open redirection attack is attempted to redirect another user to an untrusted site.
Redirecting in the ProductsController.cs File in the Controllers Folder
Testing Redirection
Redirecting to an Action Method
Redirecting to an Action the ProductsController.cs File in the Controllers Folder
If you specify only an action method name, then the redirection will target the current controller. There is an overload of the RedirectToAction method that accepts action and controller names.
The set of values in this redirection relies on convention routing to select the controller and action method. Convention routing is typically used with controllers that produce HTML responses, as described in Chapter 21.
Validating Data
Applying Attributes in the ProductBindingTarget.cs File in the Models Folder
The Required attribute denotes properties for which the client must provide a value and can be applied to properties that are assigned null when there is no value in the request. The Range attribute requires a value between upper and lower limits and is used for primitive types that will default to zero when there is no value in the request.
Applying Validation in the ProductsController.cs File in the Controllers Folder
The ModelState property is inherited from the ControllerBase class, and the IsValid property returns true if the model binding process has produced data that meets the validation criteria. If the data received from the client is valid, then the action result from the Ok method is returned. If the data sent by the client fails the validation check, then the IsValid property will be false, and the action result from the BadRequest method is used instead. The BadRequest method accepts the object returned by the ModelState property, which is used to describe the validation errors to the client. (There is no standard way to describe validation errors, so the client may rely only on the 400 status code to determine that there is a problem.)
Testing Validation
You can see examples of working with validation messages in Chapter 29 where the validation feature is described in detail.
Applying the API Controller Attribute
Using ApiController in the ProductsController.cs File in the Controllers Folder
Using the ApiController attribute is optional, but it helps produce concise web service controllers.
Omitting Null Properties
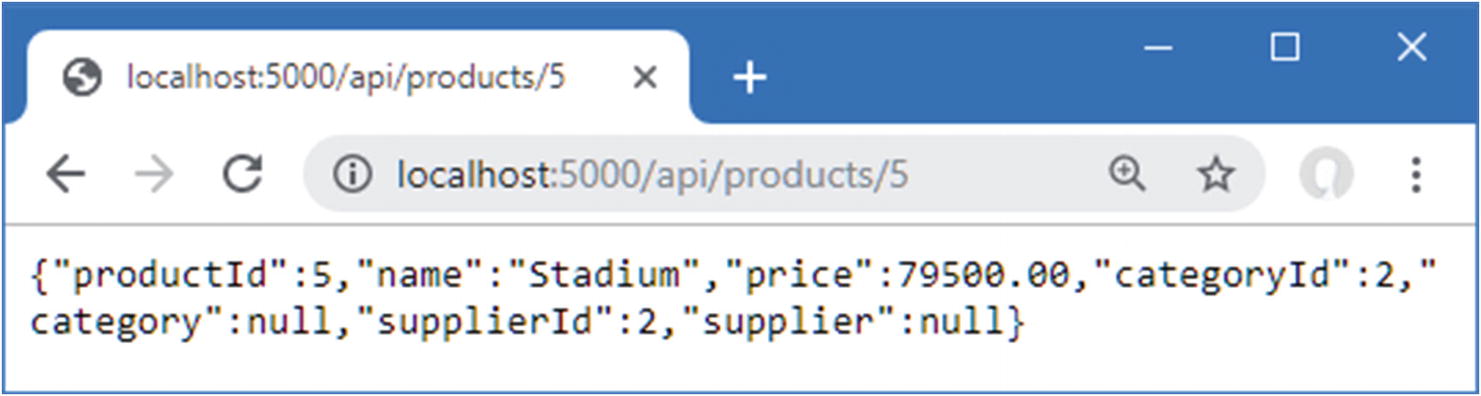
Sending a GET Request
The request was handled by the GetProduct action method, and the category and supplier values in the response will always be null because the action doesn’t ask Entity Framework Core to populate these properties.
Projecting Selected Properties
Omitting Properties in the ProductsController.cs File in the Controllers Folder
Configuring the JSON Serializer
Configuring the JSON Serializer in the Startup.cs File in the WebApp Folder
The JSON serializer is configured using the JsonSerializerOptions property of the JsonOptions class, and null values are discarded when the IgnoreNullValues property is true.

Configuring the JSON serializer
Summary
In this chapter, I showed you how to use the MVC Framework to create RESTful web services. I explained that the MVC Framework is built on top of the ASP.NET Core platform and showed you how a single controller class can define multiple action methods, each of which can process a different combination of URL and HTTP method. I showed you how to use dependency injection to consume services, how to use model binding to access request data, how to validate request data, and how to take control of the responses that are returned to the client. In the next chapter, I describe the advanced features that ASP.NET Core provides for web services.