
Embedding the tempo of your seamless loop inside of Edison will enable you to time-stretch your sample to the tempo of your FL Studio project. This can be any type of seamless loop discussed in the previous recipe, or an acapella sample, which means a vocal track without any type of instrumentation. When you embed tempo information into an acapella sample, you can time-stretch it to the tempo of your FL Studio project. We will review time-stretching in the final two recipes of this chapter, but finding your sample tempo is crucial to having creative control of your musical project.
In order to embed your tempo information into your Edison audio, you will want to have completed the previous recipe. Your seamless loop should be selected and trimmed so that the only audio within Edison is the exclusive material you have adjusted.
Let's go through the necessary steps to embed your tempo information.
- Engage Edison and hit the Space bar to start your sample.
- While your sample is playing, right-click on your main FL Studio TEMPO readout and select Tap… as shown in Fig 7.14. This will bring up the Tempo tapper window.
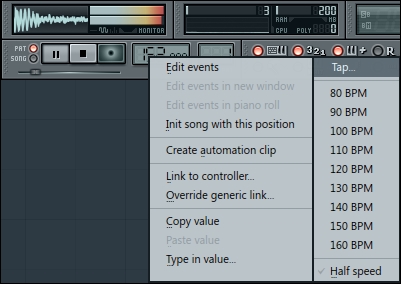
Fig 7.14
- Hit the T key on your QWERTY keyboard in sync with your sample's beat (T stands for tap). Your tempo will change as you do this, but will remain fixed once you find your beat. The following screenshot shows your tempo as 185:
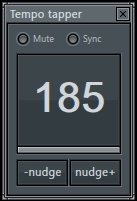
Fig 7.15
- Right-click on the small area beneath the TITLE readout on Edison. In the following screenshot, you will see we have right-clicked on the text that says DJ Premier - Seven Days (remix instrumental):
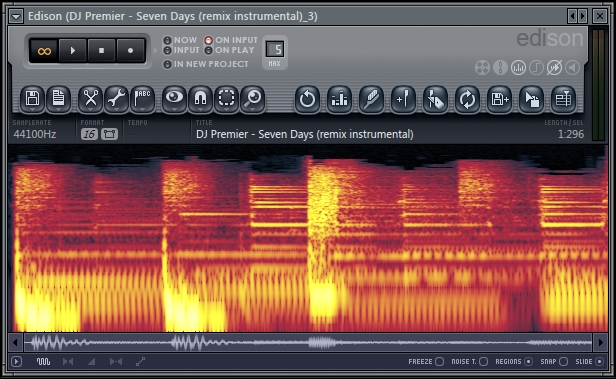
Fig 7.16
- After right-clicking on the TITLE area, the Sample properties window will appear as shown in Fig 7.17.
- In the Tempo section, enter the information that you previously discovered during the Tempo tapper process into the Tempo (BPM) field and click on Accept, as shown in the following screenshot:
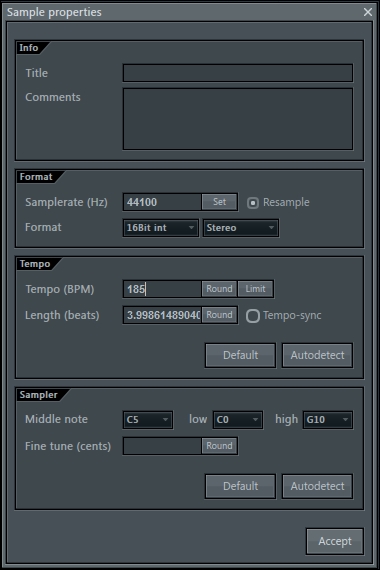
Fig 7.17
- Once accepted, the values you entered in the TEMPO section in the Sample properties window will show up inside of Edison beneath the TEMPO field. In Fig 7.18, our Edison sample now shows 185BPM. The tempo information is now embedded in your audio sample.
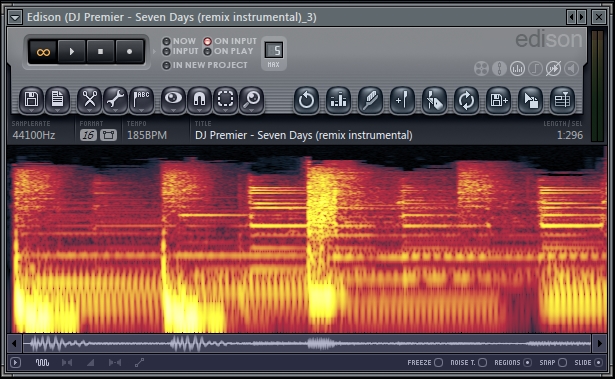
Fig 7.18
- Click on the disk icon and select Save sample as… as shown in Fig 7.19 if you want to save it anywhere on your computer or external hard drive. You could also use the Drag / copy sample / selection button or select Send to playlist as audio clip / to channel.
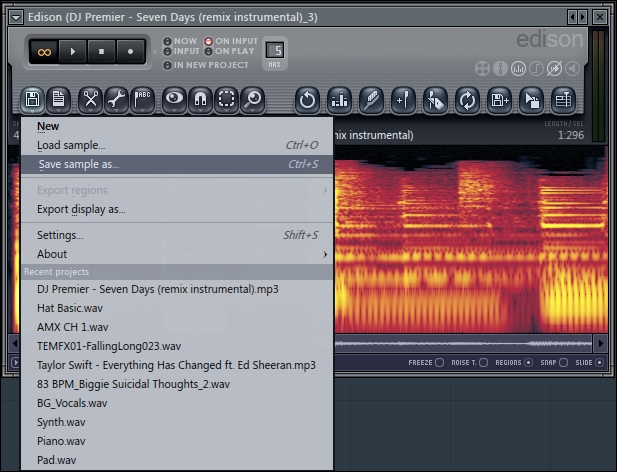
Fig 7.19
We are embedding the tempo information of our sample in order to eventually stretch it to your main FL Studio project tempo, which will be reviewed in subsequent recipes. This way, you have more options to work with your sample and the creative possibilities are greater. Once you save your tempo information into the Sample properties window, it is embedded. From there, you can either save it or drag it out of Edison into the playlist or step sequencer, respectively. Edison is only a scratch pad / audio editor; you must bring it into the step sequencer or playlist to actually use the audio in your FL Studio project.
After opening the Tempo tapper window, you can either tap out your tempo by pressing the T key on your QWERTY keyboard or use your mouse. To tap with your mouse, simply click in the area that reads TAP once the Tempo tapper window has opened.
In order to tap out these tempos, you have to get into the groove of your sample. As long as you have rhythm and can keep a beat, you are golden. Sometimes, your sample will already have tempo information embedded within the file. You can double-check the information that is already there by simply performing the Tempo tapper method.
As far as file organization is concerned, it may help to save your new samples (with tempo information embedded) in a dedicated folder or external hard drive. This works in the same manner as saving audio recordings, which we discussed in Chapter 6, Using the FL Studio Mixer and Recording Audio. Saving and organizing files properly is half the battle when composing music in any type of DAW. If you have a good system in place, it will make your life much easier, especially if you are an engineer or producer working with clients.