
The actual arrangement of your music project in FL Studio is based on the use of patterns. Patterns are, of course, made up of all your different channels and sounds in the step sequencer. Once you have differentiated all of your different patterns, the arrangement of these patterns will be placed into the FL Studio playlist, which will be reviewed in Chapter 4, Building Your Song.
To start working with patterns, you will only need to have your step sequencer open. You may do this by pressing the F6 key.
- Enter data for any of your given channels on a specific pattern. In Fig 3.23, PAT 1 is being worked on. You can observe this by looking at the area next to the right of the TEMPO information or by looking at the top of the step sequencer where it reads Pattern 1.
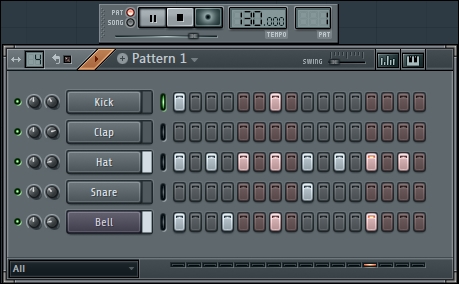
Fig 3.23
- Press the space bar or click play in FL Studio. At the very bottom of the step sequencer, you will see a small orange area, which the hint bar refers to as a "playing step." This will scroll left to right and then repeat/loop as your pattern returns to the start. The playing step helps you to visually see which pattern, if any, is currently playing. The preceding screenshot explores these details.
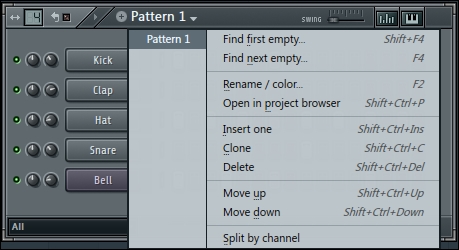
Fig 3.24
- Click on the drop-down menu to bring up the additional options. You have clicked the text titled Pattern 1 at the top of the step sequencer, as shown in Fig 3.24.
- Select Split by channel to split each channel into a separate pattern.
- If we select Split by channel, it will separate all of the channel data in the current pattern into subsequent patterns from top to bottom.
- In Fig 3.24, all the channel data is currently on Pattern 1. If we select Split by channel while on Pattern 1, FL Studio will make Pattern 1 include only the Kick data, Pattern 2 will now only have the Hat data, Pattern 3 will only have the Snare data, and Pattern 4 will only have the Bell data.
- After using the Split by channel function, as listed in Fig 3.24, Pattern 1 in the drop-down box will now show Kick, Hat, Snare, and Bell per the figure below. FL Studio will automatically rename your patterns based on the channel names (from top to bottom) and automatically split the channels into successive patterns. The following screenshot explores these options:
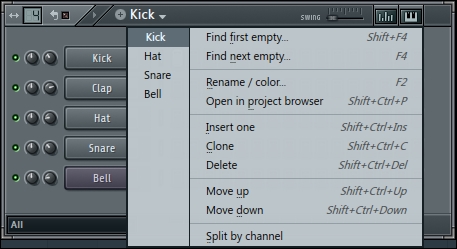
Fig 3.25
Patterns are copied and pasted or the Split by channel functionality is used basically for one purpose: to separate the many pieces, parts, and sounds of your music project in order to make a full music production. This will happen when you arrange your different patterns in the FL Studio playlist and engage the SONG button under the PAT button near your main play button. We will review this more in depth in the Using patterns to build your song recipe in Chapter 5, Using the Playlist. You may choose to work on one single pattern at the onset of the creative process because you may be adding many channels very quickly and coming up with percussion or instrument parts. After this, you can use Split by channel or manually cut and paste your channel(s) to separate patterns. In this manner, you can create sections for your intro, verses, chorus, bridge, outro, or any sections that you deem fit for your music project.