
Obtaining a seamless loop in Edison means making your loop sync in time and on beat. This is usually done in 4/4 time, but you can also find loops in 3/4 time or any variation of time you need. We will be adjusting the start and end points of the loop and making sure everything flows in musical beats and bars. If you have too much empty space at the beginning or end of your highlighted loop selection, your sample simply won't be practical to use in your musical project because the timing will be off. Your looped sample must be seamless – you are extracting the musical idea and this must be in perfect sync with respect to time or as close as possible.
Depending on your source genre, it may sometimes be a tad difficult to get a seamless loop because the song in question is not actually played in perfect time. This is usually acoustic or rock genres because some bands don't actually play with a "click track", which is a guiding tempo used during recording. Some bands don't use a click track on purpose, because it can add a more human element to their entire recording. Nevertheless, when working with Edison and trying to find a seamless loop, no matter what the source, you can usually come very close to finding a useable loop because you generally will only be extracting certain sections of your source material.
The source material doesn't always have to be long, as long as it can translate. You can also fine-tune and stretch your sample once it becomes a channel in the step sequencer, and we will review this in the final two recipes of this chapter. It may be a tad easier to find your seamless loop when working with electronic, rap, pop, and hip hop genres because they are inherently created using a strict digital tempo.
In order to find a seamless loop in Edison, you will want to have Edison open and a WAV or MP3 file loaded into the editor. You can load samples by using the disk icon and browsing on your computer or by dragging-and-dropping a sample from your desktop directly into Edison, as discussed in the previous recipe.
Let's have a look at the steps required to obtain a seamless loop.
- Click on the loop symbol at the upper-left-hand corner of Edison. It will turn yellow when engaged, as shown in the following screenshot:
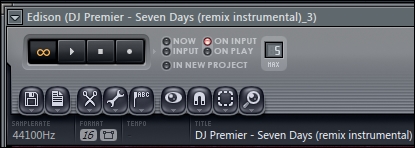
Fig 7.8
- Click on the Disable autoscrolling button near the upper-right-hand corner of the Edison interface. When disabled, it will have a slash mark through it, as shown in the following screenshot:
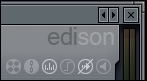
Fig 7.9
- Use your left and right scroll feature located at the bottom of Edison, as shown in Fig 7.10. When you hover your mouse over the left- or right-hand corner of the scroll bar at the bottom, notice that you can zoom in and out. You may also scroll left or right by clicking and dragging on the middle of the scroll bar.
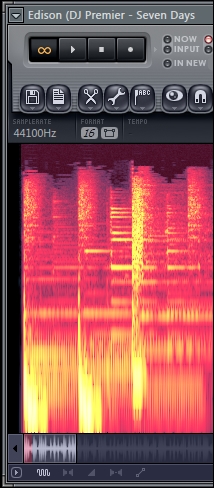
Fig 7.10
The following screenshot shows the exact location of the scroll bar area:

Fig 7.11
- Hit the S button on your QWERTY keyboard in order to change the view from a waveform to a spectrum and vice versa.
- Adjust the start and end points of your highlighted sample by clicking on them within Edison.
- Press the Space bar to start and stop your sample.
- Zoom in by pressing Page Up and zoom out by pressing Page Down. You may also need to adjust your scroll bar when doing this in order to see the exact location of your edits.
- If you notice any pops and clicks at the start or end points of your loop, right-click on your highlighted area, hover your mouse on Tools, and select Declick in (beginning/start point of your highlighted section) or Declick out (end point of your highlighted selection), respectively. This action is shown in the following screenshot:
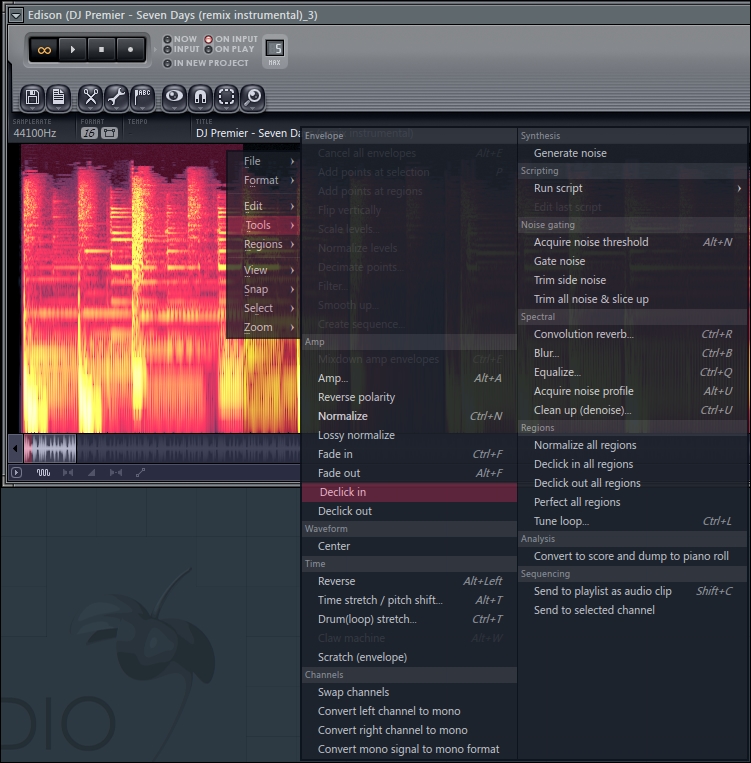
Fig 7.12
- Once you are satisfied with your loop and highlighted section, hold down Ctrl and press the Delete key. This is the Trim tool and can also be found by right-clicking on your audio in Edison, selecting Edit, and then selecting Trim.
We are basically adjusting the highlighted section of the loop we want to sample and capture/extract, and using the various tools in Edison to assist us in this process. Disabling autoscrolling will turn off automatic autoscrolling, and you can then use the scroll bar at the bottom of Edison to adjust the view of your Edison interface. Please remember that you can adjust the whole graphical interface or main window of Edison by hovering your mouse on the corners, top, or bottom of Edison to make your view as user friendly as possible.
Using the S key while adjusting your sample can greatly help you find where your beats and bars are, because the spectrum view shows straight vertical lines where certain musical phenomenon occurs. For example, there will usually be a vertical line on the down beat of your sample. This is usually where the kick drum or cymbal hits can assist you in finding the start point of your loop.
Once your loop is close to perfect in terms of musical time, you can zoom in on your sample (Page Up), use the scroll function to get in very close on the properties of your sample, and adjust your start point or end point accordingly. The closer you are zoomed in, the more audio surgery you can perform. You can also get rid of clicks and pops by zooming in very close and adjusting the highlighted portion carefully. Sometimes, the smallest adjustment when you are zoomed in can greatly help the musical feel of your sample.
An easier way of getting rid of unwanted noise, pops, and clicks at the beginning or ending portion of you sample is to use the Declick in or Declick out functionality. Trimming your sample at the final stage of your process makes your highlighted section the exclusive audio inside of Edison and removes any part of your audio that is not selected.
Once you are happy with your seamless loop, you can save it anywhere on your computer, drag it into the playlist, or drag it into the step sequencer. You can use it as a step on the step sequencer or within the piano roll. Once you have found your loop, your audio will act the same as any other type of audio used in FL Studio. You will still have your channel settings and the ability to send it to the FL Studio mixer for further processing.
You may also slice and chop your loop or any audio loaded into Edison. The button with the + sign in Fig 7.13 enables you to add manual slices, and the button to the right of that automatically slices your sample for you. Once you have your slices, you can drag your sliced sample into the Fruity Slicer channel by using the Drag / copy sample / selection button. This will enable you to play all of your slices with separate keys on a MIDI controller or with the Piano roll because it further separates your sample into individual pieces and parts. You can create a Fruity Slicer channel by going to Channels | Add one | Fruity Slicer. You can then use Drag / copy sample / selection icon, which has been discussed in the previous recipe, and drag it directly onto the Fruity Slicer channel on the step sequencer. Working with sliced audio may help you find more creative ways to utilize your samples. The Fruity Slicer channel can be sent to a mixer slot, but all of the samples/slices within it will be governed by one mixer slot.
Fig 7.13
- The Importing your new saved sample recipe
- The Time-stretching your sample to your project recipe
- The Fine-tuning your sample recipe
- The Exploring Channel settings recipe in Chapter 3, Working with Step Sequencer and Channels
- The Working with rhythm and percussion recipe in Chapter 4, Building Your Song