
You can find samples and get inspired at any point in your life. This means you may have songs that connected with you during your childhood, bands you saw in concert, orchestras you attended, YouTube videos you enjoy, or the most popular method in electronic, rap, and pop music: digging through vinyl records. Vinyl records and turntables can be recorded in the same manner as a microphone used while recording vocals. The only difference is that you will be using a line-level signal while recording vinyl records into FL Studio. It signifies that audio output for condenser microphones will generally use XLR cables and record players or turntables will use RCA, one quarter inch, and/or SPDIF outputs. You will simply select your vinyl record audio input in the same manner that you choose your input for vocals, guitar, or keyboards.
To get started with sampling in Edison, you will want to open up a new audio editor. The FL Studio hint bar will notify you that your mouse is hovering on Open (new) audio editor, which is the symbol with the scissors in the following screenshot:
Fig 7.1
Now let's begin sampling with Edison by carrying out the following steps:
- Open up Edison by clicking on the scissors symbol, as mentioned earlier.
- Drag-and-drop an MP3 or WAV file from your desktop into Edison, as shown in the following screenshot:
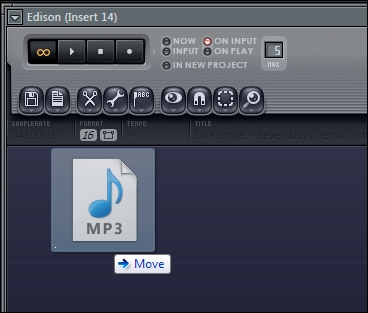
Fig 7.2
- In order to arrange and resize your FL Studio main window, you may click on the maximize/restore button, as shown in Fig 7.3. In this manner, you can resize the entire FL Studio program in order to drag-and-drop your MP3 or WAV file.
Fig 7.3
- An alternate method to the drag-and-drop method is to simply click on the disk/file icon on Edison and select Load sample…, as shown in Fig 7.4. This will enable you to browse anywhere on your computer to select the audio file that you want to listen to and edit in Edison.
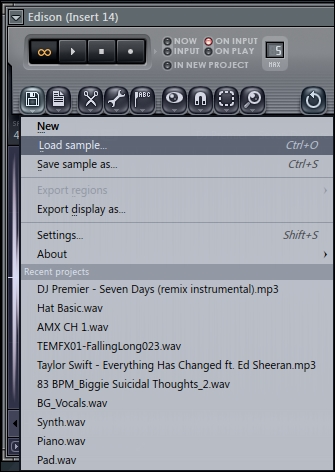
Fig 7.4
- Once your sample is loaded in either method, you will see the audio waveform of your file in a graphical display, as shown in the following screenshot:
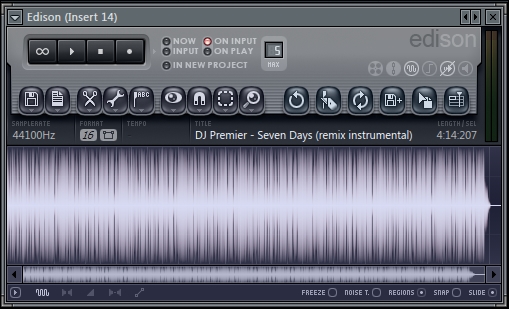
Fig 7.5
- Click-and-drag inside the waveform in order to highlight an area you want to sample or preview. Your selection will show in red and you can simply click on the left- or right-hand side of your red selection to resize.
- Select an area of your file that you want to capture (sample). Generally, you can highlight a short area that has a quick percussion hit / FX or a measure, beat, bar, or loop of music. When working with a loop, select the infinity symbol on the top-left and your selection will loop back around, allowing you to trim the beginning or end of it. In the following screenshot, we have selected a loop:
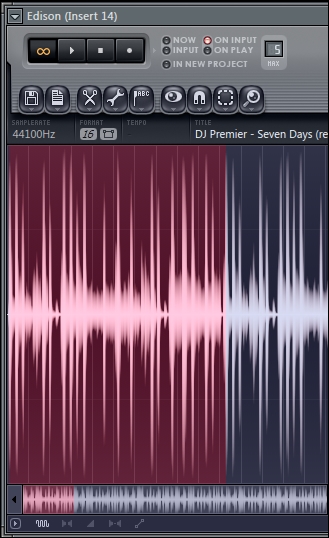
Fig 7.6
- While your Edison window is engaged, press the Space bar to play back your sample and adjust the start and end times with your mouse.

Fig 7.7
- In order to use a sample that you have selected in Edison in your actual FL Studio project, simply click on the Drag / copy sample / selection button and drag your sample into the step sequencer. The Drag / copy sample / selection button is the second icon from the far right in Fig 7.7. We discussed the various ways to drop audio into the step sequencer in the Working with rhythm and percussion recipe in Chapter 4, Building Your Song. Keep an eye on the FL Studio hint bar when you hover your mouse in order to make sure you are using the proper function.
Basically, we are importing an audio sample into Edison, selecting the part we want to use, and dragging it into the step sequencer. Once you have your audio sample inside the step sequencer, you can utilize it in the same manner you use any channel in the step sequencer.
Make sure you resize the Edison window in order to optimize your workflow and make things easier to see. You can hover your mouse on any part of the Edison window until your cursor changes to a resize arrow. You can do this on any corner of the Edison window in addition to the top or bottom. Another crucial tool when working with Edison is the S key on your QWERTY keyboard. Clicking this will change your audio view into a spectrum instead of a waveform, and it will help you find a loop. We will review getting a seamless loop in the next recipe.
A crucial tool when working with any type of audio file in Edison is the use of the Page Up and Page Down keys on your QWERTY keyboard. Page Up will zoom in on your sample and help you find the exact location you want to start or stop your highlighted selection. Page Down will zoom out so you can get an overview of what your entire audio file looks like and where your current selection actually is in relation to the whole sample. The zoom-in function can get extremely close (up to the milliseconds of your sample), and this is sometimes needed to perform audio surgery and get the best possible selection we can. Take care while choosing the proper selection because you will be using the sample in your music project.
Tip
Press Ctrl + Shift and click/drag to the left or right at the bottom of Edison in order to zoom in and out. Press Crl + Alt and click/drag up and down to zoom in and out. This is similar to using the scroll bar in the playlist, as reviewed in Chapter 5, Using the Playlist. With Edison, you use the Zoom/Scroll bar near the bottom of the window.
You may also use the Detached function—the exact function used on the FL Studio Mixer. This will allow you to detach Edison and drag it to another screen or computer monitor. Clicking on the small triangle on the upper-left-hand corner in Edison drops down a menu with the Detached functionality. Clicking on that will help you separate and isolate Edison so the entire graphical window is easier to work with. Also, be aware of where Edison actually exists on our FL Studio mixer. Sometimes, it will pop up on one of our FL Studio Mixer chain slots in the FL Studio Mixer. Edison is actually a Fruity effect and can be added to any FX slot (1 to 8 vertically) in the FL Studio Mixer.
You may also right-click on where your audio file is displayed on Edison. This will bring up a variety of parameters used to manipulate and tweak your audio. Additionally, be sure to experiment with all of the icons in the previous screenshot. Edison is a very powerful audio editor and it can definitely enhance the sound of your FL Studio project.
You can also edit any type of sample in your browser within Edison in order to tweak it to your needs. Basically, Edison can be used as an audio editor and audio sampler, as well as an audio recording system.
Send to playlist as audio clip / to channel is a newer function that enables you to send your highlighted selection directly to the FL Studio playlist. It also creates a channel in the step sequencer. This is the last icon to the right in Fig 7.7. You may also use Save icon, which we saw previously in the How to do it… section, in order to use the Save sample as… feature and save your highlighted selection wherever you desire on your computer. This can sometimes be an external hard drive or a dedicated folder and may help with organization. If you do not use this method, your dragged sample (once dragged or moved into the step sequencer) will be saved automatically in the Sliced beats folder on the FL Studio Browser.
- The Obtaining a seamless loop recipe
- The Sending a channel to a mixer slot recipe in Chapter 3, Working with Step Sequencer and Channels
- The Working with rhythm and percussion recipe in Chapter 4, Building Your Song
- The Recording external audio – keyboards, vocals, guitar, and devices recipe in Chapter 6, Using the FL Studio Mixer and Recording Audio