
The recording of external audio is done through the FL Studio Mixer. Please refer to the Knowing your sound cards and audio interfaces recipe in Chapter 1, Configuring FL Studio, with regards to engaging your audio device. No matter what type of external sound you want to record, you will have to select your sound card or audio interface in your audio settings by hitting F10 and understanding the basic signal flow.
To get started with recording external audio, you need to have your FL Studio Mixer open. This can be done by hitting F9. A prerequisite for recording external audio is to have your correct sound card or audio interface selected in your audio settings by hitting F10. This was reviewed in Chapter 1, Configuring FL Studio. Note that if your microphone is near your speakers, you will need to turn your speakers or studio monitors off before recording into a microphone to avoid feedback. The best practice is to turn your speakers all the way down or off before recording and to use headphones to hear your mix. The output of your speakers into the microphone is definitely a bad practice and can cause unwanted feedback and damage to your microphone, so turn your speakers off before recording vocals.
All external audio recordings include the exact same steps. You simply have to select the input that your audio device is plugged in to on your audio interface or ASIO4all framework. In this example, we will be working with a condenser microphone and recording vocals using the following steps:
- Click on any mixer slot in the FL Studio Mixer. This will be the path for your audio to travel. You need to pick a mixer slot that is free of any audio. In Fig 6.3, we have selected mixer slot 20 (INS 20) and renamed it to read
MBox mic. - While your external audio mixer slot is still engaged, click on the IN dropdown of your FL Studio Mixer. This is a dropdown of your available audio inputs; it is based on the sound card you previously selected in your F10 audio settings. In Fig 6.3, we can see that we have selected MBox2 In 2. In this example, our real-world XLR condenser microphone is plugged into Input 2 on our MBox2 audio interface. This drop-down box directly correlates to the inputs on your audio interface.
- Right-click on the small disk icon at the very bottom of INS 20. This column correlates to INS 20. It will bring up your computer hierarchy, where you can specify the exact location that you want to save your file in.
Tip
This is the point where you can organize your recorded audio. You can name and save this vocal track to an external hard drive, which can contain folders of all your music projects. This helps to save file space on your actual computer hard drive because WAV files are large byte files. Another option is to simply left-click on the small disk icon, but it will not allow you to specify where you want your audio recording saved. Rather, it will simply automatically save your audio recording to the default folder within FL Studio, titled
Recordedin the browser.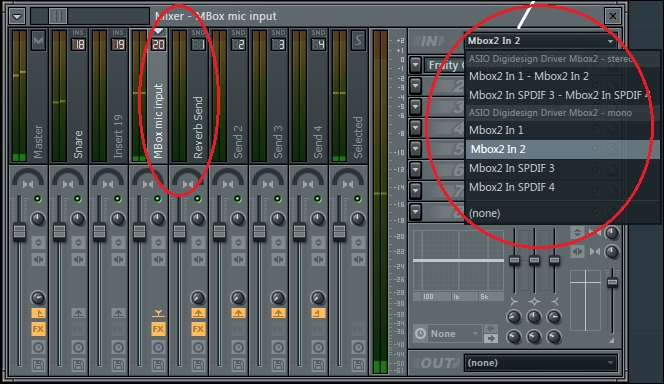
Fig 6.3
- Bring up your playlist (by hitting F5) and highlight the measures you want to record on. Generally, you can highlight an area of your verse, chorus, intro, bridge, or outro. This way, you are specifying where you want to record instead of just recording from the beginning and losing your breath along with your performance. However, if you are a singer-songwriter and want to capture the mood of a straight through performance that lasts 3 to 4 minutes or longer, you can highlight a larger chunk of time. We have double-clicked and dragged our mouse on the measures from 1 to 9 as shown in the following screenshot:
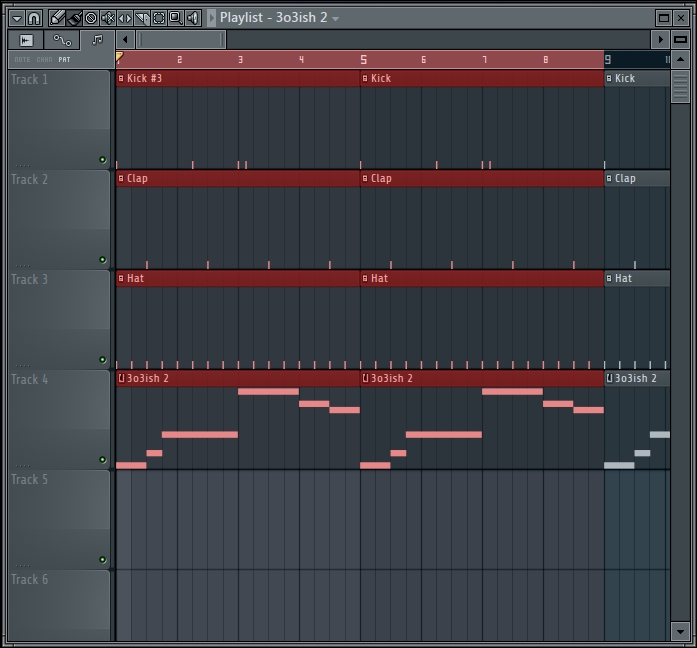
Fig 6.4
- Click on the recording button on the transport controls as shown in Fig 6.5. The transport controls are play/pause, stop, and record.
- Select Audio, into the playlist as an audio clip.
- Click on the play button, and your recording will count down based on your 3 2 1 countdown setting shown to the right of the transport controls. You can also right-click on the 3 2 1 parameter to select the 1 bar or 2 bars countdown before recording. This will help you prepare before the recording and give you a little time to set up. The following screenshot shows the Recording window:
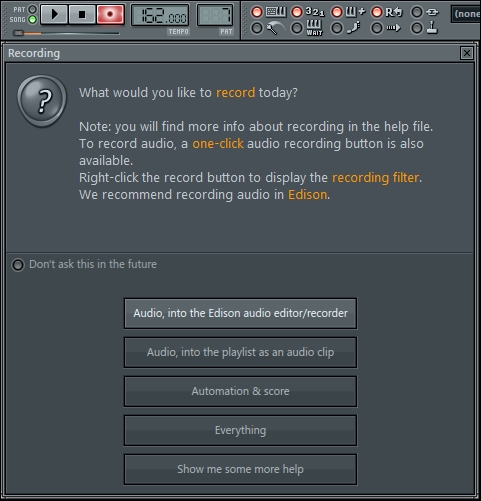
Fig 6.5
- Your audio recording will now show up in the playlist in the exact section that you previously highlighted before recording. In Fig 6.6, it shows as Vocal 1_4, and you can see the waveform readout. It also automatically goes to the next available track in the playlist, which happens to be Track 5.
- This track can now be treated like any type of audio in the playlist. You can move, cut, copy, paste, and rearrange your audio recording as shown in the following screenshot:
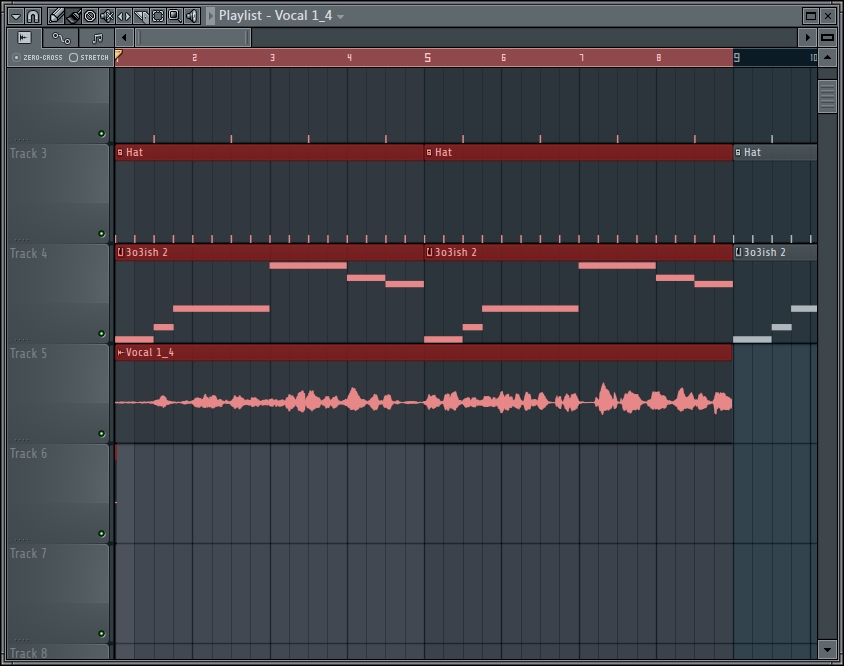
Fig 6.6
Your audio recording is now also its own dedicated channel in the step sequencer, as shown in the following screenshot:
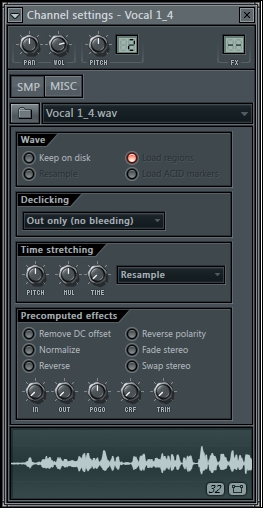
Fig 6.7
- Once you find your new audio channel in the step sequencer (it will also be defaulted to a new step sequencer group called Audio Clips), it can be treated like any other WAV sample, MP3, or virtual instrument channel. You can send this to a mixer slot to gain more control and tweak your vocals further.
- When you are done recording the vocals, go back to the FL Studio Mixer and select (none) on the insert slot where you selected your audio input (as shown in Fig 6.3). In this manner, you won't hear any audio coming through your interface or background noise being picked up from your microphone, and you will be able to mix cleanly again.
Using the FL Studio Mixer allows you to pick a mixer slot for your audio path and select the input on your sound card or audio interface. You can record one microphone or audio input at a time or multiple inputs at the same time depending on your audio interface. For example, if your audio interface has eight inputs, you will need to go through each mixer slot one at a time and then select the input you want from the input drop-down box. This can help those who are in a band and depends on human chemistry and vibe to bring out the best in their recordings. It can also help singer-songwriters because they can use one microphone input for an acoustic guitar and another microphone input for the vocals. If you only have one microphone and one input, you can lay down one piece of the input at a time, which equates to overdubbing one recording after the next. The overdubbing technique is the best way to layer vocals for singers or rappers. Artists can double their vocals to add emphasis to certain words, and the second layer of vocals is where artists usually find their harmonies.
Proper cables are extremely important when recording external audio. If you need 1/4 " cables, make sure you get balanced cables that will reduce the noise and boost your sound to an optimal level. This balanced 1/4 " cable is shown in the following image; it can be recognized by two rings near the tip, which may be black or metallic:
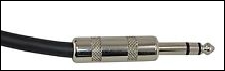
Fig 6.8
When working with condenser microphones, most of the time you will need phantom power, which is usually offered on mixers and audio interfaces, as well as an XLR cable as shown in the following image:
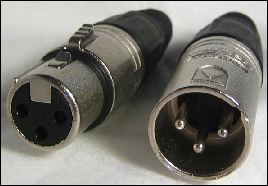
Fig 6.9
You are able to test the level of your audio the moment you select its input from the drop-down box on the FL Studio Mixer, so make sure you have everything set to a good level before recording.
You need to have a very quiet room before recording vocals and even have noise-canceling headphones that won't "bleed" or seep into the microphone. With live artists or a band recording, sometimes a small amount of bleed into the microphone can be considered good because you are capturing the sound of your room. When recording a live drum set, the bleed from one microphone to another is inevitable, and it is up to the producer or engineer to mix the various parts in the best way.
Soundproofing your room makes it so no one on the outside can hear your ruckus. Sound treatment is a whole other animal; it means adding materials (construction, flooring, carpet, doors, windows, bass traps, and monitoring isolation pads) that make your room optimal for mixing. This means that your mix will translate as what you hear and what it sounds like on entertainment systems, on CDs, on online streamed material, and on all devices. When recording vocals, you usually want to be in room that deadens the space; your level and signal will now be that much clearer and focused. Usually, a pop filter is used in front of the microphone so that sharp annunciations are not clipped. Great recordings have come from using closets as recording booths (try the song Bird's Eye View by Statik Selektah), so you may get lucky in the spaces you find! Good audio recording is, nevertheless, subjective and depends heavily on the type of sound you want to create.