
Rendering your completed music project before mastering into a WAV file allows you to render down all of the various elements of your song into one consolidated file. This will free up the processing load placed on your computer, especially if your project includes many virtual effects in your various effect chains. This is basically the same thing explored in the Exporting an MP3 or a WAV file recipe, but in this case, we are exporting an extremely high quality WAV file directly before the final stage of mastering. If we do not want to do it this way, we can use the master track on our FL Studio Mixer in our existing project, but only if your computer can keep up with the processing load.
In order to get ready to use a WAV file to master, your entire music project should be complete.
- Highlight your song in the FL Studio playlist as shown on the screen depicted in Fig 8.18. You may do this by pushing Ctrl + A. Your song should then be highlighted in red.
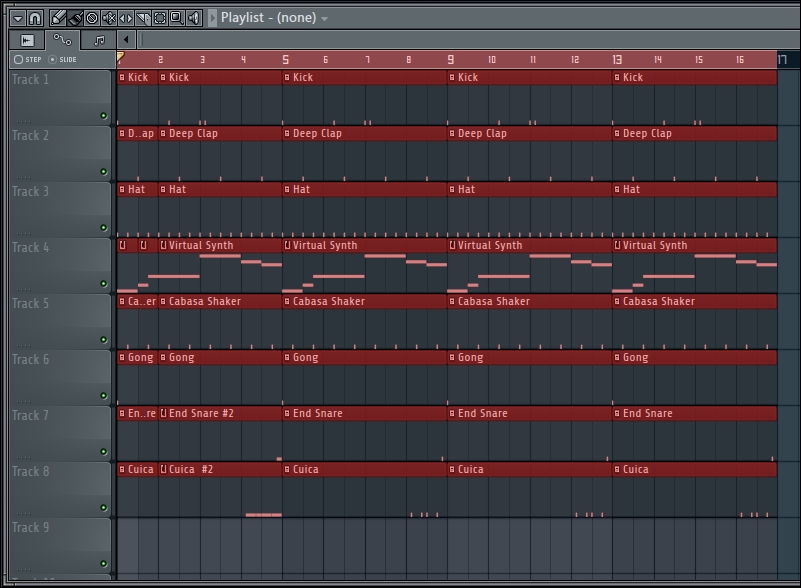
Fig 8.18
- Select FILE from the main FL Studio window, hover your mouse over Export, and select Wave file…, as shown in the following screenshot:
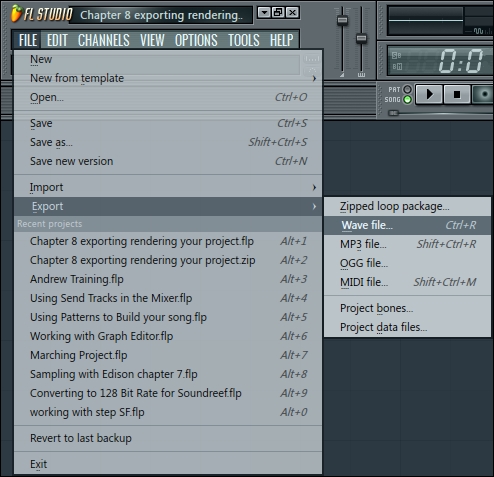
Fig 8.19
- You will then be able to name your export and pick a location on your computer.
- Next, select 24bit int, as shown in Fig 8.20, and click on Start. In this example, we have named our song
Clapmatic. This will render your project.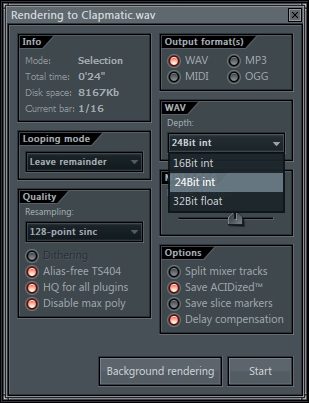
Fig 8.20
- Start a brand new empty FL Studio project as shown in Fig 8.21. Select FILE and then New.
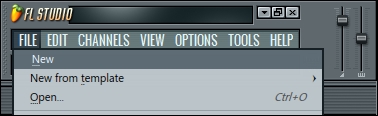
Fig 8.21
- Click on the Maximize / restore button, which is directly next to the Minimize button at the top of the main window of FL Studio. Resize your FL Studio window in order to drag your WAV file into the FL Studio playlist. The following screenshot shows the resizing options:

Fig 8.22
- Drag your rendered WAV file directly into the FL Studio Playlist. You could also drag it from the FL Studio Browser.
- Your audio file will now populate the playlist as shown in Fig 8.23. Go to the SONG mode in FL Studio, drag your file all the way to the left (in order to set an immediate start time), select your original TEMPO, and master your project using the master track effect chain in the FL Studio Mixer.
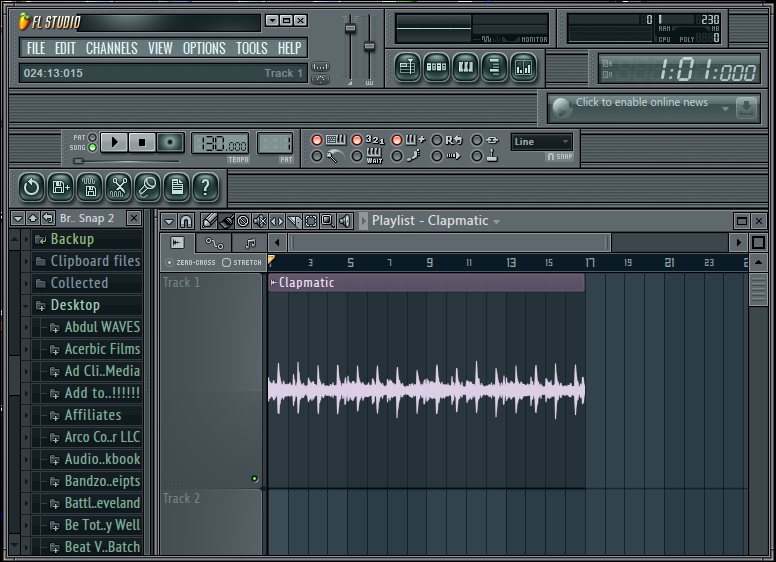
Fig 8.23
Usually, if you do not export your file before mastering, all of your plugins and data are running at the same time, and taking up various mixer slots in the FL Studio Mixer. However, in this manner, there will only be one mixer track running—the master track that is playing your WAV file! Also, the WAV file was exported at 24-bit, making it super high quality before the mastering stage! If you want your playlist to line up with the tempo of your exported project (the same project you are working with now), just set your FL Studio main tempo to the exact number as your rendered project. In this way, you can use the Slice tool to further edit your song if necessary. You will want to review the Chapter 6, Using the FL Studio Mixer and Recording Audio effect chain recipe and make your master track sound remarkable. You may use the limiters and compressors within FL Studio, as well as third-party sources such as Waves and iZotope. When you are done, you can then export the file as an MP3 or 16-bit WAV file. Remember, a 16-bit WAV file with a 44100 Hz sample rate is the standard setting for audio CDs. The MP3 format is useable for Internet streaming.
Tip
You may also use this method for resampling. If you are working with 10 virtual synths that are sucking your PC's processor dry, export them as WAV files and reload them. Be sure to delete or mute the original virtual channels as you now have rendered down wave files. However, you should also save your project as a new version so you don't completely lose any MIDI data from your virtual channels.
Remember, your file is now its own channel in the step sequencer! You can look at your channel setting and possibly use the Normalize or Reverse functions. Remember to save your current project so you keep everything organized. You can also import or drag your WAV file directly into Edison for further processing.
There are no rules to working with this exported file. Sometimes, you will want to practice these exact steps before recording vocals. In this way, you can record vocals on a rendered WAV file without worrying about too much load placed upon your computer. You can even continue to work on your song or add in new elements for remixing.
- The Comparing patterns and audio recipe in Chapter 5, Using the Playlist
- The Using markers and snap recipe in Chapter 5, Using the Playlist
- The Viewing the playlist recipe in Chapter 5, Using the Playlist
- The Adding effects and your effect chain recipe in Chapter 6, Using the FL Studio Mixer and Recording Audio
- The Understanding master tracks and loud wars recipe in Chapter 6, Using the FL Studio Mixer and Recording Audio