
Humanizing your song with Graph editor allows you to control every individual step on a channel in the step sequencer. This differs from the OFS knob, which is the global setting for your steps, and shifts all of them simultaneously. Depending on your final vision, both methods have their place in the music production.
To get started with using Graph editor, you will simply want to have step data on a channel within the step sequencer.
In this example, we will be working with the Hat channel again. Let's take a look at how to humanize your song using Graph editor on the step sequencer with the following steps:
- Once you have a channel selected (the small green slit is engaged), click on the Graph editor button in the upper right-hand corner of the step sequencer. This is directly to the left of the Keyboard editor button as per the following screenshot:
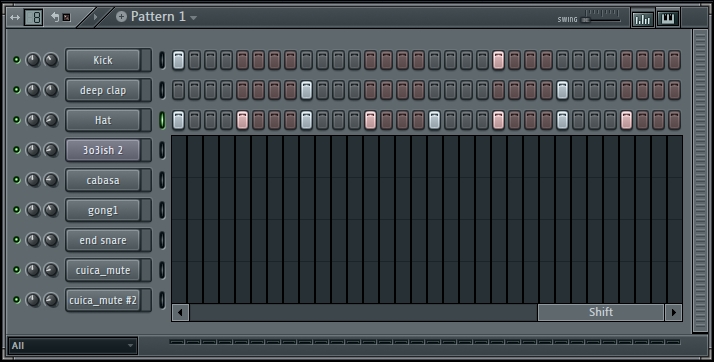
Fig 9.5
- Click on the bottom scroll bar that appears after you click on the Graph editor button. From left to right, it will read as Pan, Velocity, Release, Mod X, Mod Y, Fine pitch, and Shift. Click-and-drag the scroll bar to the extreme right to reach the Shift parameter as per the previous screenshot.
- Click-and-drag each column to form blue, vertical lines. The lines will affect the steps directly above each column as per Fig 9.6. The color will change from blue to green the higher you make the column.
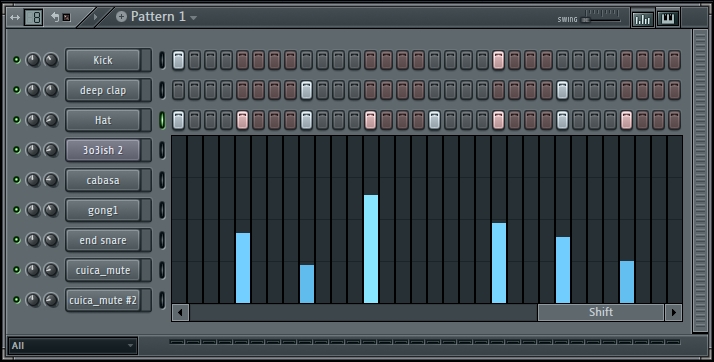
Fig 9.6
The greater the height of the blue/green line, the more in time your step will shift to the right. If you experiment with this process, you will be able to hear the changes in your sound and steps. You may right-click or hold Alt + left-click in order to delete the column data.
Be sure to use the Velocity function within the Graph editor window (use the scroll bar that pops up when you click on the Graph editor button and then scroll to Velocity). Adding a human feel is directly related to changing the time and volume (velocity) of your sound. The Velocity function will show in pink columns.
If you hold down Shift while right-clicking-and-dragging on any parameter in Graph editor, it will enable you to add incremental columns up or down. FL Studio refers to this as ramps. If you hold down Ctrl while adjusting a column, it will make uniform adjustments to all of the columns simultaneously.
- The Exploring Channel settings recipe in Chapter 3, Working with Step Sequencer and Channels
- The Working with Graph editor recipe in Chapter 3, Working with Step Sequencer and Channels
- The Sending a channel to mixer a slot recipe in Chapter 3, Working with Step Sequencer and Channels
- The Using the Keyboard editor recipe in Chapter 3, Working with Step Sequencer and Channels