
This recipe will walk you through the steps of using Report Builder 3.0 to create new reports for Service Manager. We will also show you how to create a custom folder structure in SQL Server Reporting Services to store your reports in.
Although Report Builder offers a visual wizard for creating the queries that will be used for retrieving data from the Service Manager Data Warehouse database, it is hardly possible to work with reporting effectively without at least knowing the basics of the SQL used for querying relational databases.
Furthermore, you will need to get familiar with the database model of the DWDataMart database. Please refer to the Understanding the Service Manager Data Warehouse data mart recipe earlier in this chapter.
Also, you must install Microsoft .NET Framework 3.5 on all computers you intend to run Report Builder from.
First, we will create a custom folder structure in SQL Server Reporting Services to store our reports:
- Open your web browser and navigate to the following URL:
http://[SCSMDWSQL]/Reports. - Replace [SCSMDWSQL] with the fully qualified domain name of the SQL server that is used for reporting. If SQL Server Reporting Service is running as a named instance, the syntax of the URL will be the following:
http://[SCSMDWSQL]/Reports_[InstanceName]. - Click on the SystemCenter folder, and then click on the ServiceManager folder.
- Click on New Folder, enter a name for the folder, such as
Custom Reports, and optionally enter a description. Click on OK. - Click on the newly created folder and then click on New Folder to create a new subfolder. Enter a name for the folder, such as
Incident Management, and optionally enter a description. Click on OK. - Click on the newly created subfolder. Note that the permissions applied to the newly created folder will be inherited from the parent
ServiceManagerfolder. You can break inheritance and apply custom permissions to your folders. Instructions on how to manage report permissions can be found in a later chapter.
With the folder structure created, we are now going to create the report:
- Click on the Report Builder button from the toolbar. Report Builder will be streamed to your computer.

- If you see the error message To use Report Builder, you must install .Net Framework 3.5 on this computer and you made sure .NET Framework has already been installed, you will need to run Internet Explorer in IE8 mode (you can switch mode by using the Developer Tools (F12)), or install Report Builder on your computer (see the following There's more... section).
- If you see a security warning, click on Run to start the application.
- Once Report Builder has started, on the Getting Started window, choose New Report | Table or Matrix Wizard.
- In the Choose a dataset dialog, select Create a dataset, and then click on Next.
- In the Choose a connection to a data source dialog, select the DWDataMart data source. If it is not displayed in the list, click on Browse, navigate to the SystemCenterServiceManager folder, and choose DWDataMart. Click on Open. Finally click on Next to proceed.
- The Enter Data Source Credentials dialog will be displayed because Report Builder needs credentials to access the database. If the user account that you are using to run Report Builder has access to the
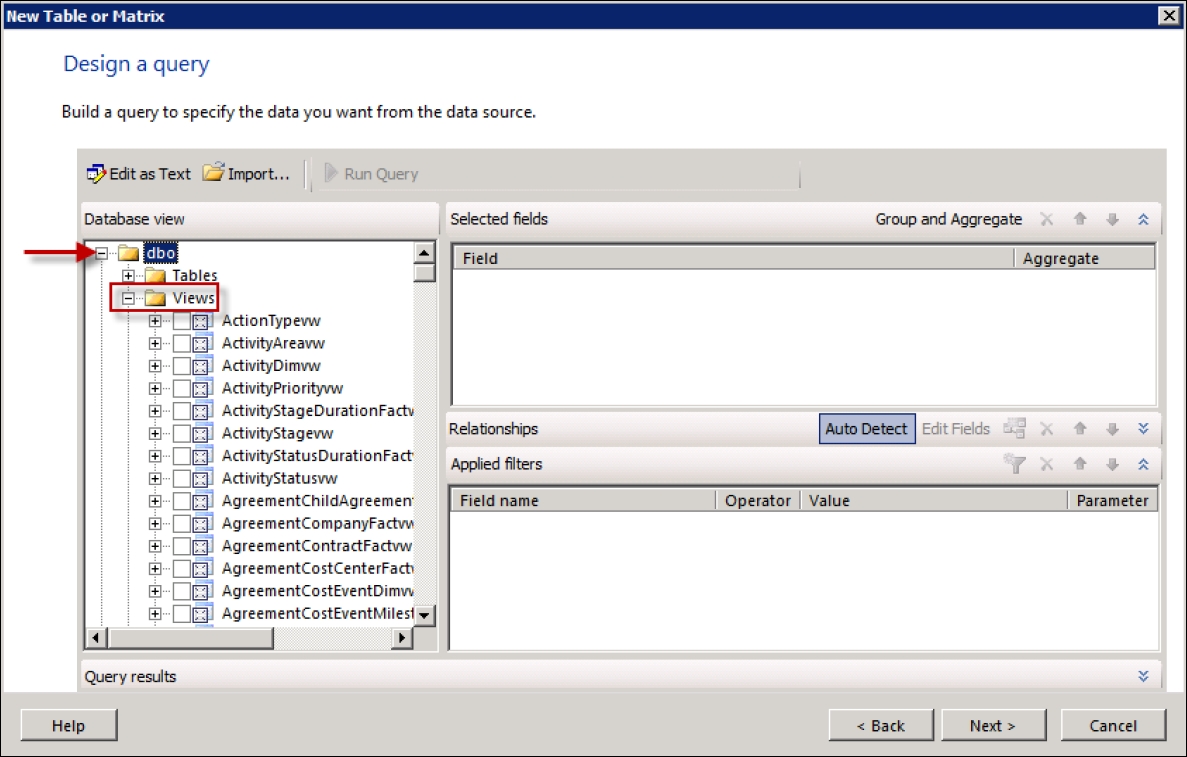
DWDataMartdatabase, you can choose the Use the current Windows user option and click on OK. Otherwise, you will need to provide the password of the Service Manager Reporting Account. - The Design a query dialog will open.
- In the Relationships section, create the following relationships:
Left Table
Join Type
Right Table
Join Fields
IncidentDimvw
Inner
WorkItemDimvw
EntityDimKey = EntityDimKey
WorkItemDimvw
Left Outer
WorkItemAffectedUserFactvw
WorkItemDimKey = WorkItemDimKey
WorkItemAffectedUserFactvw
Left Outer
UserDimvw
WorkItemAffectedUser_UserDimKey = UserDimKey
IncidentDimvw
Left Outer
IncidentClassificationvw
Classification_IncidentClassificationId = IncidentClassificationId
IncidentClassificationvw
Left Outer
DisplayStringDimvw
EnumTypeId = BaseManagedEntityId
To do so, repeat the following steps 10 to 15 for each relationship in the preceding table.
- On the left-hand side of the Design a query wizard, expand dboViews, which is under the Database view:
- In the middle pane navigate to the Relationships section (you may have to expand the Relationship pane). Click on AutoDetect to activate the relationship button.
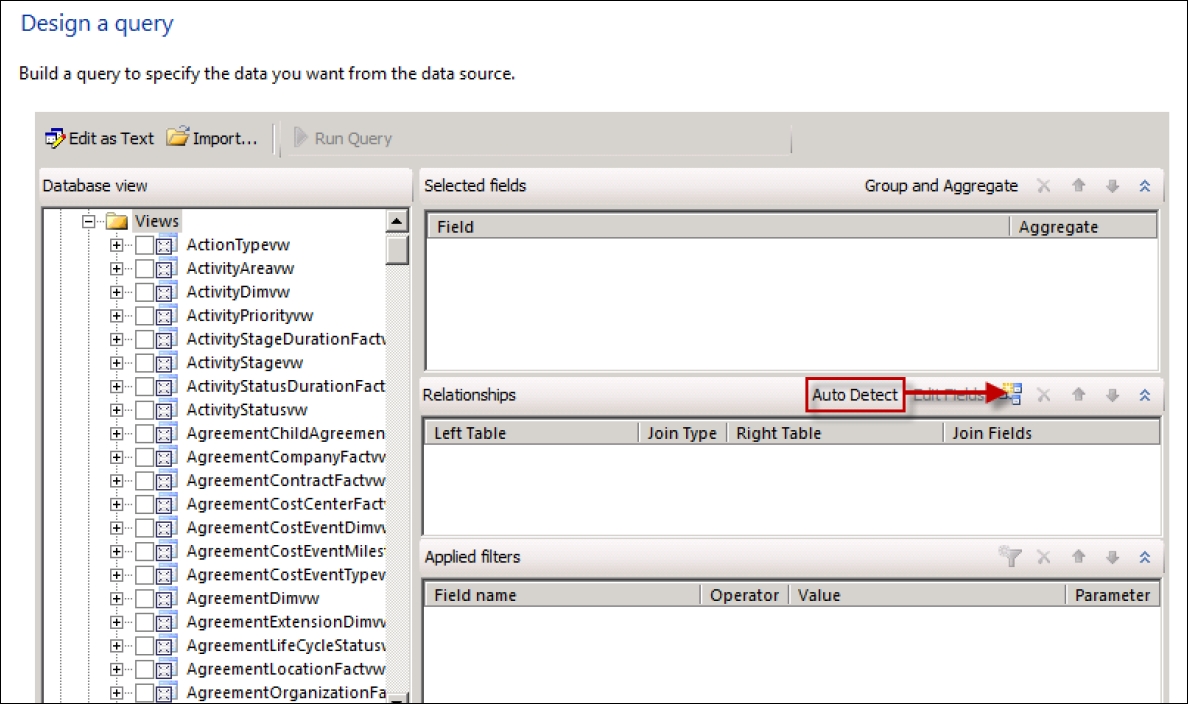
- Click on the icon for adding a relationship, as indicated in the previous screenshot. An empty relationship entry is added to the Relationships section.
- Click on the left part of the relationship. A new window is presented showing the dataset schema. Navigate to and expand dboviews. Select the table on the left-hand side view, for instance IncidentDimvw.
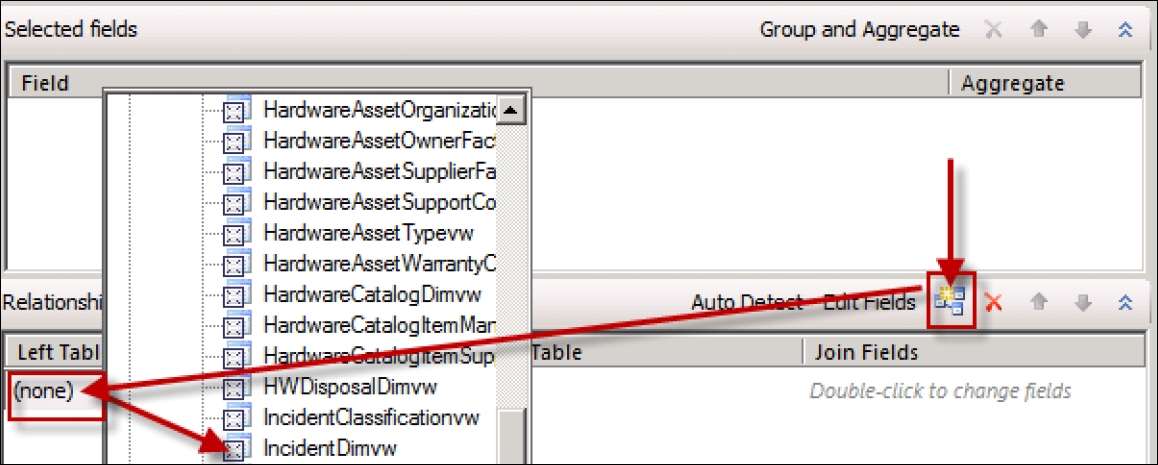
- Click on the right part of the relationship. A new window is presented showing the dataset schema. Navigate to and expand dboviews. Select the right table view, for instance WorkItemDimvw.
- To select the
joinfield, double-click the space below the join field and click on the Add Field icon. Select the left and right join fields.
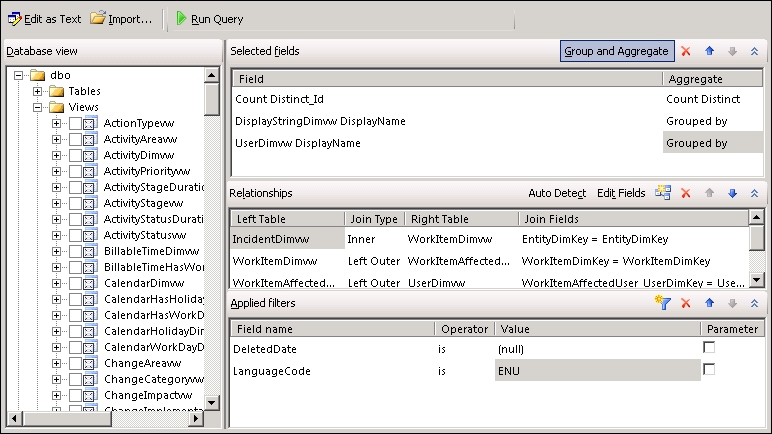
- The following screenshot shows the required configuration of the Relationships section:

- From the Database view section, select the following fields from the dboViews folder to add them to the Selected fields section, and configure the fields as follows:
Field
Aggregate
IncidentDimvw.Id
Count Distinct
DisplayStringDimvw.DisplayName
Grouped by
UserDimvw.DisplayName
Grouped by
- In the Applied filters section, add the following filters:
Field name
Operator
Value
WorkItemAffectedUserFactvw.DeletedDate
is
(null)
DisplayStringDimvw.LanguageCode
is
ENU
- Please see the following screenshot that shows all the required settings for designing the query:
- Click on Next to proceed to the Arrange fields dialog.
- Drag the DisplayStringDimvw_DisplayName field to the Column groups area.
- Drag the UserDimvw_DisplayName field to the Row groups area.
- Drag the Count_Distinct_Id field to the Values area. Click on the arrow next to the fieldname and choose Sum. Click on Next.
- In the Choose the layout dialog, make sure Show subtotals and grand totals is selected, and then click on Next.
- In the Choose a style dialog, choose a style of your choice, and then click Finish. The wizard is now finished and you will see the report in the design view of Report Builder.
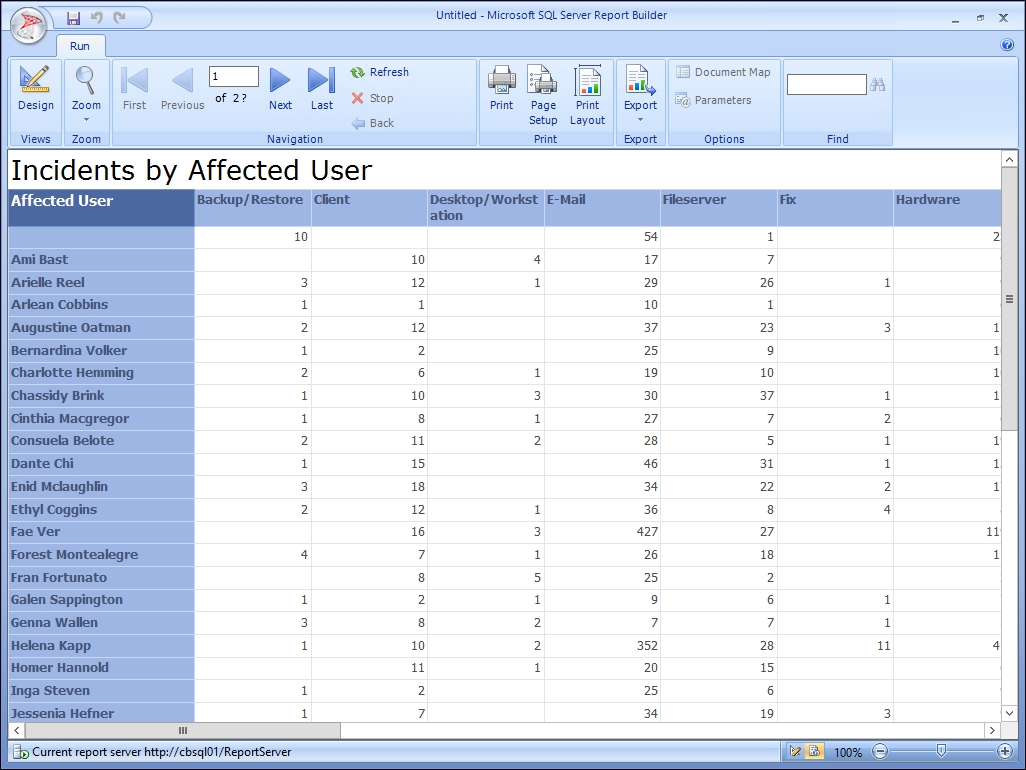
- Replace the text, Click to add title, with a title such as
Incidents by Affected User. - Replace the top-left column heading with
Affected User. - Now it's time to test our report. Click Run from the Report Builder toolbar.
- Press Ctrl+S or click on the floppy disk icon to save your report. In the Save As Report dialog, navigate to the newly created folder in the SQL Server Reporting Services folder structure, enter a name such as
Incident by Affected User, and then click on Save. - Open the Service Manager console. If it was already started, you might need to restart the console for the newly created folders and reports to show up.
- Navigate to the Reporting section of the Service Manager console.
- Under the Reports node, you will see the newly created folders, and the report will show under the folder you saved it to.
As you can see, the report that you created can now be opened either through the Service Manager console or by accessing SQL Server Reporting Services directly through your browser.
If you would like to edit the report, navigate to the folder where it is stored using your browser, hover over the report file, click the arrow next to the report, and then click on Edit in Report Builder.
Service Manager leverages SQL Server Reporting Services for providing rich reporting functionalities to the end users. As an administrator, you can create your own reports that access the DWDataMart database provided by the Service Manager Data Warehouse server.
SQL Server Report Builder is a powerful tool that you can use to design your reports and save them to SQL Server Reporting Services. Using folders and security settings, you can establish a custom reporting structure with permissions that correspond to your organization's needs. All reports can be accessed either through the web browser, or you can use the Service Manager console to browse and consume your reports.
If you are authoring reports often, you might prefer to install Report Builder to your local computer. In this section, we will show you how to do this. We will also walk you through the process of editing SQL queries for your reports and copying existing reports.
Report Builder ships with SQL Server. As you have seen in the How to do it... section of this recipe, Report Builder can be streamed to your computer by clicking on the Report Builder button on the SQL Server Reporting Service web page. This allows you to manage your reports from virtually anywhere without the need to comply with any software requirements on the computer that you are working with.
However, if you mostly use the same computer to work with reports, you might want to install Report Builder, eliminating the need to stream the software to the computer every time you launch it.
You can download SQL Server 2102 Report Builder from the following URL:
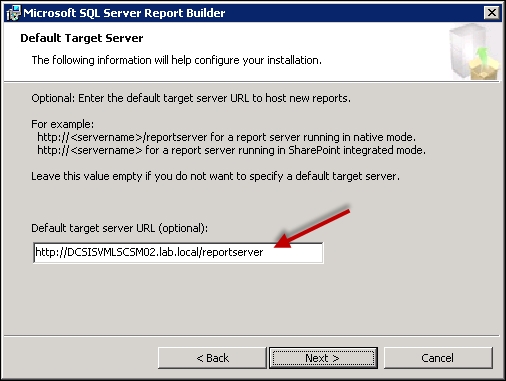
https://www.microsoft.com/en-us/download/details.aspx?id=29072. During the installation procedure, the setup will ask you for the default target server URL. Enter the following URL if you are running SQL Server Reporting Services as a default instance:
http://[SCSMDWSQL]/reportserver.
Replace [SCSMDWSQL] with the fully qualified domain name of the SQL server that is used for reporting. If SQL Server Reporting Service is running as a named instance, the syntax of the URL will be the following:
http://[SCSMDWSQL]/reportserver_[InstanceName].
When you are familiar with SQL, you might be faster to write the queries directly in SQL Server Management Studio. Use this query instead of walking through the wizard as described in this recipe. Click on the Edit as Text option in the Design a query dialog and paste the query directly in the editor. The following is the query that was used for the example in this recipe:
SELECT
  COUNT(DISTINCT IncidentDimvw.Id) AS [Count Distinct_Id]
  ,DisplayStringDimvw.DisplayName AS [DisplayStringDimvw
      DisplayName]
  ,UserDimvw.DisplayName AS [UserDimvw DisplayName]
FROM
  IncidentDimvw
  INNER JOIN WorkItemDimvw
    ON IncidentDimvw.EntityDimKey = WorkItemDimvw.EntityDimKey
  LEFT OUTER JOIN WorkItemAffectedUserFactvw
    ON WorkItemDimvw.WorkItemDimKey =
        WorkItemAffectedUserFactvw.WorkItemDimKey
  LEFT OUTER JOIN UserDimvw
    ON WorkItemAffectedUserFactvw.WorkItemAffectedUser_UserDimKey =
        UserDimvw.UserDimKey
  LEFT OUTER JOIN IncidentClassificationvw
    ON IncidentDimvw.Classification_IncidentClassificationId =
        IncidentClassificationvw.IncidentClassificationId
  LEFT OUTER JOIN DisplayStringDimvw
    ON IncidentClassificationvw.EnumTypeId =
        DisplayStringDimvw.BaseManagedEntityId
WHERE
  WorkItemAffectedUserFactvw.DeletedDate IS NULL
  AND DisplayStringDimvw.LanguageCode = N'ENU'
GROUP BY
  DisplayStringDimvw.DisplayName
  ,UserDimvw.DisplayName
Designing reports can be a very time consuming process. Once you have established and designed a report, you might want to copy the report instead of starting from scratch. This allows you to maintain the layout of the reporting controls and other settings that you made in your report definition:
- Open the report in Report Builder.
- Click on the Report Builder logo on the top left, and then click on Save As to save the report under a new name at the desired location.
- In the Report Data section, under Datasets, delete any existing datasets.
- Add a new dataset by right-clicking the Datasets folder and clicking on Add Dataset.
- Give it a name and choose the option, Use a dataset embedded in my report.
- Select the DWDataMart data source. Then either copy and paste the SQL query into the Query textbox or launch the wizard by clicking on Query Designer.
- Once you have created your dataset, make sure that all the reporting controls point to the newly created dataset. For a table report, right-click the top left corner and choose Tablix Properties. Then change the Dataset name to the new dataset.
- Add new columns to the table and make sure you delete any columns that still reference fields from the old dataset.