The Photos app provides several ways to view your pictures:
Photos Lists every picture individually for you to choose
Albums Groups pictures into categories
Events Groups pictures based on the date they were captured
Faces Organizes pictures based on the people in them
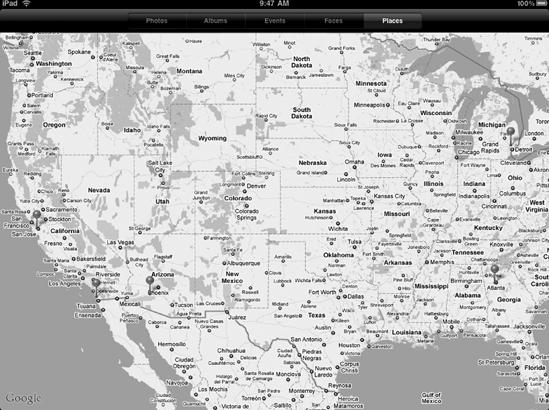
Places Organizes pictures based on where they were taken
Note
To take advantage of the Faces feature covered in this chapter, you'll need to use iPhoto or Aperture (on a Macintosh) to tag pictures with each person's face. If you're using a Windows computer, you won't be able to use the Faces feature. No matter what type of a computer you use, you'll be able to use the other features because most digital cameras capture the date a picture was taken and some of the newest ones can even identify the location where a picture was taken.
To see all the different ways of viewing your pictures, make sure you have loaded some pictures into your iPad, and then follow these steps:
From the Home screen, tap Photos. The Photos screen appears.
Tap the Photos tab at the top of the screen. Thumbnail images of all your pictures appear, as shown in Figure 27-1.
Tap any picture. Your chosen picture expands to fill the screen.
Tap the screen to display controls at the top and bottom of the screen, as shown in Figure 27-2. (After a few seconds, these controls automatically disappear.) Notice the thumbnail images of pictures that appear at the bottom of the screen.
Tap the screen to display the controls, and tap All Photos in the upper-left corner of the screen to return to the Photos screen.
Tap the Albums, Events, Faces, or Places tab at the top of the screen. Thumbnail images of different groups of your pictures appear.
Tap any album. All the pictures stored in your album appear on the screen. You may need to scroll up and down to see them all.
Tap Albums at the upper-left corner of the screen to return to the Photos screen.
Tap the Events tab at the top of the screen. Thumbnail images of all different dates appear, showing thumbnail images of pictures stored on each date, as shown in Figure 27-3.
Tap any event. All the pictures stored in your album appear on the screen. You may need to scroll up and down to see them all.
Tap Events at the upper-left corner of the screen to return to the Photos screen.
Tap the Faces tab at the top of the screen. Thumbnail images of all your defined faces (using iPhoto or Aperture) appear.
Tap any face. All the pictures that contain that person's face appear on the screen. You may need to scroll up and down to see them all.
Tap Faces at the upper-left corner of the screen to return to the Photos screen.
Tap the Places tab at the top of the screen. A map with red pins appears, showing the locations where you captured pictures, as shown in Figure 27-4.