
- My New iPad
- Acknowledgments
- Introduction
- I. Basic Training
- 1. Turning Your iPad On and Off
- 2. Charging and Conserving iPad Battery Power
- 3. Using Your iPad's Physical Controls
- 4. Controlling the iPad User Interface
- 5. Using and Customizing the Virtual Keyboard
- II. Customizing Your iPad
- 6. Customizing the Home Screen
- 7. Using Parental Controls
- 8. Protecting Your Privacy
- 9. Setting the Date and Time
- 10. Restoring and Resetting Your iPad
- 11. Setting Up an Internet Connection
- 12. Installing (and Uninstalling) Apps
- III. Getting on the Internet
- 13. Browsing with Safari
- 14. Using Bookmarks with Safari
- 15. Filling Out Forms Automatically in Safari
- 16. Setting Up and Customizing an Email Account
- 17. Reading, Writing, and Organizing Email
- IV. Sharing Data with Your iPad
- 18. Transferring Photos, Movies, Music, TV Shows, and Podcasts to Your iPad
- 19. Transferring Ebooks and Audiobooks to Your iPad
- 20. Transferring Contacts, Appointments, Mail, Notes, and Bookmarks
- 21. Transferring iTunes University Courses from a Computer to Your iPad
- V. Video, Music, and Ebooks
- 22. Shopping on iTunes and the iBook Store
- 23. Listening to Music and Other Audio Files
- 24. Watching Videos
- 25. Watching YouTube Videos
- 26. Reading Ebooks
- 27. Viewing Photographs
- 28. Using and Sharing Photographs
- VI. Organizing Yourself
- 29. Jotting Down Notes
- 30. Viewing Contact Information
- 31. Tracking Appointments on a Calendar
- 32. Viewing a Map
- 33. Finding Places and Getting Directions with Maps
- 34. Searching Your iPad with Spotlight
- VII. Additional Tips
- 35. Updating the iPad Operating System
- 36. Making an iPad Accessible
- 37. Using Foreign Languages
- 38. Transferring and Editing Microsoft Office Documents
- 39. The Best iPad Apps
- A. The Next Step
- Index
- About the Author
- Updates
When you start storing names and other personal information about people in the Contacts app, you might also want to store a picture of that person (or a picture that best represents that person) in the Contacts app. To assign a picture to a name in the contacts app, follow these steps:
From the Home screen, tap Photos. The Photos screen appears.
Tap one of the tabs at the top of the screen (Photos, Albums, Events, Faces, or Places). If you tap Photos, you'll see thumbnail images of all your pictures. If you choose any of the other options, you'll need to choose an album, event, face, or place to view thumbnail images of all your pictures.
Tap a picture. Your chosen picture fills the screen.
Tap the screen to display the Send icon in the upper-right corner of the screen.
Tap the Send icon. A menu appears (shown earlier in Figure 28-1).
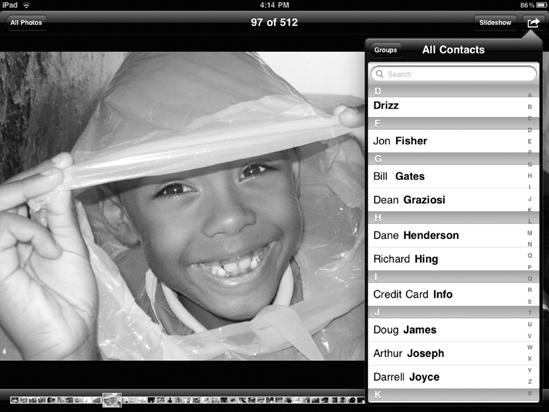
Tap Assign to Contact. The All Contacts window appears, as shown in Figure 28-4.
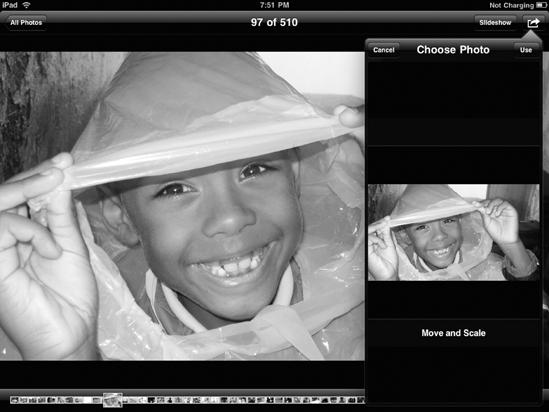
Tap a name. The Choose Photo window appears, as shown in Figure 28-5.
Move or resize your picture. When you're happy with the size and position of the picture, tap Use. Now if you open the Contacts app and choose this person's name, you'll see your chosen picture.
-
No Comment