Typing on the virtual keyboard is nearly identical to typing on a physical keyboard. The main difference is that the virtual keyboard does not offer any arrow keys. (You have to touch the screen to move the cursor.) In addition, if you type part of a word, the virtual keyboard may display the correct and complete spelling of that word, which you can choose by pressing the spacebar.
To create text, you can type it yourself or let the virtual keyboard suggest and automatically type any words that you've partially typed. To see how typing on the virtual keyboard works, follow these steps:
From the Home screen, tap Notes. The Notes screen appears.
Tap anywhere on the right side of the screen that looks like a yellow notepad. The virtual keyboard displaying letters appears (shown earlier in Figure 5-1).
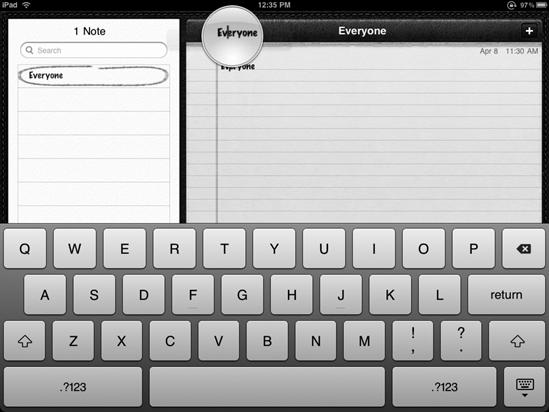
Start typing Everyo. Notice that when the virtual keyboard thinks it recognizes what you're typing, it displays a suggested word, in this case Everyone, as shown in Figure 5-4.
Tap the spacebar to let the virtual keyboard finish typing the suggested word automatically. (If you don't want to choose the suggested word, keep typing or tap the X in a circle that appears to the right of the suggested word.)
Type more text. Try misspelling a word by typing Testung—the iPad will automatically correct your spelling to Testing. To make your new text appear on another line, tap the Return key.
Tap the Shift key, then try pressing a letter. Notice it's now uppercase. Tap the Shift key again, and press the button labeled !/,—you have inserted the ! character.
Note
If you're a touch typist, make sure you do not rest your fingertips on the home row of keys, or else your iPad will think you're trying to type something.

With a physical keyboard, you can move the cursor by pressing the arrow keys or by pressing any of the other cursor movement keys such as Home or End. With the virtual keyboard, there are no cursor movement keys since you must directly place and move the cursor by touching the iPad's screen.
You can move the cursor in two ways: tapping your fingertip within text or touching and holding your fingertip within text. A quick tap moves the cursor quickly, but not always accurately. Holding your finger on the screen displays a magnifying class that lets you see the exact position of the cursor so you can slide your finger to move the cursor where you want it to appear.
To see how to move the cursor, follow these steps:
From the Home screen, tap Notes. The Notes screen appears.
Type a few sentences of text.
Tap anywhere in your text. Notice that the cursor appears wherever you tap. (However, the cursor will not appear in blank areas where there is no text.)
Hold your finger on any part of the text that you've typed. A magnifying glass appears, letting you see the current position of the cursor, as shown in Figure 5-5.
Note
If you're having trouble getting the magnifying glass to appear, make sure you do not slide your finger up or down.
Slide your finger to move the cursor. Notice how this method lets you move the cursor accurately.
Lift your finger when you're happy with the current location of the cursor. A Select, Select All, Paste menu appears, as shown in Figure 5-6.
Press the Home button.