Working with multiple artboards
Creating unique brush strokes with the Bristle Brush tool
Building shapes with the Shape Builder tool
Using the perspective grid
Illustrator only gets better and better, and you can discover the latest and greatest new features in this chapter. Many of these features are discussed in detail in the rest of the chapters in this minibook.
If you've ever dreamed of producing multiple-page documents in Illustrator, your dream has come true: CS4 introduced multiple artboards. Before then, you added pages by using a rather convoluted method of making a large artboard and then tiling its pages. But now you can create multiple artboards (as many as 100!) as soon as you open the New Document dialog box.
What makes the artboard feature enhanced in CS5? For one thing, artboards now have a dedicated panel. Use this panel to easily locate and select an artboard. Using the Artboard panel, you can also reorder, delete, and even copy artboards.
To create a document with multiple artboards, follow these steps:
Launch Adobe Illustrator CS5 and choose File

The New Document dialog box appears, as shown in Figure 1-1.
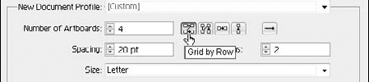
Specify the number of artboards to start with by entering a number in the Number of Artboards text box.
To specify how to arrange the artboard, click a grid or row arrangement icon to the right of the Number of Artboards text box, as shown in Figure 1-2.
Using these grid boxes, you can
Specify how many rows and columns to use.
Change the direction of the layout from left to right or right to left.
Enter an amount in the Spacing text box to determine the distance between artboards.
Enter 0 (zero) if you want the artboards to butt against each other, or a higher value if you want some space between them.
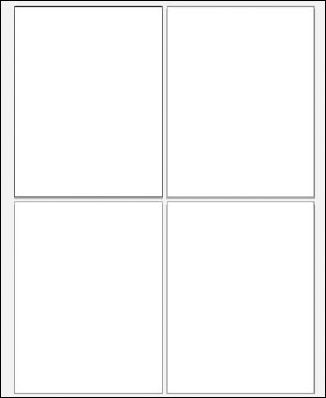
Click OK to create your new document.
The example, showing four artboards, looks like the ones you see in Figure 1-3.

After you create multiple artboards, choose Window
Here are some swell things you can do to artboards from the Artboard panel:

Navigate to a specific artboard: Just double-click the artboard's name.
Rearrange artboards: Drag the artboards inside the Artboard panel to reorganize their stacking order.
Delete an artboard: Drag it to the trashcan icon.
Copy an existing artboard: Drag it to the New Artboard icon.
Create a new artboard: Click the New Artboard icon.
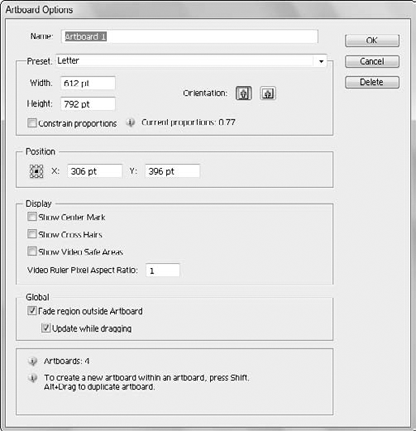
Rename an artboard: From the panel menu, choose Artboard Options to open the Artboard Options dialog box, shown in Figure 1-5. Then you can rename artboards or make additional changes to them.
Pay close attention before you print a document with multiple artboards, or else you may print needless pages. To control which artboards are printed, follow these steps:
Choose File
The Print dialog box appears, as shown in Figure 1-6.
Below the Preview box, in the lower left corner, click the arrows to preview the artboards.
After you decide which artboards to print, enter them into the Range text box.
To print all artboards, make sure that the All radio button is selected; otherwise, enter a consecutive range such as 1–3 in the Range text box. You can also print nonconsecutive pages by separating them with commas — enter 1, 3, 4 to print only artboards 1, 3 and 4.

If you've been looking for the perfect method to mimic ink or watercolor on paper, you'll love the new Bristle Brush in Adobe Illustrator CS5. To take advantage of this fantastic tool, you need to first create a new brush. Follow these steps for a quick introduction to finding the Bristle Brush and using all the options that come with it:
If the Brushes panel isn't visible, choose Window
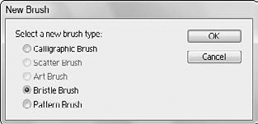
Click the panel menu and choose New Brush.
The New Brush dialog box appears.
Choose Bristle Brush, shown in Figure 1-7, and then click OK.
When you select Bristle Brush, the Bristle Brush Options dialog box opens, as shown in Figure 1-8, where you can choose the brush shape and other fun-to-explore options.
Specify options for the Bristle Brush and then click OK to close the dialog box.

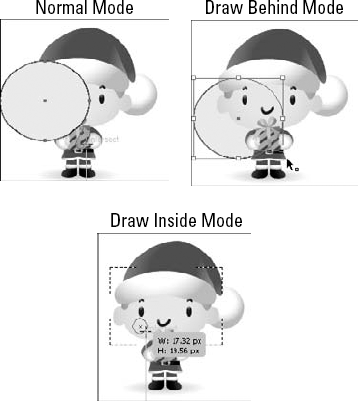
Using the new drawing modes users have increased control when adding new objects to the artboard. If your Tools panel is not expanded to two columns, click the arrows at the top of the Tools panel (see Figure 1-9) to see all three drawing tools.
Take a look at the bottom of the Tools panel to see the "ew Drawing Mode icons (see Figure 1-10); the modes are described in the following list:

To see what each mode looks like while you're drawing new objects, check out Figure 1-11.
Tip
You can also use Draw Inside mode to create a quick clipping path: Simply choose the mode and copy the objects you want to clip (mask inside another shape), select the object you want to clip into, and choose Edit

The Gradient Mesh tool helps you to create incredible photo-realistic illustrations using meshes you build on vector objects. If you have already discovered the Gradient Mesh tool, you know how useful this tool is. Add in the transparency feature, and the number of ways you can use it skyrockets.
Follow these simple steps to try out the new transparency feature:
Choose a solid color for your fill and no stroke.
Create a shape.
In our example, we created a circle.
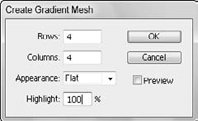
Choose Object
A gradient mesh appears in your shape with multiple mesh nodes.
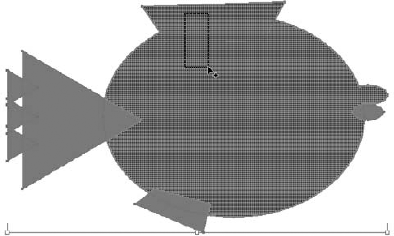
Using the Direct Selection tool, click an individual node, as shown in Figure 1-14.
Either choose another color to create a blending effect from one color to another or choose Window
The individual node becomes transparent based on the value you select.

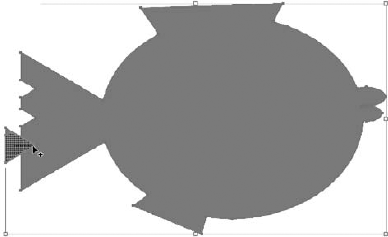
Create several overlapping shapes and then select them all.
Choose the Shape Builder tool from the Tools panel.
Click and drag over the closed edges of the shapes to unite them into one shape, as shown in Figure 1-15.
Hold down the Alt (Windows) or Opt (Mac) key to erase a segment of a shape, as shown in Figure 1-16.
Choose View
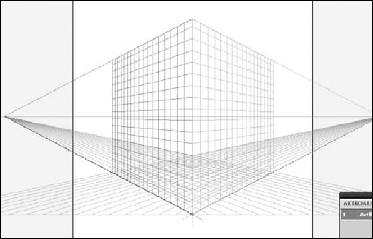
Here's how you can take advantage of this feature:
Create an object: Notice that as you click and drag a shape, it follows the perspective plane. As you reposition the object or create new objects, they follow the perspective grid.
Clone an object: When you use the Selection tool and Alt+drag (Windows) or Opt-drag (Mac) objects to other locations, notice that the perspective plane is followed.
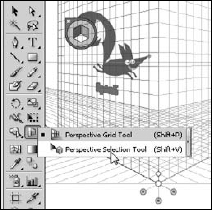
Customize the grid: Experiment with the Perspective Grid tool.
Edit your shape: Click and hold on the Perspective Grid tool to select the Perspective Selection tool, as shown in Figure 1-18.
Illustrator has many little improvements in this version, and you can find them mixed into later chapters in this minibook. Don't miss these two:
Ruler origin: If rulers have confused you (yes, the zero point was located in the lower left corner), you'll be thrilled to know that the origin point (zero) is now where you would expect, in the upper left corner.
Joining paths: Easily join two or more open paths by pressing Ctrl+J (Windows) or
