Trendy Desaturated Portrait Look
This is just about the hottest Photoshop portrait technique out there right now, and you see it popping up everywhere, from covers of magazines to CD covers, from print ads to Hollywood movie posters, and from editorial images to billboards. It seems right now everybody wants this effect (and you’re about to be able to deliver it in roughly 60 seconds flat using the simplified method shown here!).
Step One:
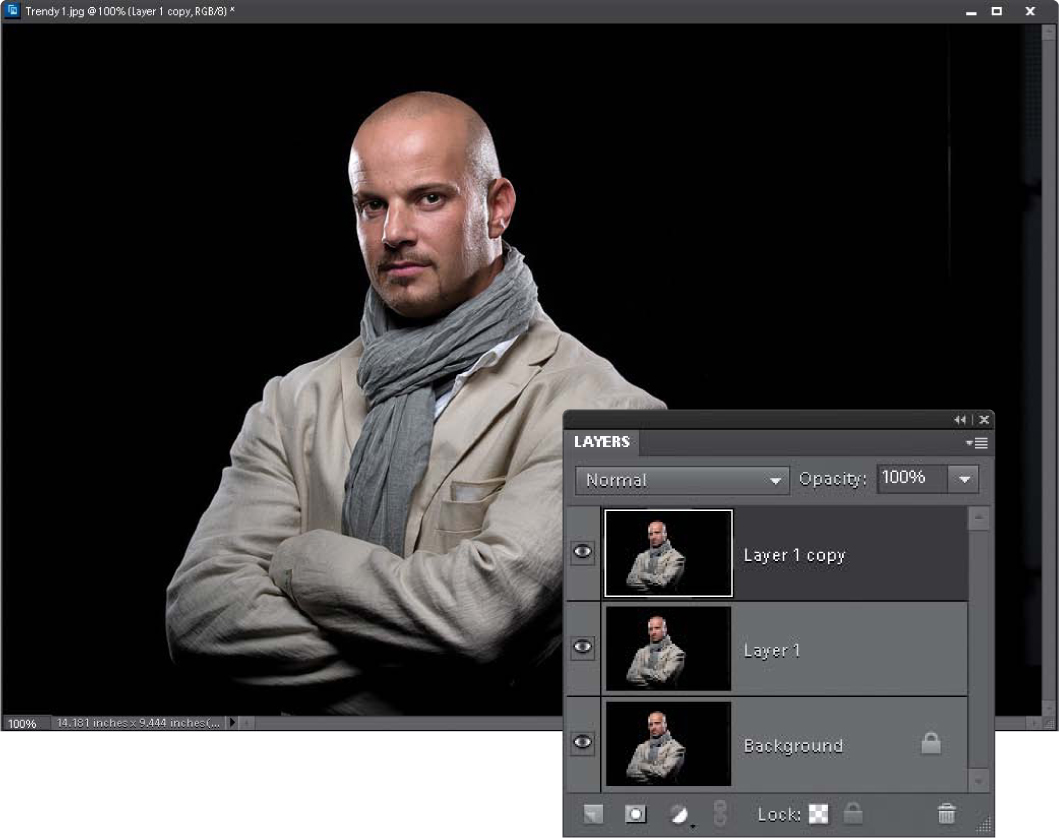
Open the photo you want to apply this trendy desaturated portrait effect to. Duplicate the Background layer by pressing Ctrl-J (Mac: Command-J). Then duplicate this layer using the same shortcut (so you have three layers in all, which all look the same, as shown here).
SCOTT KELBY
Step Two:
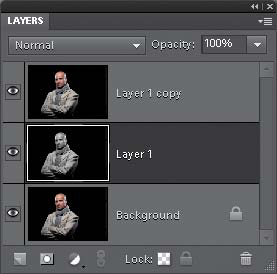
In the Layers palette, click on the middle layer (Layer 1) to make it the active layer, then press Ctrl-Shift-U (Mac: Command-Shift-U) to desaturate and remove all the color from that layer. Of course, there’s still a color photo on the top of the layer stack, so you won’t see anything change onscreen (you’ll still see your color photo), but if you look in the Layers palette, you’ll see the thumbnail for the center layer is in black and white (as seen here).
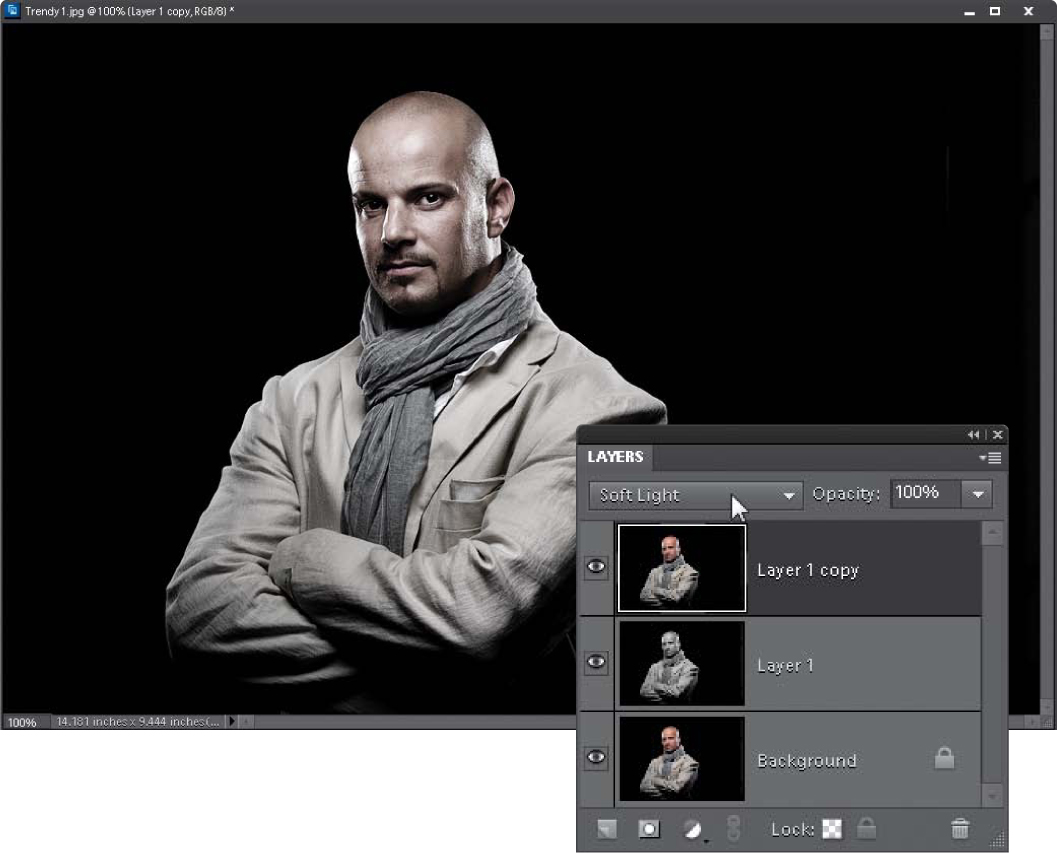
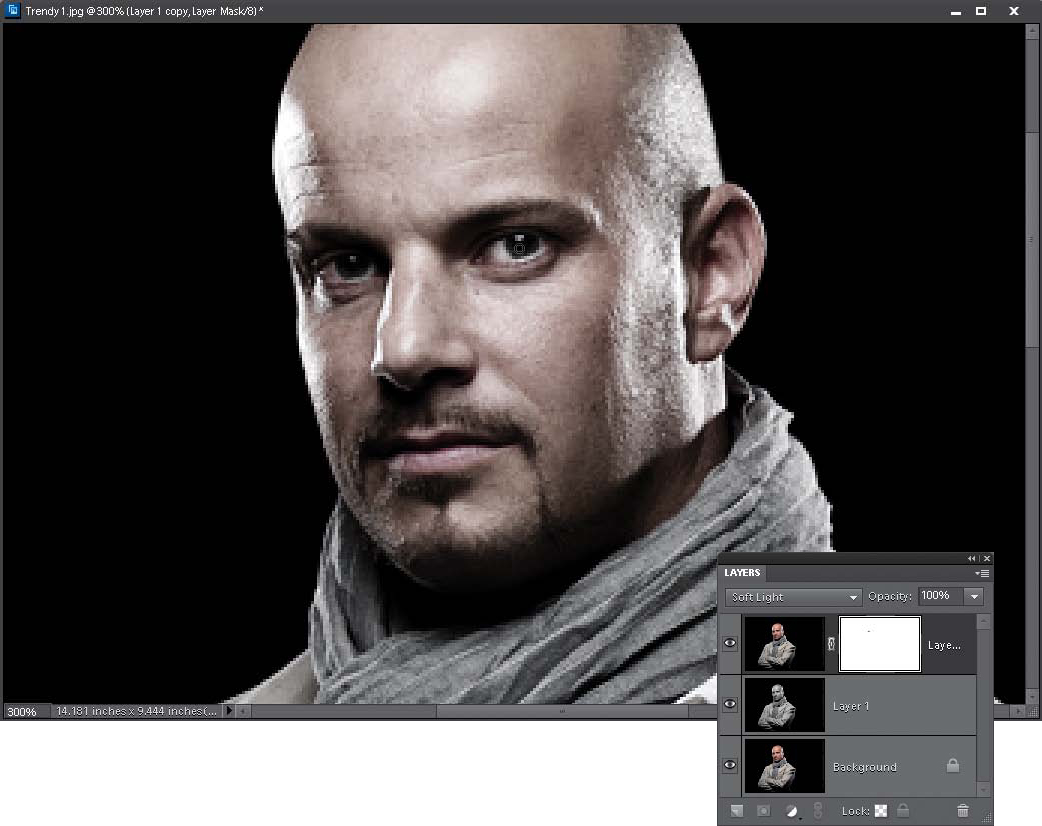
In the Layers palette, click on the top layer in the stack (Layer 1 copy), then switch its layer blend mode from Normal to Soft Light (as shown here), which brings the effect into play. Now, Soft Light brings a very nice, subtle version of the effect, but if you want something a bit edgier with even more contrast, try using Overlay mode instead. If the Overlay version is a bit too intense, try lowering the Opacity of the layer a bit until it looks good to you.
Step Four:
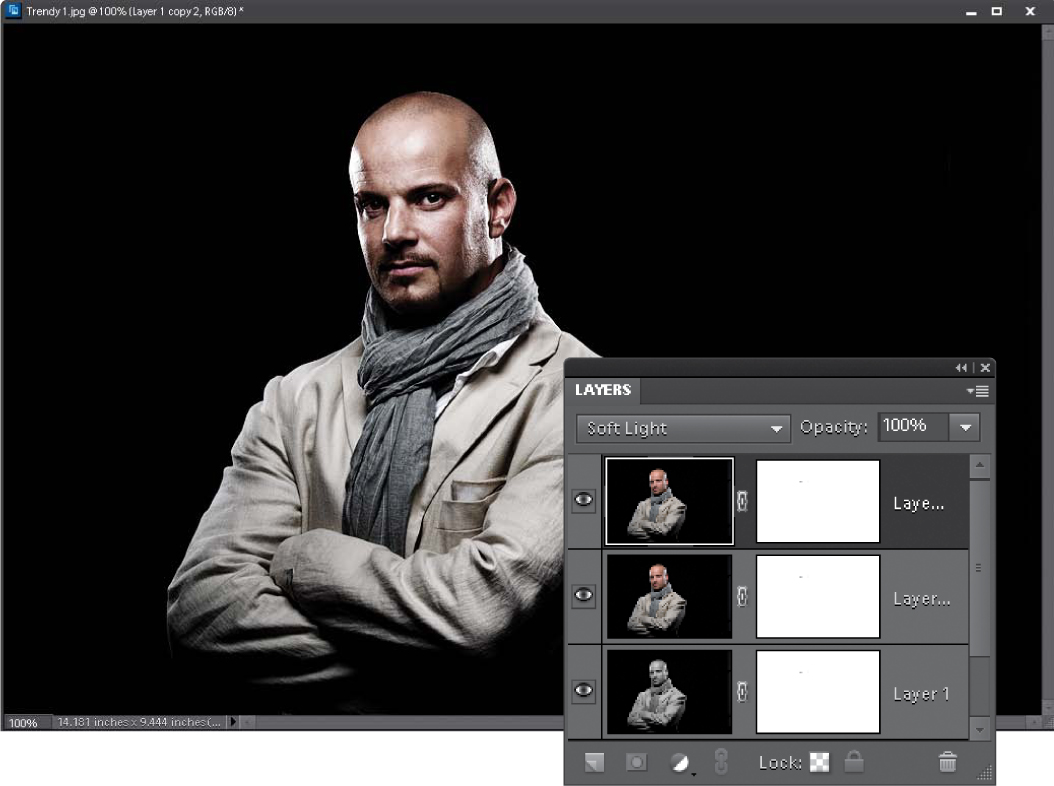
Fairly often, you’ll find that the person’s eyes really stand out when you see this effect, and that’s usually because it brings the original eye color and intensity back (this is an optional step, but if your subject has blue or green eyes, it’s usually worth the extra 15 seconds of effort). It’s just two quick steps: Start by clicking on the Add Layer Mask icon at the bottom of the Layers palette (for more on layer masks, see Chapter 7). Then get the Brush tool (B), choose a small, soft-edged brush from the Brush Picker up in the Options Bar, press D, then X to set your Foreground color to black, and paint right over both eyes (not the whites of the eyes—just the irises and the pupils). This will seem kind of weird, because since you knocked a hole out of the eyes on this layer, you’re now only seeing the eyes on the B&W layer below it, but you’re going to fix that in the next step.
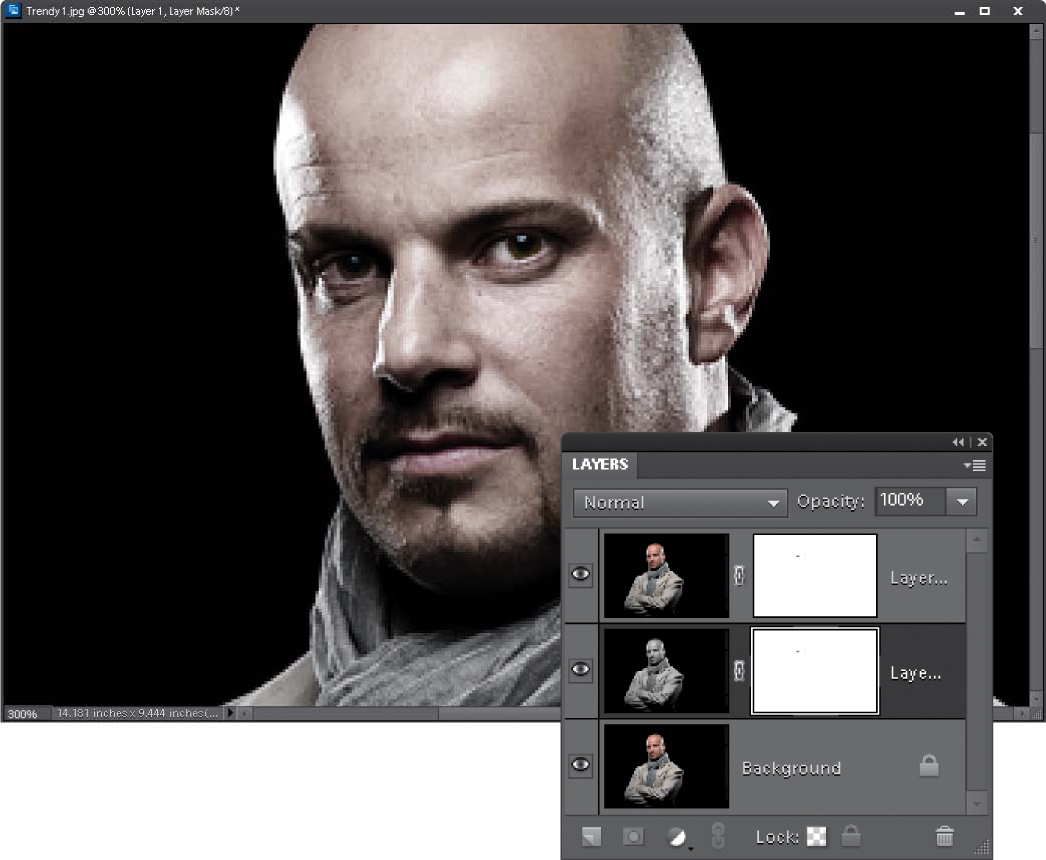
To knock the exact same hole out of the B&W layer (which means there will be “eye holes” knocked out of the top two layers, so you’ll see the original eyes from the Background layer), just press-and-hold the Ctrl (Mac: Command) key, and click directly on the layer mask thumbnail itself on the top layer to put a selection around the eyes you just painted on the mask. Then, click on the middle layer, and click on the Add Layer Mask icon again to create an exact copy of the top layer’s layer mask on your middle layer (as shown here). Now you’re seeing the original full-color unretouched eyes from the Background layer. Pretty neat little trick, eh?
Step Six:
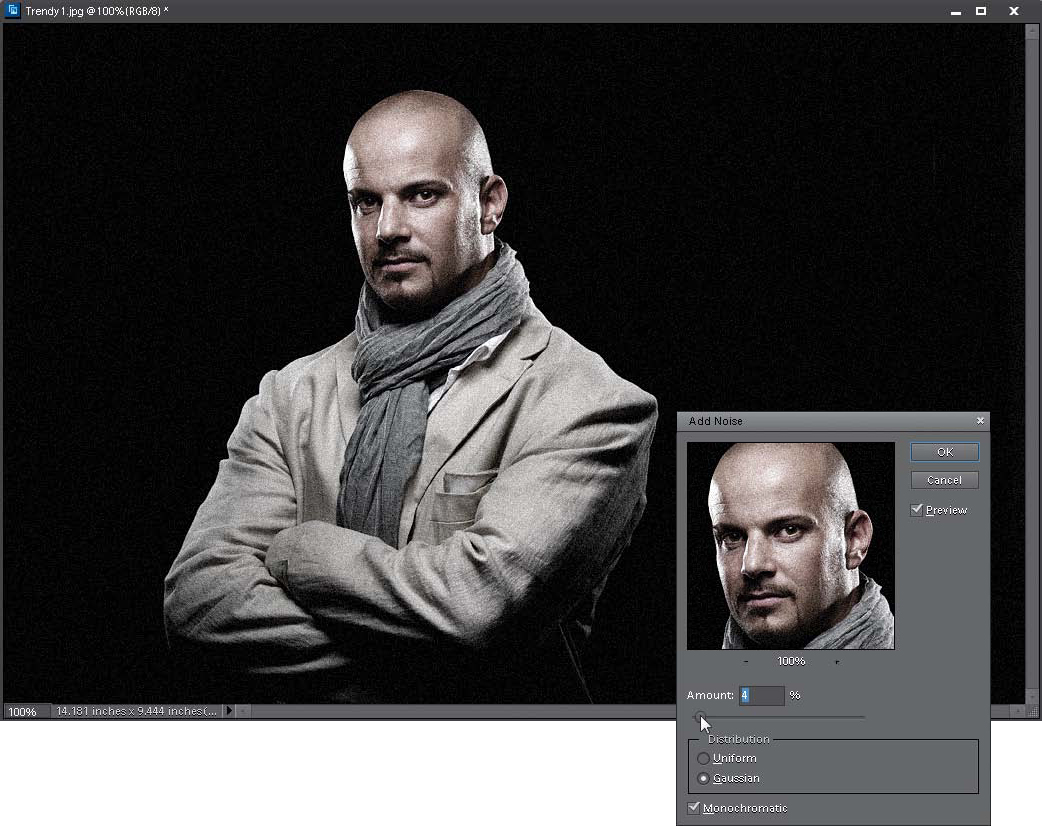
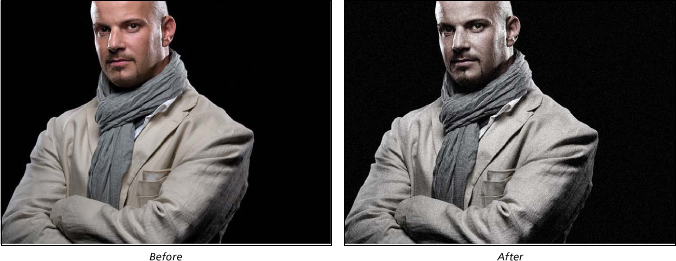
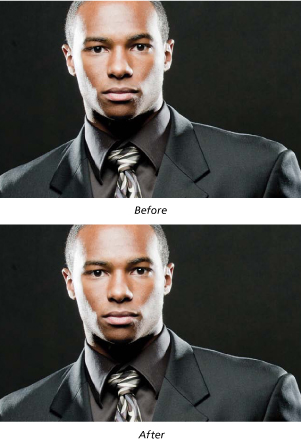
Flatten the image by clicking on the down-facing arrow in the top-right of the Layers palette and choosing Flatten Image from the palette’s flyout menu. The final step is to add some more noise, so go under the Filter menu, under Noise, and choose Add Noise. When the Add Noise filter dialog appears (seen here), set the Distribution to Gaussian, and turn on the Monochromatic checkbox (or your noise will appear as little red, green, and blue specks, which looks really lame). Lastly, dial in an amount of noise that, while visible, isn’t overly noisy. This is a very low-resolution photo, so I only used 4%. On a highres digital camera photo, you’ll probably have to use between 10% and 12% to see much of anything. You can see the before/after on the next page. Beyond that, I gave you examples of how this effect looks on other portraits.
Step Seven:
Here’s another example using the exact same technique and you can see how different the effect looks on a completely different image. I particularly love the almost bronze skin tone it creates in this image.
SCOTT KELBY
Be careful not to add too much noise, because when you add an Unsharp Mask to the image (which you would do at the very end, right before you save the file), it enhances and brings out any noise (intentional or otherwise) in the photo.
Another Tip: Try It on a Background
I once saw this effect used in a motorcycle print ad. They applied the effect to the background, and then masked (knocked out) the bike so it was in full color. It really looked very slick (almost eerie, in a cool eerie way).
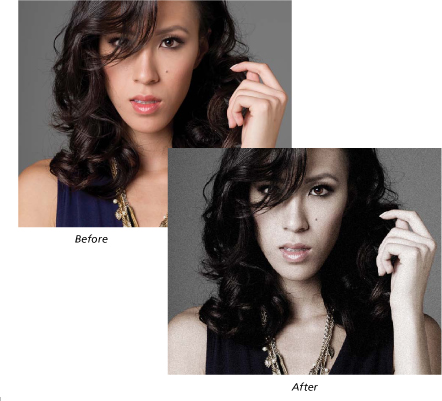
Here’s the same technique applied to a photo of a woman.
SCOTT KELBY
Here are a couple of variations you can try with this effect: If the effect seems too subtle when you first apply it, of course you could try Overlay mode as I mentioned earlier, but before you try that, try duplicating the Soft Light layer once and watch how that pumps up the effect (as shown here). You can lower the opacity of that layer if it’s too much. Another trick to try is to lower the opacity of the original Soft Light layer to 70%, which brings back some color with almost a tinting effect. Give it a shot and see what you think.