Cropping and Straightening
There are some distinct advantages to cropping your photo in Camera Raw, rather than in Elements itself, and perhaps the #1 benefit is that you can return to Camera Raw later and return to the uncropped image. (Here’s one difference in how Camera Raw handles RAW photos vs. JPEG and TIFF photos: this “return to Camera Raw later and return to the uncropped image” holds true even for JPEG and TIFF photos, as long as you haven’t overwritten the original JPEG or TIFF file. To avoid overwriting, when you save the JPEG or TIFF in Elements, change the filename.)
Step One:
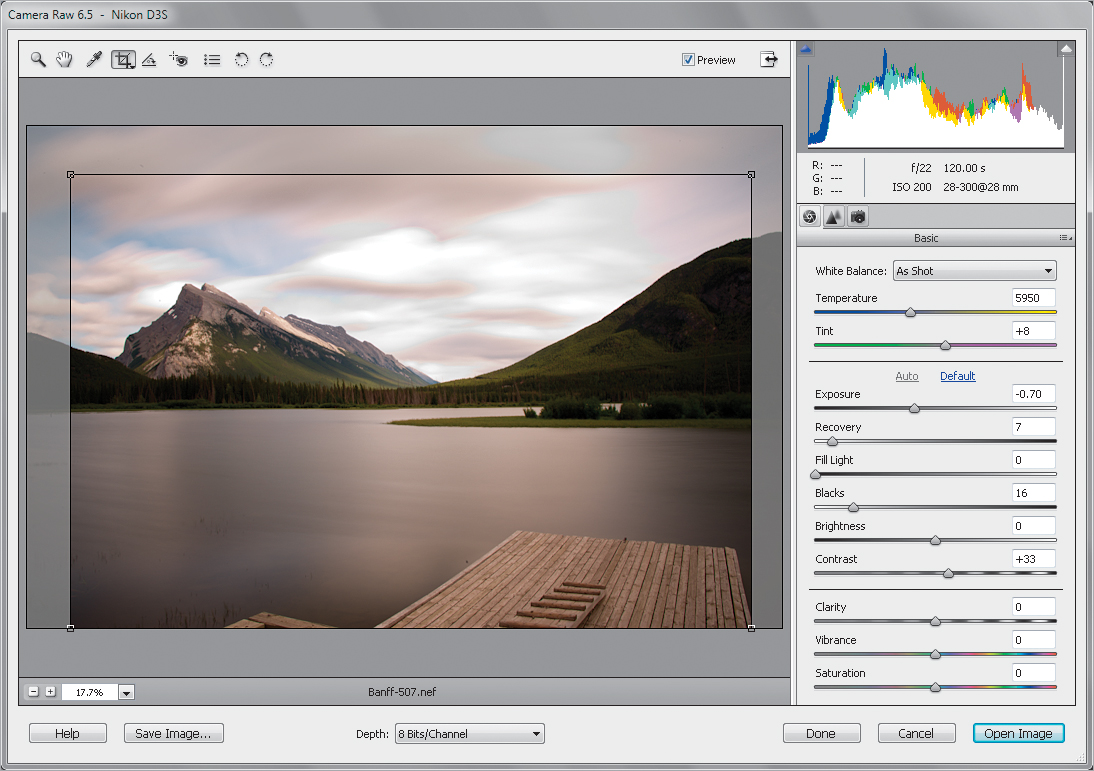
The fourth tool in Camera Raw’s toolbar is the Crop tool. By default, it pretty much works like the Crop tool in Elements (you click-and-drag it out around the area you want to keep), but it does offer some features that Elements doesn’t—like access to a list of preset cropping ratios. To get them, click-and-hold on the Crop tool and a pop-up menu will appear (as shown here). The Normal setting gives you the standard drag-it-where-you-want-it cropping. However, if you choose one of the cropping presets, then your cropping is constrained to a specific ratio. For example, choose the 2-to-3 ratio, click-and-drag it out, and you’ll see that it keeps the same aspect ratio as your original uncropped photo.

SCOTT KELBY
Step Two:
Here’s the 2-to-3-ratio cropping border dragged out over my image. The area that will be cropped away appears dimmed, and the clear area inside the cropping border is how your final cropped photo will appear. If you reopen this RAW photo later and click on the Crop tool, the cropping border will still be visible onscreen, so you can move it, resize it, or remove it altogether by simply pressing the Esc key or the Backspace (Mac: Delete) key on your keyboard (or by choosing Clear Crop from the Crop tool’s pop-up menu).

If you want your photo cropped to an exact size (like 8x10″, 13x19″, etc.), choose Custom from the Crop tool’s pop-up menu. You can choose to crop by pixels, inches, centimeters, or a custom ratio. In our example, we’re going to create a custom crop so our cropped photo winds up being exactly 8x10″, so choose Inches from the pop-up menu (as shown here), then type in your custom size. Click OK, click-and-drag out the Crop tool, and the area inside your cropping border will be exactly 8x10″.

Step Four:
Once you click on the Open Image button in Camera Raw, the image is cropped to your specs and opened in Elements (as shown here). If instead, you click on the Done button, Camera Raw closes and your photo is untouched, but it keeps your cropping border in position for the future.

If you save a cropped JPEG or TIFF photo out of Camera Raw (by clicking on the Save Image button on the bottom left of the Camera Raw window), the only option is to save it as a DNG (Digital Negative) file. DNG files open in Camera Raw, so by doing this, you can bring back those cropped areas if you decide to change the crop.

Step Six:
If you have a number of similar photos you need to crop the same way, you’re going to love this: First, select all the photos you want to crop (either in the Organizer or on your computer), then open them all in Camera Raw. When you open multiple photos, they appear in a vertical filmstrip along the left side of Camera Raw (as shown here). Click on the Select All button (it’s above the filmstrip) and then crop the currently selected photo as you’d like. As you apply your cropping, look at the filmstrip and you’ll see all the thumbnails update with their new cropping instructions. A tiny Crop icon will also appear in the bottom-left corner of each thumb nail, letting you know that these photos have been cropped in Camera Raw.

SCOTT KELBY
Another form of cropping is actually straightening your photos using the Straighten tool. It’s a close cousin of the Crop tool because what it does is essentially rotates your cropping border, so when you open the photo, it’s straight. In the Camera Raw toolbar, choose the Straighten tool (it’s immediately to the right of the Crop tool, and shown circled here in red). Now, click-and-drag it along the horizon line in your photo (as shown here). When you release the mouse button, a cropping border appears and that border is automatically rotated to the exact amount needed to straighten the photo.

SCOTT KELBY
Step Eight:
You won’t actually see the rotated photo until you click on another tool (which I’ve done here) or open it in Elements (which means, if you click Save Image or Done, Camera Raw closes, and the straightening information is saved along with the file. So if you open this file again in Camera Raw, that straightening crop border will still be in place). If you click Open Image, the photo opens in Elements, but only the area inside the cropping border is visible, and the rest is cropped off. Again, if this is a RAW photo (or you haven’t overwritten your JPEG or TIFF file), you can always return to Camera Raw and remove this cropping border to get the original uncropped photo back.

