Removing Blemishes and Hot Spots
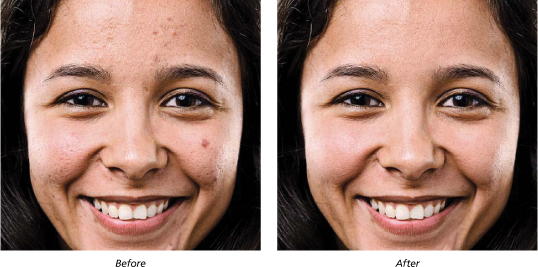
Over the years, we’ve learned lots of different ways to remove hot spots, blemishes, and other imperfections on the skin. I believe the technique you’re about to see here is the easiest and best way, though. It not only removes the blemishes, but it’s flexible enough so you can maintain the original skin texture, as well. That way the skin looks real and not like the fakey, smooth skin that’s always a dead giveaway the photo has been retouched in Elements.
Step One:
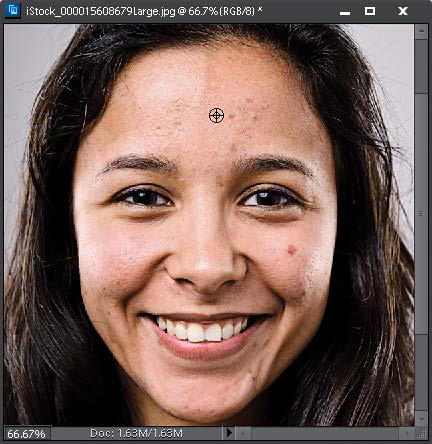
Open a photo containing some skin imperfections you want to remove (in this example, we’re going to remove a series of blemishes). Get the Zoom tool (Z) and zoom in, if needed, on the area you want to retouch, then get the Healing Brush tool (J) from the Toolbox (as shown here). You might be tempted to use the Spot Healing Brush tool because it’s so easy to use (and it’s the default healing tool in the Toolbox), but don’t fall for it. Although it does a pretty good job on its own, you can do better and work faster with the Healing Brush because you won’t have to redo anything (and you generally will have several redos using the Spot Healing Brush). Besides, you only save one click using the Spot Healing Brush over the regular Healing Brush.

©ISTOCKPHOTO/WARREN GOLDSWAIN
Step Two:
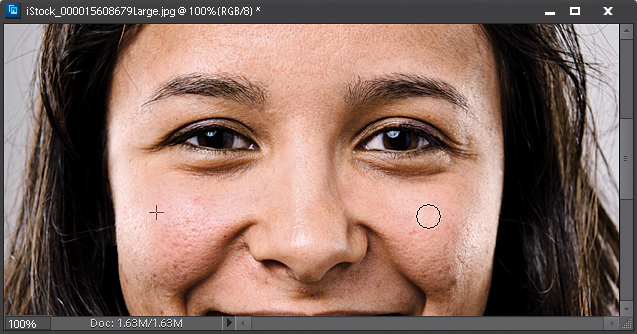
The key to using the Healing Brush correctly is to find an area of skin to sample that has a similar texture to the area you want to repair (this is different than the Clone Stamp tool, where you’re looking for matching color and shading, as well). Move your cursor over this “clean” area of skin, press-and-hold the Alt (Mac: Option) key, and click once to sample that area. Your cursor will momentarily change to a target as you sample (as shown here).
Now, just move the Healing Brush directly over the blemish or hot spot you want to remove and simply click. Don’t paint—click. Once. That’s it. That’s the whole technique—BAM—the blemish is gone!

For the best results, use a brush size that is just a little bit larger than the blemish or hot spot you want to remove (use the Left/Right Bracket keys on your keyboard [they’re to the right of the letter P] to change brush sizes). Also, you don’t have to worry about sampling an area right near where the blemish or hot spot is—you can sample from another side of the face, even in the shadows—just choose a similar texture, that’s the key.