
Fixing Areas That Are Too Bright
Although most of the lighting problems you’ll encounter are in the shadow areas of your photos, you’ll be surprised how many times there’s an area that is too bright (perhaps an area that’s lit with harsh, direct sunlight, or you exposed for the foreground but the background is now overexposed). Luckily, this is now an easy fix, too!
Step One:
Open the photo that has highlights that you want to tone down a bit. Note: If it’s an individual area (like the sun shining directly on your subject’s hair), you’ll want to press the L key to switch to the Lasso tool and put a loose selection around that area. Then go under the Select menu and choose Feather. For low-res, 72-ppi images, enter 2 pixels and click OK. For highres, 300-ppi images, try 8 pixels.

©ISTOCKPHOTO/ELIZABETH SHOEMAKER
Step Two:
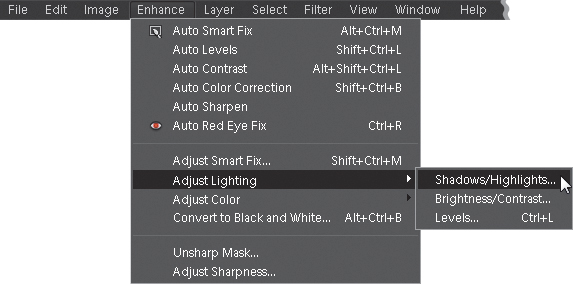
Now go under the Enhance menu, under Adjust Lighting, and choose Shadows/Highlights.
When the dialog appears, drag the Lighten Shadows slider to 0% and drag the Darken Highlights slider to the right, and as you do, the highlights will decrease, bringing back detail and balancing the overall tone of your (selected) highlights with the rest of your photo. (You’ll mainly see it in the dress, veil, and background here. They were just white before and now they’ve got more detail.) Sometimes when you make adjustments to the highlights (or shadows), you can lose some of the contrast in the midtone areas (they can become muddy or flat looking, or they can become oversaturated). If that happens, drag the Midtone Contrast slider (at the bottom of the dialog) to the right to increase the amount of mid-tone contrast, or drag to the left to reduce it. Then click OK. Note: If you made a selection, you’ll need to press Ctrl-D (Mac: Command-D) to De-select when you’re finished.

