
Before You Color Correct Anything, Do This First!
Okay, before you start along your merry color correcting way, there are a couple of settings that you should consider changing. These settings can definitely affect the results you get, so make sure you read this first. Also, keep in mind that these changes will remain as your defaults until you change them again, so you don’t have to do this each time you open Elements.
Step One:
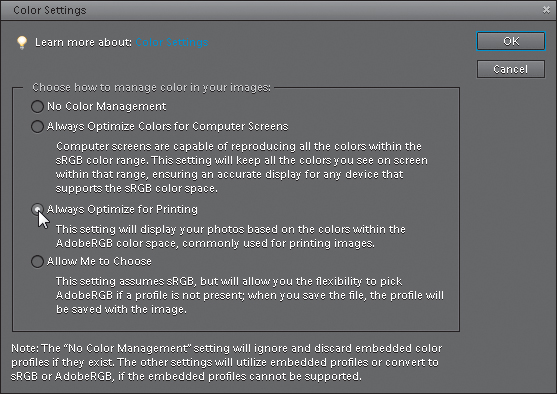
From the Edit menu, choose Color Settings (or press Ctrl-Shift-K [Mac: Command-Shift-K]).

Step Two:
In the Color Settings dialog, choose from the four options: No Color Management, Always Optimize Colors for Computer Screens, Always Optimize for Printing, or Allow Me to Choose. To a large degree, your choice will depend on your final output; but for photographers, I recommend using Always Optimize for Printing because it reproduces such a wide range (a.k.a. gamut) of colors using the Adobe RGB profile (if your photos don’t already have a profile assigned), and it’s ideal if your photos will wind up in print. Note: For more on color management, see Chapter 11.
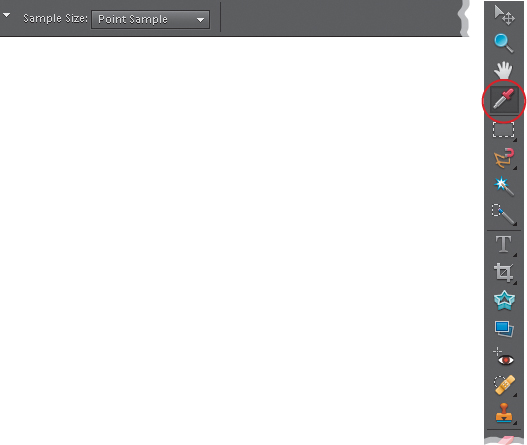
Now we’re moving to a completely different area. Press the letter I to switch to the Eyedropper tool. In the Options Bar, the default Sample Size setting for this tool (Point Sample) is fine for using the Eyedropper to steal a color from within a photo and make it your Foreground color. However, Point Sample doesn’t work well when you’re trying to read values in a particular area (such as flesh tones), because it gives you the reading from just one individual pixel, rather than an average reading of the surrounding area under your cursor.
Step Four:
For example, flesh tones are actually composed of dozens of different colored pixels (just zoom way in and you’ll see what I mean); and if you’re color correcting, you want a reading that’s representative of the area under your Eyedropper, not just a single pixel within that area, which could hurt your correction decision-making. That’s why you need to go to the Options Bar, under the Sample Size pop-up menu, and choose 3 by 3 Average. This changes the Eye-dropper to give you a reading that’s the average of 3 pixels across and 3 pixels down in the area that you’re sampling. Once you’ve completed the changes on these two pages, it’s safe to go ahead with the rest of the chapter and start color correcting your photos.
