Creating a Picture Stack Effect
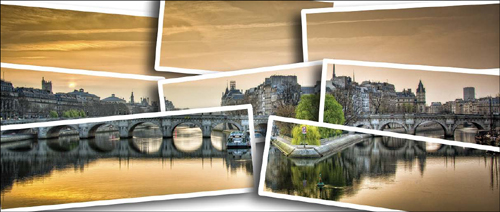
A new effect was added in Elements 10, in the Photo Play palette (which is also new) in the Guided Edit tab of the Editor, called Picture Stack. The idea is to take one photo and make it look like it was cut up into smaller photos with white borders stacked on top of each other. The effect looks pretty cool and is a fun way to show off your photos. Plus, it even goes so far as to add shadows under each photo, so it really looks like they’re lying on top of each other.
Step One:
In the Editor, open the photo that you want to use for the Picture Stack effect. I usually find landscape and travel photos look good here. You can use photos of people, too, but sometimes Elements will cut the photo right in the middle of someone’s face, so you have to watch out when using these. Click on Guided at the top of the Edit tab and then go down to the Photo Play palette and click on Picture Stack.

MATT KLOSKOWSKI
Step Two:
First, you’ll choose how many pictures you want your photo to be chopped up into. My favorite is 8 Pictures. To me, 4 Pictures doesn’t look like enough and 12 Pictures makes the photo look too busy. The good thing is that you don’t really have to commit to too much at this point. So, click on the 8 Pictures button on the right and Elements will go to work. It takes a minute, but you’ll eventually see your photo cut into smaller square/rectangular pieces.

If you want to see what it looks like using four or 12 pictures, then just click on one of those buttons and Elements will redo the stack. It’s pretty easy to figure out which one looks best for your photo by just trying out each option.

Step Four:
You’ll notice that each photo has a white border around it and in section 2 you can control the width of that border. I usually go with the Medium setting here, as the Small setting is too thin, so I barely ever use it, and the Large setting isn’t bad—sometimes it’s a little overpowering, but sometimes it looks cool. Just like with selecting the number of pictures, this one is easy to experiment with, so click on the three border buttons to see which one you like better.
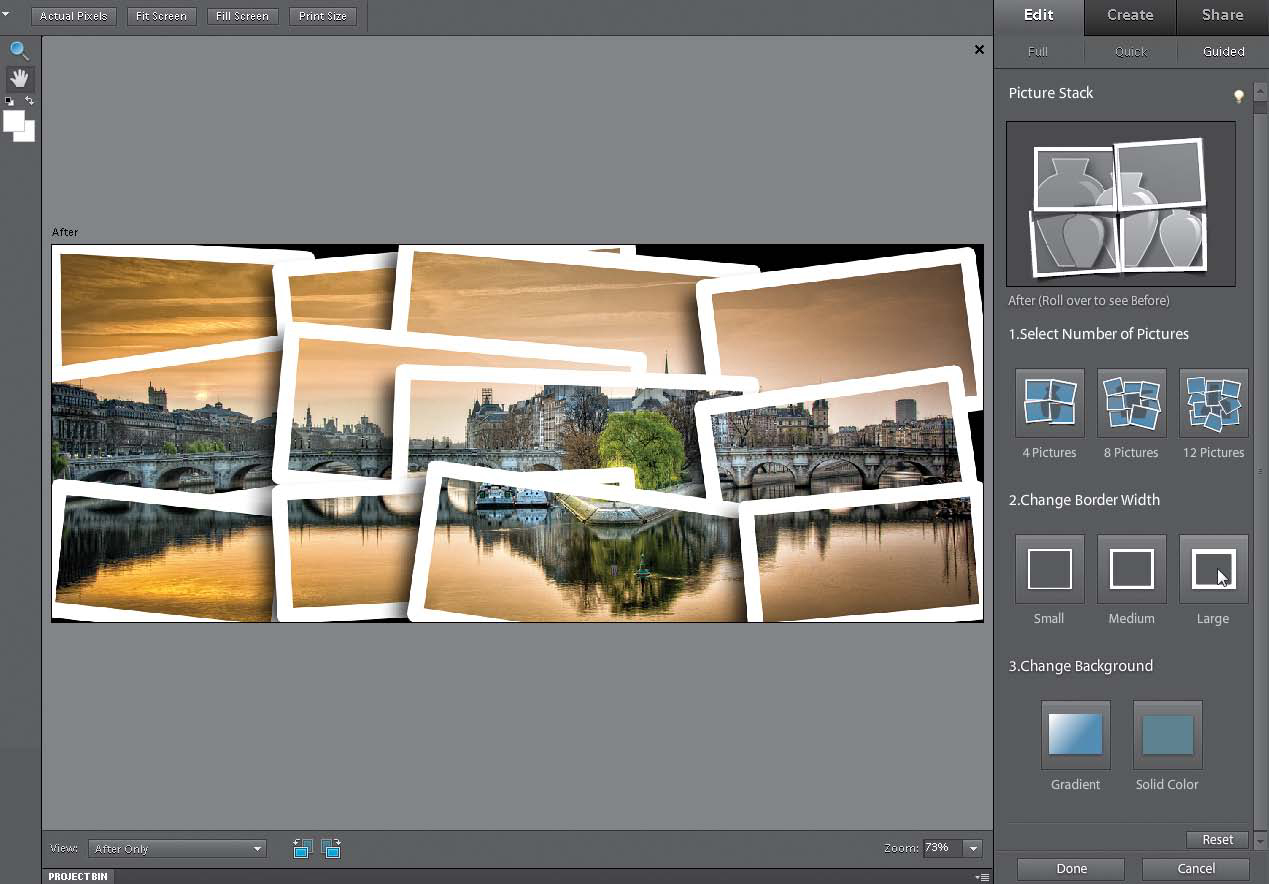
Lastly, you can change the background color and style (I switched back to eight photos with a medium border here). You have a choice between a gradient or just a simple solid-color background—I usually stick with a solid color. While the default black looks pretty cool, let’s try a white background. Click on the Solid Color button and when the New Layer dialog appears, click OK. In the Color Picker, choose white and then click OK. I kinda like white, because it lets you see the shadows under the photos. It gives the image a little more depth, so each picture in the stack really looks like it’s lying on the background.

Step Six:
When you’ve settled on your background color, just click the Done button at the bottom of the Palette Bin.
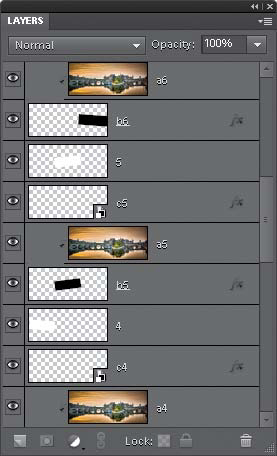
If you switch back to Full Edit mode and look in the Layers palette, you’ll see the behind-the-scenes work that went on. Elements adds quite a few layers to your document. If you’re brave enough, you can go into the separate layers and adjust them. The drop shadows, the outline around each photo—they each have their own layer, so if there’s something you want to change, you can do so right on the layer.