Getting the Grungy, High-Contrast Look Right Within Camera Raw
If you want that extreme contrast, grungy look, you can create it right within Camera Raw itself by just dragging a few sliders in the Basic panel, and then opening it in Elements and adding a vignette. And, since you’re going to leave Camera Raw and go to Elements anyway, you should try poppin’ some edge sharpening on this puppy. Shots like this, with lots of texture and metal, just love a little edge sharpening tossed on them, so give it a try. But let’s not get ahead of ourselves—here’s the grungy look made easy:
Step One:
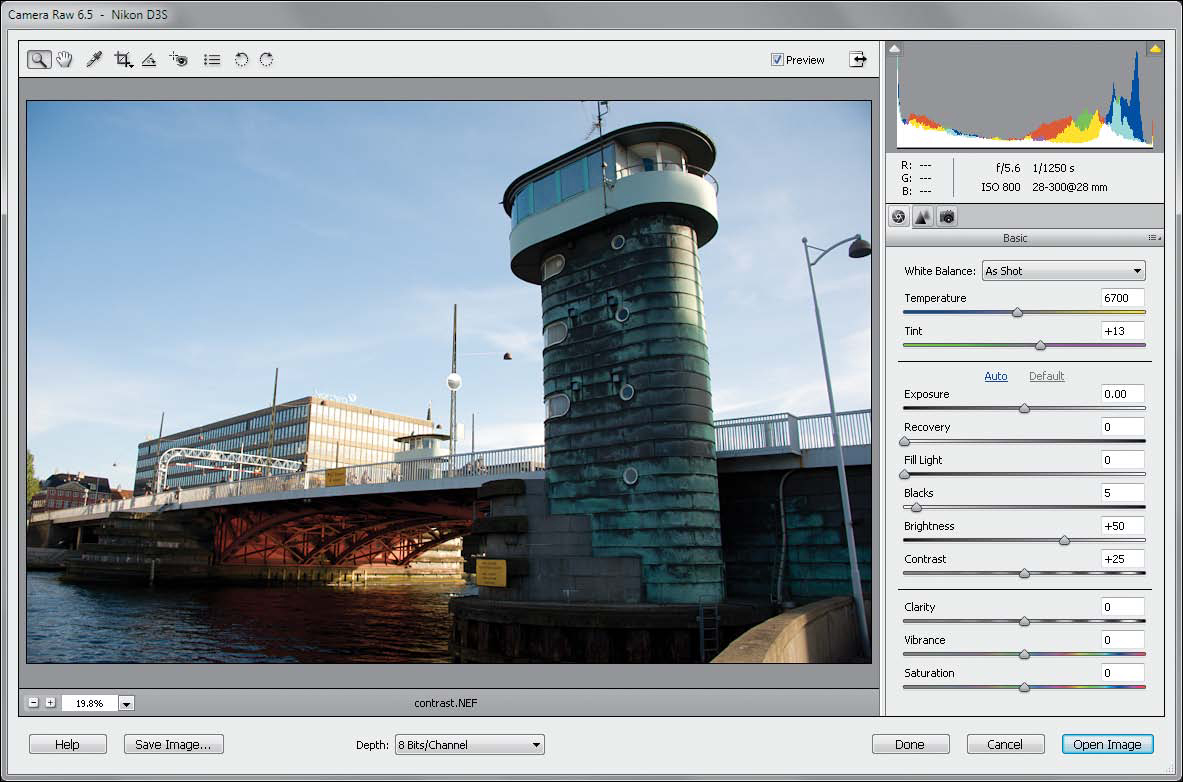
Open a photo in Camera Raw. This is one of those effects that needs the right kind of image for it to look right. Photos with lots of detail, texture, along with anything metallic, and lots of contrast seem to work best (it also works great for sports portraits, cars, even some landscapes. In other words: I wouldn’t apply this effect to a shot of a cute little fuzzy bunny). Here’s the original RAW image open in Camera Raw. (Note: This effect actually seems to come out better when you run it on RAW images, rather than JPEG or TIFF, but it does work on all three.)
SCOTT KELBY
Step Two:
Set these four sliders all at 100: Recovery, Fill Light, Contrast, and Clarity (as shown here). This is going to make your image look kind of washed out (like you see here). The brightness for this photo looks okay, because it was kind of dark when we started, but if your image was already kind of bright in the first place, it’s going to look really bright now. If that’s the case, you can go ahead and lower the Exposure amount (just drag the Exposure slider to the left until the brightness looks normal. The image will still look washed out, but it shouldn’t be crazy bright).
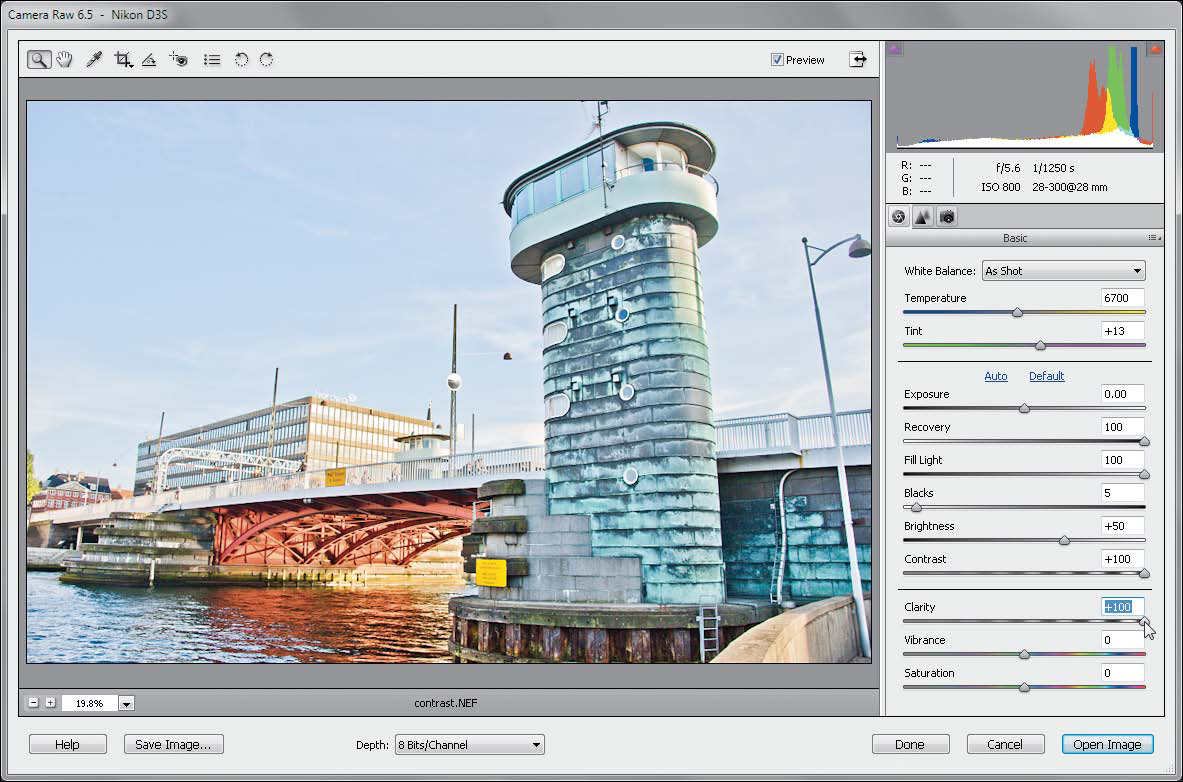
Now, you’re going to bring back all the saturation and warmth to the color in the image by dragging the Blacks slider way up to the right. Keep dragging until the photo looks balanced (like it does here, where I dragged it over to +55). If the colors look too colorful and vibrant (and they probably will), just lower the Vibrance amount until it looks just a little desaturated (that’s part of “the look”). Here, I lowered the Vibrance to –40. It did seem just a little bright at this point, so I also dragged the Exposure slider to –0.50.

Step Four:
The finishing move for this effect is to add a dark edge vignette, like we did in the last technique. So, click on the Open Image button to open the photo in the Elements Editor, then press Ctrl-J (Mac: Command-J) to duplicate your Background layer, and change the new layer’s blend mode to Multiply. Grab the Rectangular Marquee tool (M) and make a selection about ½″ to 1″ inside the edge of your photo (as shown here).
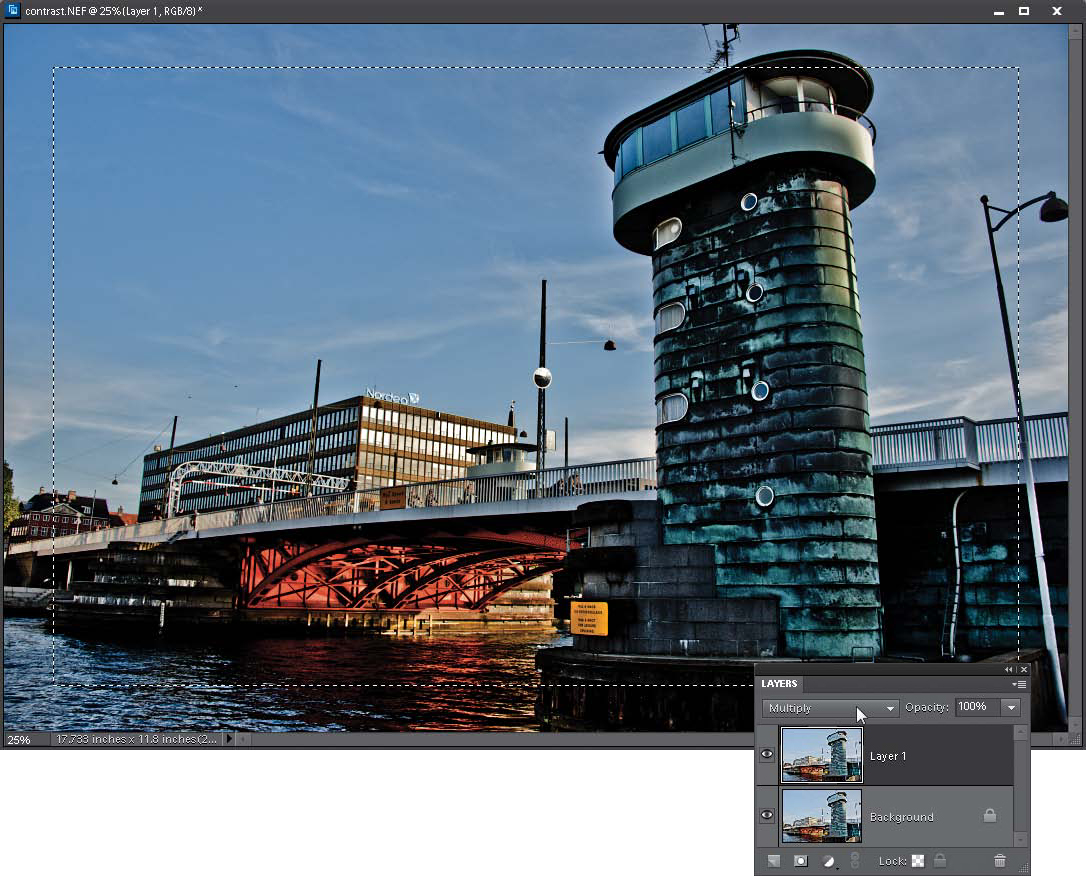
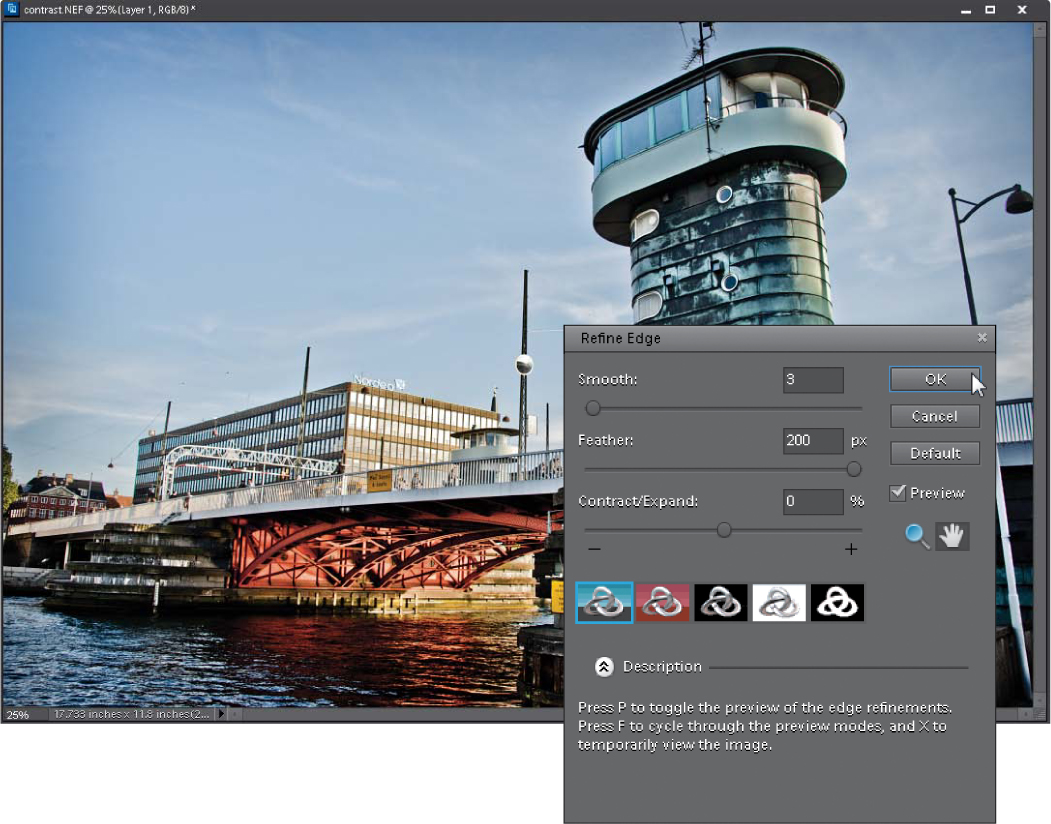
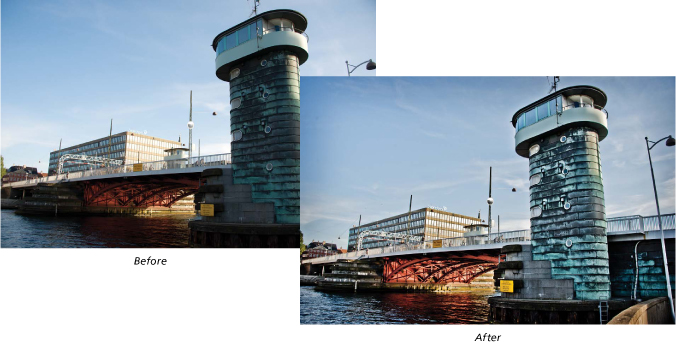
To soften the vignette, go to the Select menu and choose Refine Edge. In the Refine Edge dialog, click on the far-left icon below the sliders, so you’ll continue to see your full-color photo. Then, drag the Feather slider over to 200 for a highres photo like this (only drag to 100 for a low-res photo), and click OK. Press the Backspace (Mac: Delete) key to knock a soft-edged hole out of your Multiply layer (as shown here), and then press Ctrl-D (Mac: Command-D) to Deselect. Compare this to the original in the before/after below, and you can see the appeal of this effect, which almost looks a little like an HDR photo. Well, that’s it—the whole grungy enchilada using Camera Raw. (But, I gotta ask ya—is this baby screamin’ for some edge sharpening, or what? See the next chapter for more on that.)