
Making Your Photos Smaller (Downsizing)
There is a different set of rules we use for maintaining as much quality as possible when making an image smaller, and there are a couple of different ways to do just that (we’ll cover the two main ones here). Luckily, maintaining image quality is much easier when sizing down than when scaling up (in fact, photos often look dramatically better—and sharper—when scaled down, especially if you follow these guidelines).
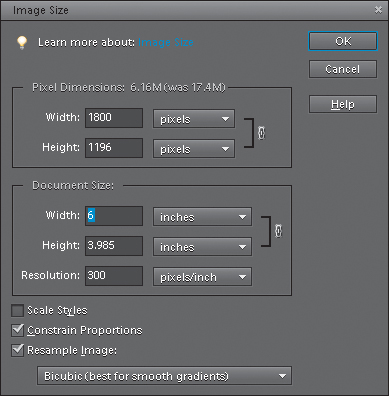
Downsizing photos where the resolution is already 300 ppi:
Although earlier we discussed how to change image size if your digital camera gives you 72-ppi images with large physical dimensions (like 24x42″ deep), what do you do if your camera gives you 300-ppi images at smaller physical dimensions (like a 10x6″ at 300 ppi)? Basically, you turn on Resample Image (in the Image Size dialog, under the Image menu, under Resize), then simply type the desired size (in this example, we want a 4x6″ final image size), and click OK (don’t change the Resolution setting, just click OK). The image will be scaled down to size, and the resolution will remain at 300 ppi. IMPORTANT: When you scale down using this method, it’s likely that the image will soften a little bit, so after scaling you’ll want to apply the Unsharp Mask filter to bring back any sharpness lost in the resizing (look at the sharpening chapter [Chapter 10] to see what settings to use).

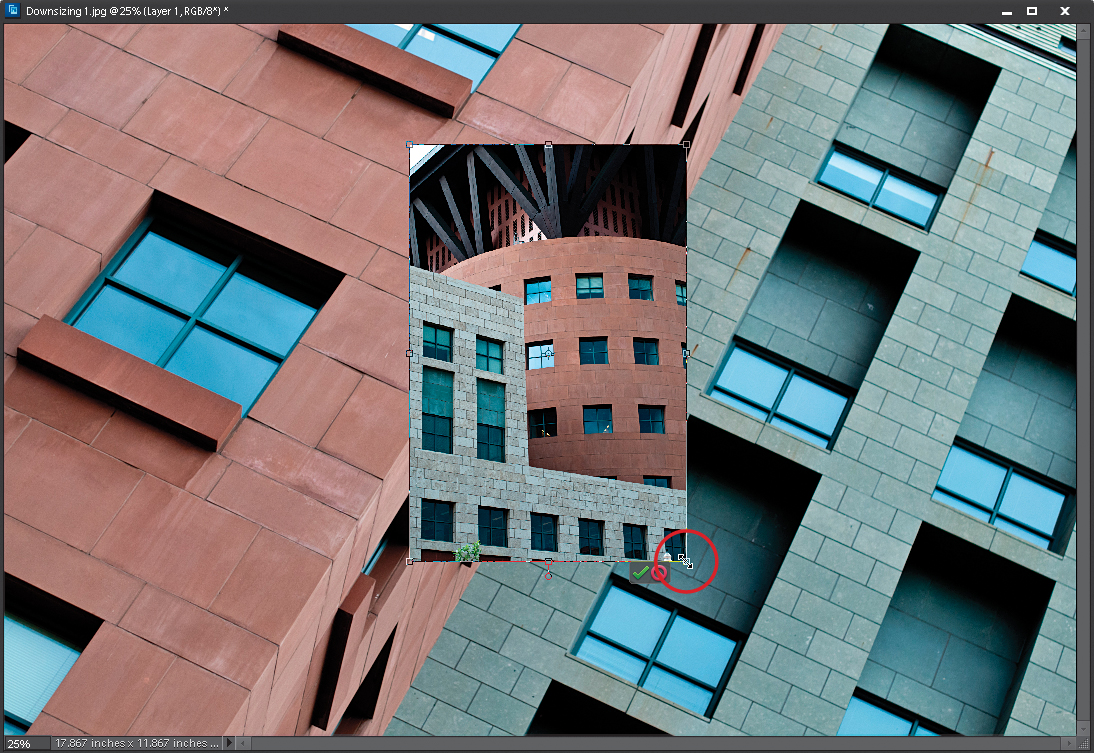
Making one photo smaller without shrinking the whole document:
If you’re working with more than one image in the same document, you’ll resize a bit differently. To scale down a photo on a layer, first click on that photo’s layer in the Layers palette, then press Ctrl-T (Mac: Command-T) to bring up Free Transform. Press-and-hold the Shift key to keep the photo proportional (or turn on the Constrain Proportions checkbox in the Options Bar), grab a corner handle, and drag inward. When it looks good to you, press the Enter (Mac: Return) key. If the image looks softer after resizing it, apply the Unsharp Mask filter (again, see the sharpening chapter).
SCOTT KELBY
Resizing problems when dragging between documents:
This one gets a lot of people, because at first glance it just doesn’t make sense. You have two documents, approximately the same size, side-by-side onscreen. But when you drag a 72-ppi photo (of a lighthouse in Oregon, in this case) onto a 300-ppi document (Untitled-1), the photo appears really small. Why is that? Simply put: resolution. Although the documents appear to be the same size, they’re not. The tip-off that you’re not really seeing them at the same size is found in the title bar of each photo. For instance, the photo of the lighthouse is displayed at 100%, but the Untitled-1 document is displayed at only 25%. So, to get more predictable results, make sure both documents are at the same viewing size and resolution (check in the Image Size dialog under the Image menu, under Resize).

SCOTT KELBY