Using the Smart Brush Tool to Select and Fix at the Same Time
Photoshop Elements includes a brush tool that lets you fix problem areas (as well as create some pretty cool effects) with just a brush stroke. It’s called the Smart Brush tool, and it helps keep you from making complicated selections and then having to fix them in a separate step. Instead, you choose which effect you want to apply and just brush away. Let’s check it out.
Step One:
Open a photo that has an area you want to enhance or fix. There’s actually a huge list of things you can do with this brush, but let’s concentrate on one area for now—the sky. A big digital image problem is that the sky never seems to look as vibrant and dramatic as it does when we’re there photographing it. Well, the Smart Brush tool has an option to help fix this, so go ahead and select it from the Toolbox (it’s the brush icon with a little gear to the left of it, right below the Brush tool and directly above the Paint Bucket tool) or just press the F key.

MATT KLOSKOWSKI
Step Two:
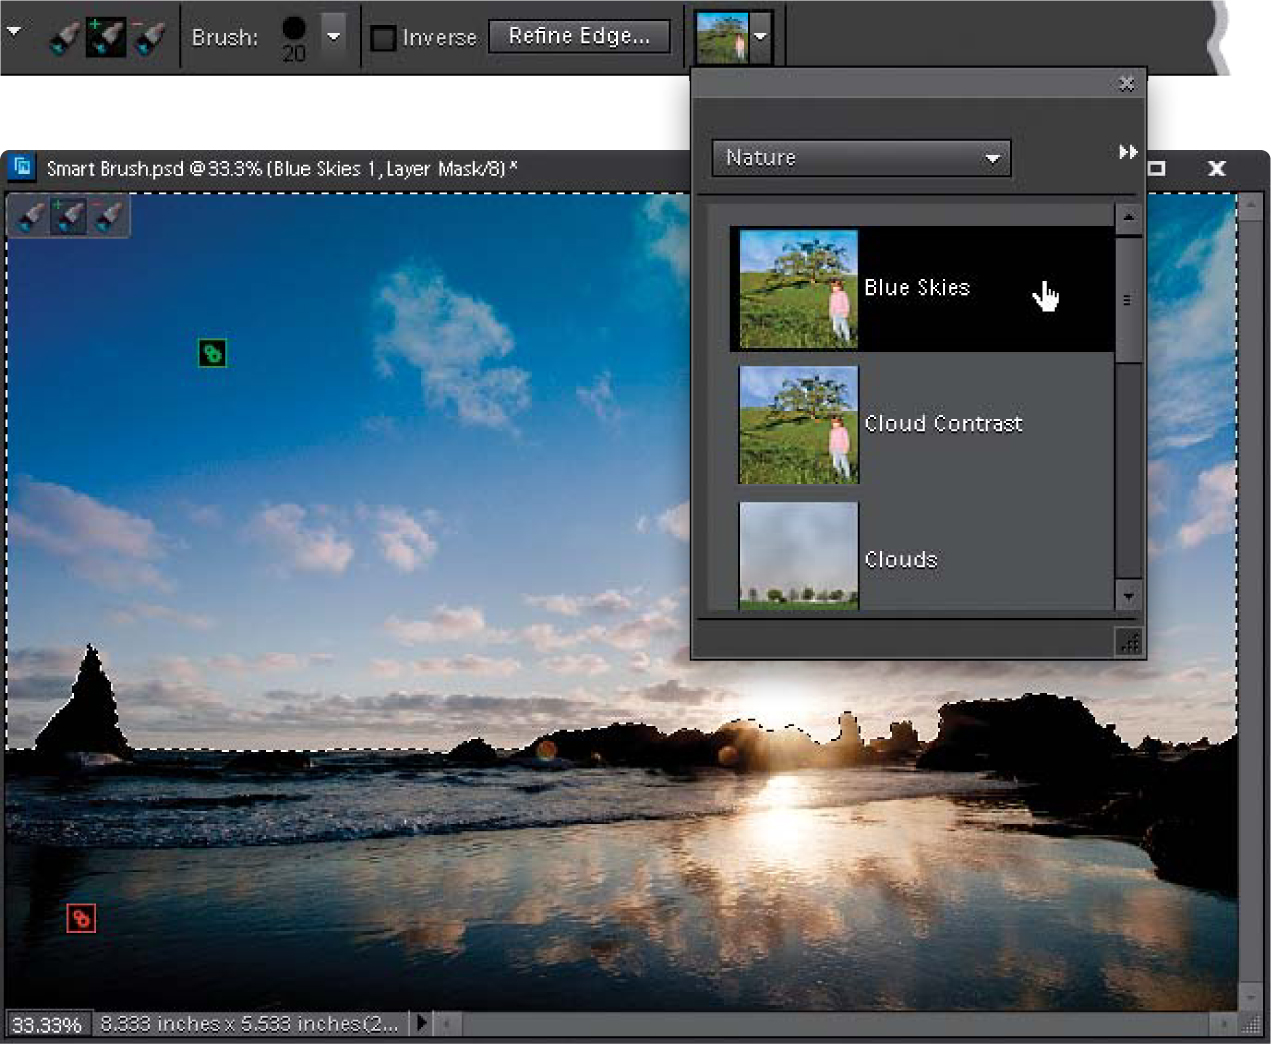
Once you select the tool, click on the thumbnail on the right side of the Options Bar to open the Preset Picker. As you change the preset pop-up menu and scroll through the Preset Picker, you’ll see what I meant in Step One—there are indeed a bunch of things you can do here. Let’s go ahead and choose Nature from the preset pop-up menu at the top, though, to narrow it down. Then click on the Cloud Contrast preset.

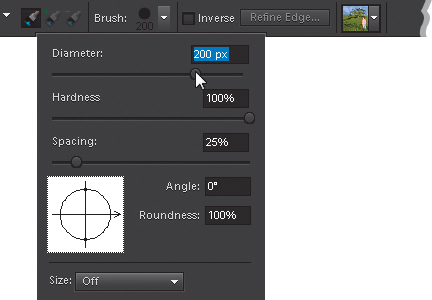
Now the main thing to remember about this tool is that it is still a brush, which means it has settings just like all other brushes (diameter, hardness, spacing, etc.). So, click on the down-facing arrow to the right of Brush in the Options Bar, and set your diameter to a size that’ll help you paint over the area fairly quickly. In this example, I’m using a 200-pixel brush for the sky.
Step Four:
The rest is pretty simple—just click-and-drag on the sky to paint the effect on the photo. By the way, notice how Elements automatically started adding the Cloud Contrast effect to parts of the sky that you haven’t even painted over yet? That’s where the “smart” part of this brush comes into play. It automatically examines your photo for areas similar to what you clicked on and adds them to the selection.

Step Five:
Now keep brushing on the sky to get the rest of it. Each time you click, you’re adding to the selection, so there’s no need to press-and-hold any keys or change tools to widen the effect to other parts of the photo.

Okay, this brush is pretty cool, right? But it’s not perfect. There will inevitably come a time (probably sooner than later) where the “smartness” of the brush isn’t as smart as it thinks it is, and it bleeds into a part of the photo you didn’t want it to (like some of the rocks on the right here). When that happens, press-and-hold the Alt (Mac: Option) key to put the brush into subtract mode. Then paint over the areas you didn’t want to apply the effect to. Again, Elements will do a lot of the work for you and wipe away the areas, even if you don’t paint directly on them. Note: Decrease the size of your brush and zoom in on the area, if needed, to help remove it from the selection.

Step Seven:
Here’s another really cool part about the Smart Brush tool: it’s non-destructive to your photo. This means you can always go back and change (or even delete) the effects. You’ll see this in two ways: First, you’ll notice that the Smart Brush tool automatically adds a new adjustment layer to the Layers palette. If you ever find the effect is too harsh, you can always reduce the opacity of the layer to reduce the effect.

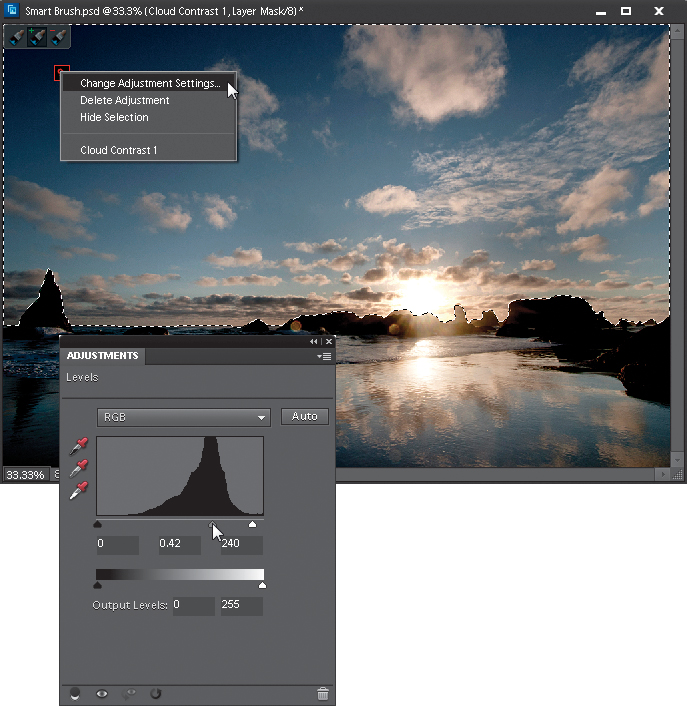
Also, you may have noticed a tiny red box on your photo where you started to paint with the Smart Brush tool. This is the adjustment marker letting you know you’ve applied a Smart Brush adjustment to the photo. If you Right-click on it, you’ll see you can delete it if you want or you can change the adjustment settings. Clicking Delete Adjustment does just what you think it does—the adjustment will be removed totally. But try clicking Change Adjustment Settings in-stead. It brings up the Adjustments palette with the controls for whatever adjustment Elements used to achieve your effect. If you’re familiar with the Adjustments palette, you can always try tweaking the settings. In this case, Levels was used, so the Levels controls appeared in the palette. If I wanted to try to make the sky even darker, I could drag that middle gray slider below the histogram toward the right a little.
Step Nine:
You can also add multiple Smart Brush adjustments to different parts of the photo. If you notice, the sky in this photo looks a lot better, but now the foreground looks a little flat in comparison. Press Ctrl-D (Mac: Command-D) to Deselect the current Smart Brush adjustment in the sky. Then, go to the Preset Picker in the Options Bar and choose the Lighting presets in the pop-up menu. Now, click on the Contrast High preset in the list, and paint on the foreground to add some contrast to the beach and water.

One more thing: the Smart Brush tool is so smart that you can not only change the adjustment settings, but you can also totally change the Smart Brush adjustment you’ve applied. For example, let’s say we want to see what the Blue Skies adjustment looks like. Just click back on your Cloud Contrast layer in the Layers palette, then click on the Blue Skies preset in the Options Bar and Elements will swap out the Cloud Contrast adjustment with the Blue Skies one. If you like it, then keep it; if not, then just click back on the first preset you chose or try a new one altogether. Once you’re finished, just choose Flatten Image from the Layers palette’s flyout menu.