
Automatic Red-Eye Removal
If you just finished shooting an indoor event with lots of flash and low light, chances are you’re going to have a ton of photos with red eyes. If you know this ahead of time, then the feature you’re about to see comes in very handy. You can set up Elements to automatically remove red eye as your photos are being imported into the Organizer. No interaction by you is needed. Just let Elements do its work and by the time you see your photos onscreen, you’ll never even know red eye existed.
Step One:
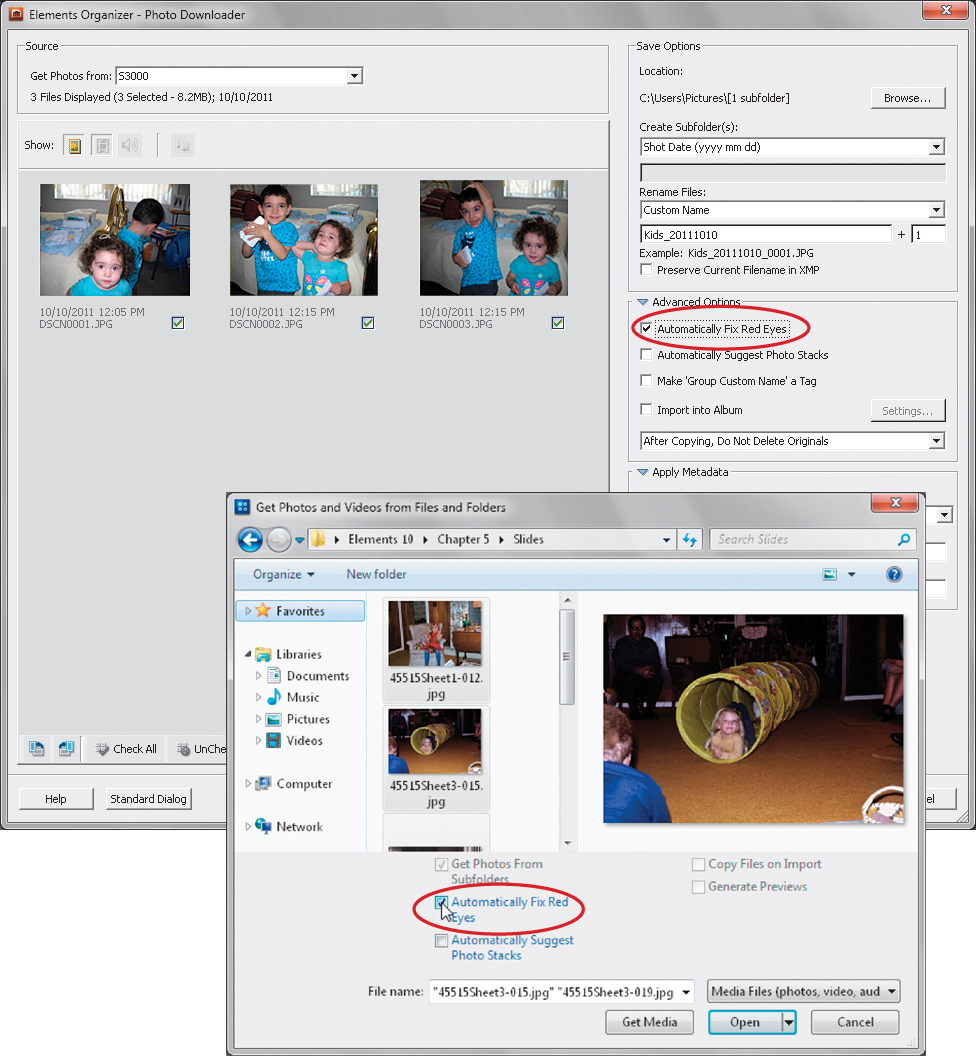
First, we’ll start with the fully auto matic version, which you can use when you’re importing photos into the Organizer. Here’s how it works: When importing photos from your camera, the Elements Organizer–Photo Downloader dialog appears. On the right side of the dialog, in the Advanced Options section, there’s a checkbox for Automatically Fix Red Eyes (if your dialog doesn’t look like this, click on the Advanced Dialog button at the bottom). If you think some of the photos you’re about to import will have red eye, just turn on this checkbox (shown circled here), and then click the Get Media button to start the importing and the red-eye correction. If you’re importing photos already on your computer, you’ll have the same option in the Get Photos and Videos from Files and Folders dialog.
KIM DOTY
HENRIK KYLIN
Step Two:
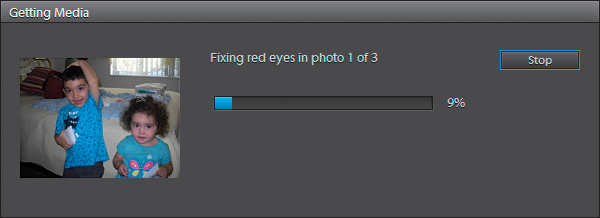
Once you click the Get Media button, the Getting Media dialog will appear. In this dialog, there’s a status bar indicating how many photos are being fixed. It also shows you a preview of each photo it’s importing.
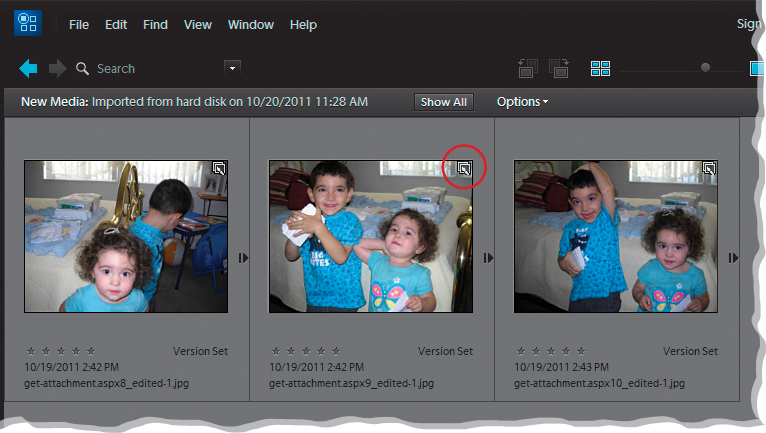
Once the process is complete, it automatically groups the original with the fixed version in a Version Set (you’ll see an icon at the top right of the image thumbnail), so if you don’t like the fix (for whatever reason), you still have the original. You can see both versions of the file by Right-clicking on the photo (in the Organizer) and in the pop-up menu, under Version Set, choosing Expand Items in Version Set (or by just clicking on the right-facing arrow to the right of the image thumbnail).
Step Four:
Here is one of the photos with red eye and with it automatically removed.

Step Five:
This really isn’t a step; it’s another way to get an auto red eye fix, and that’s by opening an image in the Editor, or even in Quick Fix, and then going under the Enhance menu and choosing Auto Red Eye Fix. You can also use the keyboard shortcut Ctrl-R (Mac: Command-R). Either way, it senses where the red eye(s) is, removes it automatically, and life is good.
