
Now that our weather station is set up and takes the readings correctly, it's time to assemble the weather station and set it up outside.
Before we do this, you may want to consider how the Pi will connect to your network and receive power. Here, I would recommend you use Wi-Fi for networking. This can be set up by following the same procedure that we used in Chapter 2, Portable Speaker System. For power, I used a 10 foot micro USB cable, which was long enough to reach as far outside as I had located the weather station.
For the Maplin weather sensors, simply assemble the two masts and fix both the anemometer and wind direction sensor at the top of their own masts by using a 30 mm M3 screw. These masts can then be pushed relatively easily into the soil. Since they are not particularly tall, it is better to place them in an area as open as possible to improve the accuracy of the readings taken from them.
As an enclosure for the remaining sensors, the Arduino, and the Pi, the easiest thing to use is a Tupperware (or sandwich) box. This should be at least 6 inches wide by 4 inches deep, around 3 inches tall, and either clear or very lightly translucent, so that the light intensity does not fall too much between the outside and inside of the box (as the light sensor will be mounted on the inside).
There are a few modifications that must first be made to the box to make it suitable for use as an enclosure for the weather sensors. Firstly, there must be some way to maintain the airflow through the box to ensure that the DHT11/22 and BMP180 sensors get accurate readings. This can be done easily by drilling a pattern of six holes on either side of a corner of the box, as shown in the following image. This provides a path for air to flow through the corner of the case without allowing moisture and water to get to the Pi and Arduino (which will be located at the opposite end of the box).
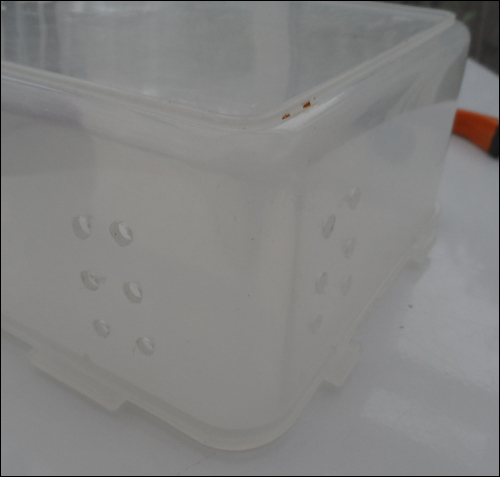
The next thing we will need is a way to run cables inside the box. This can be done by removing the lip on one side of the box, so that when the lid is replaced, there is a gap large enough to run the wires through. The lip can be removed by using a pair of wire/side cutters to create a gap wide enough for the cables from the rain gauge, wind direction sensor, and a micro USB cable, as shown in the following image:

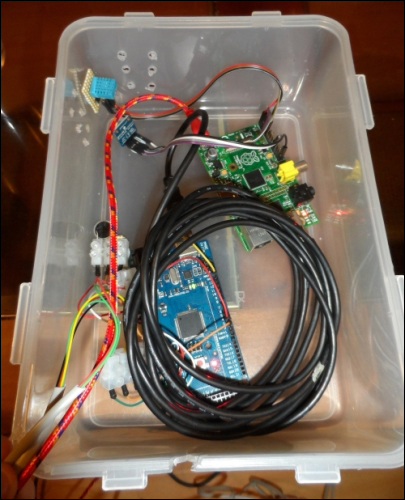
Next, we need to assemble the electronics and sensors in the box. The only requirement here is that the LCD faces directly upwards and that the DHT11/22 and BMP180 sensors are close to the path of air which goes through the corner of the box where the holes were drilled.
You should use an adhesive or glue to keep the electronics from moving. You can use anything from a temporary fixing, such as Blu-Tack, to a more permanent (but still removable) adhesive, such as hot glue. Whichever you decide to use, it is important to keep adhesives away from sensitive areas of the electronics, such as the metallic sensor chip on the BMP180 PCB or the surface mount components on the back of the Pi.
The following image shows the assembled electronics and sensors in the box:
Finally, all that is left to do is to replace the box lid, set up the weather station outside, and apply power. We can now move on to test the weather station and look at some data from it.

Note that while installing the wind direction sensor, it is important to alight it properly with the north direction. It must be installed such that when the arm is in position, as shown in the following image, the vane must point to north and the round point opposite the vane must point to south:
