
To make the data we record from the weather sensors a bit more accessible, we will use a web application written in Python to display the current and historical data recorded from our weather station.
To do this, we will make use of a Python web application framework called Flask (http://flask.pocoo.org/), an application server called Gunicorn (http://gunicorn.org/), and a reverse proxy server called Nginx (http://nginx.org/).
The web application will have two pages, one will show the current weather conditions and the other will show the history of the weather conditions over a given time range. To help visualize the data on both the pages, we will use the Google Charts API (https://developers.google.com/chart/). This is a JavaScript API that allows the creation of interactive charts on a web page.
It's now time to deploy our web application on the Pi. To do this, we will use the Nginx reverse proxy server and the Gunicorn web application server to host the application. Here, Gunicorn is the server that actually hosts the application and related files, and Nginx is an intermediate server between the Gunicorn and the client that is used to forward requests from a client to the correct web server.
After logging in to the Pi over SSH and uploading config_files and weather_station_webapp to the /home/pi directory, the process to configure the web application is as follows:
- Install some prerequisite packages:
sudo apt-get install python-pip python-dev gunicorn supervisor nginx - Clone the repository for Flask, the Python web application framework that our web app is built with:
git clone https://github.com/mitsuhiko/flask.git - Change to the directory for the repository we just cloned and install Flask on the Pi:
cd flask
sudo python setup.py install
- Copy the configuration file for Nginx to the directory of all the available sites:
sudo cp config_files/nginx/weather-station.conf /etc/nginx/sites-available/weather-station.conf - Create a symbolic link to the site configuration from the
sites-enableddirectory. This tells Nginx that it should handle requests for this site:sudo ln -s /etc/nginx/sites-available/weather-station.conf /etc/nginx/sites-enabled/ - Remove the default site that Nginx hosts when it is first installed:
sudo rm /etc/nginx/sites-enabled/default - Once all the configuration is done, it can save a lot of debugging time to have Nginx. Verify its configuration, which can be done by using the following command:
sudo nginx -tAssuming that the configuration was validated correctly, you should see a result similar to the following screenshot. If not, go back through the configuration steps and ensure that the configuration is performed correctly:

- Assuming that the configuration is validated successfully, you can now restart the Nginx service for it to start handling requests for our web app:
sudo service nginx restart - Next, change to the directory for the web app:
cd ~/weather_station_webapp - Before we start to serve the web app, we need to initialize an empty database to record measurements. This can be done using the following command:
flask --app=weather_station_webapp initdb - Now, we are ready to test the web application by running Gunicorn, which can be run using the following command:
gunicorn -b 127.0.0.1:5000 weather_station_webapp:app
Here, Gunicorn is serving the web application on port 5000 on the local loopback network interface, which is only available to the Pi. Then, a request comes in from an external client on port 80 (the standard port for web pages to be served). Nginx forwards this traffic to 127.0.0.1:5000, where the request is then processed by Gunicorn.
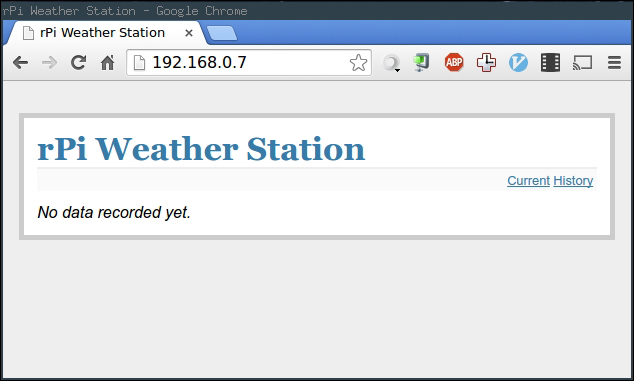
To test whether this is working properly, browse to the IP address of the Pi from another computer on the same network as the Pi. You should be greeted with a page similar to the upcoming screenshot.
If you receive a page with a Bad Request error message, then you may need to reboot the Pi and try the last step again. If you receive Internal Server Error, then you may need to run the command to initialize the database again.
Assuming that the web app is loaded correctly, we can now perform the final step, which will start the Gunicorn server automatically when the Pi boots. To do this, we will use the Supervisor (http://supervisord.org/) application, which is a process control tool that makes the creation of daemon instances of programs very easy, and perform the following steps:
- First, we need to copy the configuration entry for the web application into the Supervisor configuration directory:
sudo cp config_files/supervisor/weather-station-webapp.conf /etc/supervisor/conf.d/weather-station-webapp.conf - Next, run this set of commands to update the superuser configuration and start the web application as a background process:
sudo supervisorctl reread
sudo supervisorctl update
sudo supervisorctl start weather-station-webapp
You may receive what looks to be an error message when running the final command here. However, this simply states that the process is already running and can safely be ignored.
- Finally, reboot the Pi to finish the deployment:
sudo reboot
Once the Pi has rebooted, browse once again to the IP address of the Pi and you should be able to see the same page as before. If so, you have successfully deployed the web application on your Pi.