
The security system will be based on a web application that will be used to record and view events from the sensors and will allow a configuration of sensors and alarms.
For this, we will use the Flask framework for Python, which was used in the previous chapter, and the MQTT protocol to establish communication between the sensors and web application. This protocol is a publisher and subscriber model, where clients can subscribe to information (topics) they are interested in and receive new data as it is made available (published) by other clients.
An overview of the structure of the web application is shown in the following diagram. As we did in the previous chapter, we will use the SQLite database engine:

We will first start by deploying the web application on the Pi. This will mostly be the same process as was used in the previous chapter for the weather station web application. However, there are additional steps here as the security application requires an extra configuration file to set options for the login details, MQTT broker, and e-mail alerts:
- First, we will add an additional source to the list of repositories that APT searches for. When we install new packages, this will allow us to install the up-to-date version of the Mosquitto MQTT broker needed for the security system:
wget http://repo.mosquitto.org/debian/mosquitto-repo.gpg.key
sudo apt-key add mosquitto-repo.gpg.key
cd /etc/apt/sources.list.d/
sudo wget http://repo.mosquitto.org/debian/mosquitto-wheezy.list
cd
- Now that the repository has been added, we need to update the local copy of the list of packages that are available and install any updates while we are at it:
sudo apt-get update
sudo apt-get upgrade
- Now that the Pi is up to date, we can start installing the packages we will need for the security system. Don't worry if you get a message saying a package is already installed or is up to date, as some of these may or may not be already installed:
sudo apt-get install mosquitto mosquitto-clients python-pip git python-dev gunicorn supervisor nginx
sudo pip install paho-mqtt
- From here on, the procedure will be similar to that used while installing Flash in the previous chapter. However, we will be making a couple of modifications this time, so we will go through the full procedure here. Continue by cloning the Flash code repository and install Flask on the Pi:
git clone https://github.com/mitsuhiko/flask.git
cd flask
sudo python setup.py install
- Next, we need to copy the Nginx configuration files for the security web application site. Enable the site configuration and remove the default Nginx site:
sudo cp config_files/nginx/security.conf /etc/nginx/sites-available/security.conf
sudo ln -s /etc/nginx/sites-available/security.conf /etc/nginx/sites-enabled/
sudo rm /etc/nginx/sites-enabled/default
- Now, we can let Nginx test the configuration and assuming that the test has passed, restart the service. If the test failed, go back to the configuration and ensure that all the files have been copied correctly:
sudo nginx -t
sudo service nginx restart
- Next, we can test the web application by running it manually with Gunicorn. Here, it is not important that the application is missing the configuration file, so it can be started with the following commands:
cd ~/security_webapp
flask --app=security initdb
gunicorn -b 127.0.0.1:5000 security:app

- Now, browse the IP address of the Pi on a computer of the same network and you should see a page similar to that shown in the following screenshot. As it is, this is the only page of the site that will work, as the application is running without the configuration file:
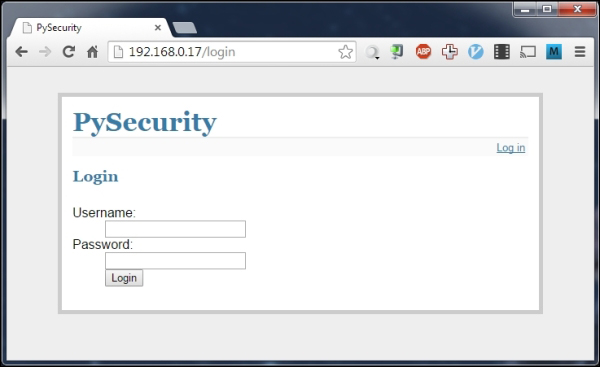
If the web page does not appear, then you may need to reboot the Pi before trying again to flush out any bad configuration, which may still be applied to one of the running services. If this does not work, then go back to the configuration steps and ensure that each file was copied correctly.
- Next, we will configure the web application that will start automatically when the Pi boots using the supervisor:
sudo cp config_files/supervisor/security-webapp.conf /etc/supervisor/conf.d/security-webapp.conf
sudo supervisorctl reread
sudo supervisorctl update
sudo supervisorctl start security_webappp
- Now that the web application is deployed, we need to edit the configuration file to enable login, MQTT broker connection, and e-mail alerts:
sudo supervisorctl stop security_webappp
sudo cp config_files/security.conf ~
nano ~/security.conf
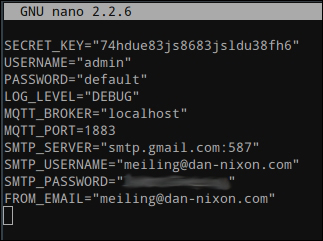
- Now, we need to modify the configuration file so that it suits the setup we have for the MQTT broker, e-mail alerts, and the credentials used to login to the web application. Here, we must also set a secret key that allows our application to save information in a browser session.
In the configuration file, you will find that all the configuration entries are already there; they simply need to be populated with customized values. Note that while the SECRET_KEY value will allow you to log in to the application, it should be changed to something unique to your application before you start using the system properly.
The MQTT_BROKER and MQTT_PORT configuration parameters are used to determine which MQTT broker the application should connect to. Here, we are using the broker running on the Pi locally, so these can be left as the parameters' default values.
The USERNAME and PASSWORD parameters are used to set the credentials that you will use on the login page to access the web application. As it is, the web application only supports a single user.
The SMTP_SERVER, SMTP_USERNAME, SMTP_PASSWORD, and FROM_EMAIL parameters are used to configure the sending of e-mail alerts. Currently, only Gmail and Google Apps e-mail accounts have been tested with the application, so it is highly recommended that you use one of these accounts. However, the Python SMTP library (https://docs.python.org/2/library/smtplib.html) is well documented, so modifying the send_mail() function in security.py is always an option if you want to use a different e-mail provider.
Assuming that you will just use a Gmail (or Google Apps) e-mail account for e-mail alerts, the SMTP_SERVER parameter is already set to the correct value. SMTP_USERNAME and SMTP_PASSWORD must be set to your account login details, which are your full e-mail address and password. The FROM_EMAIL parameter is used to set the e-mail address the message is sent from; this should be set to the same as the SMTP_USERNAME parameter.
Once the configuration file is complete, it should look something like what is shown in the following screenshot:
Now that the configuration file has been modified, the last step is to start the web application once more:
sudo supervisorctl start security_webappp
Once this final step is complete, you can try to access the web application by browsing to the IP address of the Pi on a computer on the same network. This should present you with the same login screen as before.
Now that the web application is deployed correctly, it is time to log in to it and configure the sensors and alarms we will use for the system:
- Start by browsing to the IP address of your Pi and enter the login details in the page you are taken to. These login credentials are the ones that were configured in the configuration file in the previous section.

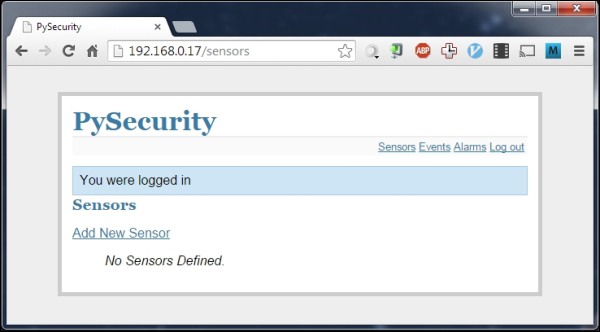
- Once logged in, you will be greeted with the Sensors page. This shows a list of all the sensors that are currently configured on the security system. We will start by first adding a new sensor by clicking on the Add New Sensor link at the top of the page.
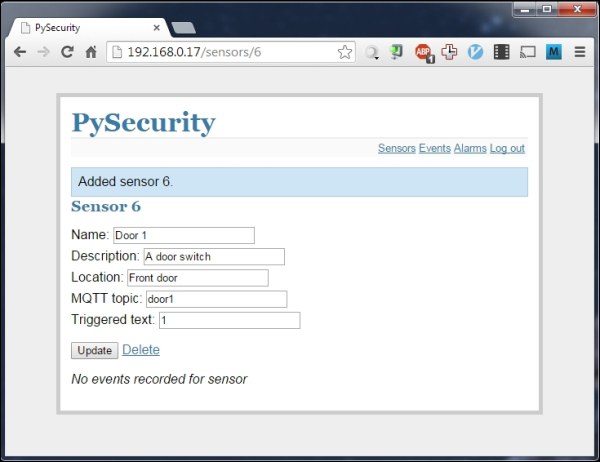
- Here, we are given options for the name and identification of the sensor, both in relation to the position in the house and the MQTT topic that it maps to. We will set this sensor to be the door sensor on the first sensor node. For all the sensors we will use, the value of Triggered text should be
1.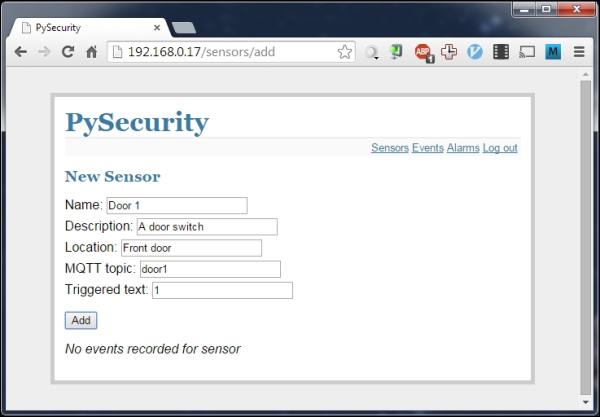
- Once this is complete, click on Add and you will see a message saying that the sensor has been added. At the bottom of this screen, you will see a section that displays the last recorded event for this sensor. Since it has just been added, no events have been recorded yet.
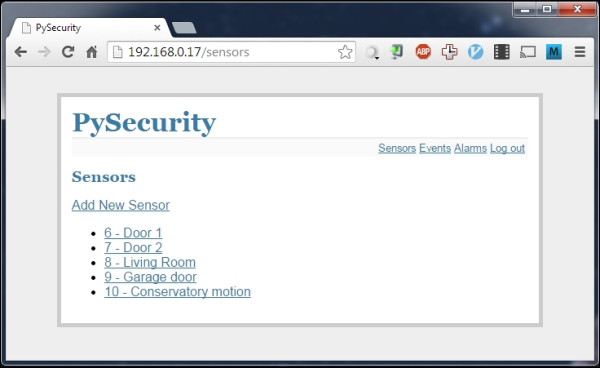
- Follow this procedure for the remaining sensors in your setup, following the system structure diagram you made earlier in this chapter. Once this is complete, you will have a fair few sensors added to the system, as depicted in the following screenshot:
- Next, we will move on to add an alarm for some of the sensors. This will control how and when you receive alerts when the state of the sensors in the network changes. To start, click on Alarms to navigate to the alerts page and add a new alarm.
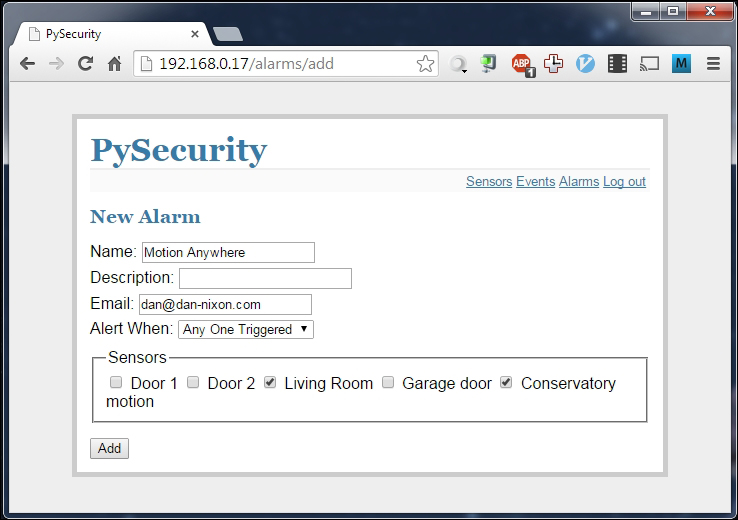
- On this screen, you will be given the option to give the alarm a name and description to assist identification as well as a field for an e-mail address to send notification e-mails when the alarm is triggered.
- At the bottom of the screen is a list of all the sensors that have been added to the security system. Check all of them that you want to have an effect on this alarm.
- Next, choose the alarm type from the Alert When drop-down box. This contains several options for how sensors must behave in order to trigger the alarm. Typically, you will usually set this to Any One Triggered. There is also an option to disable the alarm if needed.
At this point, the system is sufficiently configured to behave as a simple security system and send alerts when sensors have been triggered. However, should you ever need to look up the history of a sensor to see when it has been triggered, there is an events page, which will display all the recorded sensor events and the time they were recorded at.
This can also be handy to verify that a sensor is functioning correctly.
As we are yet to add any sensors to the system, you can simulate the triggered sensors using the Mosquitto command-line tools. If not already installed, they can be downloaded using the following command:
sudo apt-get install mosquitto_clients
Once these are installed, you can simulate, for instance, a door being opened and closed using the following two commands, where PI_IP is the IP address of the Pi:
mosquitto_pub -h 192.168.0.17 -t door2 -m 1
mosquitto_pub -h 192.168.0.17 -t door2 -m 0
On the Events page of the web application, this will appear, as shown in the following screenshot:

When an alarm is triggered and a valid e-mail address has been set in the configuration page, an e-mail similar to the following will be delivered to the configured e-mail address:
