
The next piece of hardware we will set up is the six switches that will be used for the four direction keys, back, and enter. Although they can be easily remapped to whatever set of controls you like.
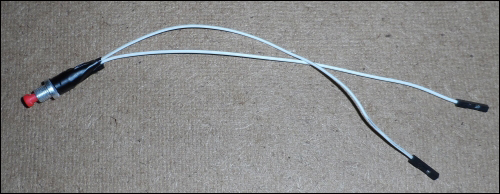
- The first step here is to solder wires with a 0.1 inch female pin socket at one end to each switch terminal. This process is very similar to what we did for the arcade buttons in Chapter 3, Mini Retro Arcade Cabinet.
- Once this is done, it would be worth wrapping the connections in some insulation tape to give the cables extra relief from the strain, as shown in the following image:
- Next, it is time to wire the switches to the Pi. To do this, we will follow the same wiring diagrams used in the previous section to connect the LCD.
Once this is done, we can move on to the software setup for the buttons. To interface with the GPIO hardware, we will use the sysfs bindings that are available by reading and writing to files under the
/sys/class/gpio/directory. This method is used because OpenELEC does not include the library to access GPIO through Python, and because the operating system runs mostly from a read-only filesystem, it is difficult to install this library. - If you wish to use a different button mapping, then you can change it in the lines 131-136 of
button_watcher.py:BUTTONS['enter'] = (4, 'Input.Select') BUTTONS['back'] = (9, 'Input.Back') BUTTONS['up'] = (27, 'Input.Up') BUTTONS['down'] = (22, 'Input.Down') BUTTONS['left'] = (10, 'Input.Left') BUTTONS['right'] = (11, 'Input.Right')
Here, the first entry in the tuple for each button is the GPIO number (not the pin number) the button is connected to and the second entry is the command that is sent to the XBMC API when the button is pressed.
Changing the values for these entries allows you to remap the buttons to any functions supported by the API. Full documentation of the API is available on the XBMC wiki (http://kodi.wiki/view/JSON-RPC_API/v4). Here is a list of some common remote control functions that can be used:
Input.Up: This navigates up in the GUIInput.Down: This navigates down in the GUIInput.Left: This navigates left in the GUIInput.Right: This navigates right in the GUIInput.Select: This selects the current item in the GUIInput.Back: This navigates back one level in the GUIInput.Home: This returns to the home menu in the GUIPlayer.PlayPause: This pauses or resumes playbackPlayer.Stop: This stops playbackPlayer.GoPrevious: This takes you to the previous item in the playlistPlayer.GoNext: This takes you to the next item in the playlist
- Once you have the buttons mapped according to your liking, go ahead and copy the
button_watcher.pyscript to the/storage/.config/directory on the SD card. This is easily done by using SFTP. - When this is done, use the following command to run the script and test each of the buttons:
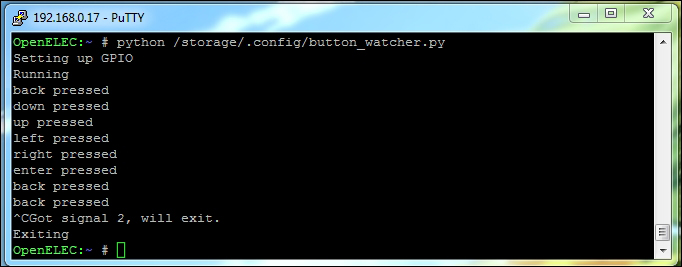
python /storage/.config/button_watcher.py
If all is well, you should see an output similar to the following on the console and XBMC should react according to what the button has been configured to do in button_watcher.py. To exit the script, press Ctrl + C.
If you see an error stating that the device is busy or unavailable, check the mapping in button_watcher.py and ensure that all of the GPIO port numbers are correct and that you have not mapped a button over another button or the LCD.
- When the script is working as intended, it is time to configure it in order to start it when OpenELEC boots up. This is done in a slightly different manner in OpenELEC, as opposed to Raspbian. First, we must create a script that OpenELEC looks for to run on startup:
touch /storage/.config/autostart.sh
chmod +x /storage/.config/autostart.sh
nano /storage/.config/autostart.sh
- Here, the first command creates the file, the second command makes the file executable, and the third opens it in nano for us to edit. Here, we will add the following line to the end of the file:
#!/bin/sh
python /storage/.config/button_watcher.py &
- This tells the shell to run the Python script in the background (noted by the
&trailing). Now, simply exit nano using Ctrl + X and reboot the Pi using the following command:reboot
When the Pi has booted back into OpenELEC and XBMC is running, you should now be able to use the buttons right away.