
GUI programming is an art, and like all art, you need a drawing board to capture your ideas. The drawing board you will use is called the root window. Our first goal is to get the root window ready.
The following screenshot depicts the root window we are going to create:
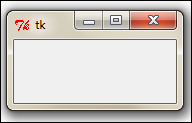
Drawing the root window is easy. You just need the following three lines of code:
from Tkinter import *
root = Tk()
root.mainloop()
Save this with the .py file extension or check out the code 1.01.py. Open it in the IDLE window and run the program from the Run menu (F5 in IDLE). Running this program should generate a blank root window as shown in the preceding screenshot. This window is furnished with functional minimize, maximize, and close buttons, and a blank frame.
Tip
Downloading the example code
You can download the example code files for all Packt books you have purchased from your account at http://www.packtpub.com. If you purchased this book elsewhere, you can visit http://www.packtpub.com/support and register to have the files e-mailed directly to you.
The description of the code is as follows:
- The first line imports all (
*) classes, attributes, and methods of Tkinter into the current workspace. - The second line creates an instance of the class
Tkinter.Tk. This creates what is called the "root" window that you see in the screenshot provided. By convention, the root window in Tkinter is usually called "root", but you are free to call it by any other name. - The third line executes the
mainloop(that is, the event loop) method of therootobject. Themainloopmethod is what keeps the root window visible. If you remove the third line, the window created in line 2 will disappear immediately as the script stops running. This will happen so fast that you will not even see the window appearing on your screen. Keeping the mainloop running also lets you keep the program running until you press the close button, which exits the main loop.
Congratulations! You have completed your first objective, which was to draw the root window. You have now prepared your drawing canvas (root window). Now get ready to paint it with your imagination!
Note
Commit the three lines of code (shown in code 1.01.py) to memory. These three lines generate your root window, which will accommodate all other graphical components. These lines constitute the skeleton of any GUI application that you will develop in Tkinter. All code that will make your GUI application functional will go between line 2 (new object creation) and line 3 (mainloop) of this code.
This section describes the different styles of importing Tkinter modules.
In the preceding example, we imported Tkinter using the following command:
from Tkinter import *
This method of import eases the handling of methods defined in the module. That is to say, you can simply access the methods directly. Generally, it is considered a bad practice to import all (*) methods of a module like we did here. This is because if you import all methods from some other module with a common method name, it would lead to the overwriting of methods.
There are several ways to import Tkinter in which this overlapping can be avoided, a common one being:
import Tkinter
This style of importing does not pollute the namespace with a list of all methods defined within Tkinter. However, every method within Tkinter will now have to be called using the format Tkinter.methodA instead of directly calling the method.
Another commonly used import style is as follows:
import Tkinter as Tk
Here too, you do not pollute the current namespace with all Tkinter methods and now you can access methods such as Tk.methodA. "Tk" is a convenient, easy-to-type alias commonly used by many developers for importing Tkinter.
As a GUI programmer, you will generally be responsible for deciding three aspects of your program:
- What components should appear on screen?: This involves choosing the components that make the user interface. Typical components include things such as buttons, entry fields, checkboxes, radio buttons, scroll bars, and the like. In Tkinter, the components that you add to your GUI are called widgets.
- Where should the components go?: This involves deciding the positioning or placement of each component in the overall design structure. This includes decisions to be made on issues of positioning and the structural layout of various components. In Tkinter, this is referred to as geometry management.
- How do components interact and behave?: This involves adding functionality to each component. Each component or widget does some work. For example, a button, when clicked on, does something in response; a scrollbar handles scrolling; and checkboxes and radio buttons enable the user to make some choices. In Tkinter, the functionality of various widgets is managed by
commandbinding oreventbinding using callback functions.
Let us delve deeper into each of these three components in the context of Tkinter.