
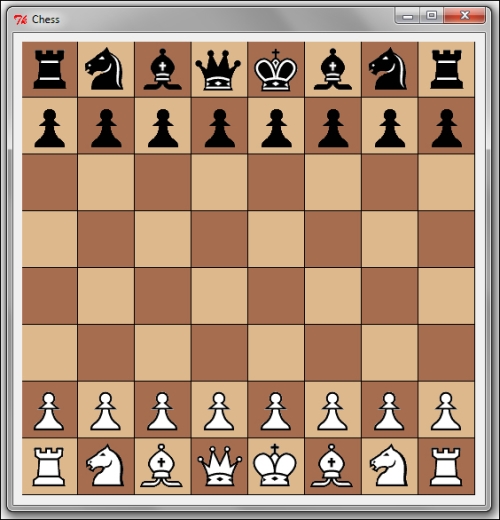
We now have a code that converts the FEN notation to its expanded coordinate-based representation. Now, let's code to actually display chess pieces on the board, based on a given FEN notation, as shown in the following screenshot:
We will use PNG images for displaying pieces on the board. We have provided PNG images for each piece in a folder named pieces_image. The images have been named by appending the shortname of each piece followed by the color of the piece. For instance, black queen is saved as qblack.png, and white knight is saved as nwhite.png.
We have chosen PNG over GIF because unlike GIF, PNG allows for alpha channels (variable transparency), automatic gamma correction on different platforms, and color correction.
However, the TkinterPhotoImage class does not support the PNG format. We, therefore, use the PIL to process PNG files.
Tip
Currently, the TkinterPhotoImage class supports images in GIF, PPM, XBM, and PGM formats only. None of these formats are in vogue currently. Unfortunately, support for new formats can only be added if the Tcl/Tk starts supporting those formats.
Up till then, you may find it handy to use the PIL, which supports most of the popular image formats including PNG, JPEG, GIF, TIFF, and BMP.
In addition to displaying images in Tkinter, the PIL module can also be used for image processing, such as size transformations, format conversions, thumbnail creation, and several other image manipulation requirements.
We will add code for displaying chess pieces in our view file, gui.py.
Because we will use the PIL module to display PNG images for our pieces, we start by importing ImageTk from the PIL module as follows:
from PIL import ImageTk
The code for adding pieces on the board is as follows (see code 4.03: gui.py):
def draw_pieces(self):
   self.canvas.delete("occupied")
   for xycoord, piece in self.chessboard.iteritems():
     x,y = self.chessboard.num_notation(xycoord)
     if piece is not None:
        filename = "../pieces_image/%s%s.png" % (piece.shortname.lower(), piece.color)
        piecename = "%s%s%s" % (piece.shortname, x, y)
        if (filename not in self.images):
           self.images[filename] = ImageTk.PhotoImage(file=filename)
        self.canvas.create_image(0,0, image=self.images[filename], tags=(piecename, "occupied"), anchor="c")
        x0 = (y * self.dim_square) + int(self.dim_square/2)
        y0 = ((7-x) * self.dim_square) + int(self.dim_square/2)
        self.canvas.coords(piecename, x0, y0)
The description of the code is listed as follows:
- We begin by importing
ImageTkfrom the PIL module. We need this to handle PNG images. - We define our
draw_pieces()method, whose role is to draw the pieces on a board for a given FEN notation. Because the FEN notation is available to all class methods, we need not pass it as an argument. - Recall that we have created an instance of the chessboard which produces a dictionary comprising of the coordinate-based location of a piece and the corresponding piece instance as the key-value pair.
- We loop through the dictionary using
iteritems(), and break down the x and y coordinate string into corresponding x-and-y-based number notation. - If there exists a piece for a given coordinate, we add it to the Canvas widget using
canvas.create_image(). - One of the most important things to note here is that we have added two tags to each of the pieces: the name of the piece and a static string name
occupied. Tags are the most important tool that you can use to operate on objects within the Canvas widget. - The next two lines create the x, y coordinate for a given board size.
- The final line of the method uses
self.canvas.coordsto place the piece at the calculated coordinate. - Finally, we need to call our newly defined method. We do that from our
show()method to invoke the pieces.
Note
Let's wrap this iteration by analyzing the two canvas-related methods used here.
canvas.create_image(x, y, *options): The create_image method takes two arguments that specify x and y coordinates for positioning the image. After the coordinates, you may specify any number of option-value pairs. In our example, we have used the anchor="c" option to keep the image in the center.
canvas.coords(tag/id, x0, y0, x1, y1, ..., xn, yn): The coords() method decides or modifies the coordinates for items attached to a given tag or ID. If coordinates are not specified, it returns a tuple specifying the coordinates of the item referenced by given tag or ID. If coordinates are specified, then they replace the current coordinates for the named item. If the tag or ID is attached to multiple items, only the first item is used.
We will learn about the Canvas widget in greater detail as we progress. However, you may find it useful to look at the interactive help for the Canvas widget, or a list of available methods and configurable options.
Our code can now take a FEN notation and display the images for corresponding pieces on the chessboard. If you modify the FEN notation, the pieces on the chessboard will change their places accordingly.
In the process, we got acquainted with the basic features of the Canvas widget. We also saw two canvas-related methods to create image and to change the coordinates.
Finally, we saw how to overcome a Tkinter limitation on image handling by using the PIL module to handle formats not supported by Tkinter.