
We now have the capability to play a single audio file, but what is an audio player if it does not allow for a playlist?
Let's add a playlist feature to our player. Once a playlist is added, we accordingly need to provide buttons to add files to the playlist, delete files from it, and add all supported files from a chosen directory and the ability to delete all items in the list at once.
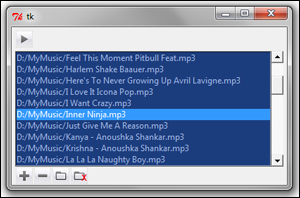
At the end of this iteration, we will have a player that looks like the following screenshot:
We will use Tkinter Listbox widget to provide a playlist. Let's look at some of the key features of the Listbox widget:
- You create a Listbox like you create any other widget as follows:
mylist = ListBox(parent, **configurable options)
- When you initially create the Listbox widget, it is empty. To insert one or more lines of text into the Listbox, you use the
insert()method, which takes two arguments: an index of the position where the text is to be inserted and the actual string to be inserted as follows:mylist.insert(0, "First Item") mylist.insert(END, "Last Item")
- The
curselection()method returns the index of all items selected in the list, and theget()method returns the list item for a given index as follows:mylist.curselection() # returns a tuple of all selected items mylist.curselection()[0] # returns first selected item mylist.get(1) # returns second item from the list mylist.get(0, END) # returns all items from the list
- In addition, the Listbox widget has several other configurable options. For a complete Listbox widget reference, type the following into your Python interactive shell:
>>> import Tkinter
>>> help(Tkinter.Listbox)
Let's first add an empty Listbox widget, as follows (see code 5.02 main-gui.py):
def create_list_frame(self):
    list_frame = Frame(self.root)
    self.Listbox = Listbox(list_frame, activestyle='none', cursor='hand2', bg='#1C3D7D', fg='#A0B9E9', selectmode=EXTENDED, width=60, height =10)
   self.Listbox.pack(side=LEFT, fill=BOTH, expand=1)
   self.Listbox.bind("<Double-Button-1>", self.identify_track_to_play)
   scrollbar = Scrollbar(list_frame)
   scrollbar.pack(side=RIGHT, fill=BOTH)
   self.Listbox.config(yscrollcommand=scrollbar.set)
   scrollbar.config(command=self.Listbox.yview)
   list_frame.grid(row=4, padx=5)
The description of the code is listed as follows:
- We create a new frame,
list_frame, to hold our List widget. - We create a Listbox widget within this frame and set some styling options, such as background color, foreground color, and mouse cursor. The styling of active line is set using the Listbox option,
activestyle, which means that we do not want to underline the selected item. - The
selectmodeoption is configured as extended. See the following information box for a list of choices available and their meaning. We will use theEXTENDEDselect mode, because even though a single file can be played at once, we want to allow the user to select more than one file together at once for deletion. - We add a scrollbar to the Listbox, similar to the way we did in our text editor project.
- We bind the double-click of mouse to another method named
identify_track_to_play.
Note
The Listbox widget offers four selection modes using the selectmode option as follows:
SINGLE: It allows only a single row to be selected at one time.
BROWSE (Default mode): It is similar to SINGLE but allows for moving the selection by dragging the mouse.
MULTIPLE: It allows for multiple selections by clicking on items one at a time.
EXTENDED: It allows for selection of multiple range of items using Shift and Control keys.
Our program was simpler in the first iteration, where we had only song to play. However, given a playlist, now we have to identify which song needs to be played from the given list.
The rule is simple. If a user clicks on a given song, it becomes our selected track. If the user has made no selection and hits the Play button, the first song in the playlist should be played. Put in code this would look like as follows (see code 5.02 main-gui.py):
def identify_track_to_play(self, event=None):
   try:
     indx = int(self.Listbox.curselection()[0])
     if self.Listbox.get(indx) == "":
        self.del_selected()
     except:
        indx = 0
        self.currentTrack =self.Listbox.get(indx)
     self.player.start_play_thread()
Now that we have a Listbox and we can play any item by double-clicking on it, let's add methods to populate and remove items from the list.
However, even before we do any modifications to our list, let's first define an empty list named alltracks to keep track of all items in the playlist. We will need to update this list after any changes are done to the list, as follows(see code 5.02 main-gui.py):
alltracks = []
We had already created an add file method in the last section. Let's modify it slightly so that the file selected does not become the selected track, instead it gets added to the playlist, as follows (see code 5.02 main-gui.py):
def add_file(self):
    filename = tkFileDialog.askopenfilename(filetypes=[('All supported', '.mp3 .wav'), ('.mp3 files', '.mp3'), ('.wav files', '.wav')])
    if filename:
      self.Listbox.insert(END, filename)
    self.alltracks = list(self.Listbox.get(0, END))
The description of the code is listed as follows:
- The file selected through
tkFileDialogis inserted at the end of the list box, and our attribute,alltracks, is updated with all elements in the Listbox widget. - Notice that the
get()method returns a tuple of all items. Because tuples are immutable, we explicitly convert the tuple into a list by using thelisttype declaration.
Let's add a new button to delete selected files. This is added to our existing create_bottom_frame method, as follows (see code 5.02 main-gui.py):
del_selectedicon = PhotoImage(file='../icons/del_selected.gif')
del_selectedbtn=Button(bottomframe, image=del_selectedicon, padx=0, borderwidth=0, text='Delete', command=self.del_selected)
del_selectedbtn.image = del_selectedicon
del_selectedbtn.grid(row=5, column=2)
This button has a command callback to a method named del_selected. The code for del_selected is as follows:
def del_selected(self):
    whilelen(self.Listbox.curselection())>0:
      self.Listbox.delete(self.Listbox.curselection()[0])
    self.alltracks = list(self.Listbox.get(0, END))
As usual, we update our alltracks list after deletion of items from the Listbox widget.
Now, you can make a selection from your list box and click on the Delete button to remove all selected items from the list box.
Adding individual audio files to a playlist can become tedious. We want to allow the users to select a directory, and our list should get populated with all supported media formats from that directory.
We, therefore, add a new button to allow for adding all media files from a given directory. This is also added to our existing create_bottom_frame method, as follows (see code 5.02 main-gui.py):
add_diricon = PhotoImage(file='../icons/add_dir.gif')
add_dirbtn=Button(bottomframe, image=add_diricon, borderwidth=0, padx=0, text='Add Dir', command=self.add_dir)
add_dirbtn.image = add_diricon
add_dirbtn.grid(row=5, column=3)
We need to use the os module to grab all supported types. Let's first import the os module into the current namespace, as follows:
import os
Now the associated command callback is as follows:
  def add_dir(self):
     path = tkFileDialog.askdirectory()
     if path:
        tfileList = []
        for (dirpath, dirnames, filenames) in os.walk(path):
           for tfile in filenames:
              if tfile.endswith(".mp3") or tfile.endswith(".wav") or tfile.endswith(".ogg"):
                 tfileList.append(dirpath+"/"+tfile)
        for item in tfileList:
           self.listbox.insert(END, item)
        self.alltracks = list(self.listbox.get(0, END))
The description of the code is listed as follows:
- The
add_dirmethod first creates a temporary list,tfilelist. - It then iterates through all filenames fetched through the
tkFileDialog.askdirectory()method. If it encounters a supported file format, it appends the file to the temporary list. - It then iterates through all items in the
tfilelist, inserting them into our Listbox. - It finally updates our
alltracksattribute with all items in the newly modified list.
Finally, we add a button to delete all items from the playlist. The associated button is added to the create_bottom_frame method, as follows:
delallicon = PhotoImage(file='../icons/delall.gif')
delallbtn = Button(bottomframe, image=delallicon, borderwidth=0, padx=0, text='Clear All', command=self.clear_list)
delallbtn.image = delallicon
delallbtn.grid(row=5, column=4)
Now its associated command callback is as follows:
def clear_list(self):
    self.Listbox.delete(0, END)
self.alltracks =list(self.Listbox.get(0, END))This completes our second iteration.
In this iteration, we saw how to work with the Listbox widget. In particular, we learned to add Listbox, add items to he Listbox widget, select a particular item from the Listbox widget, and delete one or more items from it.
You now have a playlist where you can add and delete items.
The Listbox widget has an event binding for double-click of the mouse button on an item. This associated event callback selects the clicked item, and sends it across to be played on a separate thread.
In the process, we saw a list of common operations done on the Listbox widget.