
All our previous projects have been structured as a single file. However, as programs grow in complexity, we need to break our programs into modules and class structures.
Development of large applications generally starts with recording the software requirement specifications (SRS). This is generally followed by a graphical representation of constructs, such as class, composition, inheritance, and information hiding using several modeling tools. These tools can be flow charts, unified modeling language (UML), data flow diagrams, Venn diagrams (for database modeling), and several other tools.
These tools are very useful when the problem domain is not very clear. However, if you have ever played the game of chess, you are very well acquainted with the problem domain. Furthermore, our chess program may be classified as a medium-sized program spanning a few hundred lines of code. Let us, therefore, bypass these visual tools and get to the actual program design.
In this iteration, we decide an overall structure for our program.
In the true spirit of object-oriented programming (OOP), let's first list the kind of objects that we would encounter in our program. An intuitive look at a chessboard tells us that we have two sets of objects to handle:
- Chessboard: It is an 8 x 8 square board with alternatively colored squares
- Chess pieces: They are the king, queen, bishop, knight, rook, and pawns
As we proceed, we may or may not come across other objects. But we are sure to come across these two kinds of objects. So, without much further delay, let us create two files named chessboard.py and pieces.py in our project folder. (See code folder 4.01)
We will use these two files to define the respective classes to keep the logic associated with these two objects. Note that these files will not display the board or its pieces; it will instead keep all logic related to board and pieces. In programming parlance, this is broadly referred to as the model.
The actual display of board and pieces will be kept in a separate file, which will handle all views related to the program.
Tip
The rule of separating logic from presentation should be applied not only for deciding your file structure, but also when defining methods within your files.
Every time you write a method, try to separate its presentation from the logic. If you find a method mixing logic and presentation, refactor your code to separate the two. Avoid coupling the presentation and logic into the same method.
It is a good idea to keep the presentation layer (view) separate from logic (model). So, we will create a new file named gui.py to code all visible components of the program, including all our widgets. This file will be primarily responsible for generating the view.
Note
In addition to the model and view files, many programs also keep a separate controller file to decouple behavioral aspects of a program from the logic (model) and presentation (view). This kind of structural segregation is named the model-view-controller (MVC) style of programming.
However, our chess program has just one event to handle: mouse click for moving chess pieces. Creating a separate controller for just one event can make the program more complex than it should be.
Given this limitation, we will handle the presentation (view) and event handling (controller) from a single class named GUI.
Now that we have our file structure ready, let us start our coding. To begin, let's code the GUI class for our chessboard, as shown in the following screenshot. Because this pertains to the view section, let's put this code in the gui.py file.
We first create a GUI class and assign attributes such as rows, columns, colors of squares, and the dimension of each square in pixels. We initialize our GUI class to create the canvas on which we will draw our chessboard, as follows (see code 4.01 gui.py):
from Tkinter import *
class GUI():
  rows = 8
  columns = 8
  color1 = "#DDB88C"
  color2 = "#A66D4F"
  dim_square = 64
  def __init__(self, parent):
       self.parent = parent
       canvas_width = self.columns * self.dim_square
       canvas_height = self.rows * self.dim_square
       self.canvas = Canvas(parent, width=canvas_width, height=canvas_height, background="grey")
       self.canvas.pack(padx=8, pady=8)
       self.draw_board()
The description of the code is listed as follows:
- We create a class,
GUI, to handle the rendering of our view files. Theinitmethod of theGUIclass is called immediately on object instantiation. Theinitmethod sets up a Canvas widget of the required size. This canvas will act as our container for all objects, such as chess square areas and eventually the chess pieces. - We have used the Canvas widget as a container, because it provides us the ability to handle tasks based on precise location coordinates of events, such as click of the mouse button.
- The
initmethod then calls thedraw_board()method, which is responsible for creating square blocks of alternating colors similar to a chessboard.
Now, we draw the squares on the chessboard using the canvas.create_rectangle method, filling it alternating between the two colors we defined earlier.
def draw_board(self):
     color = self.color2
     for r in range(self.rows):
       color = self.color1 if color == self.color2
	   else self.color2 # alternating between two colors
       for c in range(self.columns):
             x1 = (c * self.dim_square)
             y1 = ((7-r) * self.dim_square)
             x2 = x1 + self.dim_square
             y2 = y1 + self.dim_square
             self.canvas.create_rectangle(x1, y1, x2, y2, fill=color, tags="area")
             color = self.color1 if color == self.color2 else self.color2
The description of the code is listed as follows:
- To draw squares on the board we use the
canvas.create_rectangle()method, which draws a rectangle given the x, y coordinates for the two diagonally opposite corners of the rectangle (coordinates of upper-left and lower-right edges). - We will need to target the board. We, therefore, add a tag named
areato each of the squares created on the board. This is similar to tagging of the text widget, as we had done in our text editor program.
Now, we will create Tkinter mainloop as follows:
def main():
root = Tk()
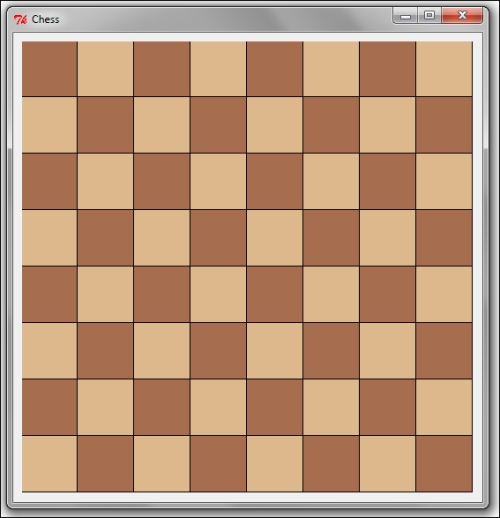
root.title("Chess")
gui = GUI(root)
root.mainloop()
if __name__ == "__main__":
main()The description of the code is listed as follows:
Note
The Tkinter Canvas widget lets you draw line, oval, rectangle, arc, and polygon shapes at a given coordinate specified location. You can also specify various configuration options, such as fill, outline, width, and several others for each of these shapes.
In addition, the Canvas widget has a huge list of methods and configurable options. For a complete list of canvas-related options, type the following into Python interactive shell:
>>> import Tkinter
>>> help(Tkinter.Canvas)
You can also access the documentation of Tkinter in your core Python installation directory. The documentation is located at path opythoninstallationDocPython273.
This is a compiled HTML help file. Within the help file, search for Tkinter, and you get a comprehensive reference with details of all widgets.
This completes our first iteration. In this iteration, we decided the class structure for our chess program. We created a GUI class and added attributes we would normally expect a chessboard to have.
We also got our first taste of the Canvas widget. We created a blank canvas, and then added square areas using the canvas.create_rectangle method to create our chessboard.
We also created out Tkinter mainloop and created an object out of the GUI class from within our mainloop. Now, if you run code 4.01 gui.py, you will see a chessboard.
The Canvas widget comes with a rich set of methods and configurable options. However, there are three important things to note about the Canvas widget:
- It uses a coordinate system to specify position of objects on the widget. Coordinates are measured in pixels. The top-left corner of the canvas has coordinates (0,0).
- It offers methods to add images and to draw basic shapes, such as line, arc, ovals, and polygons.
- The objects drawn on the Canvas widget are usually handled through assigning them an ID or tag.